- Location
- Nesquehoning, PA
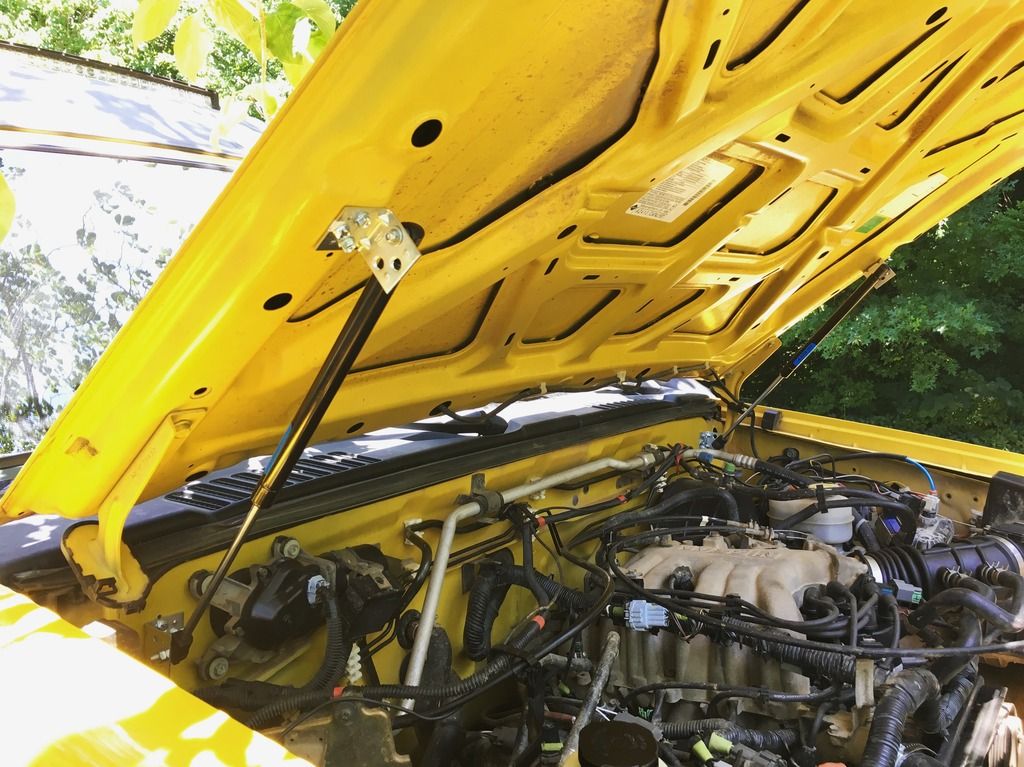
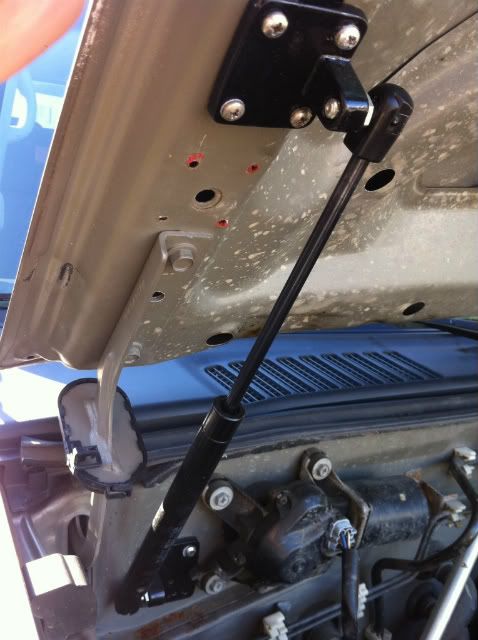
This is a write up on how to install hood struts so you don't have to deal with that annoying hood prop anymore.
Difficulty: Easy
Cost: Unknown....I apologize for this, my buddy had them laying around. If you do it please let me know so I can edit this.
Time: Less than 1 hour
Equipment needed:
Drill
Drill bit (be sure to use the right size bit for the tap you need)
Tap (according to what size screws you use)
Fine point sharpie
Screwdriver/nutdriver
Center punch
Hardware needed:
2 hood struts
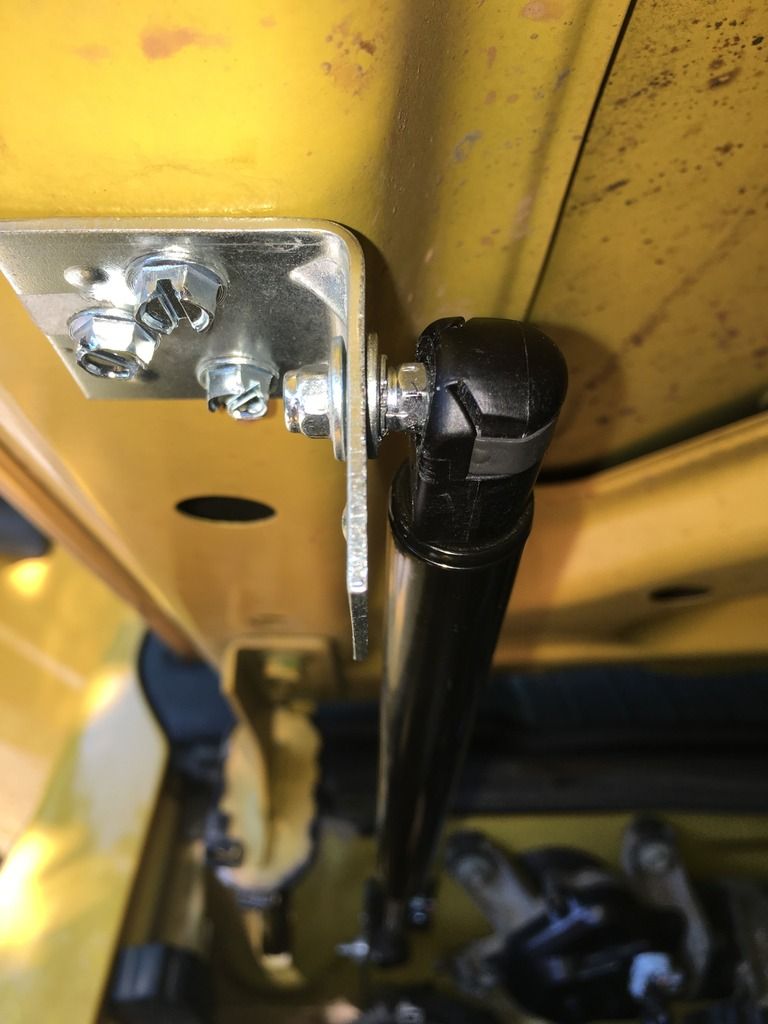
4 90 degree mounting brackets with a 10mm ball
16 screws (size based on holes on mounting brackets you choose to get)
I'll start by saying that my buddy had these laying around so I didn't have to order them...but I did find their website and will post the link.
Here is the link to the struts that I have on my X. They are 90lbs of force each. Which is overkill. I'm sure the 60lb struts will work just fine, but I havn't tried them so if you choose to go that route please fill me in.
Link to strut...GS08-0675PE10-094 GAS SPRING (bottom one on page) http://www.austinhardware.com/index....Gas Springs#
Link to mounting brackets http://www.austinhardware.com/index....=Gas Springs
I think he may have gotten the mounting brackets from somewhere else because I can't seem to find them on their site. But I'm sure any of those 90 degree brackets with a 10mm ball will work just as good.
Okay, so now you have your struts and brackets. The first thing to do is find your mounting points. What I did was attach the mounting brackets to the struts and hold them where I thought was a good place on the firewall and hood. I tried to find the flattest points that I could, and was sure to check that they wouldn't hit anything when closed. Then as I was holding them where I thought a good spot would be, I simply took a fine point shapie and poked it through the mounting holes to locate where my screws would go. Now it is just a matter of center punching where the holes will be drilled, drilling and tapping the holes. I started with the bottom mounts then after I got those mounted I attached the struts so I could just swivel it up to where the top mount would be then marked those holes. It was definitely easier than trying to mark all holes while holding everything perfectly in place.
BE SURE TO WATCH OUT FOR....On the driver side (on first gens, not sure about second gens) Be sure to mount the strut high enough as to clear your brake lines in the engine compartment. Especially if you don't have a body lift installed.
I also routed my windshield sprayer hose on the drivers side in front of the strut for less tension.
Here are some pics to help you along. Take note of the direction of my mounting brackets, I found by orienting them that way it was easier for me to find a good flat surface.
Drivers side....
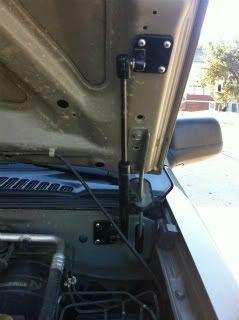
Passenger side....
Difficulty: Easy
Cost: Unknown....I apologize for this, my buddy had them laying around. If you do it please let me know so I can edit this.
Time: Less than 1 hour
Equipment needed:
Drill
Drill bit (be sure to use the right size bit for the tap you need)
Tap (according to what size screws you use)
Fine point sharpie
Screwdriver/nutdriver
Center punch
Hardware needed:
2 hood struts
4 90 degree mounting brackets with a 10mm ball
16 screws (size based on holes on mounting brackets you choose to get)
I'll start by saying that my buddy had these laying around so I didn't have to order them...but I did find their website and will post the link.
Here is the link to the struts that I have on my X. They are 90lbs of force each. Which is overkill. I'm sure the 60lb struts will work just fine, but I havn't tried them so if you choose to go that route please fill me in.
Link to strut...GS08-0675PE10-094 GAS SPRING (bottom one on page) http://www.austinhardware.com/index....Gas Springs#
Link to mounting brackets http://www.austinhardware.com/index....=Gas Springs
I think he may have gotten the mounting brackets from somewhere else because I can't seem to find them on their site. But I'm sure any of those 90 degree brackets with a 10mm ball will work just as good.
Okay, so now you have your struts and brackets. The first thing to do is find your mounting points. What I did was attach the mounting brackets to the struts and hold them where I thought was a good place on the firewall and hood. I tried to find the flattest points that I could, and was sure to check that they wouldn't hit anything when closed. Then as I was holding them where I thought a good spot would be, I simply took a fine point shapie and poked it through the mounting holes to locate where my screws would go. Now it is just a matter of center punching where the holes will be drilled, drilling and tapping the holes. I started with the bottom mounts then after I got those mounted I attached the struts so I could just swivel it up to where the top mount would be then marked those holes. It was definitely easier than trying to mark all holes while holding everything perfectly in place.
BE SURE TO WATCH OUT FOR....On the driver side (on first gens, not sure about second gens) Be sure to mount the strut high enough as to clear your brake lines in the engine compartment. Especially if you don't have a body lift installed.
I also routed my windshield sprayer hose on the drivers side in front of the strut for less tension.
Here are some pics to help you along. Take note of the direction of my mounting brackets, I found by orienting them that way it was easier for me to find a good flat surface.
Drivers side....
Passenger side....