CaptainMorgan_SOS's Official Build Thread (finally)

bigjim247365

Anime boobs & male genitals? Sign me up!
Supporting Member
Location
Hainesville IL
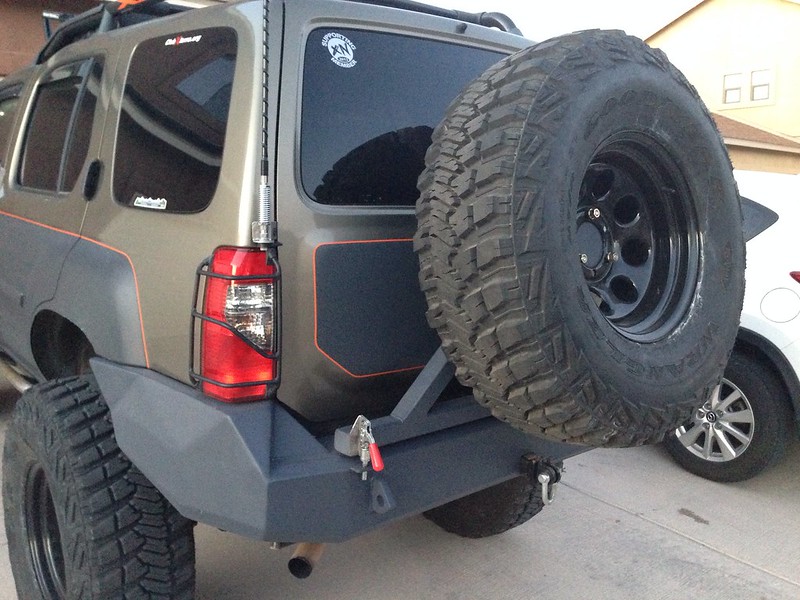
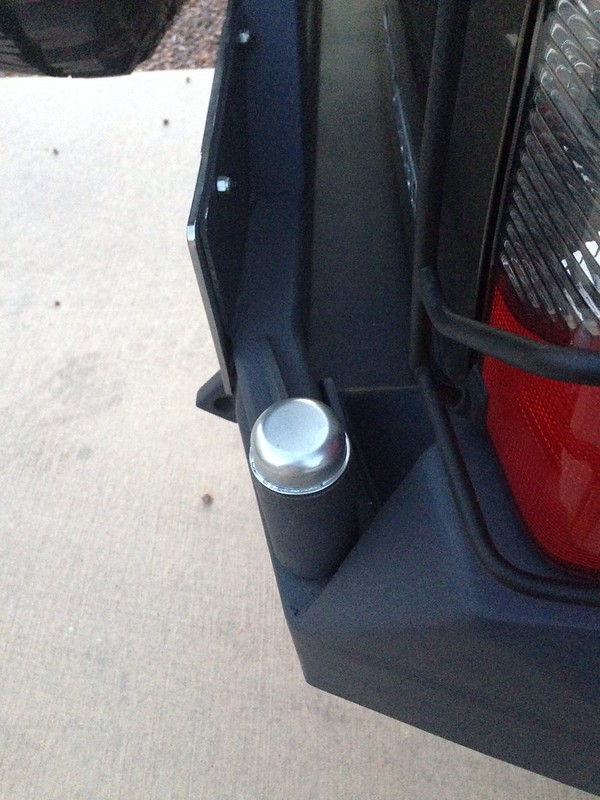
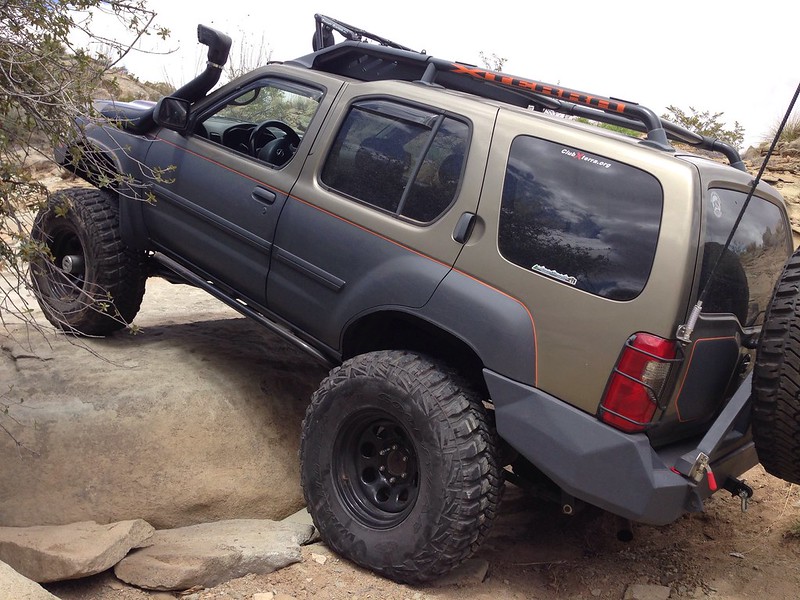
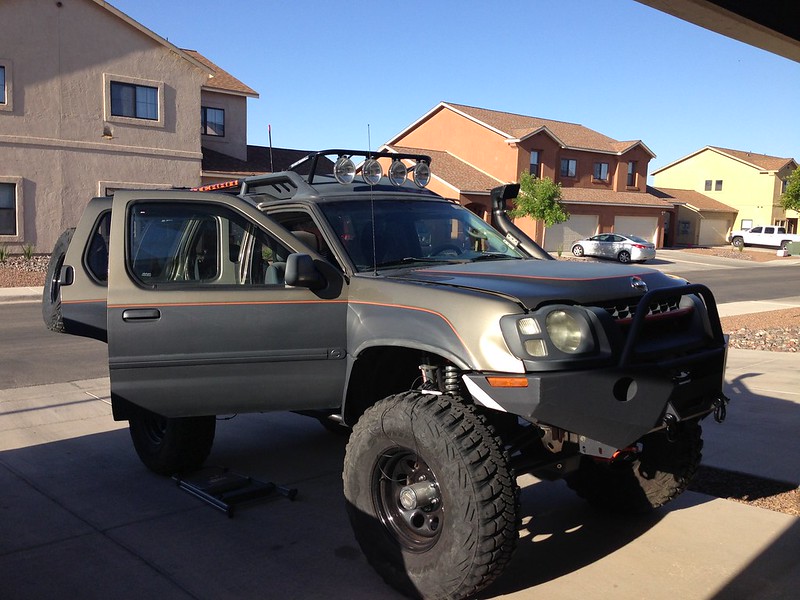
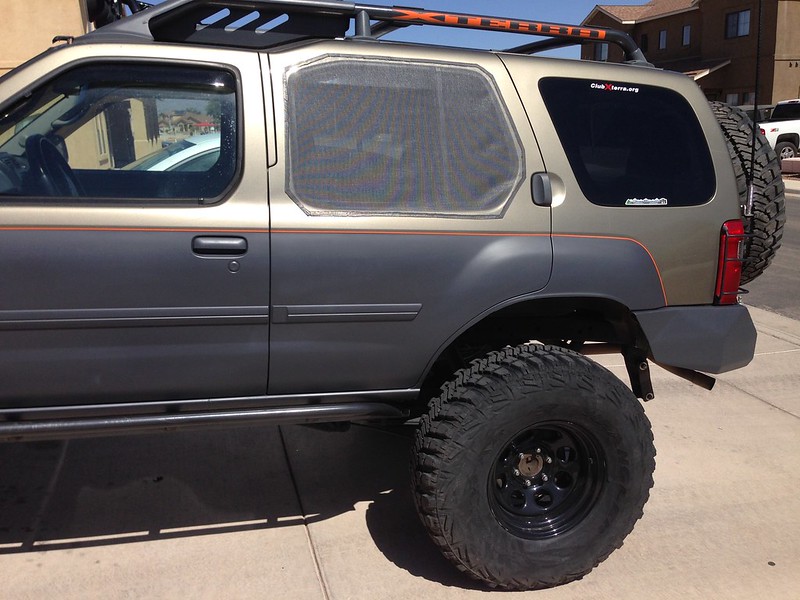
Crappy night pic, but rear bumper is finished. Well, almost. I still have to put a coat of my bumper coating on it to have it match the other gray perfectly. But this primers is pretty daggum close. Sliders still have to be painted too.

13615437204_2d44756408_c.jpg


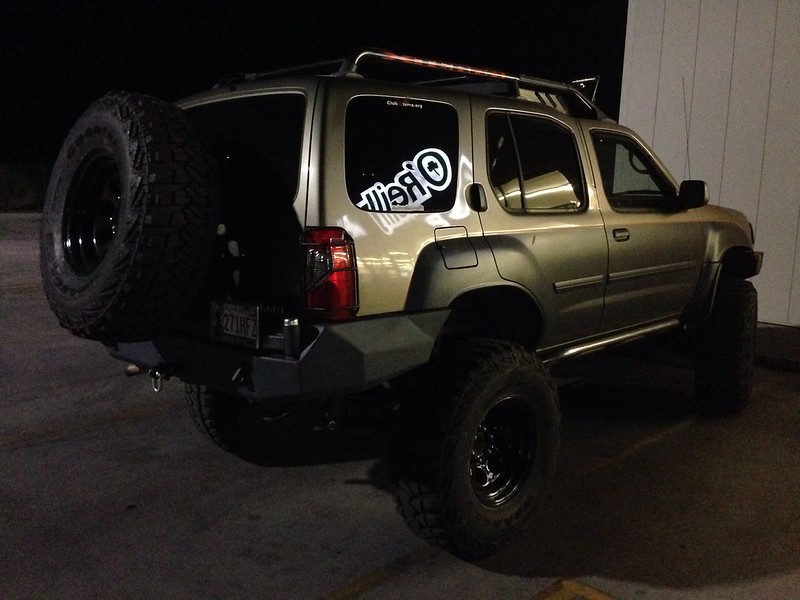
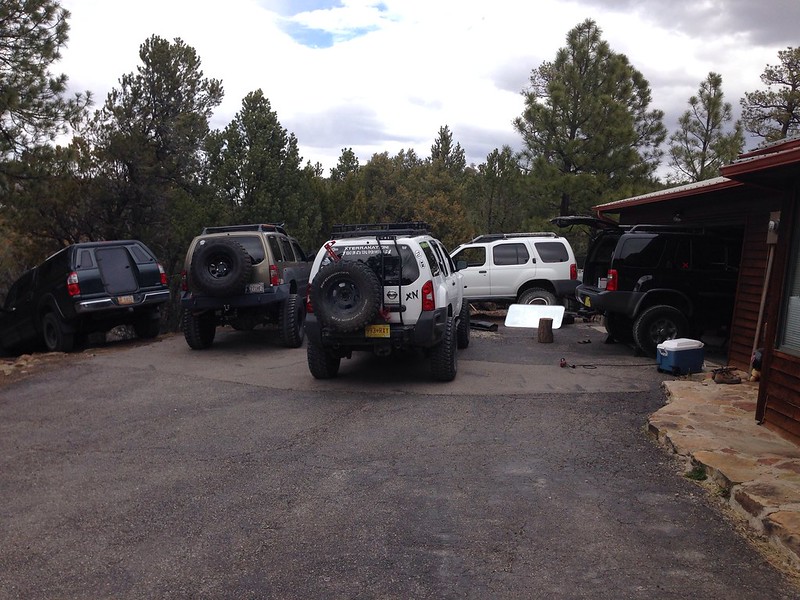
I like this pic. It displays my favorite auto parts place.


ill trade you Warn hubs for that bumper! :)
 

CaptainMorgan_SOS

Need Bigger Tires
Location
Alamogordo, NM
It was made by a guy down here in Las Cruces. The guy puts out some awesome bumpers. But for this one, there was no jig and he didn't save any sort of directions, instructions or measurements so it's a 1 of 1 design. I'm sure he could make another one if someone were to supply him their X, but it would be one of its own. That's just the way he does things. The price came out at about the same as what a Shrockworks one would cost.
 

DC xterra

Wheeling
Location
CT
It was made by a guy down here in Las Cruces. The guy puts out some awesome bumpers. But for this one, there was no jig and he didn't save any sort of directions, instructions or measurements so it's a 1 of 1 design. I'm sure he could make another one if someone were to supply him their X, but it would be one of its own. That's just the way he does things. The price came out at about the same as what a Shrockworks one would cost.

only if i wasn't so far away i would give him my truck
 

CaptainMorgan_SOS

Need Bigger Tires
Location
Alamogordo, NM
Ended up making a set of extended fender flares out of 2 sets of the stock ones today. I got the "stock" look back and the sharp metal edges are now covered up and protected! The rears are about 75% completed and I should be able to knock them out next weekend.

13679581665_8ddffbd7b5_c.jpg


13679623593_6a69814322_c.jpg


And then Saturday, we had a little NM meet & greet at casa de Rok.

13679655633_c73cc15ed1_c.jpg
 
Last edited:

CaptainMorgan_SOS

Need Bigger Tires
Location
Alamogordo, NM
Fiiiiiiiiiiiiiine......... I'll post some pics of the bumper... even though it isn't painted yet...

13728595825_c6eb645341_c.jpg


13729010314_d60a1d563b_c.jpg


13728618263_1afd17fa54_c.jpg


13729026684_010496ba75_c.jpg

13728643753_de24190397_c.jpg


13728662073_82467c63ef_c.jpg


As you can see, a lot of that rear fender corner piece that hangs down got cut off since the sides of this bumper are so much shorter than the stock plastic corners.

13729050824_3eeb682434_c.jpg


The whole bumper is actually a whole lot shorter than stock. The rear shackles are pretty exposed now though, which may be cause for concern, but we won't really know until I go out on the rocks and ledges again. Also, the rear recovery points are mounted directly to the frame and they are what the rest of the bumper is built around.
 

CaptainMorgan_SOS

Need Bigger Tires
Location
Alamogordo, NM
It still needs some work though... I'm not too happy about how the latch is; the swing away slams down on the bumper every time I hit a big bump. I got some lo pro bumpstops from Crucible so I think I will put one underneath the swingarm right at the latch point to keep that from happening.
 

metzican

Suspension Lift
Location
Lafaytte, la
It still needs some work though... I'm not too happy about how the latch is; the swing away slams down on the bumper every time I hit a big bump. I got some lo pro bumpstops from Crucible so I think I will put one underneath the swingarm right at the latch point to keep that from happening.

I think a L bracket with some bump stop material on it would work wonders for that. Do you have to lift the swingarm at all to latch it? do you think you will in the future.
 

CaptainMorgan_SOS

Need Bigger Tires
Location
Alamogordo, NM
I don't have to lift the swingarm, nor do I think I will. The spindle and how it is on this is, how we say, way over engineered. Just how I like it. I don't think I can do the L bracket though because it may end up interfering with opening the hatch. I have some bumpstops, so maybe I'll work on doing that this weekend.
 

Prime

Shut up Baby, I know it!
Admin
Location
Denver Adjacent
The issues with your swing arm not withstanding......

THAT THING IS UFKING SEXY!!!!

I love the corners. Very stealth bomber. And it comes out to meet the bulge in the fender. AWESOME bumper.
 

caseycamby

Suspension Lift
Location
Marion, NC
The issues with your swing arm not withstanding......

THAT THING IS UFKING SEXY!!!!

I love the corners. Very stealth bomber. And it comes out to meet the bulge in the fender. AWESOME bumper.

I think that's my favorite part, the corners. I love how it's pretty much all triangles* put together. It's so flush! I love it!
 

CaptainMorgan_SOS

Need Bigger Tires
Location
Alamogordo, NM
Built a rack today for the compressor. It is thin enough to where I can still fit in my air mattress if I decide I want to sleep in the X during GONE. Really strong and really light. I am thinking about making a whole rack system in the back based on this design, keeping it tight to the sides to where I can still use most of the back hatch area and then going overhead as well to have a rack tight to the roof; nothing would be wider than the where the inner wheel wells stick out. So once I paint the rack and bolt it in for good, I will start hooking up the air locker. I have a wheeling trip this coming Sunday and am hoping I can have fully funtional lockers and OBA by then. See below for pics:

13959541113_1b052ccb31_c.jpg


13936384902_91ed769f82_c.jpg


13959563283_a3b6bafbc1_c.jpg
 

metzican

Suspension Lift
Location
Lafaytte, la
Built a rack today for the compressor. It is thin enough to where I can still fit in my air mattress if I decide I want to sleep in the X during GONE. Really strong and really light. I am thinking about making a whole rack system in the back based on this design, keeping it tight to the sides to where I can still use most of the back hatch area and then going overhead as well to have a rack tight to the roof; nothing would be wider than the where the inner wheel wells stick out. So once I paint the rack and bolt it in for good, I will start hooking up the air locker. I have a wheeling trip this coming Sunday and am hoping I can have fully funtional lockers and OBA by then. See below for pics:

13959541113_1b052ccb31_c.jpg


13936384902_91ed769f82_c.jpg


13959563283_a3b6bafbc1_c.jpg

one thing I would suggest is it looks like the air compressors are bolted to flat bar. I will say on my mounting rack that is where the spare is. I have this setup and to be honest it is loud as ****. Due to the vibration of the air compressor just compounds on the flat bar. I need to replace mine with angle iron.
 

XBetty

First Fill-Up (of many)
Location
Littleton, CO
Your build thread has officially inspired me. I should be able to start Nismo's build this summer. Hopefully it can be as bad ass as yours.
 

xterraminator

Wheeling
Location
Maple Ridge,BC
I love that bumper, a lot of detail. sure is not a an easy one to built and especially at multiples. It is a one of a kind for sure. So when are you going to chop off the back like mine? Mine needs a twin brother??? Just kidding, your truck looks good. Where are you mounting the air compressor cage or is it going to be pulled out loose?
 

CaptainMorgan_SOS

Need Bigger Tires
Location
Alamogordo, NM
Thanks Betty, and make it your own! These things are a blast to modify.

And I will not be chopping this rig. Not going to happen ;) The compressor is mounted where it is going to stay and I have the wiring there, but I just need to finish wiring it up and then run the air lines for the locker and it should be good to go. After my wheeling trip this past weekend, I found a couple clearance issues that need to be addressed, so I will take care of that too.

Here's a couple poser pics from the wheeling trip Sunday:

14087550863_113bf335ea_c.jpg


Not me; I'm in the driver's seat; this guy just wanted a pic next to the X.
14064386602_5c8a052c3a_c.jpg


14087452883_a34111f1bb_c.jpg


14064242731_80a2d1a22c_c.jpg


14067441205_99fe3f003e_c.jpg
 
Last edited:

CaptainMorgan_SOS

Need Bigger Tires
Location
Alamogordo, NM
You?! Clearance issues?!?!

Haha, between the tires and the body/bumper (uptravel). I need to trim to corners of of the RLC bumper quite a bit around the front wheel well and the rear inner fenders need to be trimmed up about an inch or so. On the underside, no clearance issues except hanging up on the rear diff every once in a while when I am going through the big rocks ;)
 

XBetty

First Fill-Up (of many)
Location
Littleton, CO
Thanks Betty, and make it your own! These things are a blast to modify. And I will not be chopping this rig. Not going to happen ;) The compressor is mounted where it is going to stay and I have the wiring there, but I just need to finish wiring it up and then run the air lines for the locker and it should be good to go. After my wheeling trip this past weekend, I found a couple clearance issues that need to be addressed, so I will take care of that too. Here's a couple poser pics from the wheeling trip Sunday: Not me; I'm in the driver's seat; this guy just wanted a pic next to the X.

For sure! Me and my hubby came up with some ideas. I can't wait. It's like a bonding experience for us lol. He's a jeep guy so this will be his first X. He's very capable though and he's going to teach me a few things so I can help. He doesn't do anything to nismo without me being present lol.

And yeah we're going to try and not chop anything. If possible.
 

xterraminator

Wheeling
Location
Maple Ridge,BC
Love your second last picture the one with the jeeps trailing and they look so small! Trust me don't do a full chop like I did, takes more time than I thought. Would never do that again but it was fun doing it. BTW in the back of your truck when Steve did the LOA swap in the pack what did he do wit the emergency brake cable? Did he have to pull it back some. With mine it appears to be tight and I have not flexed the truck yet.
 

CaptainMorgan_SOS

Need Bigger Tires
Location
Alamogordo, NM
Got a bit done this weekend.

Trimmed up the bumper and the rear inner wheel wells to fix my clearance issue. Cutting 3/16" plate with a crappy die grinder takes foreeeeeeeeeever. Should flex out well now.
13923747648_dceb28dd35_c.jpg

13923697627_7c2da6a7e4_c.jpg


Wired up the compressor, got the OBA working and hooked up the locker. Not the prettiest setup, but I'll work on that later. It works, so I am happy.
14109522434_afb40a390b_c.jpg


Made these magnetic mosquito nets out of door screen material and strip magnets.
14085999596_321307012d_c.jpg


Test fit the air mattress. It fits well and is surprisingly comfortable. Add that to the mosquito nets and battery operated ceiling hung fan and it should be a fairly comfortable sleeping area for GONE.
13923513859_0ebf45ef3f_c.jpg
 
Top