snoborderphx
Bought an X
- Location
- Holly Springs, NC
I'm scabbing pictures and instructions from Rook's write up in an effort to help those AUTO guys get their BL's installed a little quicker and a little easier. This will follow the same general format, but will have more details for the STOCK bumper folks; sorry, no extra pictures, but I will look for them online to post up here. This is also more geared towards the Automatic folks, as I do not have an MTX Xterra.
Material List:
- Napa Part # 8978 - extended rad hose
- AC 2" Body Lift Kit
- FULL metric socket set (notably 8, 10, 12, 14, 17, and 19's for the most part)
- 7/16" Socket
- Socket extensions (3", 6", (optional) 9")
- Floor Jack
- Pieces of Wood...6 inches of 2x4's would be ideal
- Zip Ties, depending on how well you take off the clips
- Flat head screw Driver
- Philips head screw driver (you will want one with a small head and one with a large head....Oh yeah!") )
)
- Bucket (to drain coolant)
- 2 gallons of coolant (for the 2012 P4X, it is blue and a DEALER ONLY mix)
- Angle Grinder designed for metal
- Tungsten Carbide or Titatium drill bit 1/2" or one step larger would be preferred; specifically for metal work (wood bits will die very quickly)
- WD40 or NON-FLAMMABLE Lubricant
I will go through the AC steps that you NEED to do to complete this body lift (in bold), then I will scab some pictures and directions from Rook's write up because his was pretty good and I am lazy.
Prep Work
You don't have to do this, but I found it easier to:
- Put the front end on jack stands
- Remove the front tires
- Remove the driver and passenger front splash guards
Step 1: Disconnect the Battery, both negative and positive. REMOVE the battery and tie-downs and tray and stuff
10mm

Step 2: Remove the 6 clips holding the grill top to the radiator core support and snaps at the bottom of the grill. Remove it from it's mounts.
Flat head screw driver under the tab in the middle and rotate the flat head and remove the screw and the base it plugs into. At the lower part of the grill, between the back of the grill and the radiator are two tabs that need to be pressed to get it to release. Picture below is just the top part where the clips were connected

Step 3: Disconnect the fog lights if your Xterra is so equipped
Easy step…just disconnect them from the stalks if you have them
Step 4: Remove the 4 Philips head bolts on each side of the front bumper. Remove 4-M6x20mm Bolts that attach the bottom of the bumper to the skid plate. Remove the 2 Philips screws from the corners of the bumper cover under the splash shield. Remove the 5 screws and snaps from the top of the front bumper mount. Remove the bumper cover.
These are also easy steps and very straightforward. The bolts on the bottom are easily found and can be removed with a socket wrecnh (10mm) cake walk. The 4 philps head bolts are bolted right into the fender on each side…they easily come with out with a good screwdriver.
B]Step 5: Unbolt the skid plate from the body and remove the front skidplate.[/B]
10mm
Again easy one you undo those 4 M6 bolts…just yank it off carefully…they may be a few more bolts holding it on… If you have aftermarket skids...you should be removing at least the front rad skid at this point in time.

Step 6: Unhook the strap holding the lower radiator hose to the side of the frame. Unsnap the lower radiator fan shroud guard located on the bottom of the fan shroud.
Comes right off. Just a few clips. No pictures cause it’s super easy without skidplates on.
Step 7: Drain the radiator according to the manufacturer specifications.
I did this earlier…but you can do it now if you want.


Step 7: Remove the 4-M12x 25mm Bolts from the front crash bar and remove it.
17mm
Step 8: Remove the upper and lower radiator clamps and hoses from the radiator.
Grab a pair of needle nose pliers and apply pressure on the tabs of the clamp till you can wriggle it off.
Step 9: Unbolt the 2-M6x30mm gold bolts holding the intake tubing to the engine and unbolt the hose clamp. Remove the intake.
A quick and easy step that gives you more room to work when working on other parts. Remove everything from the throttle body to the airbox.
Step 10: Lower and remove the spare tire. Unclip the license plate light wire from the front of the rear bumper.
Step 11: Remove the 6-M14x50mm rear bumper bolts and remove the bumper.
19mm
If you are blessed to have an aftermarket bumper, get friends to help…or a floor jack and a piece of wood
Step 12: Unclip the wire harness cover just behind the passenger side tire. Unbolt the 1-M6x20mm bolt holding the wire harness to the passenger side frame rail. Unclip the two clips holding the same wire harness to the frame mount body bracket.


Step 13: Unhook the clip holding the brake sensor wire to the bracket at the top of the passenger's side coil bucket.

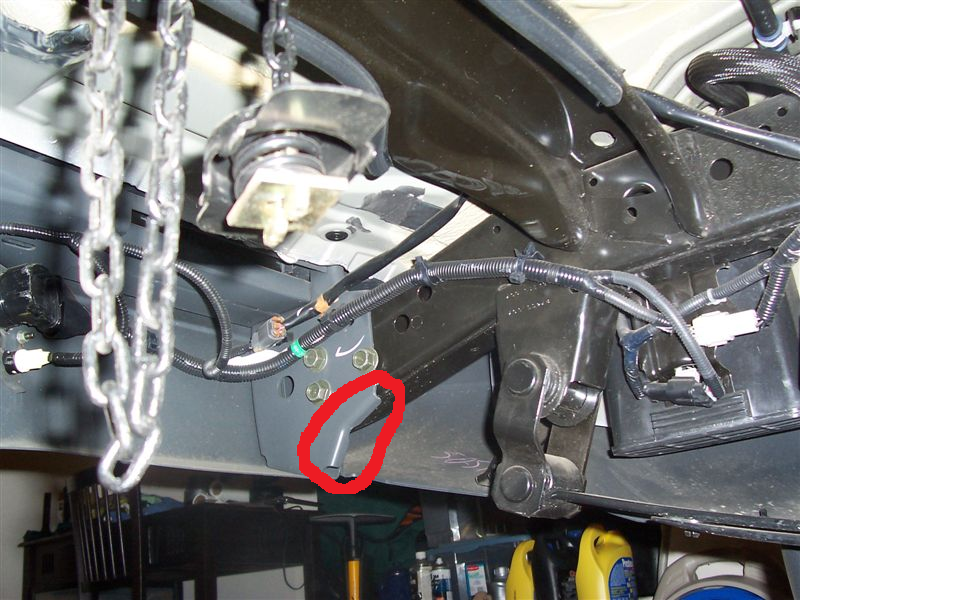
Step 14: Unbolt the 3-M6x30mm bolts holding the power steering reservoir bracket to the fender and separate from bottle. Remove the bracket from the truck.


Step 15: Unhook the clip holding the brake sensor wire to the bracket at the top of the driver's side coil bucket.
You can just unclip the push clips at the
Step 16: Unbolt the 2 nuts holding the brake line assembly on the lower driver's side firewall and remove the bracket from the studs. Unclip the two hoses from below.


Step 17: Mark the lower steering shaft and rack with a line going up and down to make sure it is re-assembled exactly the same. Remove the bolt and lower steering shaft from the rack and pinion 1-M8x30mm bolt. Loosten but do not remove the nut on the upper bolt holding the steering shaft to the shaft that goes through the firewall.
17mm, I believe
This one isn't that bad once you have the airbox removed. You WILL need a 1/2" driver. I used a long torque wrench to break this bad boy. It was by far the tightest bolt on the car.


Step 18: Loosen, but do NOT remove the 5 body mount bolts on the driver's side.
17mm
3 are located at the rocker panel, 1 is located at the front of the Xterra, and there is one at the very back inside the rear bumper (where the step is) quarter. USE ½†DRIVE ON THESE! Smaller may break. I used a cordless impact drill and it worked well.
Step 19: REMOVE the 5 body mount bolts on the passenger side. Place a hydraulic jack and a block of wood at the mid side of the truck on the passenger's side and gently lift the body of the truck no more than 2". Lift your Xterra just high enough to slide the 2" body blocks between the lower part of the body and the stock bushings on top of the frame mounts. Hand tighten the 5-M12 bolts included in the kit. Do NOT tighten completely and DON'T FORGET THE BIG WASHERS.
These turn into 19mm in the AC kit, btw.
Placing wood:

Jacking up the rig:

==========================================================
Rook's write-up said you had to machine the blocks; I did not have to do this...I was able to get them to fit with minimum "shoving". Others have had to shave them down. With the angle grinder, this will be very quick and easy.
==========================================================
Step 20: Lift the driver's side with a jack and a block of wood only high enough to slide the 5 2" blocks between the body and the stock rubber body mount bushings. Keep all of the rubber mounting body blocks in their stock locations and use them with the 2" blocks.
Same on the driver's side as you did on the passenger side.


Step 21: Grab the Steering shaft and move it up and down to make sure that it extends all the way
Just put this in there so the steering shaft settles all the way in the position it desires to be in, or you steering feeling and response will suck azz.
Step 22: Cut the power steering bottle bracket in half as shown and drill the hole into the side of the upper bracket.
This step is a WHORE. Just because it takes a while… (left this in there for a reason...)
Cut it like so:


then make a hole in it.. a little lower.


Material List:
- Napa Part # 8978 - extended rad hose
- AC 2" Body Lift Kit
- FULL metric socket set (notably 8, 10, 12, 14, 17, and 19's for the most part)
- 7/16" Socket
- Socket extensions (3", 6", (optional) 9")
- Floor Jack
- Pieces of Wood...6 inches of 2x4's would be ideal
- Zip Ties, depending on how well you take off the clips
- Flat head screw Driver
- Philips head screw driver (you will want one with a small head and one with a large head....Oh yeah!
)- Bucket (to drain coolant)
- 2 gallons of coolant (for the 2012 P4X, it is blue and a DEALER ONLY mix)
- Angle Grinder designed for metal
- Tungsten Carbide or Titatium drill bit 1/2" or one step larger would be preferred; specifically for metal work (wood bits will die very quickly)
- WD40 or NON-FLAMMABLE Lubricant
I will go through the AC steps that you NEED to do to complete this body lift (in bold), then I will scab some pictures and directions from Rook's write up because his was pretty good and I am lazy.
Prep Work
You don't have to do this, but I found it easier to:
- Put the front end on jack stands
- Remove the front tires
- Remove the driver and passenger front splash guards
Step 1: Disconnect the Battery, both negative and positive. REMOVE the battery and tie-downs and tray and stuff
10mm
Step 2: Remove the 6 clips holding the grill top to the radiator core support and snaps at the bottom of the grill. Remove it from it's mounts.
Flat head screw driver under the tab in the middle and rotate the flat head and remove the screw and the base it plugs into. At the lower part of the grill, between the back of the grill and the radiator are two tabs that need to be pressed to get it to release. Picture below is just the top part where the clips were connected
Step 3: Disconnect the fog lights if your Xterra is so equipped
Easy step…just disconnect them from the stalks if you have them
Step 4: Remove the 4 Philips head bolts on each side of the front bumper. Remove 4-M6x20mm Bolts that attach the bottom of the bumper to the skid plate. Remove the 2 Philips screws from the corners of the bumper cover under the splash shield. Remove the 5 screws and snaps from the top of the front bumper mount. Remove the bumper cover.
These are also easy steps and very straightforward. The bolts on the bottom are easily found and can be removed with a socket wrecnh (10mm) cake walk. The 4 philps head bolts are bolted right into the fender on each side…they easily come with out with a good screwdriver.
B]Step 5: Unbolt the skid plate from the body and remove the front skidplate.[/B]
10mm
Again easy one you undo those 4 M6 bolts…just yank it off carefully…they may be a few more bolts holding it on… If you have aftermarket skids...you should be removing at least the front rad skid at this point in time.
Step 6: Unhook the strap holding the lower radiator hose to the side of the frame. Unsnap the lower radiator fan shroud guard located on the bottom of the fan shroud.
Comes right off. Just a few clips. No pictures cause it’s super easy without skidplates on.
Step 7: Drain the radiator according to the manufacturer specifications.
I did this earlier…but you can do it now if you want.
Step 7: Remove the 4-M12x 25mm Bolts from the front crash bar and remove it.
17mm
Step 8: Remove the upper and lower radiator clamps and hoses from the radiator.
Grab a pair of needle nose pliers and apply pressure on the tabs of the clamp till you can wriggle it off.
Step 9: Unbolt the 2-M6x30mm gold bolts holding the intake tubing to the engine and unbolt the hose clamp. Remove the intake.
A quick and easy step that gives you more room to work when working on other parts. Remove everything from the throttle body to the airbox.
Step 10: Lower and remove the spare tire. Unclip the license plate light wire from the front of the rear bumper.
Step 11: Remove the 6-M14x50mm rear bumper bolts and remove the bumper.
19mm
If you are blessed to have an aftermarket bumper, get friends to help…or a floor jack and a piece of wood
Step 12: Unclip the wire harness cover just behind the passenger side tire. Unbolt the 1-M6x20mm bolt holding the wire harness to the passenger side frame rail. Unclip the two clips holding the same wire harness to the frame mount body bracket.
Step 13: Unhook the clip holding the brake sensor wire to the bracket at the top of the passenger's side coil bucket.
Step 14: Unbolt the 3-M6x30mm bolts holding the power steering reservoir bracket to the fender and separate from bottle. Remove the bracket from the truck.
Step 15: Unhook the clip holding the brake sensor wire to the bracket at the top of the driver's side coil bucket.
You can just unclip the push clips at the
Step 16: Unbolt the 2 nuts holding the brake line assembly on the lower driver's side firewall and remove the bracket from the studs. Unclip the two hoses from below.
Step 17: Mark the lower steering shaft and rack with a line going up and down to make sure it is re-assembled exactly the same. Remove the bolt and lower steering shaft from the rack and pinion 1-M8x30mm bolt. Loosten but do not remove the nut on the upper bolt holding the steering shaft to the shaft that goes through the firewall.
17mm, I believe
This one isn't that bad once you have the airbox removed. You WILL need a 1/2" driver. I used a long torque wrench to break this bad boy. It was by far the tightest bolt on the car.
Step 18: Loosen, but do NOT remove the 5 body mount bolts on the driver's side.
17mm
3 are located at the rocker panel, 1 is located at the front of the Xterra, and there is one at the very back inside the rear bumper (where the step is) quarter. USE ½†DRIVE ON THESE! Smaller may break. I used a cordless impact drill and it worked well.
Step 19: REMOVE the 5 body mount bolts on the passenger side. Place a hydraulic jack and a block of wood at the mid side of the truck on the passenger's side and gently lift the body of the truck no more than 2". Lift your Xterra just high enough to slide the 2" body blocks between the lower part of the body and the stock bushings on top of the frame mounts. Hand tighten the 5-M12 bolts included in the kit. Do NOT tighten completely and DON'T FORGET THE BIG WASHERS.
These turn into 19mm in the AC kit, btw.
Placing wood:
Jacking up the rig:
==========================================================
Rook's write-up said you had to machine the blocks; I did not have to do this...I was able to get them to fit with minimum "shoving". Others have had to shave them down. With the angle grinder, this will be very quick and easy.
==========================================================
Step 20: Lift the driver's side with a jack and a block of wood only high enough to slide the 5 2" blocks between the body and the stock rubber body mount bushings. Keep all of the rubber mounting body blocks in their stock locations and use them with the 2" blocks.
Same on the driver's side as you did on the passenger side.
Step 21: Grab the Steering shaft and move it up and down to make sure that it extends all the way
Just put this in there so the steering shaft settles all the way in the position it desires to be in, or you steering feeling and response will suck azz.
Step 22: Cut the power steering bottle bracket in half as shown and drill the hole into the side of the upper bracket.
This step is a WHORE. Just because it takes a while… (left this in there for a reason...)
Cut it like so:
then make a hole in it.. a little lower.