
- Location
- Smyrna, TN
Tools and supplies you will need:
10mm socket
8mm socket
Phillips screwdriver
Brass brush
Brake Cleaner
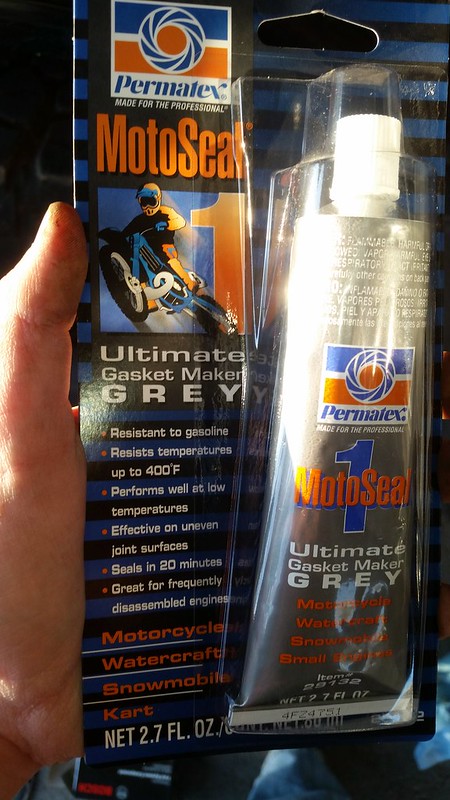
Permatex MotoSeal 1 Gasket maker (Gasoline resistance is KEY)
New O-Ring Bosch 68203 (link)
Remove the fuse for the fuel pump to drain the fuel lines (15amp, top left of in-cab fuse box) while the truck is running. Let it die on its own. After it dies, try to crank it a few more times to make sure all the fuel is out of the pump/lines.
Disconnect the battery. (10mm socket)
Remove the bottom of the rear passenger seat.
Remove the Inspection port cover (10mm socket)
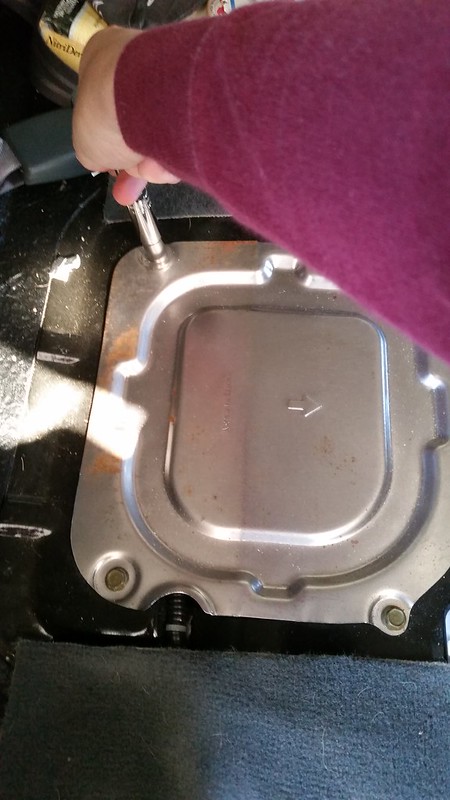
Remove the next cover (10mm socket)
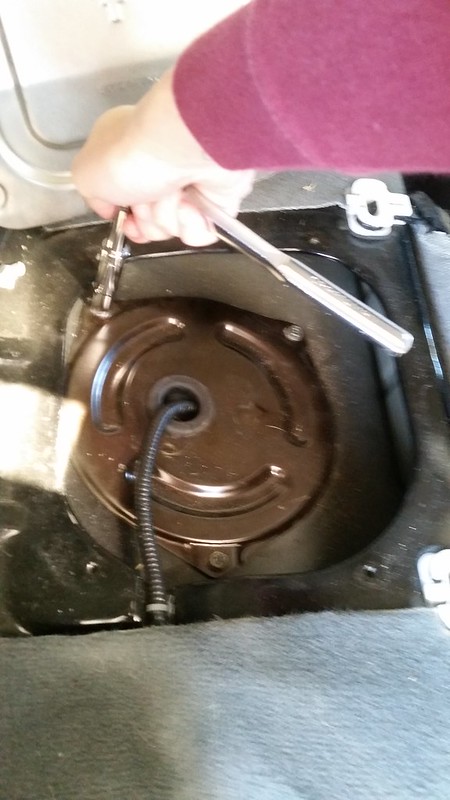
Step 6- Unplug the 2 electrical plugs from the FSU. (pressure clips are on top)
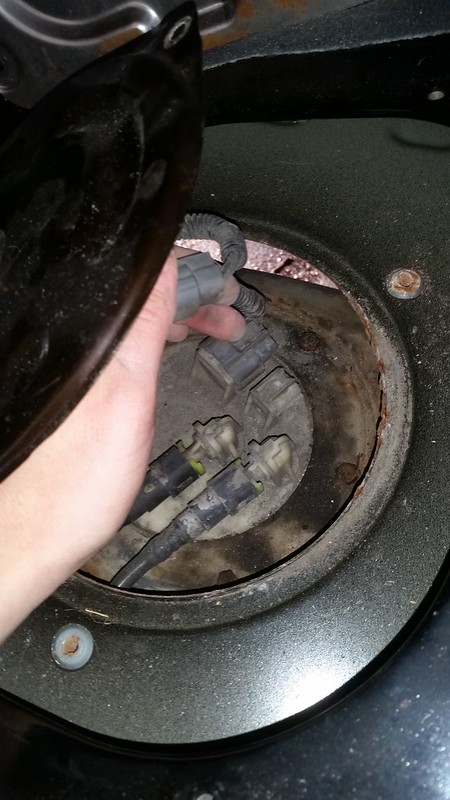
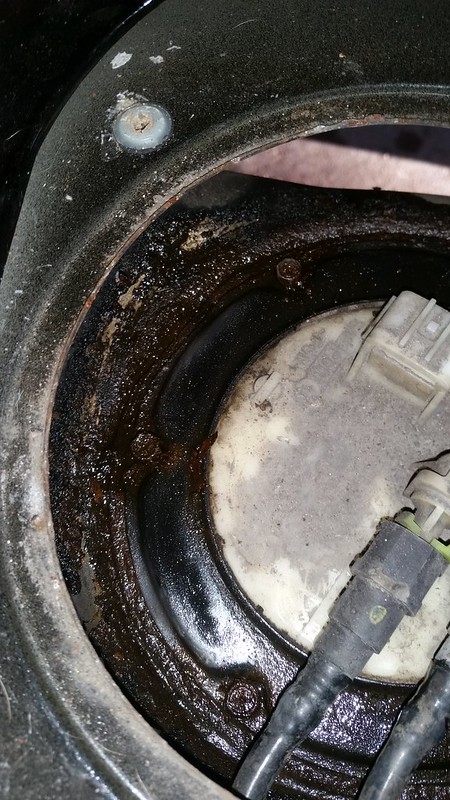
Remove the 2 fuel lines. Tuck the lines between the tank and the cab.**CAUTION: THE OUT-FLOW LINE (on the left) MAY STILL BE PRESSURIZED. REMOVE SLOWLY**
Here, I realized the out-flow gas line was still pressurized. You can place a towel or a rag over the line before you pull to help keep the spray out of your face.
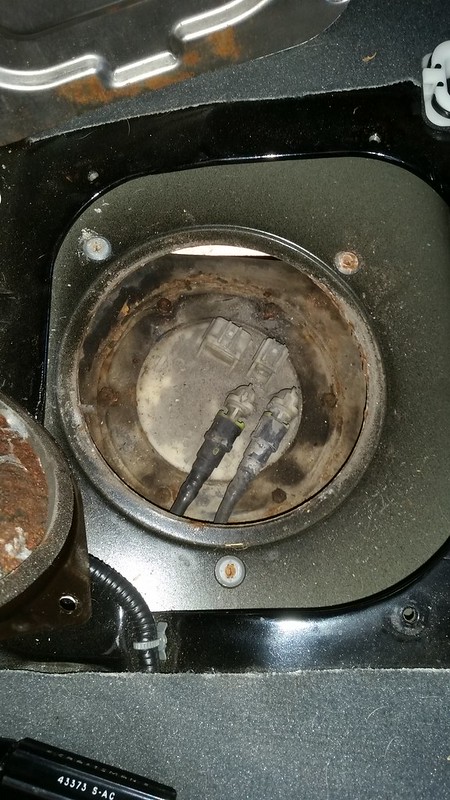
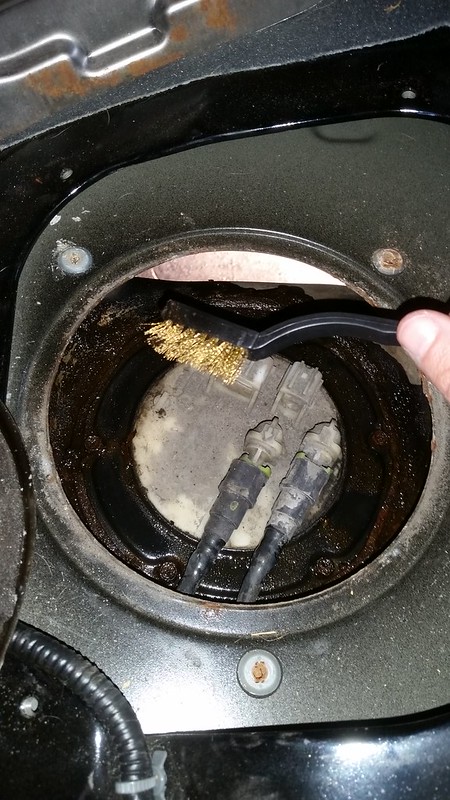
Spray a liberal amount of brake cleaner around the outer ring. After soaking for 30-60 seconds, scrub vigorously with the wire brush.
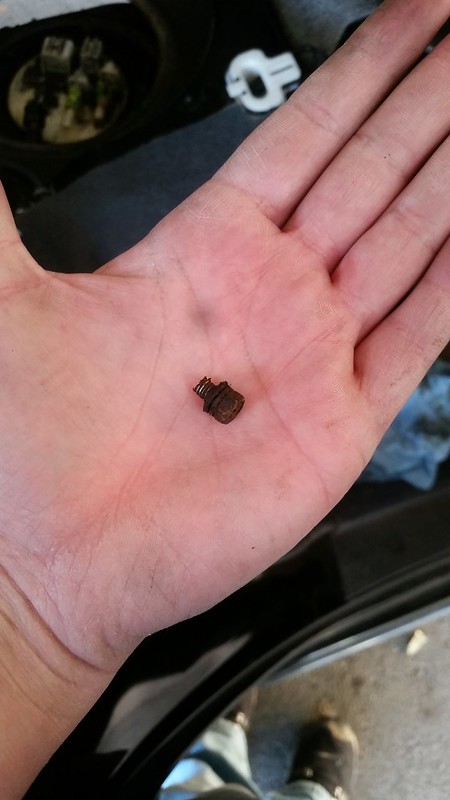
Use the 8mm socket and remove the 6 screws on the FSU Retainer Ring
These screws are SMALL. Put them in a safe place.
Pull up the ring.

Set the retainer ring aside. If it is corroded like mine, spray a liberal amount of brake cleaner on it and let it soak. You can scrub it with the wire brush in a few moments.
Lift up on the plastic FSU. Be careful when doing so, as you might dislodge the float on the fuel gauge or any debris from the top of the tank. You do not have to remove the unit entirely, just pick it up enough to get the ring off. Discard it.
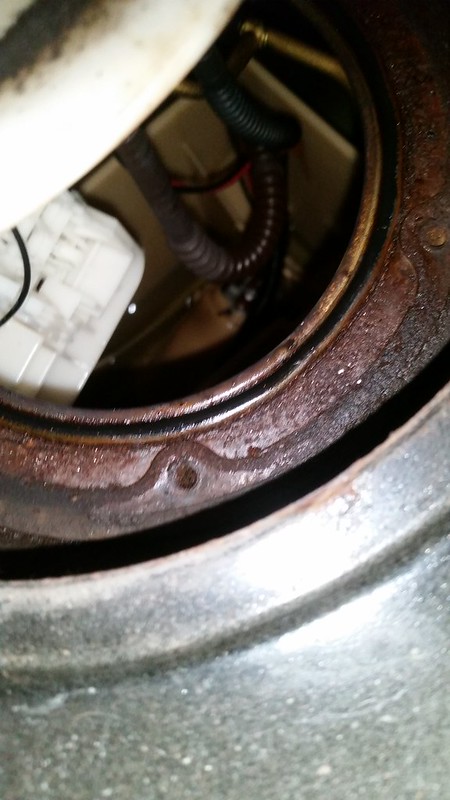
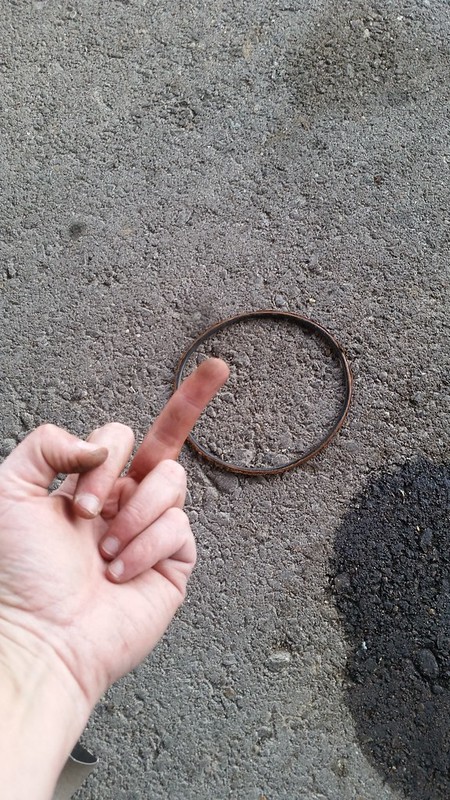
Slide the new O-Ring around the top of the FSU and seat it in its groove in the tank. Lower the FSU back on top of it.
Before replacing the Retainer Ring, apply the Permatex MotoSeal 1 as seen below. Try to avoid getting any inside the screw holes.
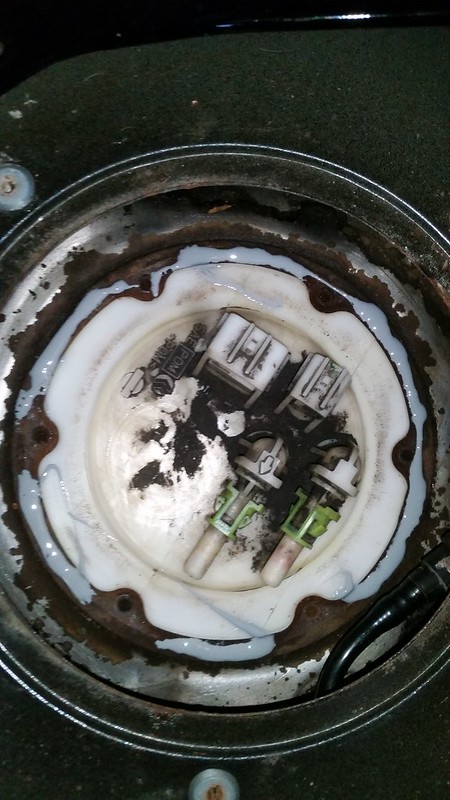

Allow both surfaces to set for ~60 seconds, then mate them together. Put the retainer screws back in with the Phillips screwdriver, stopping when you feel the first bit of resistance. The FSM does not specify a specific order to torque them down, but I did the "opposite" order. It DOES specify 17.4-22.6 INCH-pounds of torque. Be careful when you do the final torquing of these crews, as they will strip VERY easily. (ask me how I know)
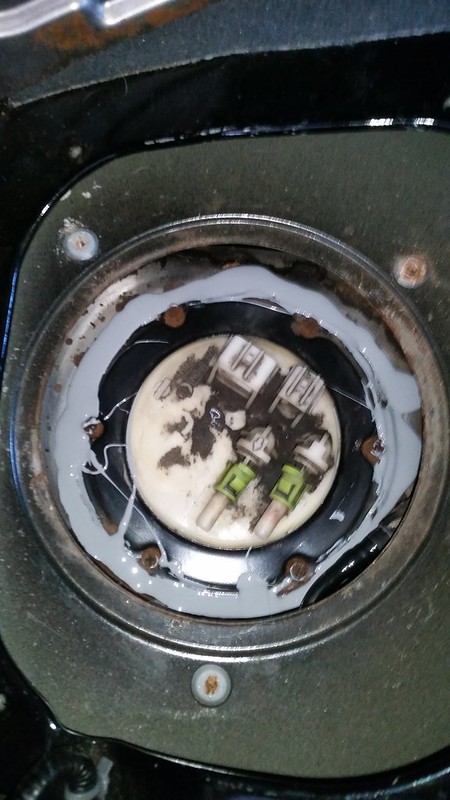
Once you finish torquing the screws, apply a liberal amount of Permatex to the outside of the retainer ring as seen below. This is where I had my original leak (bubbles were visible when sprayed with soapy water during diagnostic testing), so I put almost 3/4 of the tube on it. Again, try not to get any on the screws and pray you never have to replace this thing again, because it'll be hell getting that Permatex off.
Re-connect the fuel lines, then the electrical plugs.
Allow the Permatex to cure while putting the fuse back in and re-connecting the battery.
Before re-installing the Inspection Port Cover, allow the truck to run. Check the Permatex for bubbles. If bubbles are visible, turn off the motor and add more Permatex to that area. If no bubbles, let the engine run while you re-install the Inspection Port Cover and the seat. Do not be alarmed if the motor runs a little funny for the first few moments, as there will be air in the fuel lines until it is primed completely.
Re-install the rear seat.
If you happen to get gasoline on any rag or shop towel, DISPOSE OF THEM IN ACCORDANCE WITH STATE/LOCAL laws.
10mm socket
8mm socket
Phillips screwdriver
Brass brush
Brake Cleaner
Permatex MotoSeal 1 Gasket maker (Gasoline resistance is KEY)
New O-Ring Bosch 68203 (link)
Remove the fuse for the fuel pump to drain the fuel lines (15amp, top left of in-cab fuse box) while the truck is running. Let it die on its own. After it dies, try to crank it a few more times to make sure all the fuel is out of the pump/lines.
Disconnect the battery. (10mm socket)
Remove the bottom of the rear passenger seat.
Remove the Inspection port cover (10mm socket)
Remove the next cover (10mm socket)
Step 6- Unplug the 2 electrical plugs from the FSU. (pressure clips are on top)
Remove the 2 fuel lines. Tuck the lines between the tank and the cab.**CAUTION: THE OUT-FLOW LINE (on the left) MAY STILL BE PRESSURIZED. REMOVE SLOWLY**
Here, I realized the out-flow gas line was still pressurized. You can place a towel or a rag over the line before you pull to help keep the spray out of your face.
Spray a liberal amount of brake cleaner around the outer ring. After soaking for 30-60 seconds, scrub vigorously with the wire brush.
Use the 8mm socket and remove the 6 screws on the FSU Retainer Ring
These screws are SMALL. Put them in a safe place.
Pull up the ring.
Set the retainer ring aside. If it is corroded like mine, spray a liberal amount of brake cleaner on it and let it soak. You can scrub it with the wire brush in a few moments.
Lift up on the plastic FSU. Be careful when doing so, as you might dislodge the float on the fuel gauge or any debris from the top of the tank. You do not have to remove the unit entirely, just pick it up enough to get the ring off. Discard it.
Slide the new O-Ring around the top of the FSU and seat it in its groove in the tank. Lower the FSU back on top of it.
Before replacing the Retainer Ring, apply the Permatex MotoSeal 1 as seen below. Try to avoid getting any inside the screw holes.
Allow both surfaces to set for ~60 seconds, then mate them together. Put the retainer screws back in with the Phillips screwdriver, stopping when you feel the first bit of resistance. The FSM does not specify a specific order to torque them down, but I did the "opposite" order. It DOES specify 17.4-22.6 INCH-pounds of torque. Be careful when you do the final torquing of these crews, as they will strip VERY easily. (ask me how I know)
Once you finish torquing the screws, apply a liberal amount of Permatex to the outside of the retainer ring as seen below. This is where I had my original leak (bubbles were visible when sprayed with soapy water during diagnostic testing), so I put almost 3/4 of the tube on it. Again, try not to get any on the screws and pray you never have to replace this thing again, because it'll be hell getting that Permatex off.
Re-connect the fuel lines, then the electrical plugs.
Allow the Permatex to cure while putting the fuse back in and re-connecting the battery.
Before re-installing the Inspection Port Cover, allow the truck to run. Check the Permatex for bubbles. If bubbles are visible, turn off the motor and add more Permatex to that area. If no bubbles, let the engine run while you re-install the Inspection Port Cover and the seat. Do not be alarmed if the motor runs a little funny for the first few moments, as there will be air in the fuel lines until it is primed completely.
Re-install the rear seat.
If you happen to get gasoline on any rag or shop towel, DISPOSE OF THEM IN ACCORDANCE WITH STATE/LOCAL laws.