
01XterraPhilly
First Fill-Up (of many)
- Location
- Conshohocken, PA
So I finally got this dang light bar done and what not so Im going to attempt to do a write up for it and make it as simple as possible. So let's start with what I am working with.
Light Bar Link:http://www.apocalypticlighting.com/180w-Infection-32-Dual-Row_p_18.html
Wiring Harness: http://www.apocalypticlighting.com/Wiring-Harness_p_31.html
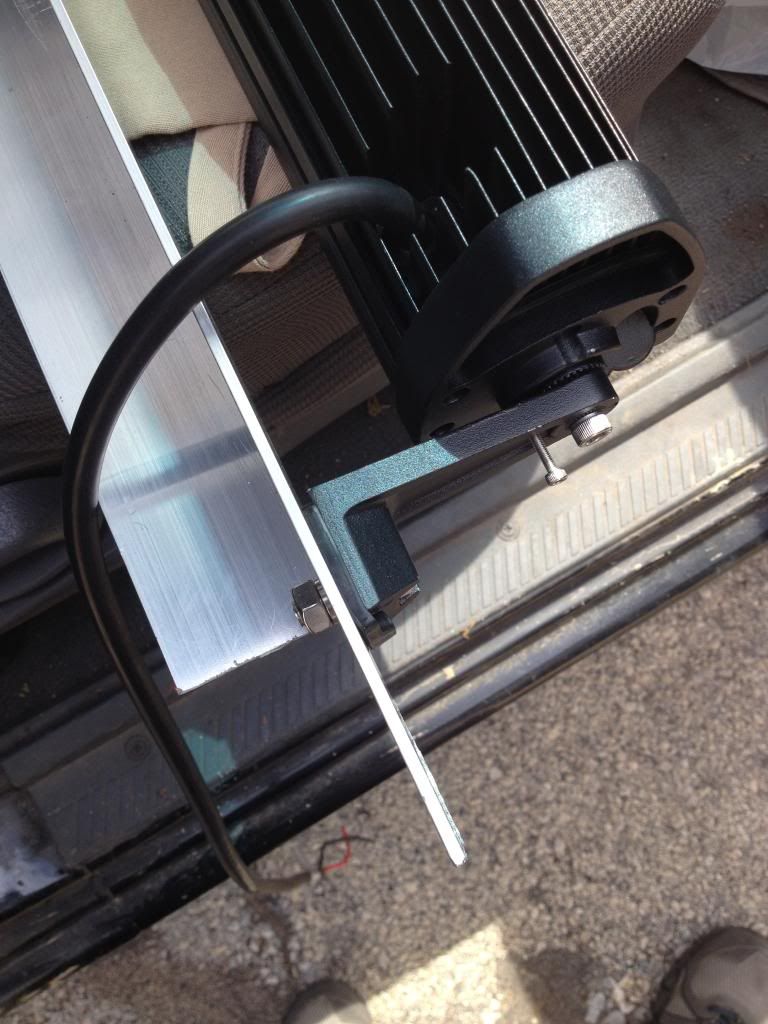
Light bar mount, 4' by 1.5" angled bar. cut notches in the ends to fit between roof rails, drill holes...yada yada
Now let's get to the fun stuff...Wiring (not, i absolutely hate wiring btw)
Start at the battery: Red to red, black to black (or ground to the body or chassis). From the battery, the wires go to the fuse, from the fuse wires go to relay:
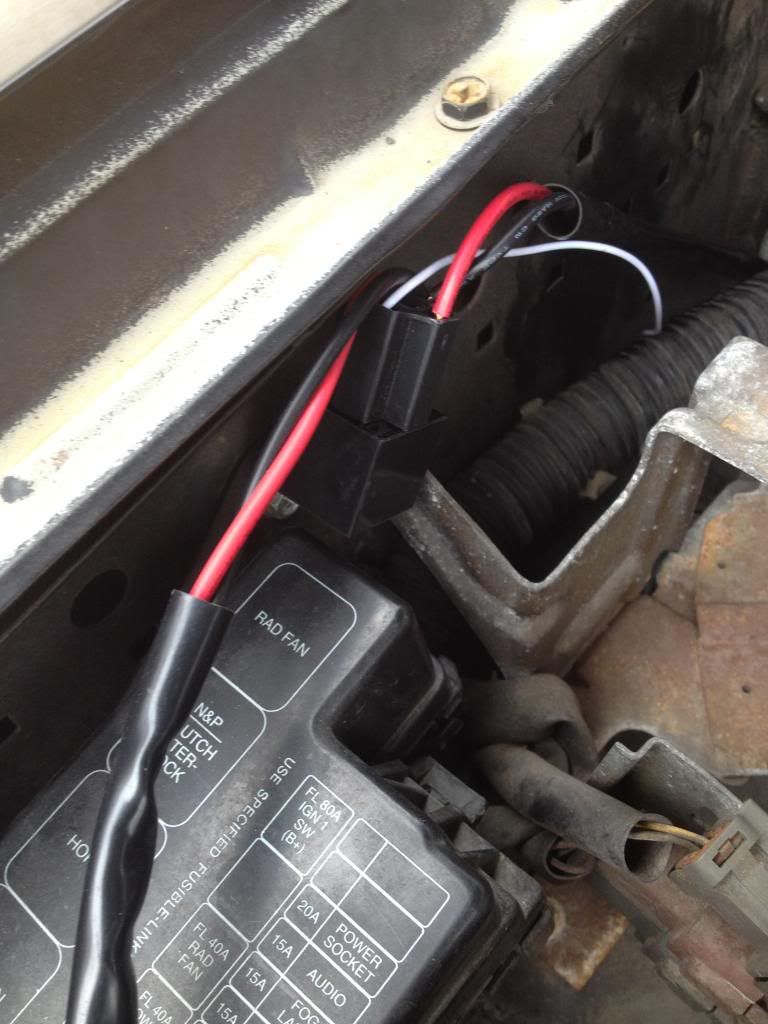
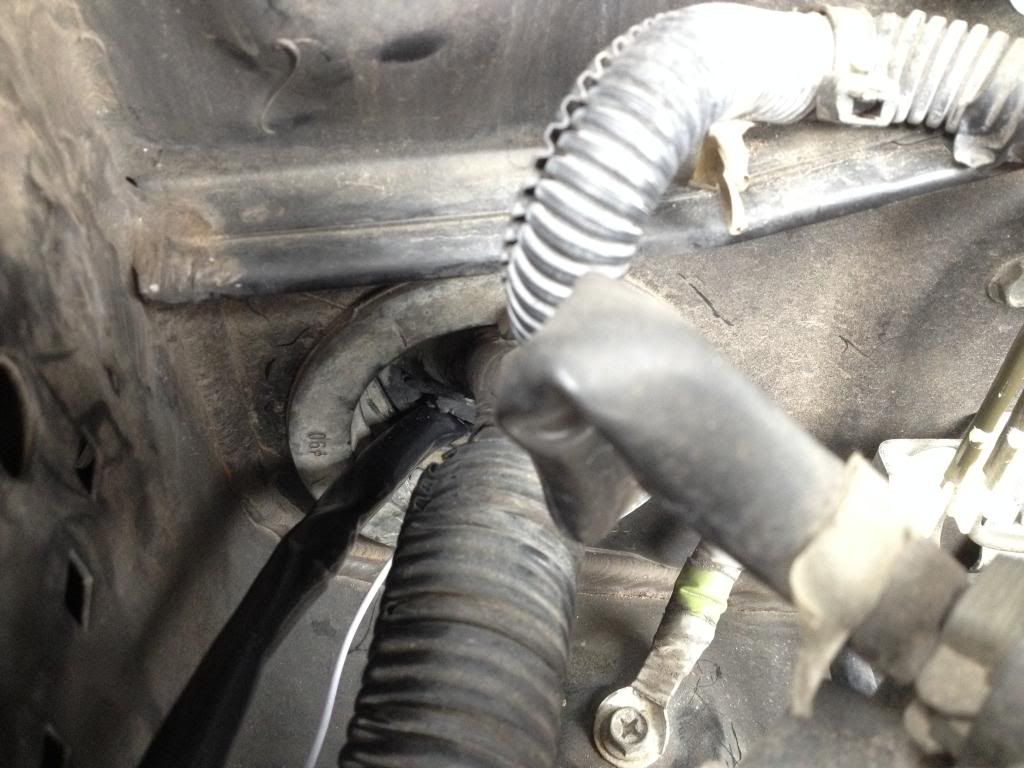
From the relay, you see in that last picture that has a black and red wires in a sleeve and a white wire. These go through the firewall, cut a slit in the foam piece big enough for you to fit the wires through. Note, there is a red wire with a ring terminal to power the switch, leave that in the engine compartment and connect it to the red terminal on the battery.
So know that the wires go into the cab, let's get this bad boy going. So those red and black wires that were in the sleeve get routed up the A pillar:
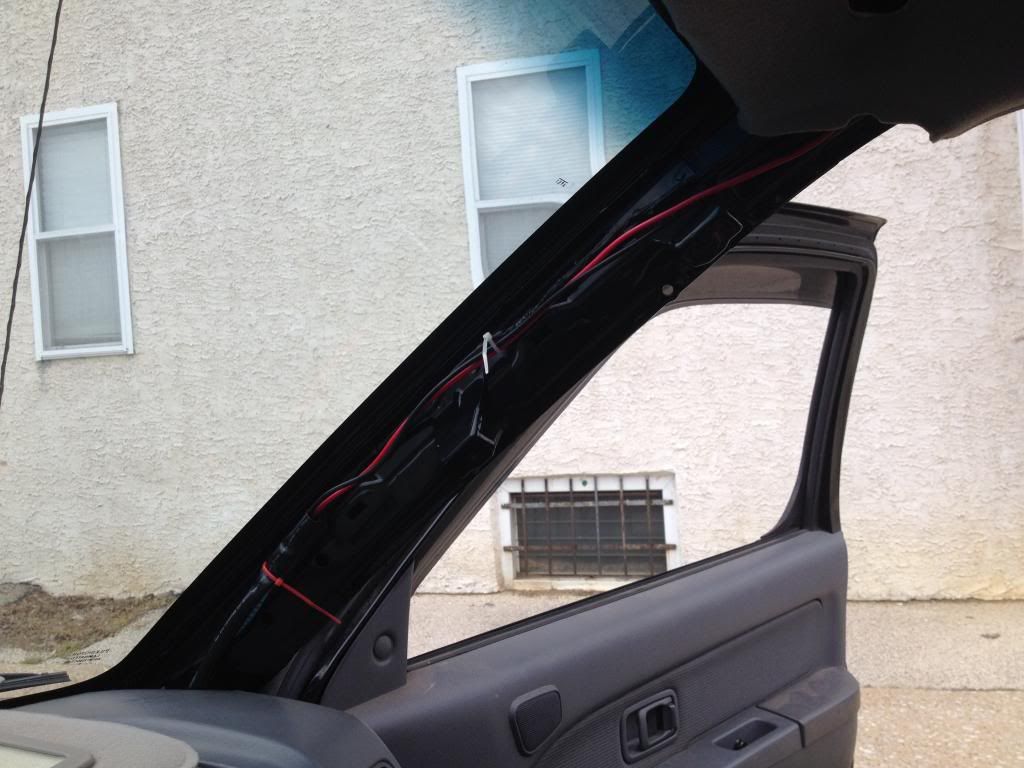
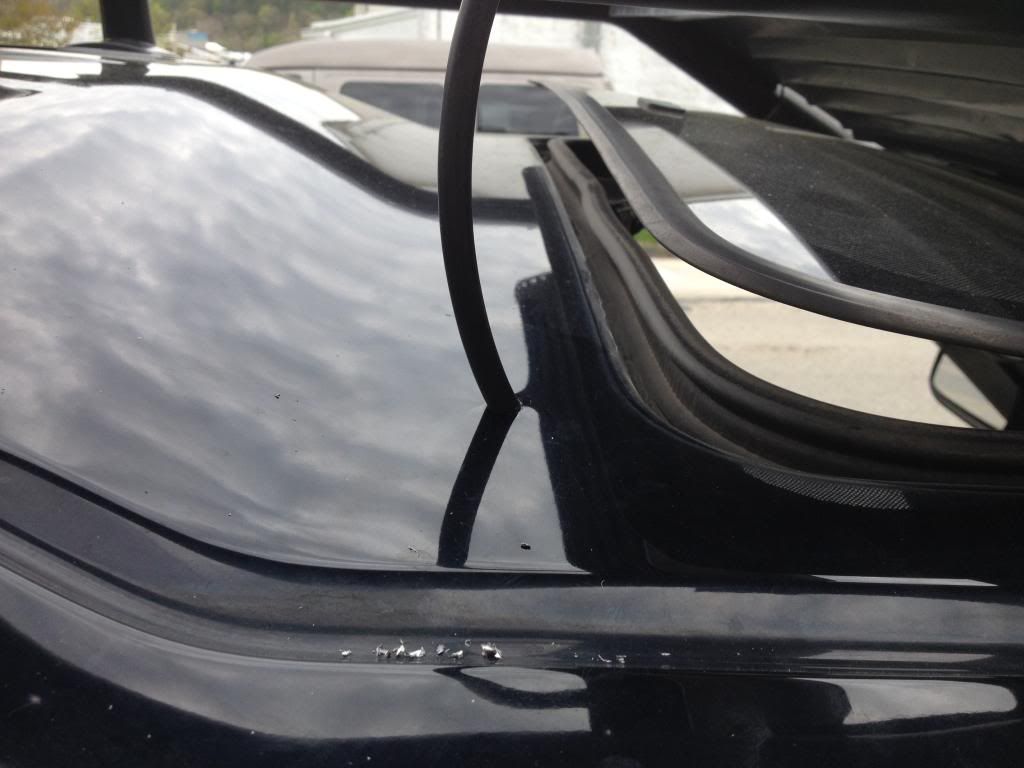
The wires will have either female or male quick disconnects. The Light bar red and black wires will not have disconnects so you will have to add them to match up with the wiring harness. Hook the black to black and red to red. Tape or use heat shrink sleeve to cover the connectors up and dont let them touch. Tuck it up between the headliner and roof. Here is the pic of the wires with a drilled hole in the roof. Used Black silicone to seal up the hole for rain and all that.
Now lets go to the switch. There There is a red wire with a ring terminal, this goes back to the battery. it powers the switch. Next is the wires to the switch. There is a red, yellow, and black. If for some reason you have to remove the wires to the switch, black goes to the middle and the red and yellow doesnt matter which side it goes to as long as the black is to the middle prong. There is a random blue wire. I have no clue what its for, i assume its for hooking up other accessories or lights to the switch...but idk so yea. you can actually cut it off and discard it if you wish. thats what i did. And viola youre done! congrats now have a beer. you earned it
[video=youtube_share;FfR2wFd6YZA]http://youtu.be/FfR2wFd6YZA[/video]
Light Bar Link:http://www.apocalypticlighting.com/180w-Infection-32-Dual-Row_p_18.html
Wiring Harness: http://www.apocalypticlighting.com/Wiring-Harness_p_31.html
Light bar mount, 4' by 1.5" angled bar. cut notches in the ends to fit between roof rails, drill holes...yada yada

Now let's get to the fun stuff...Wiring (not, i absolutely hate wiring btw)
Start at the battery: Red to red, black to black (or ground to the body or chassis). From the battery, the wires go to the fuse, from the fuse wires go to relay:

From the relay, you see in that last picture that has a black and red wires in a sleeve and a white wire. These go through the firewall, cut a slit in the foam piece big enough for you to fit the wires through. Note, there is a red wire with a ring terminal to power the switch, leave that in the engine compartment and connect it to the red terminal on the battery.

So know that the wires go into the cab, let's get this bad boy going. So those red and black wires that were in the sleeve get routed up the A pillar:

The wires will have either female or male quick disconnects. The Light bar red and black wires will not have disconnects so you will have to add them to match up with the wiring harness. Hook the black to black and red to red. Tape or use heat shrink sleeve to cover the connectors up and dont let them touch. Tuck it up between the headliner and roof. Here is the pic of the wires with a drilled hole in the roof. Used Black silicone to seal up the hole for rain and all that.

Now lets go to the switch. There There is a red wire with a ring terminal, this goes back to the battery. it powers the switch. Next is the wires to the switch. There is a red, yellow, and black. If for some reason you have to remove the wires to the switch, black goes to the middle and the red and yellow doesnt matter which side it goes to as long as the black is to the middle prong. There is a random blue wire. I have no clue what its for, i assume its for hooking up other accessories or lights to the switch...but idk so yea. you can actually cut it off and discard it if you wish. thats what i did. And viola youre done! congrats now have a beer. you earned it
[video=youtube_share;FfR2wFd6YZA]http://youtu.be/FfR2wFd6YZA[/video]