Xterraforce's build thread

Xterraforce

<img src="http://i164.photobucket.com/albums/u7/ra
Founding Member
Location
Signal Mtn., TN
No lift other than cranking the t-bars about an inch to level it a bit. The shocks don't provide any lift. All they do is help control the suspension movement.
 

AaronsX

Suspension Lift
Founding Member
Ok gotcha that just looked like a lot of room in the new shock picture, compared to the old one. But now I understand the old shocks where shot and compressed to much
 

Xterraforce

<img src="http://i164.photobucket.com/albums/u7/ra
Founding Member
Location
Signal Mtn., TN
I think you missed the point of those pictures Aaron. Those were both actually pictures with the suspension flexed out. I drove the right front up on a dirt pile in 2WD to see how much difference there was before and after the rear sway bar removal. The extra room was because the suspension flexed more without the sway bar, and with the longer shocks and I was able to drive farther up the dirt pile before loosing traction. On level ground there was no difference in clearance before and after the new shocks, or without shocks for that matter. I didn't need to jack it up to change the shocks and since they don't support the weight of the X so it never moved up or down with the old shocks, the new shocks or without shocks between removing the old ones and installing the new ones. The only way shocks would make a difference is if they were air shocks or coilover shocks designed to actually help support the weight of the vehicle.
 

Xterraforce

<img src="http://i164.photobucket.com/albums/u7/ra
Founding Member
Location
Signal Mtn., TN
So it's been a very long time since I've done any updates. Like lots of others there's been a lot of things happen that took time and funds away from mods. Turns out mod bugs are like cockroaches though. They can survive a nuclear blast. Until lately the only thing added to the Xterra was miles and off road pinstripes (some people call them scratches but we know better) so just after Christmas I decided the X needed a gift too. I painted the grill black to match the RLC bumper, then came the one I'd been waiting for. Before I ever even got my Xterra, I had wanted one with a snorkel for some time. After a lot of decision making I broke down and ordered one. The hardest part for me was working up the nerve to take the plunge and start drilling. Once the first hole was done the others were a little easier to deal with. Hopefully I'll be able to finally get the suspension lift this year and do more rides with my XN family. I added some pictures of the snorkel and painted grill to the first page if you want to have a look.
 
S

Steeze

Guest
snorkel looks good... hell the whole truck is looking good!
 

Xterraforce

<img src="http://i164.photobucket.com/albums/u7/ra
Founding Member
Location
Signal Mtn., TN
Thanks. Your tube bumper is one of the best I've seen. I wanted to go tube but at the time I was looking I couldn't find any that I liked. Most of the ones I saw looked like they were made for something totally different and just didn't seem to blend with the X. Of course many of them WERE for something else. Looks like people are finally making some that look like they're supposed to be there.
 

Trexx

Bought an X
Location
Colorado
Thanks. Your tube bumper is one of the best I've seen. I wanted to go tube but at the time I was looking I couldn't find any that I liked. Most of the ones I saw looked like they were made for something totally different and just didn't seem to blend with the X. Of course many of them WERE for something else. Looks like people are finally making some that look like they're supposed to be there.

Ya Brian is a great fabricator and ill always recommended him Xtf fab ftw
 

Scott Peele

Bought an X
Location
Poway, CA
Your X looks great; I really like the wheels. Do you know where I could get some 16's? Also, I'm thinking the ladder on the driver side would be a better spot so that it would not interfere with your over the right shoulder view.
 

Xterraforce

<img src="http://i164.photobucket.com/albums/u7/ra
Founding Member
Location
Signal Mtn., TN
Your X looks great; I really like the wheels. Do you know where I could get some 16's? Also, I'm thinking the ladder on the driver side would be a better spot so that it would not interfere with your over the right shoulder view.


Thanks. I got my wheels from www.tirerack.com and they are 16s. They're Granite Alloy GA9 wheels. The problem most people have with the ladder on the driver side is that most bumpers with tire carriers place the spare on the driver side. I don't have a tire carrier and if I was getting one I'd have it custom made anyway. I think I'll be going to a roof mounted spare soon and I'm perfectly happy with the driver's side ladder. If you're not planning on a bumper with tire carrier that only has a driver side option I'd recommend a driver side ladder.
 

stevencox93

First Fill-Up (of many)
Location
Tazewell,Tn
Hey man I got a couple questions when you did your BL.
How did you fix the gap between the bumper and grille with the RLC bumper?
Also when doing your BL how did you configure for the Power Steering resevior?
and what did you do with your marker light when you installed your RLC?
 
Last edited:

Xterraforce

<img src="http://i164.photobucket.com/albums/u7/ra
Founding Member
Location
Signal Mtn., TN
To raise the RLC bumper I drilled new holes through the frame two inches higher than the factory holes. I drilled all the way through both sides and used grade 8 1/2" bolts with two inch fender washers topped with 1 1/2" grade 8 hardened washers to spread the load from tightening the bolts. That way I can tighten them as tight as possible without the frame bending inward. I used nylock nuts to reduce the chance of them loosening and rechecked them a few times just in case. My bumper is the prototype RLC so I don't know if others are the same, but my winch plate rested directly on top of the frame before I raised it. This made it pretty easy to install the bumper by myself since I could just set it in place then hold it with one hand and start the bolts with the other. Once I drilled the new holes after the body lift, I used electrical tape to temporarily hold some six inch sections of 2x2 square metal tubing I had to the top of the frame. That allowed me to rest the bumper on them just like before to reinstall it in the new higher holes.

For the power steering reservoir, we temporarily popped it off of the bracket and used a zip tie to hold it in place lower. A few days later I took the bracket off and cut it a little below where the reservoir attaches. I then lowered the upper part down two inches on the inside of the lower part and held them together with vice grips while I drilled a couple of holes through both parts. I bolted the two parts back together and reinstalled the bracket and popped the reservoir back onto it. Cutting two inches out of the bracket and welding it would be a better option but I didn't want to wait for someone to do it for me and I'm VERY bad at welding.

My side marker lights are still attached to the OEM plastic bumper cover laying around somewhere. I'm thinking about installing some small LEDs but it hasn't been an issue not having them.
 

lbishop

Need Bigger Tires
Location
Polk County,TN
this is such an awesome truck!!!! Carry on :d

what kind of trimming did it take to fit the 285s? with your wheels? Can you run the backspacing by me?
 

Xterraforce

<img src="http://i164.photobucket.com/albums/u7/ra
Founding Member
Location
Signal Mtn., TN
Thanks everyone.

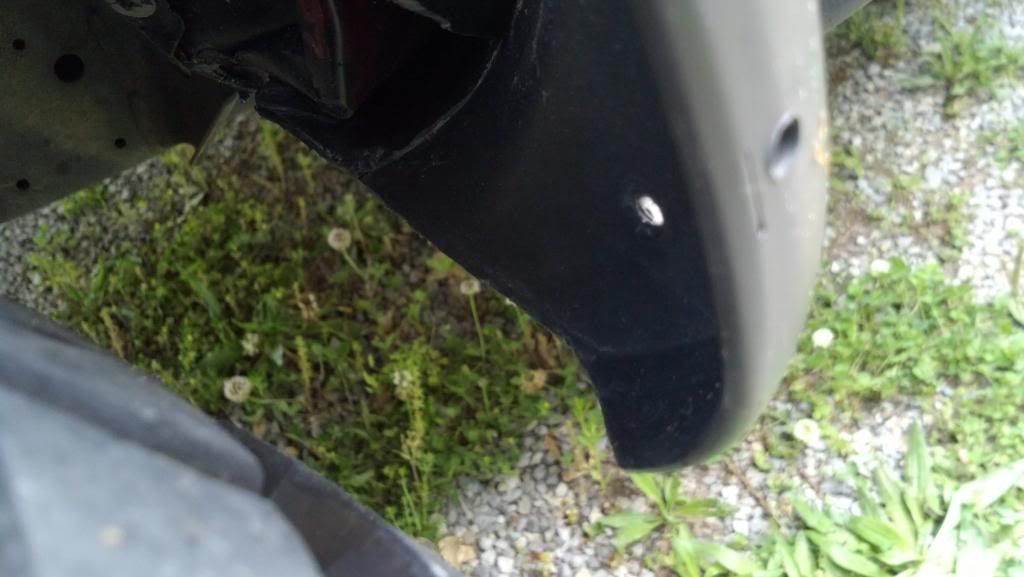
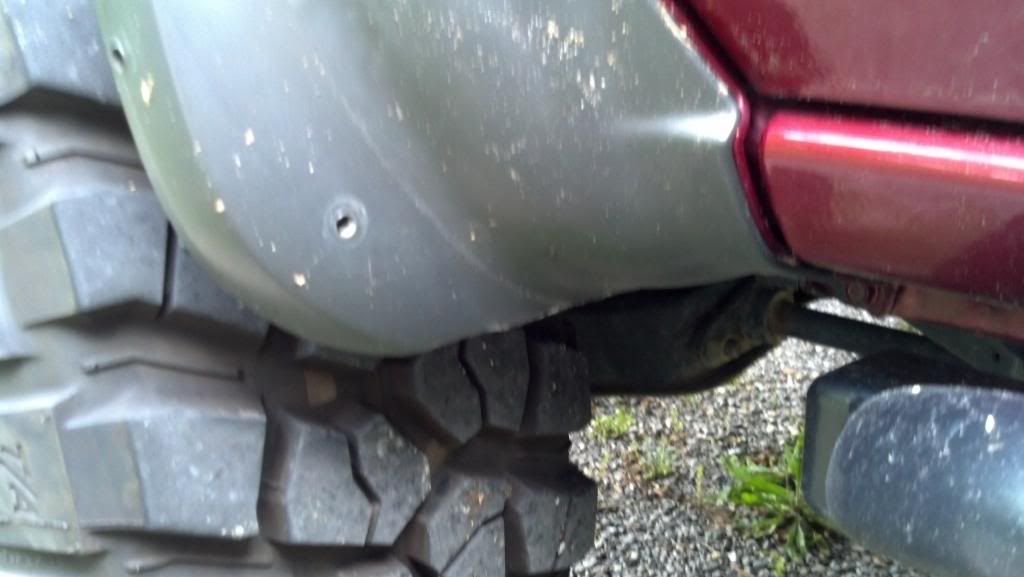
Ibishop, the wheels are 16x8 with 4.78 backspacing. The 285s were fine for street driving with the minor plastic surgery I had already done before the body lift but I could see when the wheels were turned it was going to be too close for off-road. I took the plastic parts at the rear of the wheel opening off and cut pretty much the entire lip off the bottom. I cut maybe four or five inches off of the the bottom rear of the plastic inner fender. Next I made some small cuts into the metal at the bottom of the fender, right about where it curves under. I cut at a bit of an angle removing the turned up lip and going back no more than 1/2 inch where the fender ends under there at the body. I gently massaged the pinch weld (with a hammer :angel:) back a bit at the lower corner then folded the lower part of the fender up to the body (hammer again) which made room for tire clearance and also helped close up the opening that was uncovered by cutting the inner fender short. I held the plastic parts back in place and made note of how much more I could trim to get it back pretty much even with the metal.

When I thought it looked good I shot some black primer on all the metal to cover where I had cut and knocked paint off with the hammer. Using a body hammer will give you smoother results that a carpentry hammer. I put the plastics back on and took it to a nearby trail where I know I can get some three wheeled action on the rocks to make sure nothing rubs. I'll be taking my tin snips with me for a while just in case. You never know until you've compressed the suspension and about every steering angle which can take a while. The plastic cuts easily so trail trimming is as simple as finding where the dirt gets rubbed off then cutting it back.

Here's a couple of pictures I took tonight. Maybe they'll give you a better idea.


lbishop

Need Bigger Tires
Location
Polk County,TN
awesome man thanks for the info. it looks really good... I wanna run 285s on wheels with 4.5 inch backspacing so ill be cutting a little more, but this gives me a place to start. I may talk to my local body shop about some trimming while im at it
 

Xterraforce

<img src="http://i164.photobucket.com/albums/u7/ra
Founding Member
Location
Signal Mtn., TN
For me the 285s are perfect. With only a two inch body lift and the wheels I have there would have been a lot of metal cutting to clear a wider tire.
 

Roadwarrior

Titan Swapped / SAS'd
Founding Member
Hey Xterraforce, have you installed your winch yet? I am getting a winch soon and just wanting to know easy installation will be and how to use the winch when it is fully covered by the bumper

Undo the top bolts from the top and then loosen the bottoms in order to let the front of the bumper down
 

Xterraforce

<img src="http://i164.photobucket.com/albums/u7/ra
Founding Member
Location
Signal Mtn., TN
Hey Xterraforce, have you installed your winch yet? I am getting a winch soon and just wanting to know easy installation will be and how to use the winch when it is fully covered by the bumper

I haven't installed it yet. My plan is to get that done this weekend. With my RLC bumper using the winch won't be any trouble at all. The upper center section is pretty much wide open unlike most others. I've seen where some people have removed the grill to install the winch with RLC bumpers but they've all been the early gen 1. I'm not sure I could do that on my gen 1.5 because the lower part of the grill is more forward than the gen 1 and may be too close to the center hoop. No worries though because I'll just remove the bumper, install the winch then put it all back on and wire it up. The bumper is approximately 100 pounds, but I'm a big guy and I've removed and installed it a few times by myself with no trouble. I don't think the extra weight of the winch will be a problem but I'll have Cody with me to help if needed.

Undo the top bolts from the top and then loosen the bottoms in order to let the front of the bumper down

I'm not sure what you mean about top and bottom bolts. RLC bumpers use the factory mounting locations so on each side there are two side bolts and one front bolt. I think I've seen other bumpers that have brackets that bolt to the frame then the bumper bolts to the brackets but mine isn't like that. It does seem like I've seen pictures of people working on their Xterra with the bumper tilted forward. Mine wouldn't be able to do that because the side parts would hit the fenders as it tilted. It needs to go straight forward to remove it. I'm not sure if all RLCs are like that since mine is the prototype. I know James tweaked a couple of things before putting them into production.
 

Roadwarrior

Titan Swapped / SAS'd
Founding Member
When I helped Caseycamby install his we were talking about it, and I remembered Dave told me something about taking two of the bolts out and loosening the other two.
 
Top