- Location
- Columbus, OH
Pics to be added later, just popping this stuff in now. I'll also edit it so it doesn't look all poopish later, too.
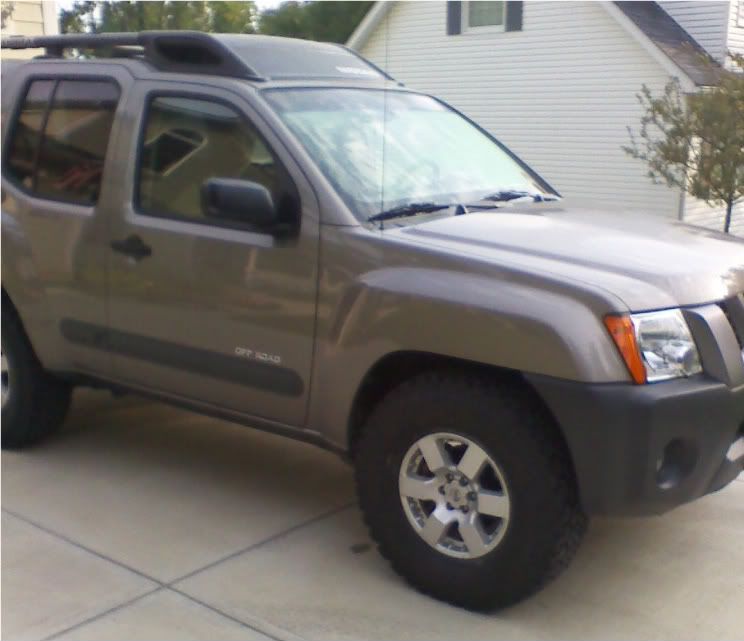
Year: 2007
Make: Nissan (duh)
Model: Xterra (double duh)
Trim: OR
Color: Desert Stone
Codename: Off Kilter
Pilot: Ron
Project Goal (without a vision, you spend and spend): A capable, but not hyper-done, expedition vehicle. Enough to get me out to most places with enough gear to be comfortable. Having it as a basecamp for hiking, mountain biking, and the like is what it'll spend most of its life doing. It has to remain a DD even though it's paid off, so no getting too crazy.
External Mods:
Completed
In the works – I’ve not decided for sure on these, but I’d like to get around to them at some point (more or less in order)
Internal Mods:
Completed – I like the stereo and probably won’t be replacing too much.
In the works
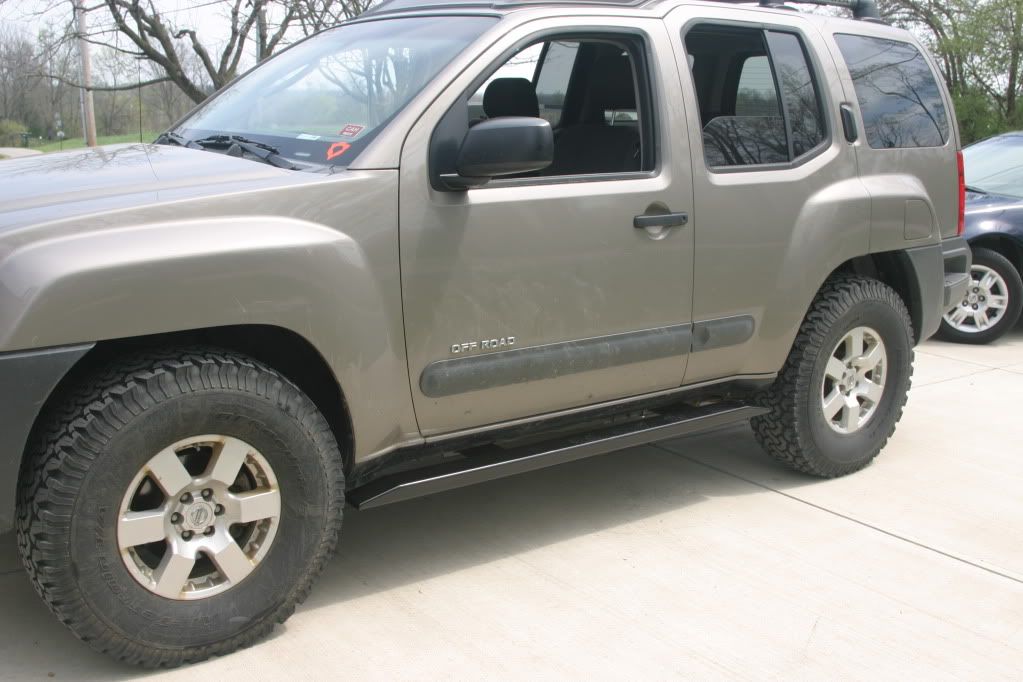
Picture of the new shoes:
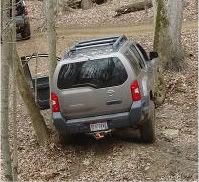
My first actual stuck (yes, it looks lame. Really, it was. I was on the stock Rugged Trails, muddy, inclined, and there was a rootball that I couldn't get over. Every time I gave it any gas the tires spun on the leaves and mud and I slid towards that tree):
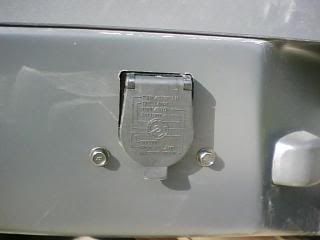
The cut out for the 7 pin connectors:
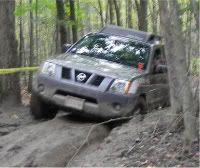
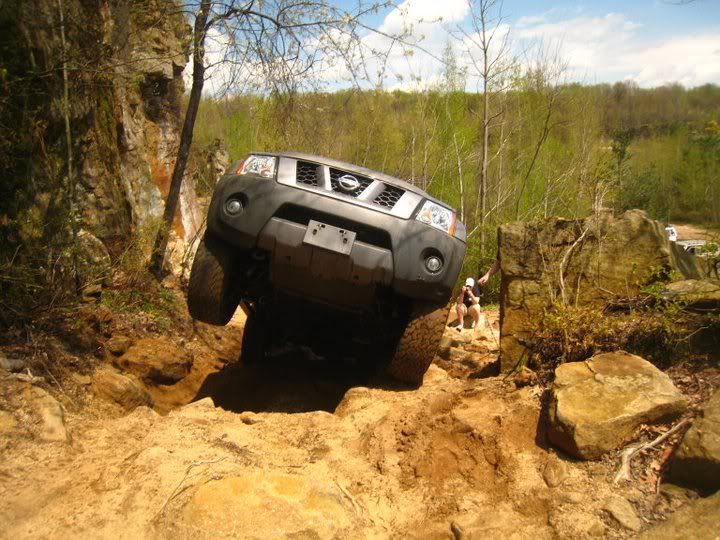
And an action shot:
Remy's sliders:
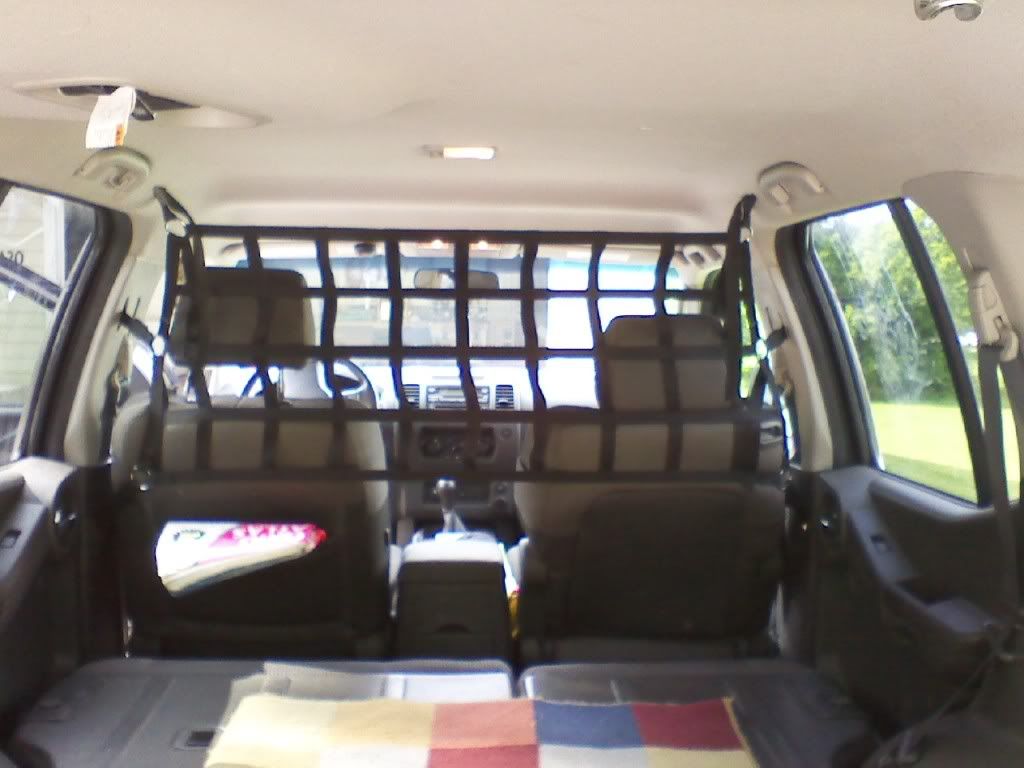
Raingler Net:
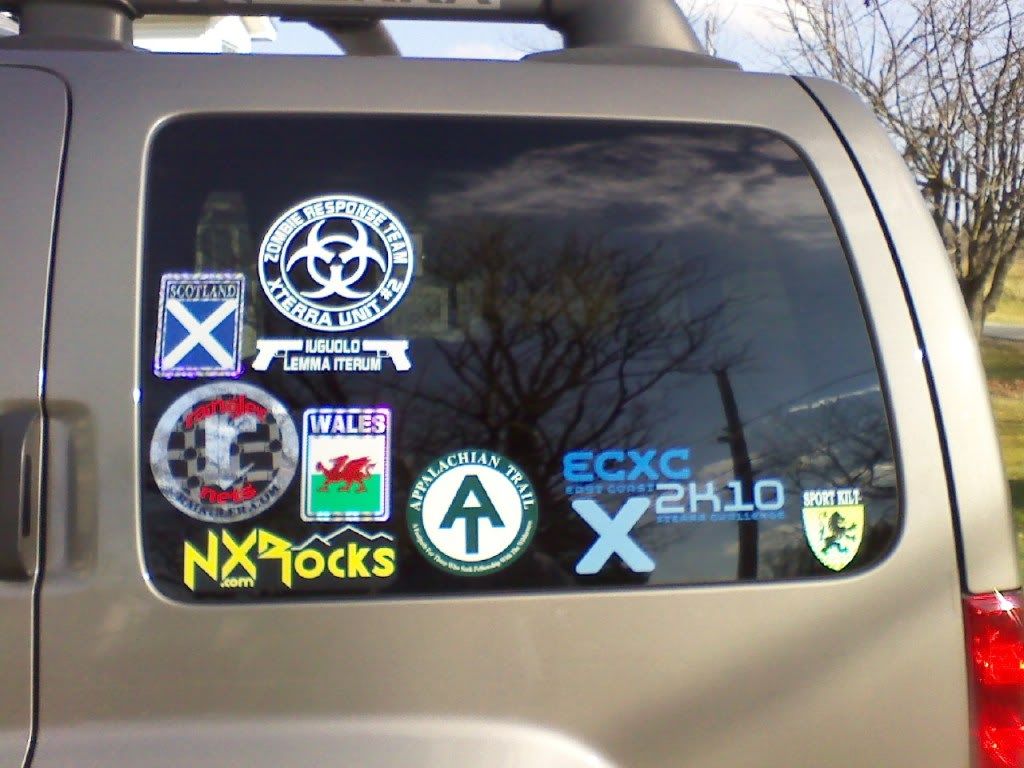
Mo betta stickers shot (I think I'm up to 8-10 extra HP from these):
After adding the 2" lift and NX Rocks skids, I was able to be a bit more confident when wheeling.
Year: 2007
Make: Nissan (duh)
Model: Xterra (double duh)
Trim: OR
Color: Desert Stone
Codename: Off Kilter
Pilot: Ron
Project Goal (without a vision, you spend and spend): A capable, but not hyper-done, expedition vehicle. Enough to get me out to most places with enough gear to be comfortable. Having it as a basecamp for hiking, mountain biking, and the like is what it'll spend most of its life doing. It has to remain a DD even though it's paid off, so no getting too crazy.
External Mods:
Completed
- Curt hitch and 7 pin harness install (cut out in the bumper)
- Mudflap be-gone mod
- Fuel tank mod - I'll have to write this up later. If you want to know, PM me.
- BFG AT KOs all around 285-75/16
- NX Rocks Solid Sliders - The sliders are on. Definitely cool and impressive.
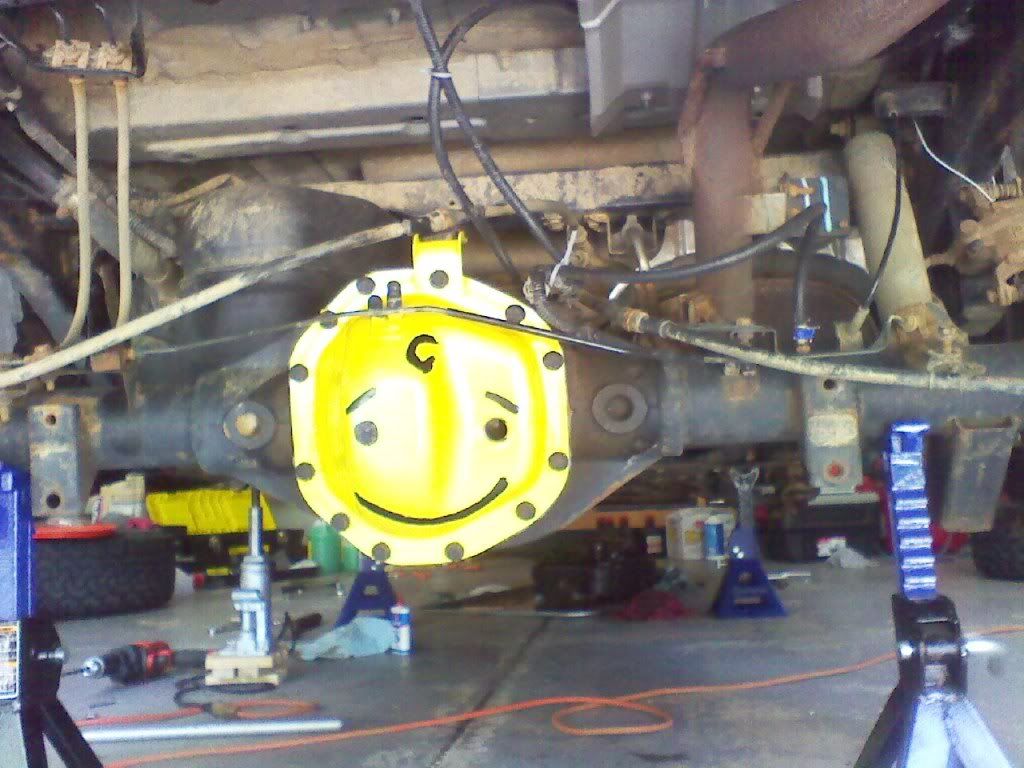
- Rear axle breather extension - did this one today, not too difficult. I'm feeling much better about some of the mud and water I'll likely get into. FYI - Nissan part # = 38323-C601A. Replaces the little capped vent perfectly and lets you mount a hose with no problems whatsoever. Plus this way you don't have any dirty Toyota parts on your X.
- NX Rocks skids (one of the last sets) are installed. Brush painted them with some implement primer and implement paint from TSC.
- 2" lift kit from AllDayFab is installed.
- 24" Firestik NGP antenna installed (temporarily) on top of the gear box. I like the mounting point but I need to permanently wire it up.
- Dephep goodness installed. Purchased a used one that had a LineX or some other bedliner coating, installed it. Pimpish.
In the works – I’ve not decided for sure on these, but I’d like to get around to them at some point (more or less in order)
- Front winch bumper – right now I've not gotten into a position where I need it, so additional suspension mods are actually sitting ahead of this in my priority list.
- Rear tire carrier bumper – same as above, but I can definitely see where having the spare not under the X is a Very Good Thing.
- Way down the road is the RTT - I can sleep in back with what I've got now, so this is on the last of the mods list.
Internal Mods:
Completed – I like the stereo and probably won’t be replacing too much.
- Dog Prevention Unit – a quick bit of work on some mdf I had laying around to prevent Betsy from putting her head on the armrest/console. Plus it gives me a spot to stuff some soft gear in where it won’t be seen from the outside. Good for roadtrips.
- Raingler Net - it's a complement to the above. I got their RN90 net but installed it behind the driver/passenger seats to help keep Betsy out of the front as well as provide an anchor point for some smaller bits of gear.
- Diehard Platinum battery - when I had the X checked out near the warranty expiration, the battery came up as lacking. I did a bit of research and it came down to the Optima and the Diehard. With a 10 year warranty (and the first 4 being full replacement at no cost) it seemed to be a bit of a no-brainer.
- Cobra 18WXST II CB just installed. Much like the antenna, it's temporarily mounted for now. I'll perma-mount it after Moab.
- McMaster Carr 175lb struts are installed. Took about 5 minutes or so to complete, very easy. I did use a 2x4 to hold up the hatch, which helped.
In the works
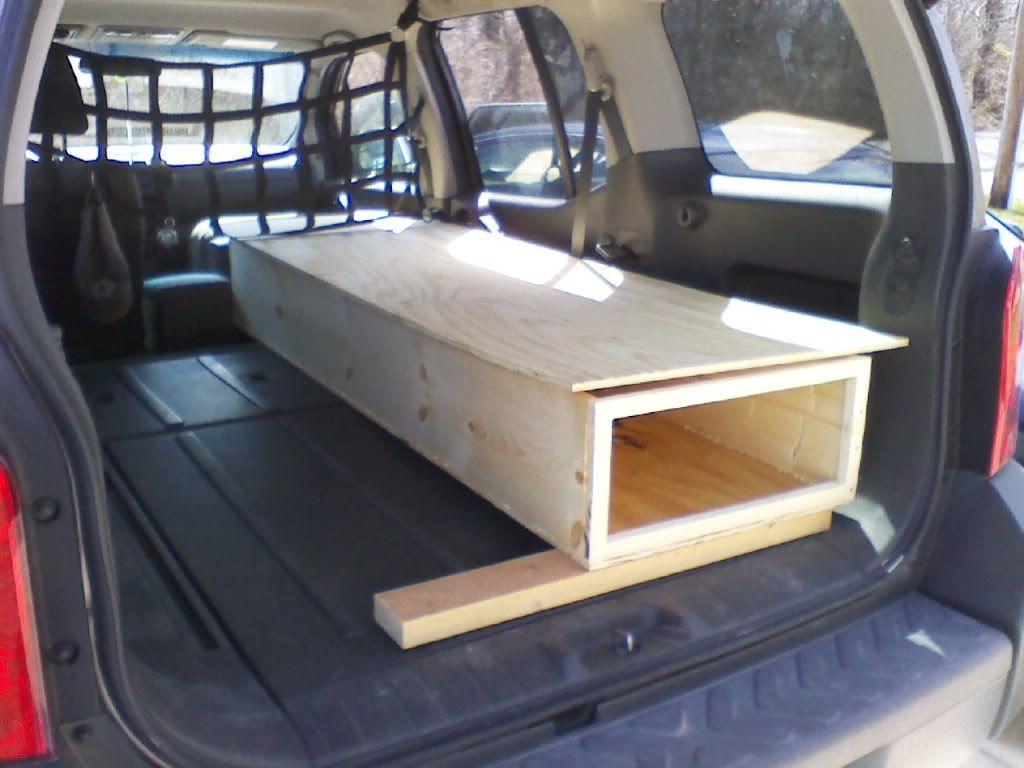
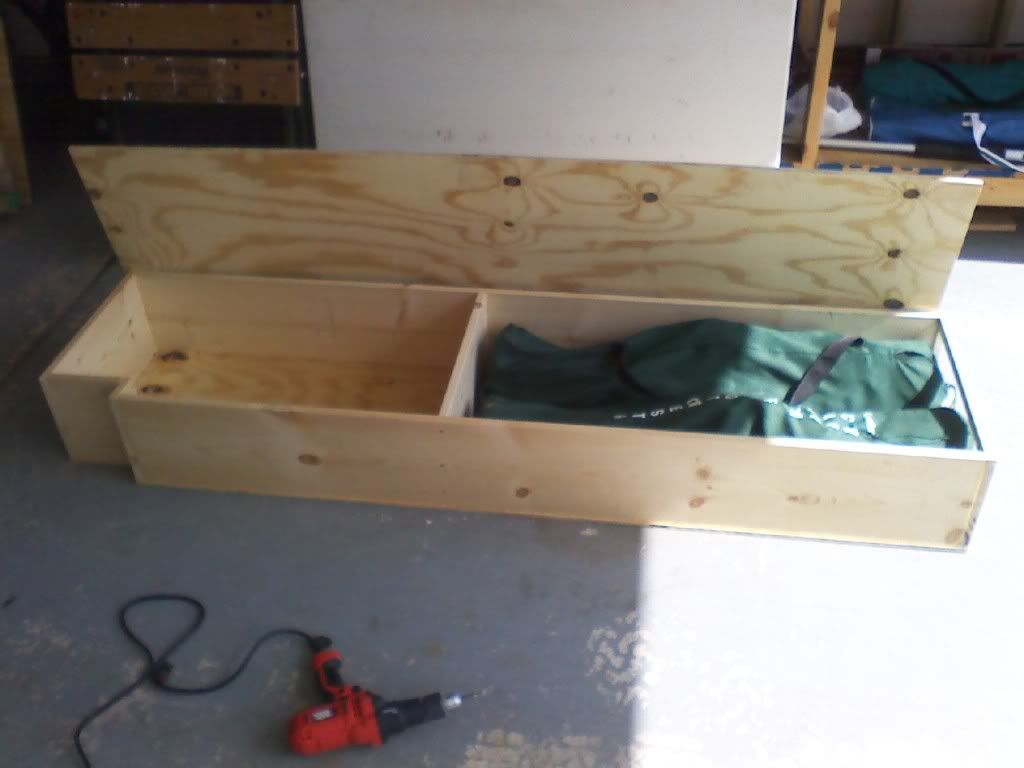
- Sleeping platform – just something to give me a solidly level surface to sleep on and a bit of a seat when getting dressed. Plan on storing some of the gear under it. Got the go-ahead from the missus to buy what I need to do this. Now I'm really planning it out. Thinking about a few modular units that I can slide in and out. By making them modular I can make it easier to remove and install them and if I need to upgrade one vs the other, it's much easier.
- Lobo - I thought about doing the Lobo. Still haven't done it and am putting it on indefinite hold (not that it's not been on hold for some time now)
Picture of the new shoes:
My first actual stuck (yes, it looks lame. Really, it was. I was on the stock Rugged Trails, muddy, inclined, and there was a rootball that I couldn't get over. Every time I gave it any gas the tires spun on the leaves and mud and I slid towards that tree):
The cut out for the 7 pin connectors:
And an action shot:
Remy's sliders:
Raingler Net:
Mo betta stickers shot (I think I'm up to 8-10 extra HP from these):
After adding the 2" lift and NX Rocks skids, I was able to be a bit more confident when wheeling.
Last edited:
") (I usually just copy and paste my info from TNX.)
(I usually just copy and paste my info from TNX.)