
- Location
- Bloomington, IN
I installed 4 new shocks, an idler arm brace and changed the front diff, rear diff, transfer case and engine oil yesterday. I tried to take some good pictures to help illustrate what it was like. For the record, I had never done any work like this on a vehicle before (minus the oil change). I did the research and took my time.
Although I did not list them, you need to refer to the manual to make sure you tighten all fasteners to the correct specifications. With that said...
Shocks:
Bilsteins, F4-B46-2126-H0 in the rear, F4-B46-1099-H0 in the front
I have a stock 2004 XE 4x4 with no SL or BL and these worked fine (as TJ and others have stated repeatedly). If you have a stock X, these will fit with no problems. I ordered them through 4x4parts.com. They will be concerned about the stock vs 3" lift but just say you know and they will ship them. Make sure to get the ones that say "for 3" lift".
The following is a list of what I did and in what order.
1. Dropped the spare tire
2. Jacked up the back, put it on stands and removed the rear tires for more room
3. Removed the rear sway bar (and put it in the dark corner of my garage where no one goes). I will probably throw it away at some later date
3a. I removed the top links first and then removed the mounts located on the axle
3b. No pressure is on these so do not worry about them swinging out or whatnot
4. With the spare tire and the rear sway bar removed, I started on the rear shocks
The torque specs for the shocks:
Front Shock Top: 12 - 16 ft-lbs
Front Shock Bottom: 87 - 108 ft-lbs
Rear Shock Top: 30 - 37 ft-lbs
Rear Shock Bottom: 30 - 37 ft-lbs
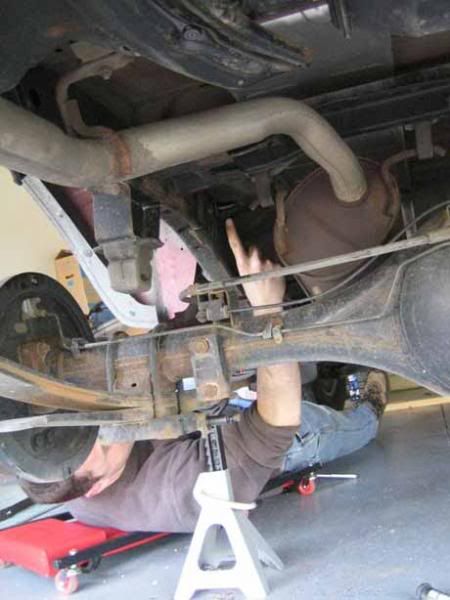
5. I removed the top bolt first and then the bottom. Then pulled the old one off
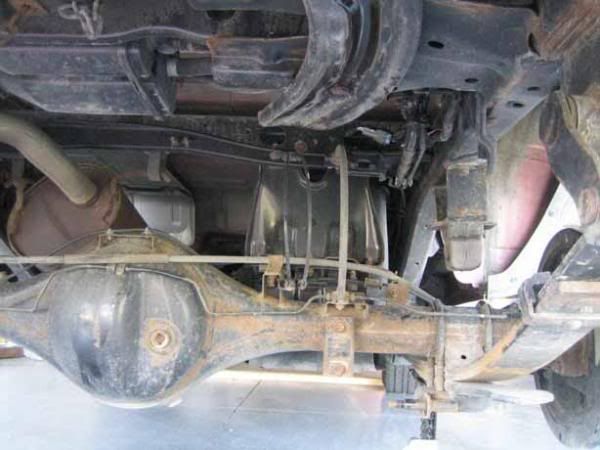
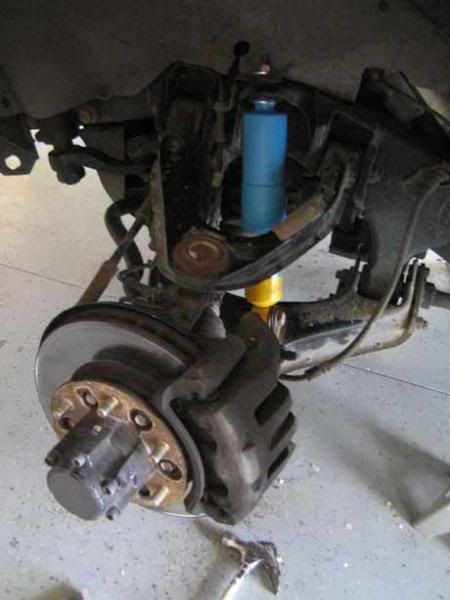
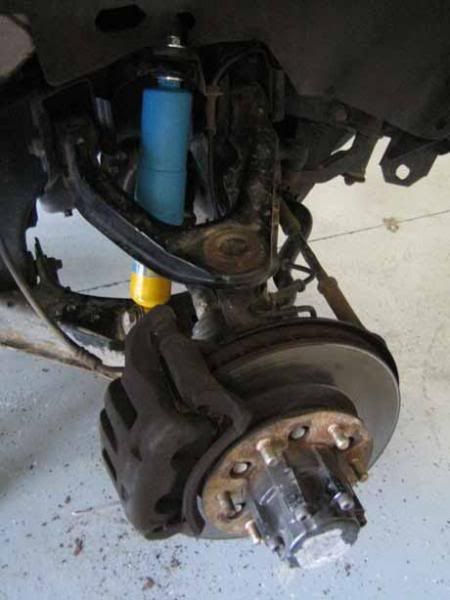
5a. A picture of the rear-left removed
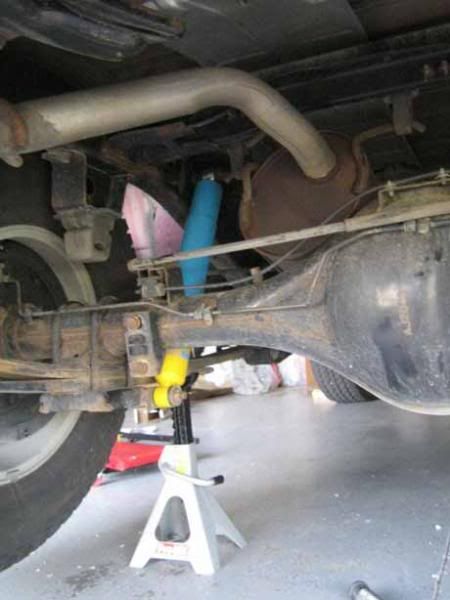
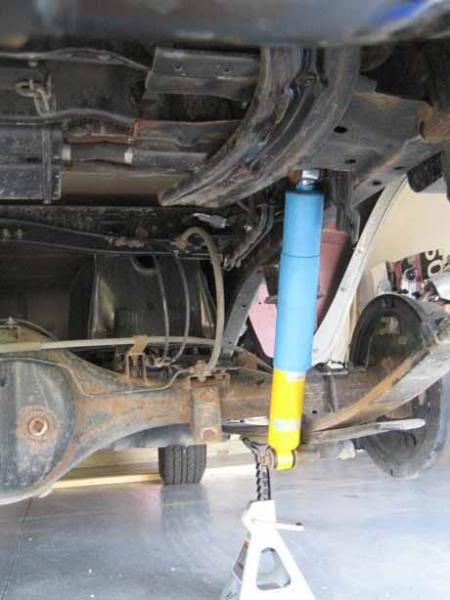
5b. A picture of the rear-left installed
5c. A picture of the rear-right removed
5d. A picture of the rear-right installed
6. Put the rear tires back on, put the spare tire back on and took the rear off the stands
7. Jacked up the front, put it on stands and removed the tires
8. I removed the top fasteners first and then the bottom. Remember to see how the bushings and washers are installed and install them the same way.
8a. A picture of the front-left shock being removed
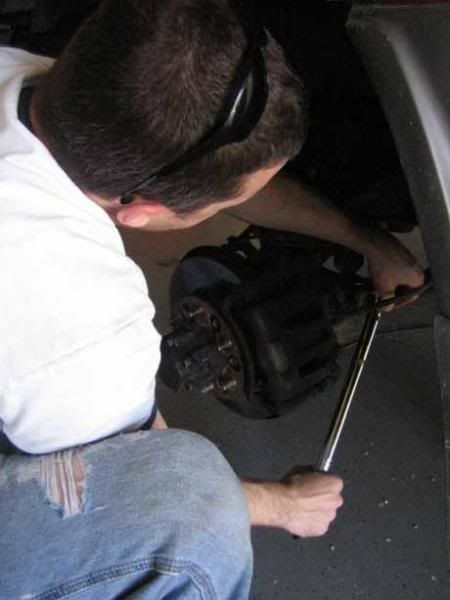
8b. A picture of the front-left shock installed
8c. A picture of the front-right shock being removed
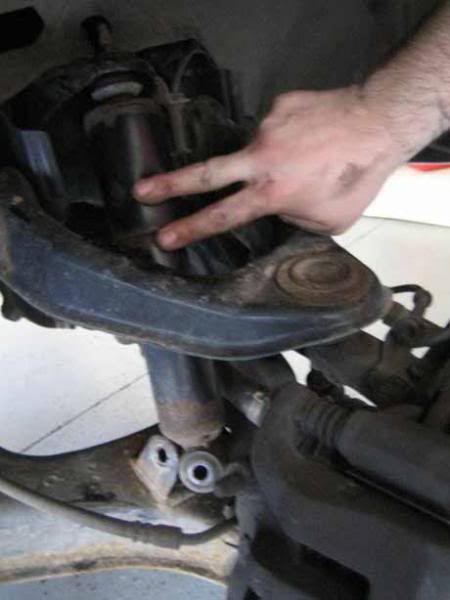
8d. A picture of the front-right shock installed
If you have issues with installing the front shocks top nut, follow the link below to a post suggested by Pro2Amendment on ClubXterra.org. He encountered an issue and posted a writeup of what he did to fix it.
Pro2Amendment Post
It is NOT necessary to install the Idler Arm Brace when installing these shocks. It IS recommended that an IAB be installed when possible as it addresses one of the weak links on the X.
Idler Arm:
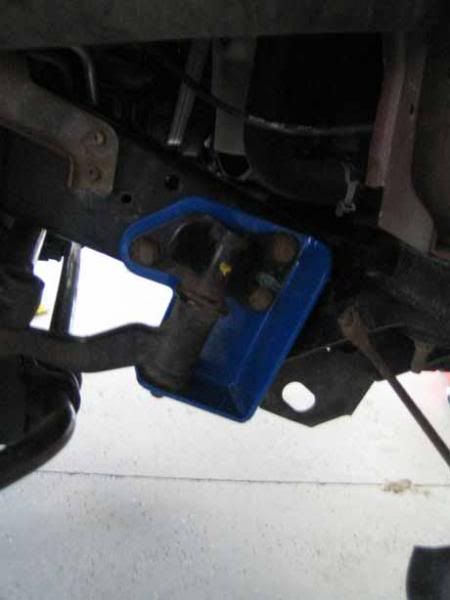
At this point the shocks were done. I moved on to install a Calmini Idler Arm Brace (Part Number CAL-NP12490) (from OffroadToyStore.com)
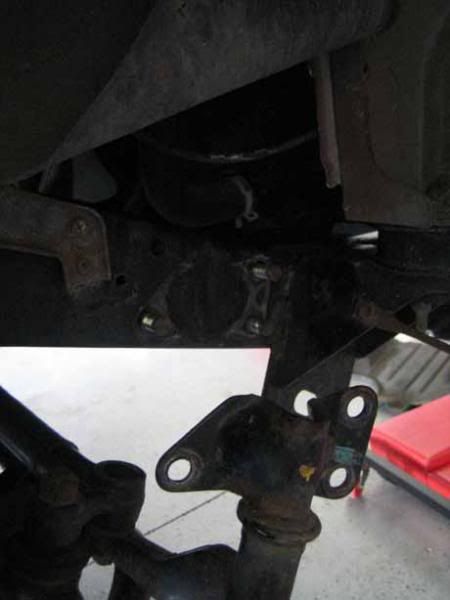
The idler arm is located in the front right wheel well (passenger side). You will need to pull back some shrouding around this area. You will see it in a later picture.
1. Remove the nuts holding the idler arm in place. I found it easier to remove the front skid plate to gain access to see behind the frame to get the backup wrench on the bolt heads. Sorry, no picture; it is pretty straight forward though.
2. Make sure you have the right part
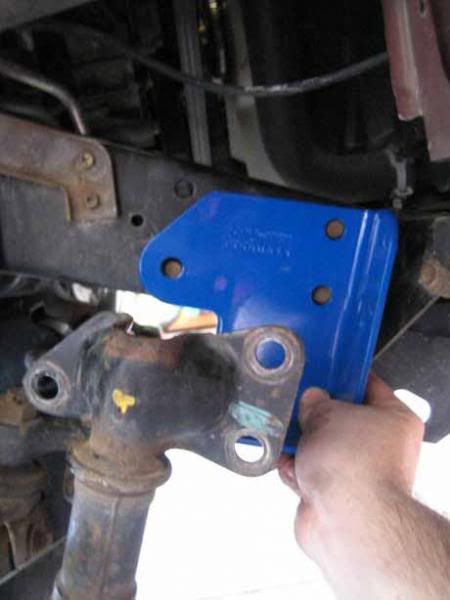
3. The install is intuitive. Remember NOT to replace the stock washer on the arm bolt as the bottom plate on the brace replaces it.
Per DoubleZeroX, here are the torque specs for the IAB:
Idler arm-to-frame bolts/nuts : 58-72 Ft-lbs or 78-98 Nm
Idler arm ballstud nut*:
-XTERRA:
-2000:
-4-cyl engine:
-2WD 40-72 Ft-lbs or 54-98 Nm
-4WD 43-54 Ft-lbs or 59-75 Nm
-V6 Engine 40-72 Ft-lbs or 54-98 Nm
-2001 and later: 40-72 Ft-lbs or 54-98 Nm
Thanks again, DoubleZeroX (CX)! Great find.
That is all I have y'all. I was getting tired and I was way to oily to use the camera when I was draining and filling fluids.
A word to the wise, DON'T BUY CHEAP TOOLS. Get the good stuff, it is cheaper in the long run.
Proof:
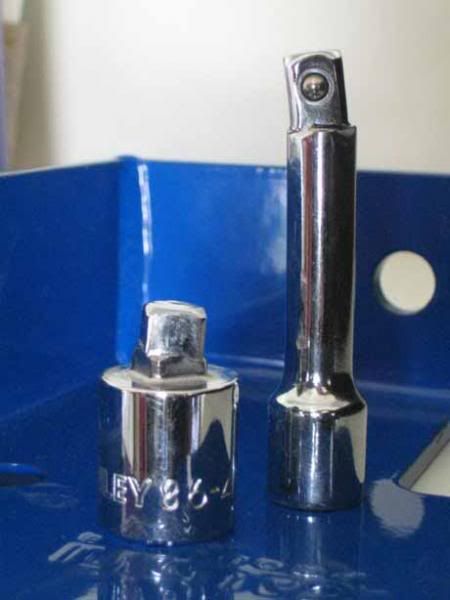
1/2" to 3/8" adapters have no chance on a torque wrench. Buy the right tools for the job. I did after those breaks happened.
Although I did not list them, you need to refer to the manual to make sure you tighten all fasteners to the correct specifications. With that said...
Shocks:
Bilsteins, F4-B46-2126-H0 in the rear, F4-B46-1099-H0 in the front
I have a stock 2004 XE 4x4 with no SL or BL and these worked fine (as TJ and others have stated repeatedly). If you have a stock X, these will fit with no problems. I ordered them through 4x4parts.com. They will be concerned about the stock vs 3" lift but just say you know and they will ship them. Make sure to get the ones that say "for 3" lift".
The following is a list of what I did and in what order.
1. Dropped the spare tire
2. Jacked up the back, put it on stands and removed the rear tires for more room
3. Removed the rear sway bar (and put it in the dark corner of my garage where no one goes). I will probably throw it away at some later date
3a. I removed the top links first and then removed the mounts located on the axle
3b. No pressure is on these so do not worry about them swinging out or whatnot
4. With the spare tire and the rear sway bar removed, I started on the rear shocks
The torque specs for the shocks:
Front Shock Top: 12 - 16 ft-lbs
Front Shock Bottom: 87 - 108 ft-lbs
Rear Shock Top: 30 - 37 ft-lbs
Rear Shock Bottom: 30 - 37 ft-lbs
5. I removed the top bolt first and then the bottom. Then pulled the old one off
5a. A picture of the rear-left removed
5b. A picture of the rear-left installed
5c. A picture of the rear-right removed
5d. A picture of the rear-right installed
6. Put the rear tires back on, put the spare tire back on and took the rear off the stands
7. Jacked up the front, put it on stands and removed the tires
8. I removed the top fasteners first and then the bottom. Remember to see how the bushings and washers are installed and install them the same way.
8a. A picture of the front-left shock being removed
8b. A picture of the front-left shock installed
8c. A picture of the front-right shock being removed
8d. A picture of the front-right shock installed
If you have issues with installing the front shocks top nut, follow the link below to a post suggested by Pro2Amendment on ClubXterra.org. He encountered an issue and posted a writeup of what he did to fix it.
Pro2Amendment Post
It is NOT necessary to install the Idler Arm Brace when installing these shocks. It IS recommended that an IAB be installed when possible as it addresses one of the weak links on the X.
Idler Arm:
At this point the shocks were done. I moved on to install a Calmini Idler Arm Brace (Part Number CAL-NP12490) (from OffroadToyStore.com)
The idler arm is located in the front right wheel well (passenger side). You will need to pull back some shrouding around this area. You will see it in a later picture.
1. Remove the nuts holding the idler arm in place. I found it easier to remove the front skid plate to gain access to see behind the frame to get the backup wrench on the bolt heads. Sorry, no picture; it is pretty straight forward though.
2. Make sure you have the right part
3. The install is intuitive. Remember NOT to replace the stock washer on the arm bolt as the bottom plate on the brace replaces it.
Per DoubleZeroX, here are the torque specs for the IAB:
Idler arm-to-frame bolts/nuts : 58-72 Ft-lbs or 78-98 Nm
Idler arm ballstud nut*:
-XTERRA:
-2000:
-4-cyl engine:
-2WD 40-72 Ft-lbs or 54-98 Nm
-4WD 43-54 Ft-lbs or 59-75 Nm
-V6 Engine 40-72 Ft-lbs or 54-98 Nm
-2001 and later: 40-72 Ft-lbs or 54-98 Nm
Thanks again, DoubleZeroX (CX)! Great find.
That is all I have y'all. I was getting tired and I was way to oily to use the camera when I was draining and filling fluids.
A word to the wise, DON'T BUY CHEAP TOOLS. Get the good stuff, it is cheaper in the long run.
Proof:
1/2" to 3/8" adapters have no chance on a torque wrench. Buy the right tools for the job. I did after those breaks happened.