
Racer Xterra
Bought an X
- Location
- Southern UT
Some of this is a re-post from my Ronin entry.... But this is the "New & Improved" version which will contain recent upgrades and activity:
April 2011
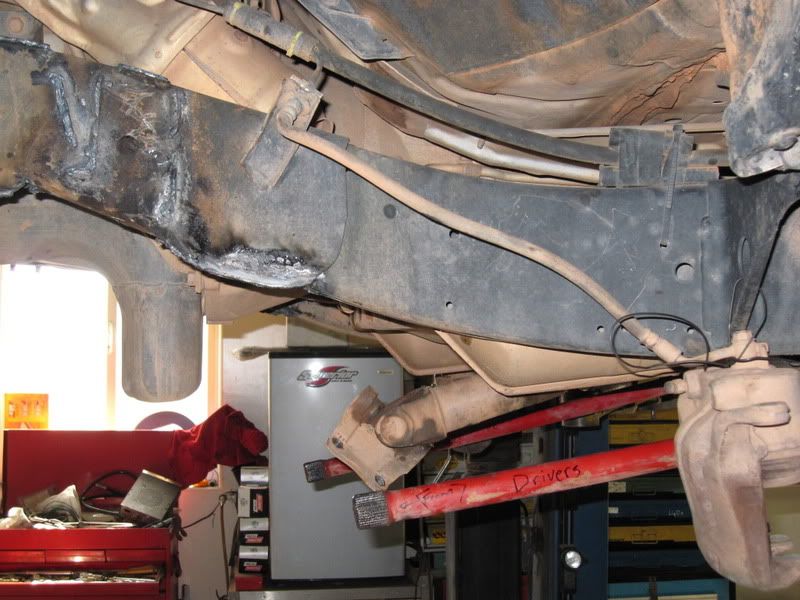
The surgery has begun
Future doner R200 W/ ARB ready for new home
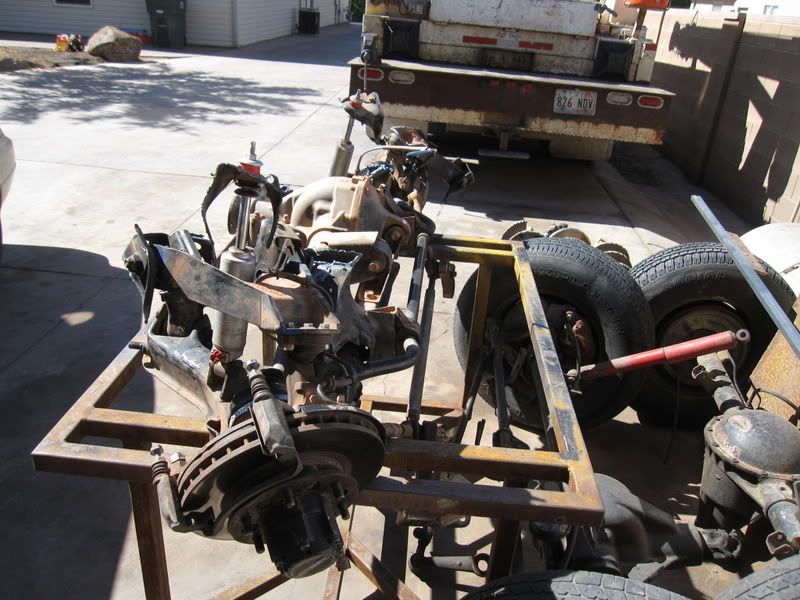
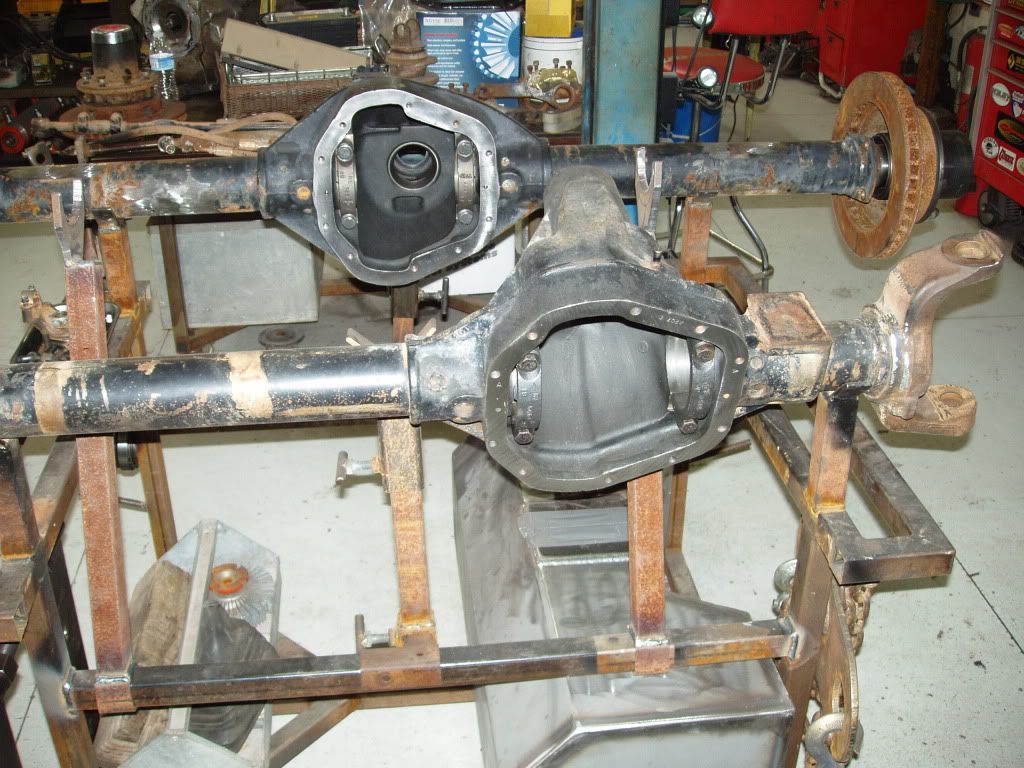
The Twins - D60 front & 70 for the rear. They are waiting patiently here for the tubes to be chopped down to comply w/ UT vehicle regs...
Update - The truck is ready to roll..... I'm currently going through a shakeup period to make sure all the important parts stay in place.
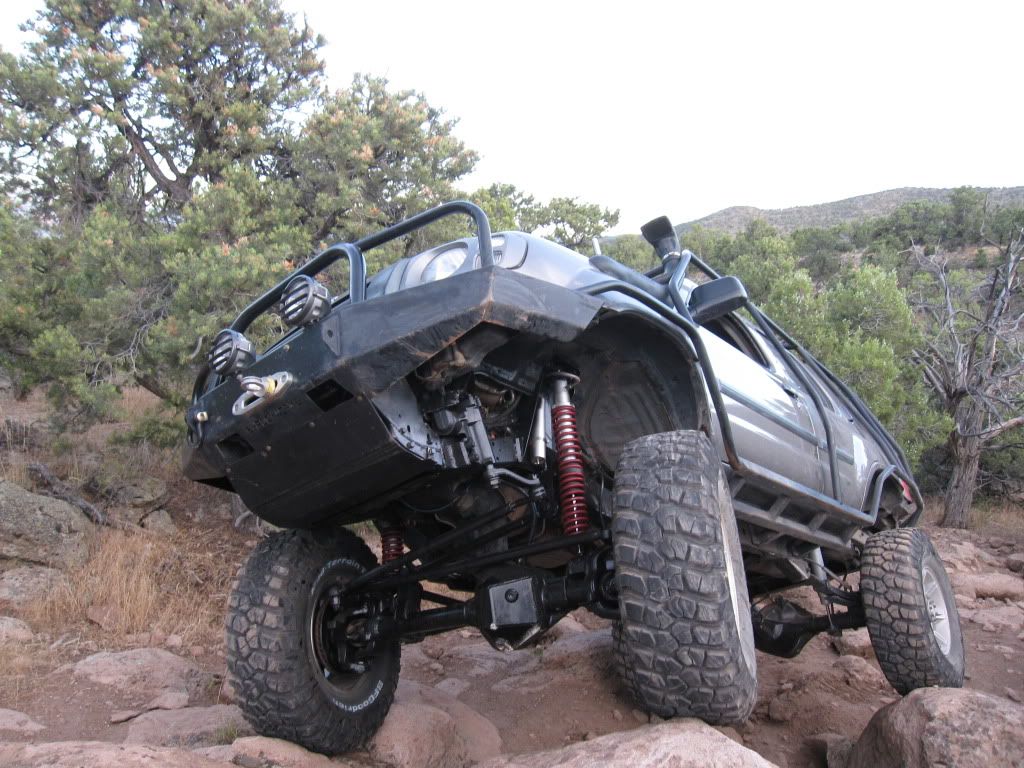
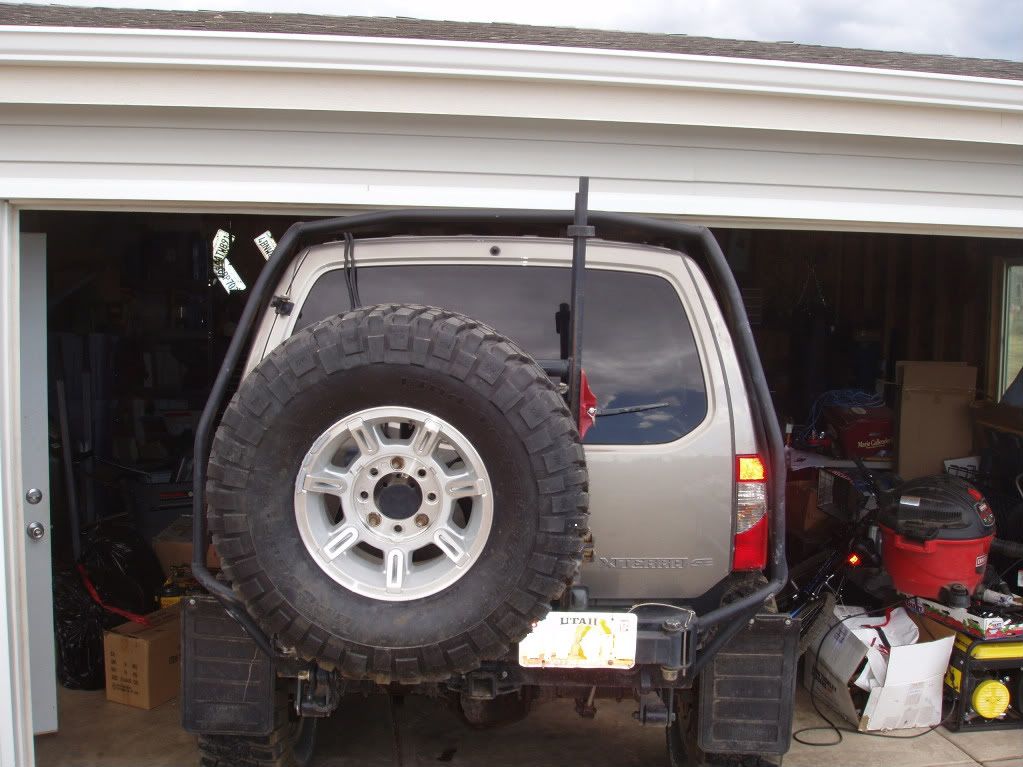
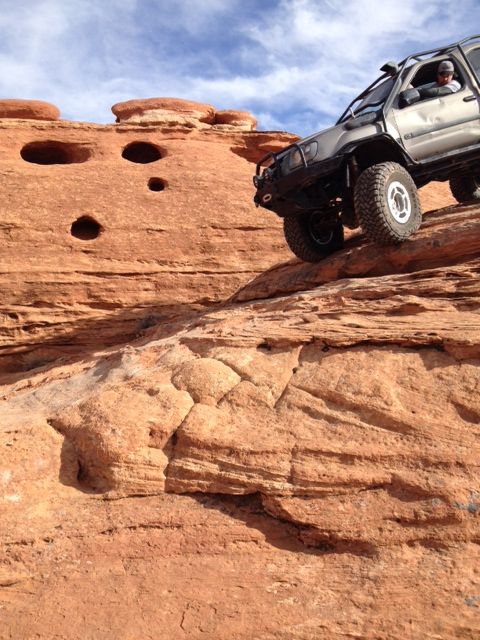
Here's a couple pics from the hills near my house....
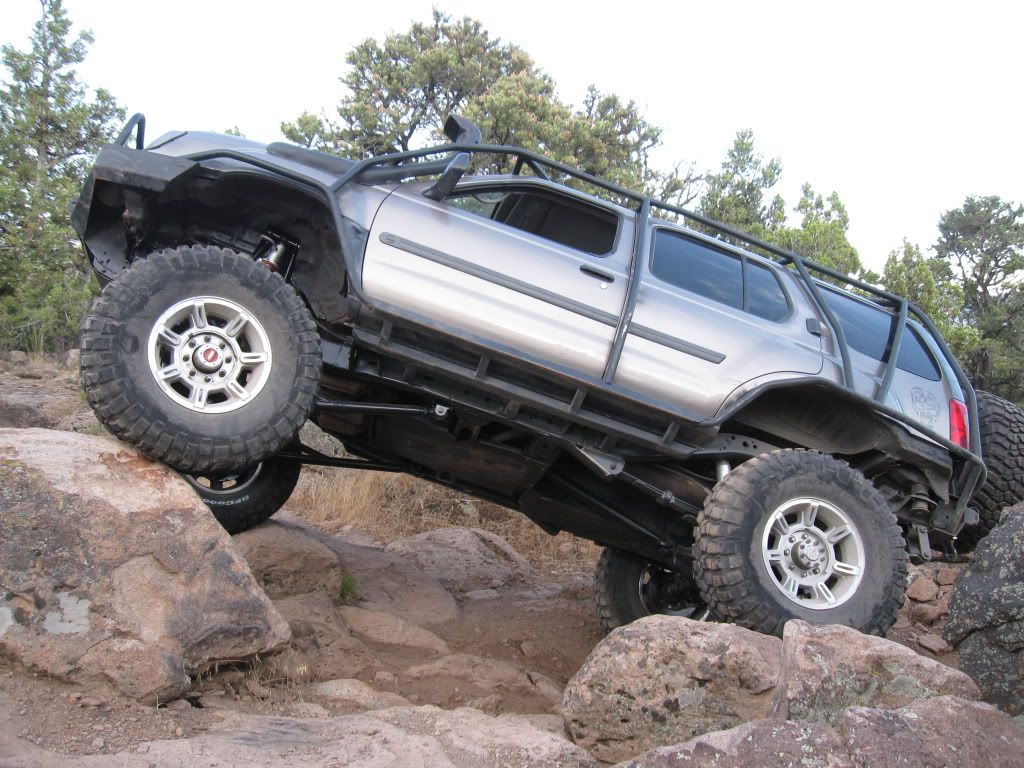
And another from the front...
Here are some of the details thus far:
The front axle is a Ford D60 late ball joint model with customized high steer arms and brake setup by Frost Inc. Shafts are 35 spline w/ custom cut Dutchman long inner. Other shafts in front are stock Ford F350. The gearing is 5.13's with an ARB at the heart of the pumpkin. Protecting this investment is a massive steel diff cover fabed up by Ruff Stuff Specialties.
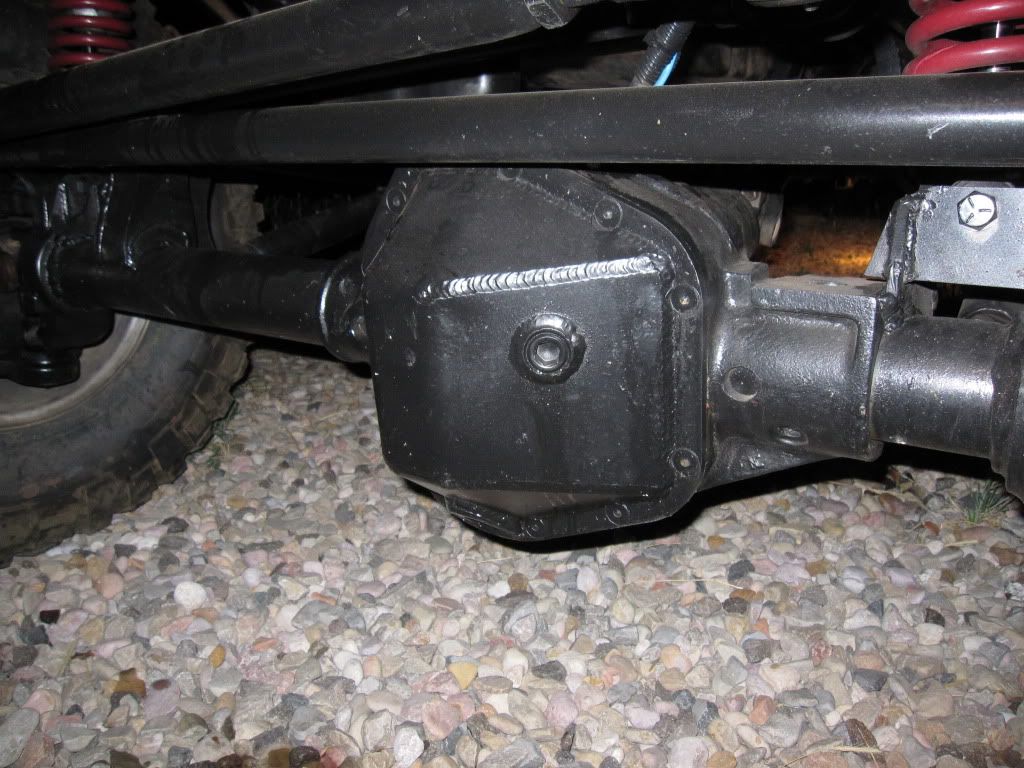
Rear axle is a Dana 70 also equipped w/ ARB & 5.13's. Rear shafts are 35 spline custom axles from Dutchman and are also protected by a Ruff Stuff bomb proof diff cover.
Both axles have been narrowed 6 ¼ inches to comply w/ local vehicle codes and remain street-able.
4 wheel disk brake setup w/ Caddy mid 70's calipers and parking brake. Chevy master cylinder setup is based upon Houdini's setup.
Shocks are Rancho 9000XL in back w/ Rancho Pro coil overs in front. The coil over selection is based upon Alpine Spirit's setup. Shock adjustments are controlled from in cab via wireless controller.
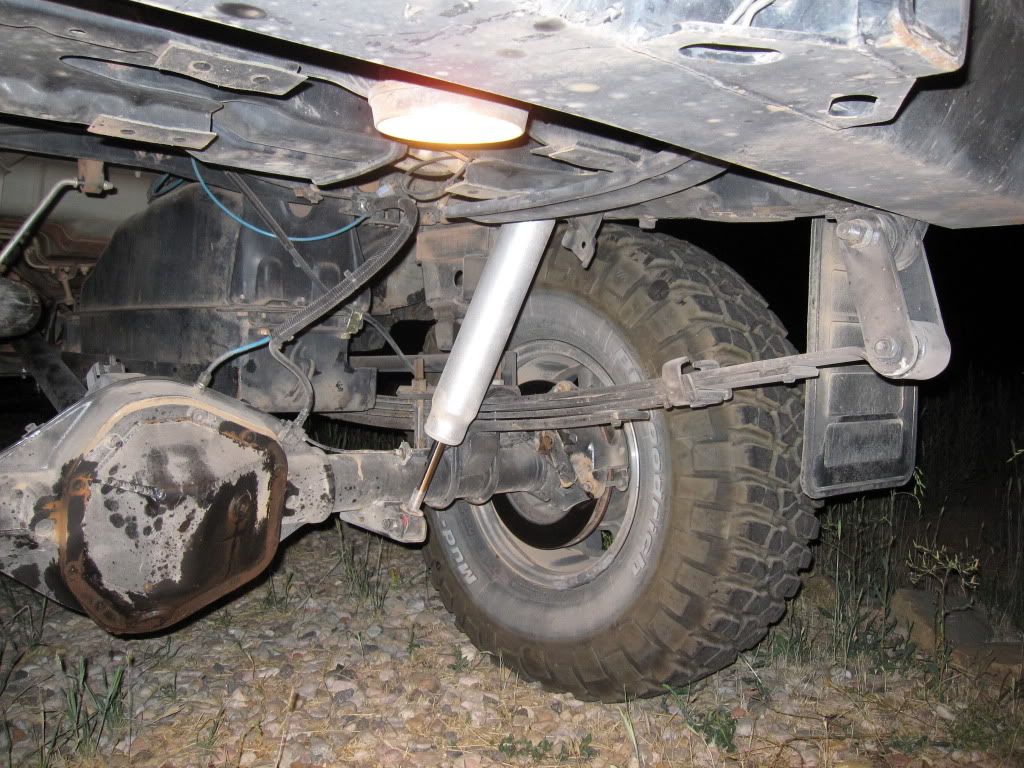
Rear is leaf sprung w/ 63 in Chevy springs & All Pro Johnny Joint setup. Spring selection was decided upon based on post by Ryan.
Tie rod and drag link ends are 1980 1 Ton Chevy.
Steering box has been moved forward 4 inches to make room for 37 inch tires.
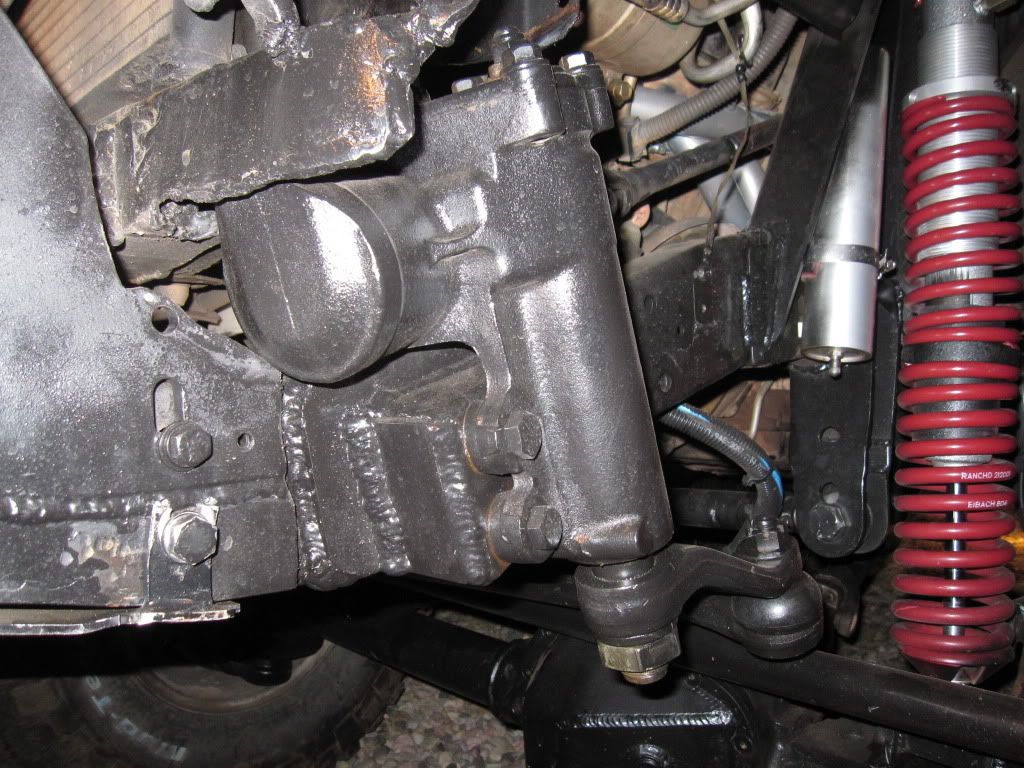
Custom High Steer for ball joint axle -
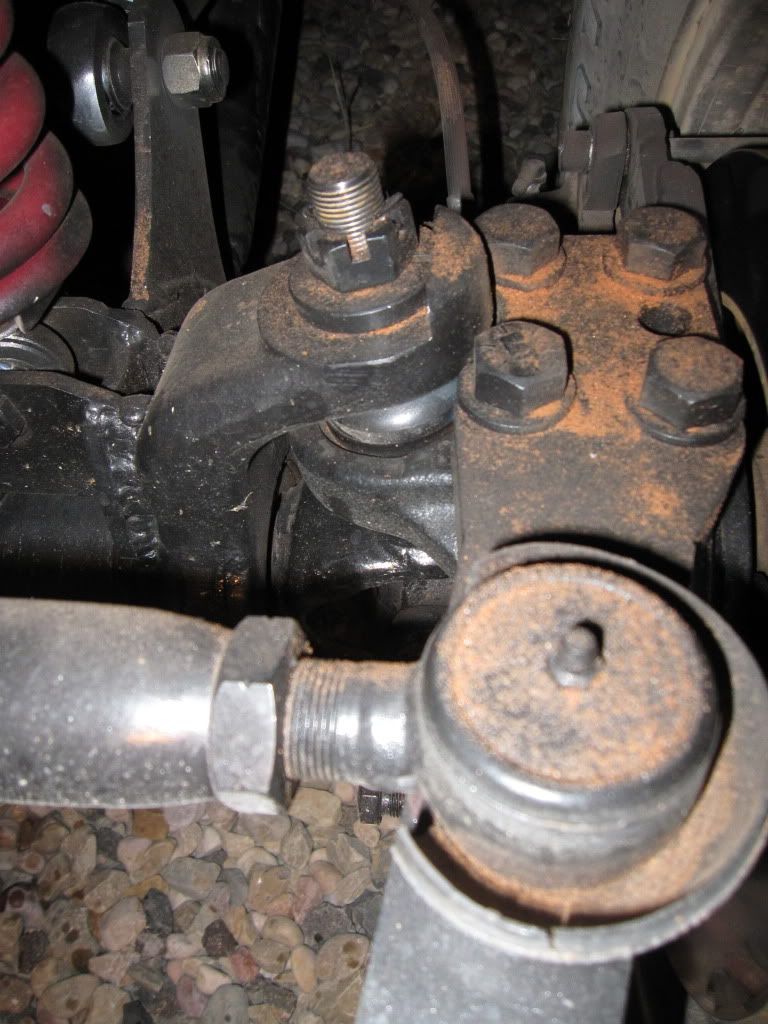
Installation and all custom fabrication including high steer arms machined into ball joint axle & brake system done by Frost Inc of Washington, UT (RIP JESSE 1952 - 2012)
Pics from the initial shakedown run...
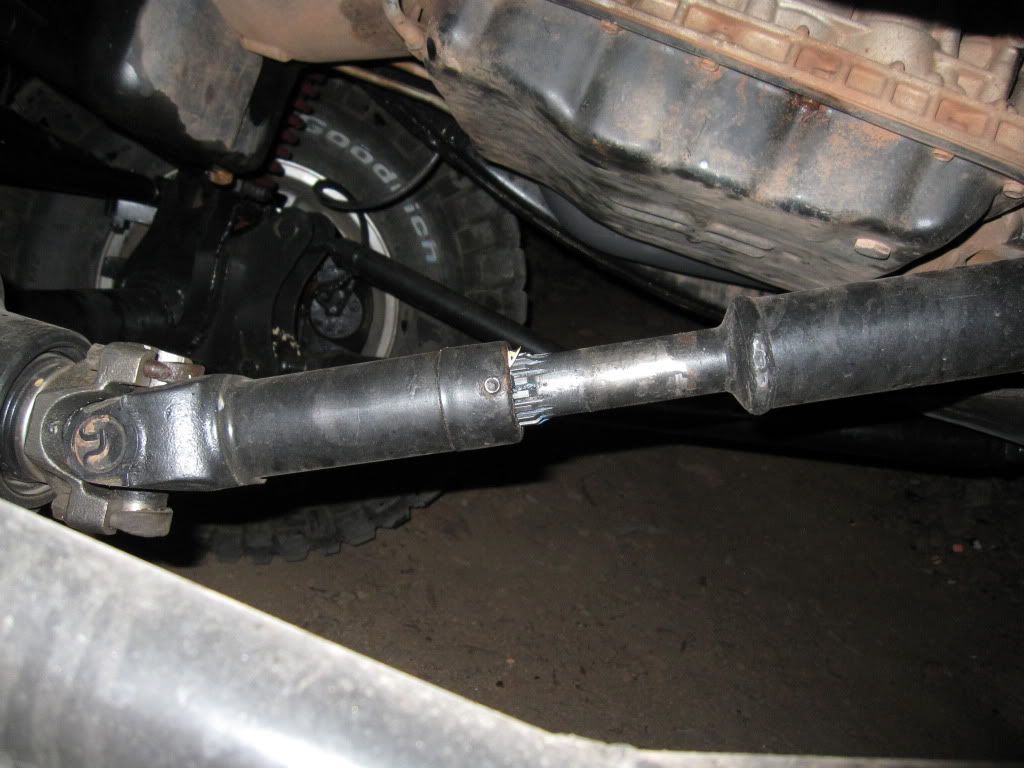
Stock front drive shaft with Tom Woods SuperFlex Ujoint
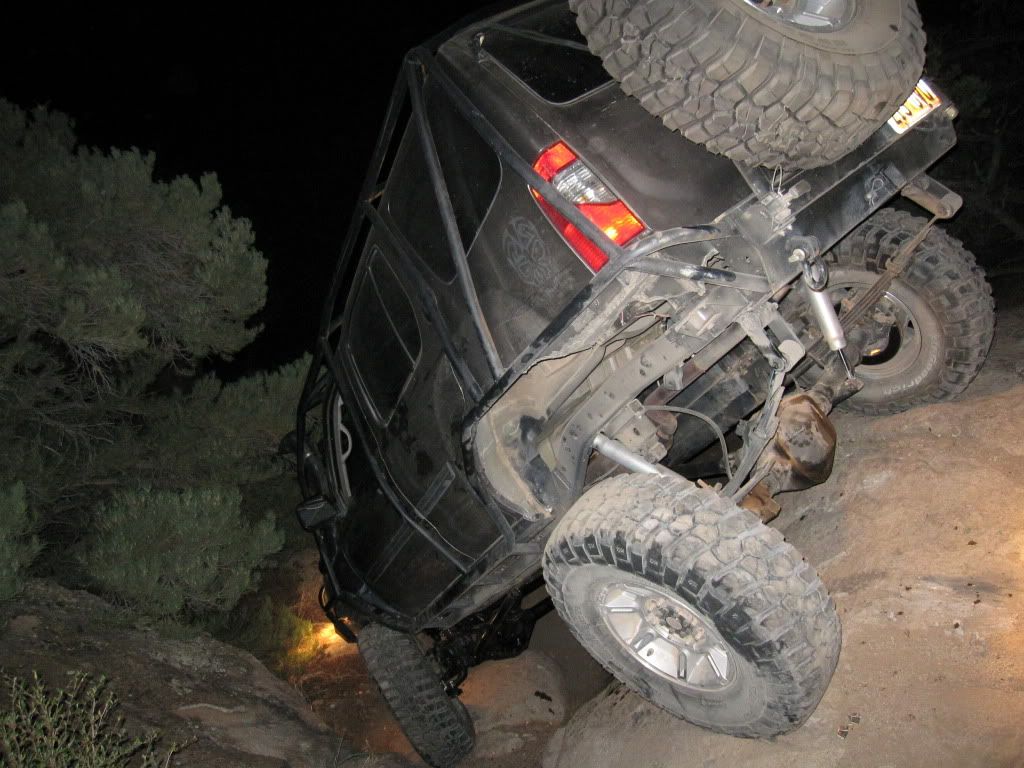
Bottoms up!
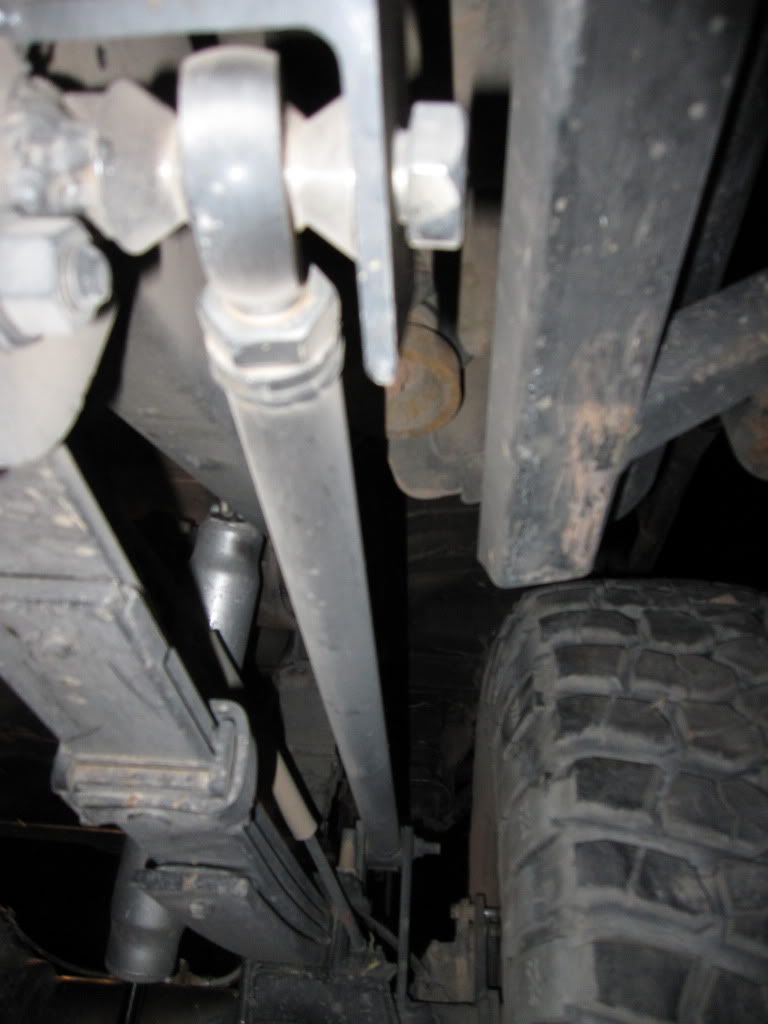
Modified front crossmember
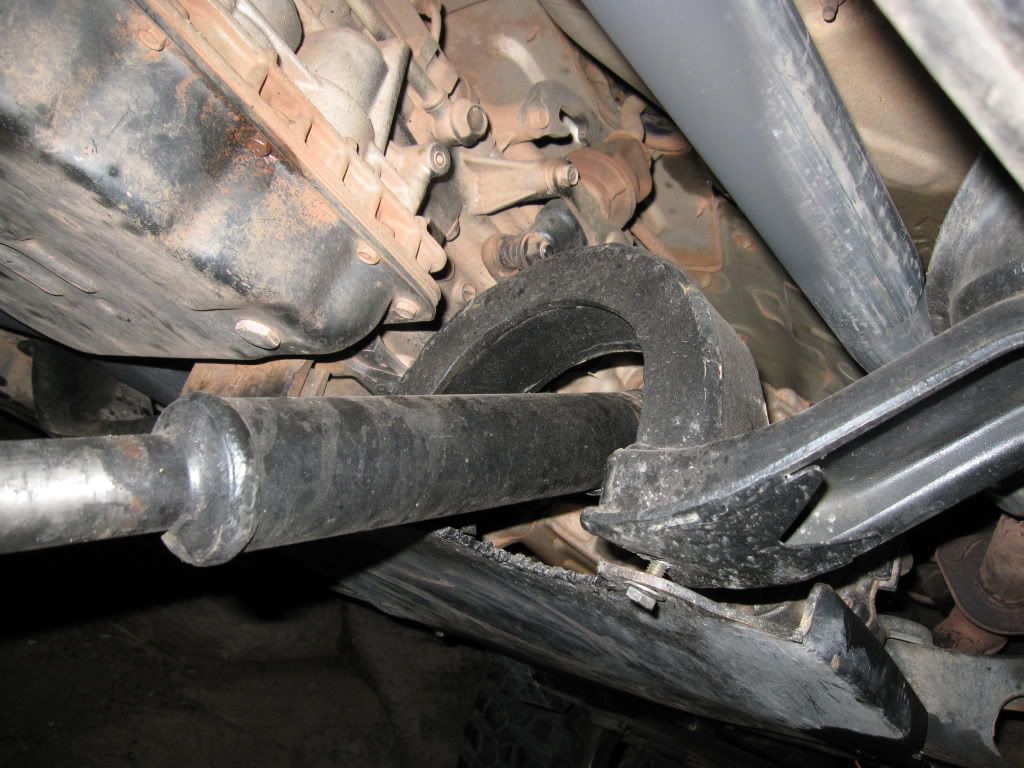
Antiwrap bar
So Close - One issue folks will run into when SAS'ng
Sometimes you need a good reason to upgrade parts..... This happened about a year into my SAS
I managed to break my drivers side outer stub shaft the other weekend while wheeling on the Maze trail outside of St George UT. Unfortunately it also destroyed the hub as well. There goes my money saved by not buying half shafts fund.
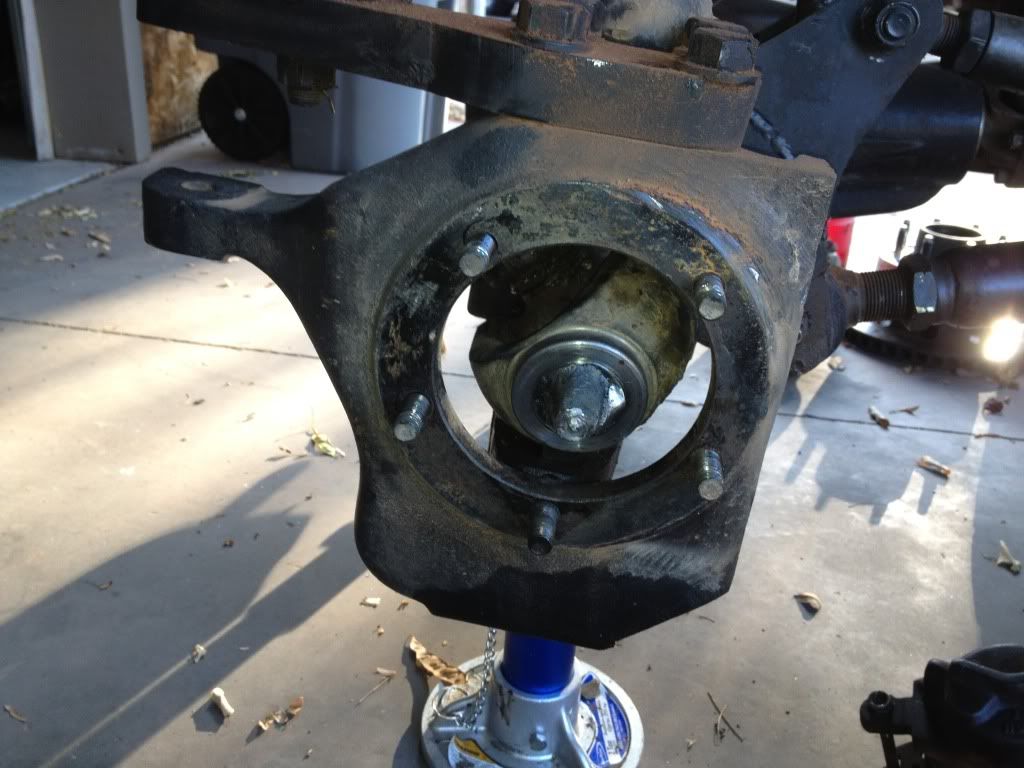
Upgraded my outer stub shafts to Yukon 35 spline and also picked up a set of Yukon's low profile heavy duty lockout hubs. They are very stout looking and a lot more tucked away then the Spicer units they are replacing. They do not stick out much further then the drive flanges I've seen on the rock buggies out here.

I checked in my previous posts on other forums, but couldn't find anything regarding my hydro assist. Soon after my SAS was complete I realized it was going to be a task to run the steering with the new 37's in place. After checking out some of the other rigs here in Southern UT, I decided to have a PSC hydro assist installed.
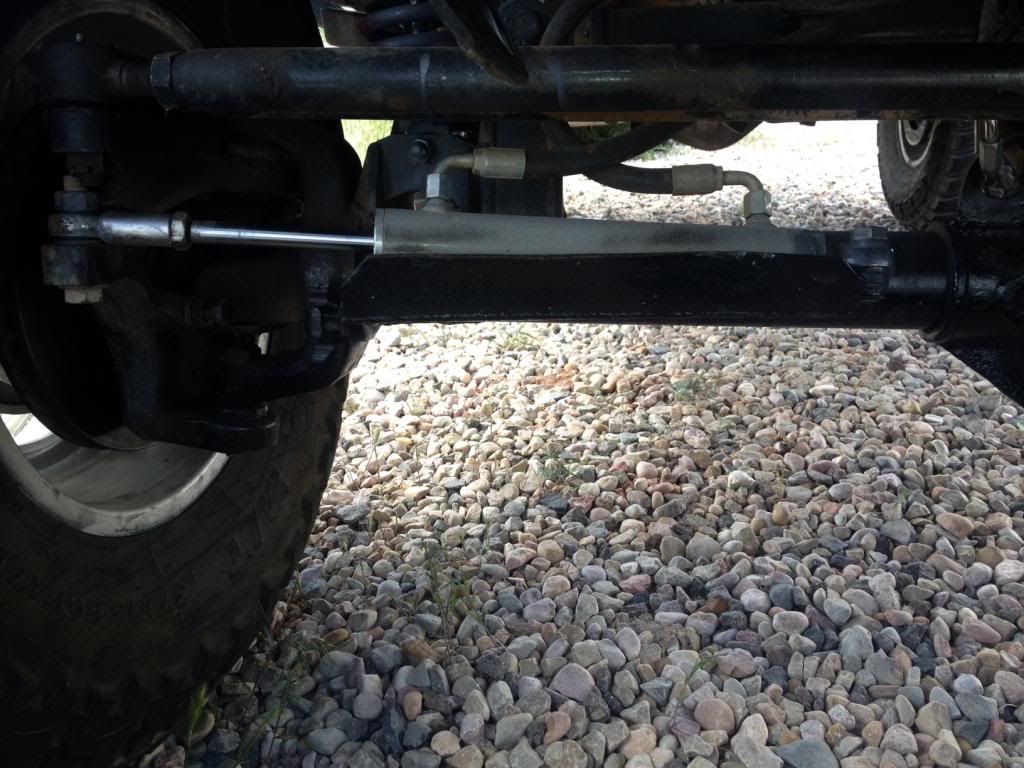
The shop that installed the steering assist also created a rock shield directly off the axle tube. So far the sheild has held up to the abuse I've thrown at it, as many of the hits would have easily damaged the cylinder.

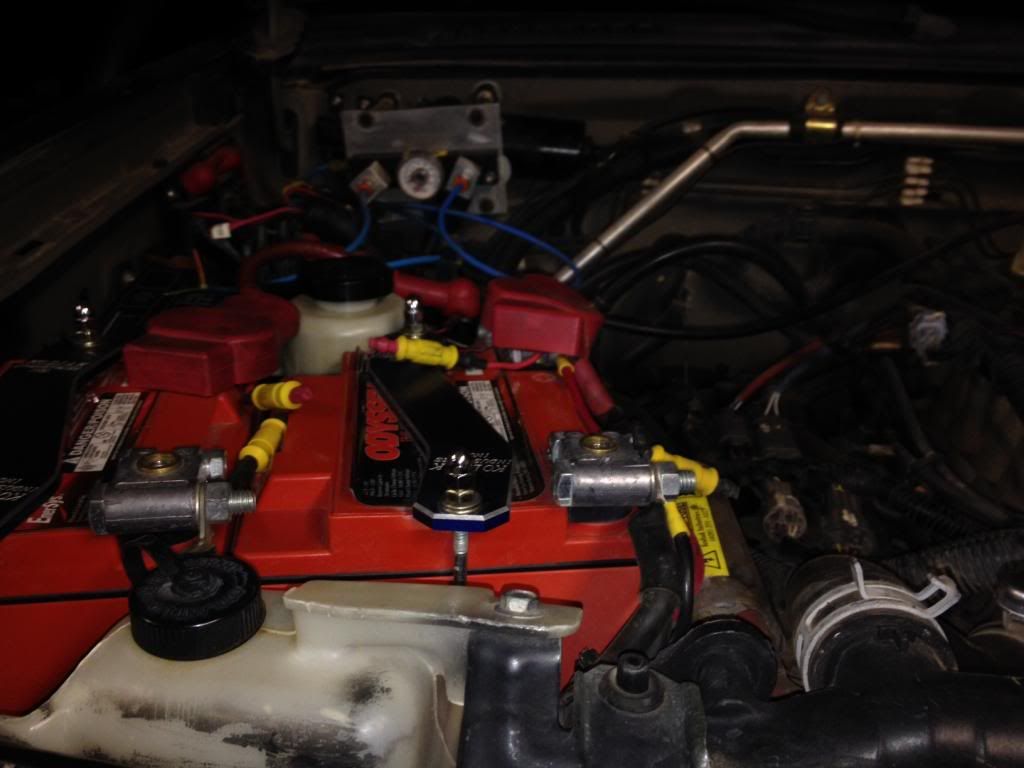
This is one of my pre SAS mods... Dual Odyssey battery setup installed by Kodiak Industries:
View from the cockpit
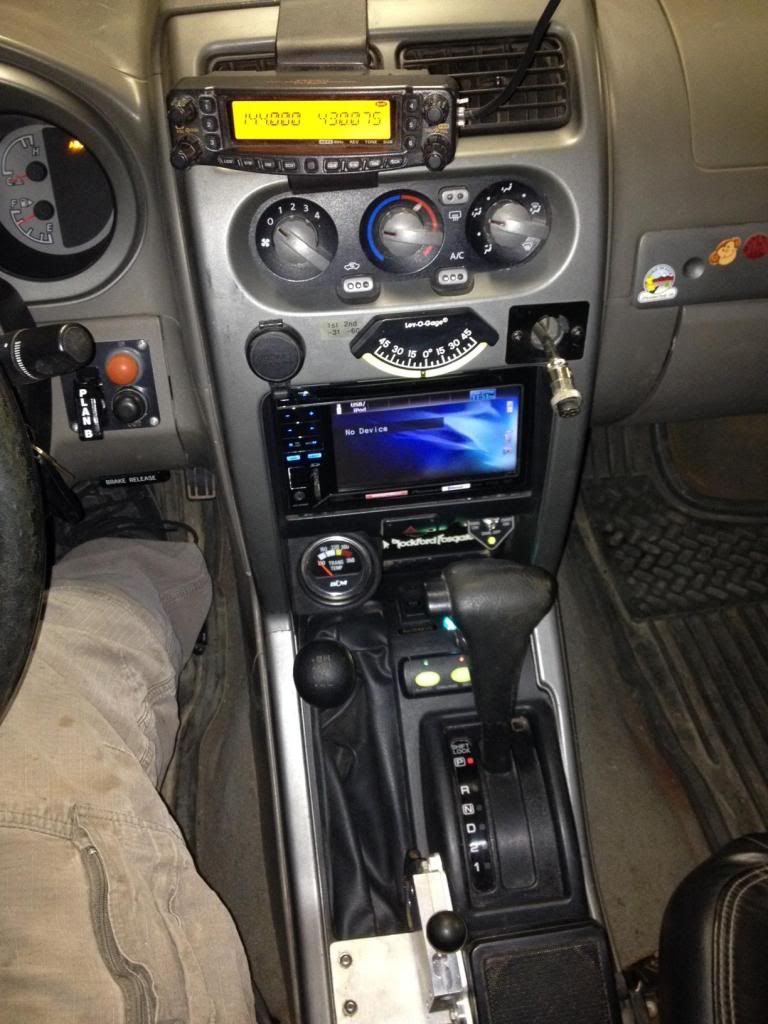
The following mods are visible in this pic.
Rail shifter - Bottom center
Yaesu FT8800 - Top center
Warn offroad light controller - Above auto shift lever
B & M Tranny fluid tem guage - Above T-Case shifter
Kodiak Dual Battery control - Directly to the right of B & M guage
Suckdown winch control (Plan B) - Directly below fuel guage
Levo Guage - Below climate controls
Pioneer Radio / Touchsreen - Below levo guage
Winch disconnect button - Not visable in pic, but to the right of B & M guage
Cobra CB connection - To the right of Levoguage
Speaker for ham radio output - To the right of rail shifter
ABS light constant on Mod.... - Above fuel guage
37x13.5x17 Toyo Mud Country & 17" Spyderlocks for the trails.....
Allthough the BFG KM 2's worked great on the IFS setup, they did not hold up very well with the extra weight of 1 tons axles... I kept getting slashes on the sidewalls. The Toyo tires are a much heavier tire, so I'm hoping they'll hold up to the abuse.
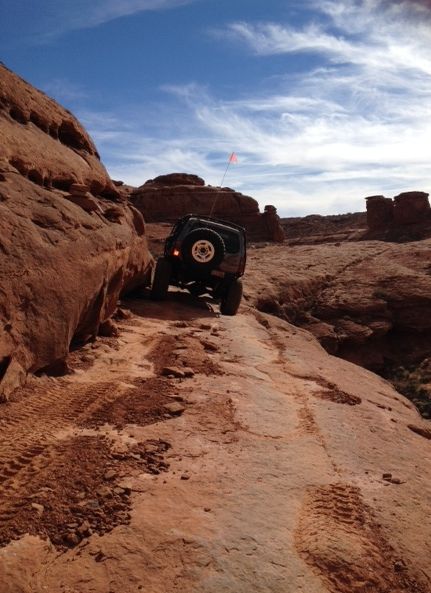
These pics are from the Plan B trail in Sand Hollow / St. George, UT
Here's some pics/info from my suck-down winch setup
The winch is an inexpensive Milemarker ATV winch mounted on the inside of a Shrockworks bumper skid. I swapped out the steel cable w/ some synthetic line I had left over after I replaced the line for my main winch.
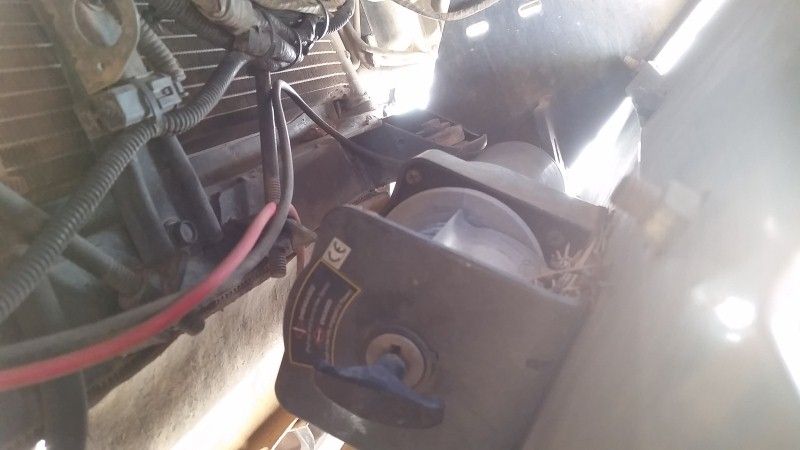
The tension plate that covers the line also acts as a debris shield.
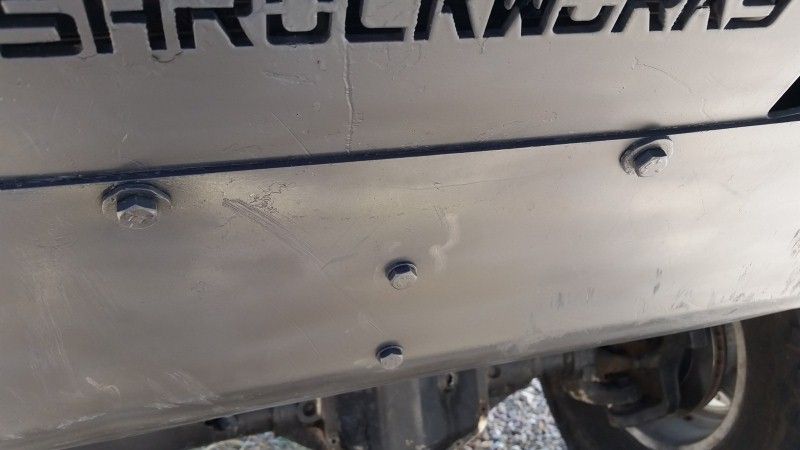
Here's a view of the the mounting bolts from the front of the skid - The 2 center bolts secure the winch in place.
And the view from underneath....
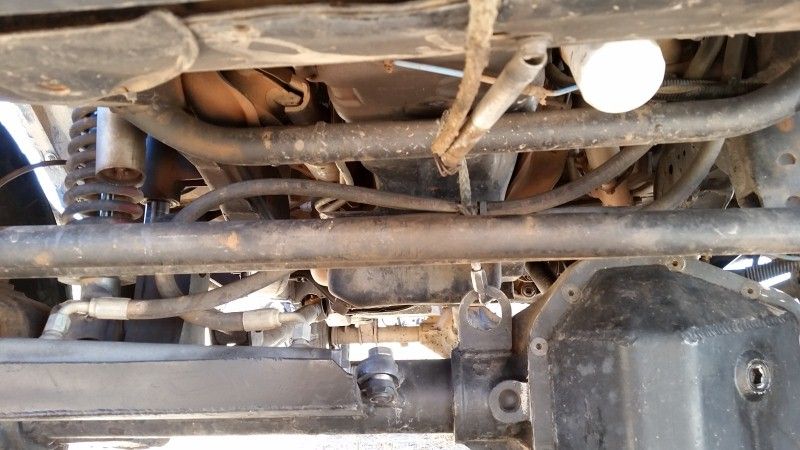
The line feeds over a crossbar that connects to the frame on both sides. The crossbar keeps the line out of the steering components. The spring keeps the cable, when slack, from going into the pulleys. The opposite end of the line connects to a mount at the top of diff housing via a carabiner.
RX
April 2011
The surgery has begun
Future doner R200 W/ ARB ready for new home
The Twins - D60 front & 70 for the rear. They are waiting patiently here for the tubes to be chopped down to comply w/ UT vehicle regs...
Update - The truck is ready to roll..... I'm currently going through a shakeup period to make sure all the important parts stay in place.
Here's a couple pics from the hills near my house....
And another from the front...
Here are some of the details thus far:
The front axle is a Ford D60 late ball joint model with customized high steer arms and brake setup by Frost Inc. Shafts are 35 spline w/ custom cut Dutchman long inner. Other shafts in front are stock Ford F350. The gearing is 5.13's with an ARB at the heart of the pumpkin. Protecting this investment is a massive steel diff cover fabed up by Ruff Stuff Specialties.
Rear axle is a Dana 70 also equipped w/ ARB & 5.13's. Rear shafts are 35 spline custom axles from Dutchman and are also protected by a Ruff Stuff bomb proof diff cover.
Both axles have been narrowed 6 ¼ inches to comply w/ local vehicle codes and remain street-able.
4 wheel disk brake setup w/ Caddy mid 70's calipers and parking brake. Chevy master cylinder setup is based upon Houdini's setup.
Shocks are Rancho 9000XL in back w/ Rancho Pro coil overs in front. The coil over selection is based upon Alpine Spirit's setup. Shock adjustments are controlled from in cab via wireless controller.
Rear is leaf sprung w/ 63 in Chevy springs & All Pro Johnny Joint setup. Spring selection was decided upon based on post by Ryan.
Tie rod and drag link ends are 1980 1 Ton Chevy.
Steering box has been moved forward 4 inches to make room for 37 inch tires.
Custom High Steer for ball joint axle -
Installation and all custom fabrication including high steer arms machined into ball joint axle & brake system done by Frost Inc of Washington, UT (RIP JESSE 1952 - 2012)
Pics from the initial shakedown run...
Stock front drive shaft with Tom Woods SuperFlex Ujoint
Bottoms up!
Modified front crossmember
Antiwrap bar
So Close - One issue folks will run into when SAS'ng
Sometimes you need a good reason to upgrade parts..... This happened about a year into my SAS
I managed to break my drivers side outer stub shaft the other weekend while wheeling on the Maze trail outside of St George UT. Unfortunately it also destroyed the hub as well. There goes my money saved by not buying half shafts fund.
Upgraded my outer stub shafts to Yukon 35 spline and also picked up a set of Yukon's low profile heavy duty lockout hubs. They are very stout looking and a lot more tucked away then the Spicer units they are replacing. They do not stick out much further then the drive flanges I've seen on the rock buggies out here.
I checked in my previous posts on other forums, but couldn't find anything regarding my hydro assist. Soon after my SAS was complete I realized it was going to be a task to run the steering with the new 37's in place. After checking out some of the other rigs here in Southern UT, I decided to have a PSC hydro assist installed.
The shop that installed the steering assist also created a rock shield directly off the axle tube. So far the sheild has held up to the abuse I've thrown at it, as many of the hits would have easily damaged the cylinder.
This is one of my pre SAS mods... Dual Odyssey battery setup installed by Kodiak Industries:
View from the cockpit
The following mods are visible in this pic.
Rail shifter - Bottom center
Yaesu FT8800 - Top center
Warn offroad light controller - Above auto shift lever
B & M Tranny fluid tem guage - Above T-Case shifter
Kodiak Dual Battery control - Directly to the right of B & M guage
Suckdown winch control (Plan B) - Directly below fuel guage
Levo Guage - Below climate controls
Pioneer Radio / Touchsreen - Below levo guage
Winch disconnect button - Not visable in pic, but to the right of B & M guage
Cobra CB connection - To the right of Levoguage
Speaker for ham radio output - To the right of rail shifter
ABS light constant on Mod.... - Above fuel guage
37x13.5x17 Toyo Mud Country & 17" Spyderlocks for the trails.....
Allthough the BFG KM 2's worked great on the IFS setup, they did not hold up very well with the extra weight of 1 tons axles... I kept getting slashes on the sidewalls. The Toyo tires are a much heavier tire, so I'm hoping they'll hold up to the abuse.
These pics are from the Plan B trail in Sand Hollow / St. George, UT
Here's some pics/info from my suck-down winch setup
The winch is an inexpensive Milemarker ATV winch mounted on the inside of a Shrockworks bumper skid. I swapped out the steel cable w/ some synthetic line I had left over after I replaced the line for my main winch.
The tension plate that covers the line also acts as a debris shield.
Here's a view of the the mounting bolts from the front of the skid - The 2 center bolts secure the winch in place.
And the view from underneath....
The line feeds over a crossbar that connects to the frame on both sides. The crossbar keeps the line out of the steering components. The spring keeps the cable, when slack, from going into the pulleys. The opposite end of the line connects to a mount at the top of diff housing via a carabiner.
RX
Last edited:
")