- Location
- Brentwood, TN
I have just finished my 2nd Xterra cargo box and wanted to share the build with you. I built my first box a while back and although it has served me well, I felt it needed some improvements. Diadaga contacted me just as I was starting this build and he ended up getting this one. If anyone would like one built for them, please PM me.
Build Objectives:
Design:
Single Drawer vs Two Drawers
A single drawer provides more storage space.
Storage Well Access
The cut out area in the front storage area provides access to the storage well below. This design requires the factory cargo floor be removed.
Build:
Here's the carcass inside the Xterra for a test fitting.

The front storage area. The wood arch lines up with the split in the rear seats. Each front access door will be as wide as the seat in front of it and its center most edge will rest on the arch for support. Also note the access panel to storage well which lifts out.

Side view showing how the cargo box follows the lines of the back seat. There's just enough room between the arch and the seat for the access door.

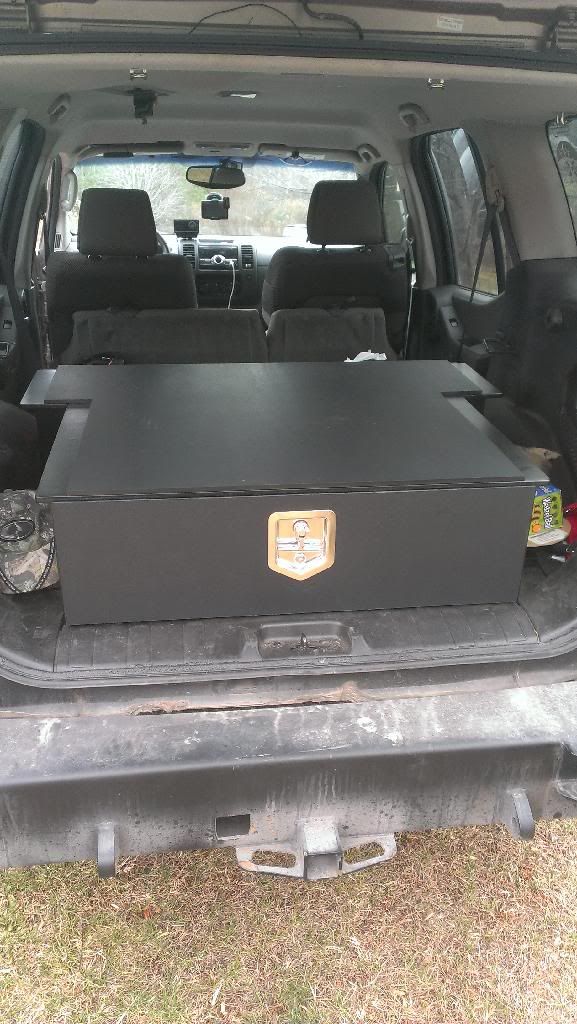
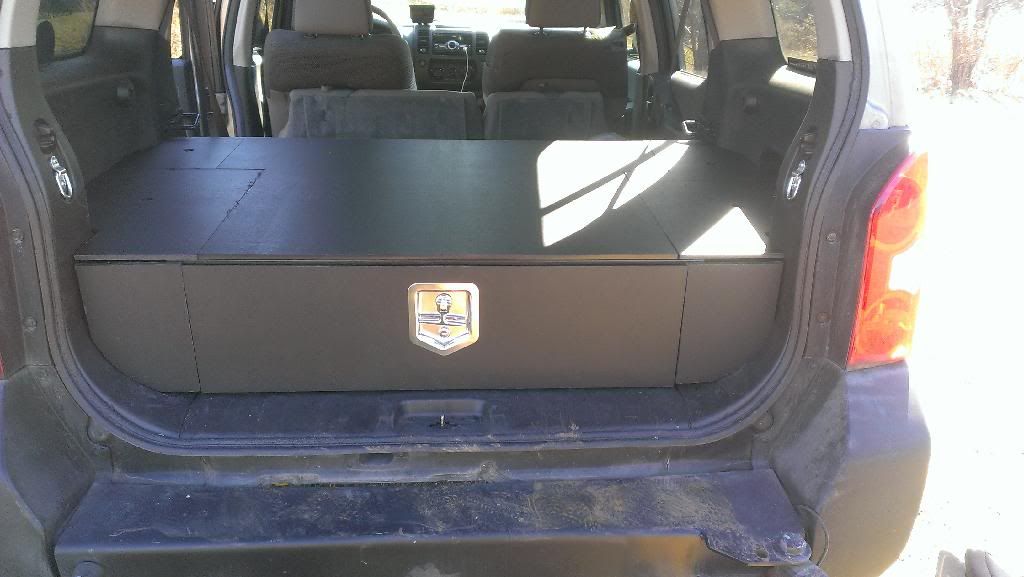
Cargo box with drawer installed and cover in place.

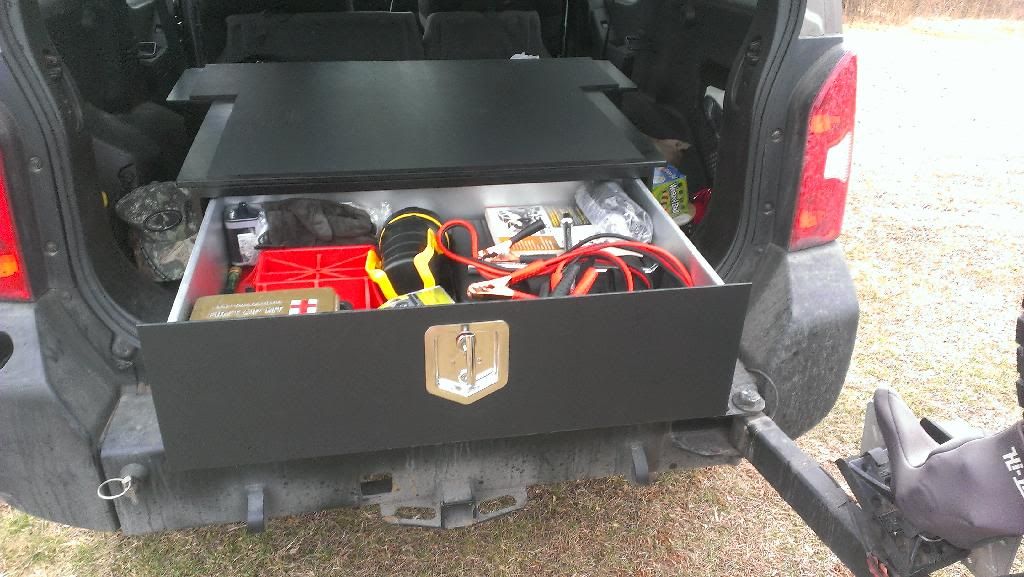
Paint done. Latch hardware installed, plastic cover installed on drawer front.

Backside of latch. This was the first time I used this type of latch and required some effort to get it installed correctly.

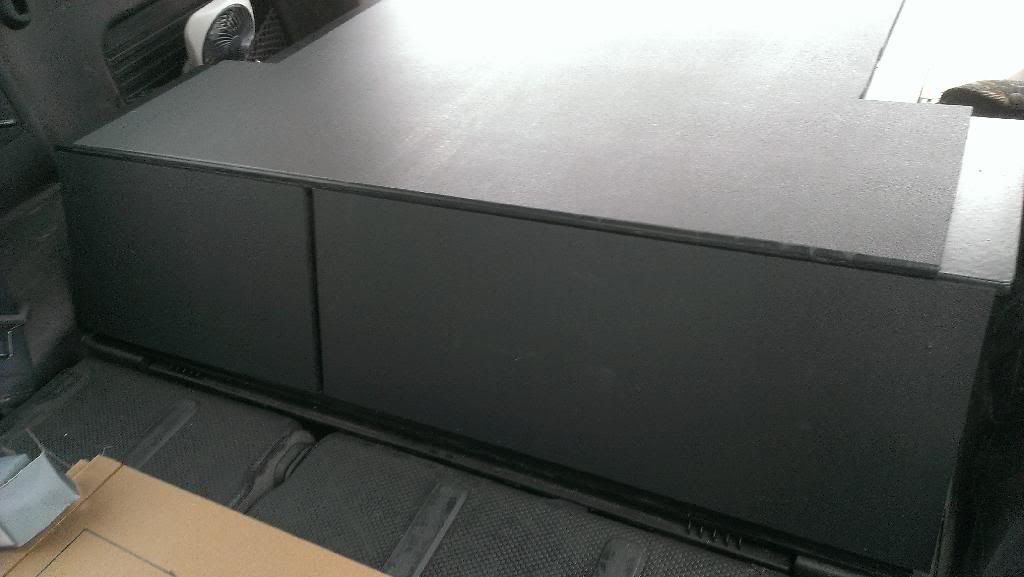
Finished cargo box. Note that the plastic covering does not extend to the edge of the wood. This allows the "cubby hole" covers to rest on that lip for support.


Front of cargo box.

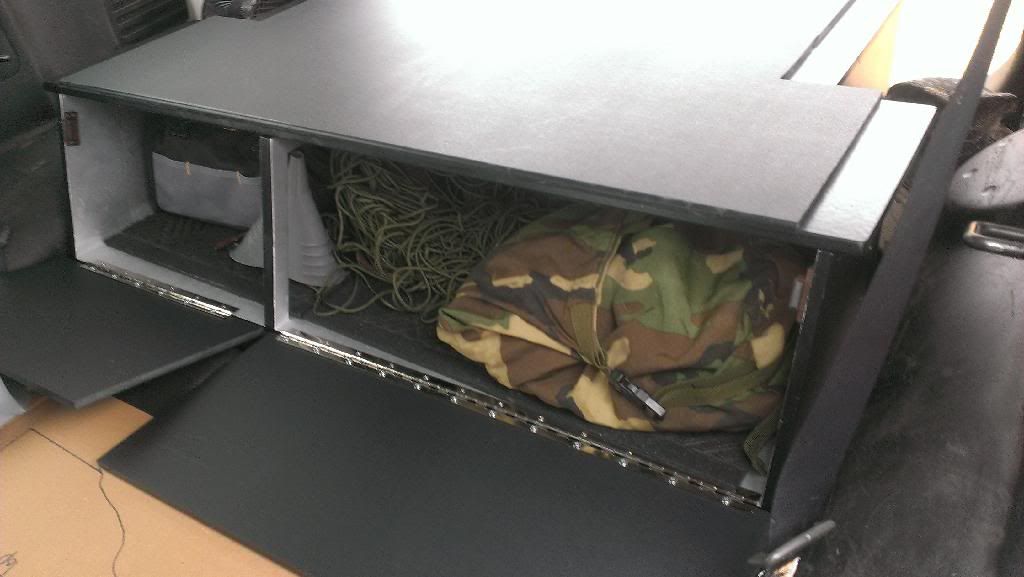
Drivers side access door opened.

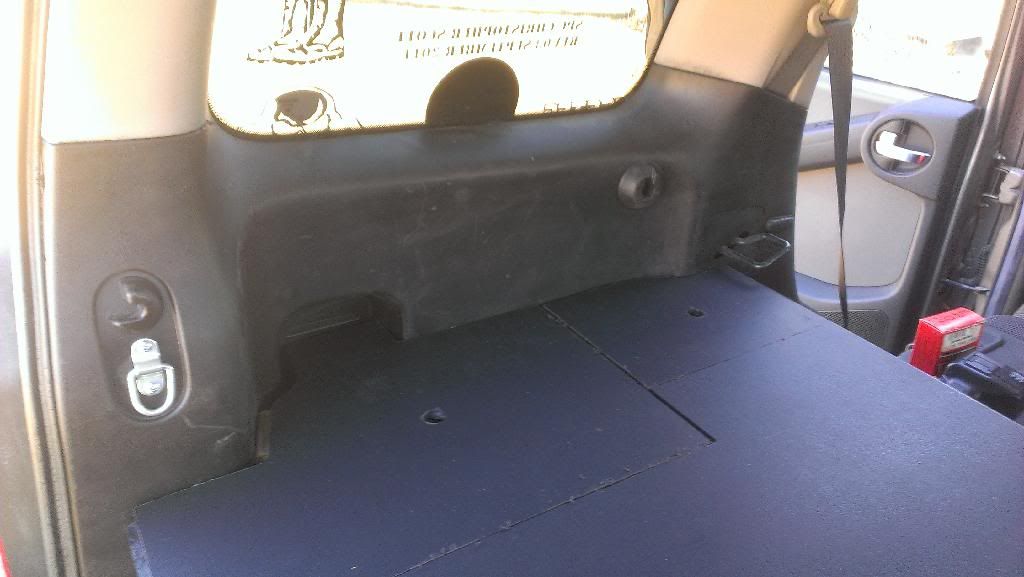
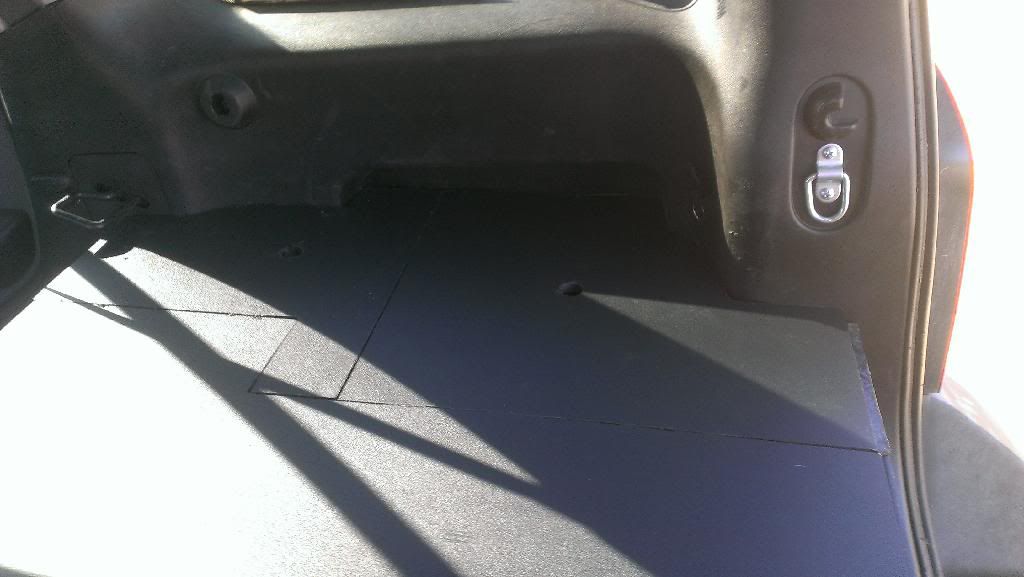
Both doors opened, storage well access panel lifted out.

Post Mortem:
Looking back at the objectives, here is how this build scores:
Hopefully this gives everyone out there some ideas for their own cargo boxes. Enjoy!
Build Objectives:
1. Provide drawer-based access to gear from the rear of the vehicle.
This has worked well for me in the past 18 months with my previous box. Gear is easily accessible when needed and stows away nicely when not needed. If I can't find something and retrieve it quickly when needed, why bring it in the first place?
2. Enable access to the storage well underneath the storage box.
My first cargo box did not allow access to the storage well underneath the cargo floor.
3. Utilize Xterra cargo space more efficiently.
My first cargo box left some space unused between the rear seats and the cargo box. It also could have extended a few more inches towards the rear hatch providing additional usable storage space. This new design will take advantage of that wasted space.
4. Reduce weight from previous build.
Previous box was heavy to get in and out of the X.
5. Reasonably good looking.
No unpainted, exposed, wood. Clean lines, etc. Minimize visible screws, bolts, etc.
6. Durable.
The cargo box needs to hold up to life on the trail. It needs to be able to get dirty and clean up easily. It also needs to hold together and stand the test of time.
7. Bolt-in.
The cargo box will bolt into the cargo rails in the floor of the cargo area.
8. Removable.
The cargo box needs to be removable / reinstallable.
9. Allow installation of air compressor, 2nd battery and inverter within the area enclosed by the cargo box.
The first cargo box was frustratingly close to being able to house my inverter and compressor. Close enough that I knew it was possible, but not with the first design.
Design:
The drawing below shows the design of the cargo box.

Materials
Materials
- [*=1]The box is built with 1/2" cabinet quality birch plywood, except the base which is 3/4".
[*=1]The box is covered in 3/8" HDPE plastic which I have found to be extremely durable, good looking and easy to clean. Many boxes are covered in marine carpet; I chose the HDPE plastic over the carpet because it handles mud, oil and other dirty things so much better.
[*=1] Joints are screwed and glued, except the cover which only screwed in. This allows removal for future customization. The gluing really adds a lot of strength.
[*=1]Drawer slides are heavy duty slides, rated at 100 lbs.
[*=1]Bolts to attach the box to the cargo rails are 3/8" x 2" with nuts made to fit in C-channel without spinning.
Single Drawer vs Two Drawers
A single drawer provides more storage space.
Storage Well Access
The cut out area in the front storage area provides access to the storage well below. This design requires the factory cargo floor be removed.
Here's the carcass inside the Xterra for a test fitting.
The front storage area. The wood arch lines up with the split in the rear seats. Each front access door will be as wide as the seat in front of it and its center most edge will rest on the arch for support. Also note the access panel to storage well which lifts out.
Side view showing how the cargo box follows the lines of the back seat. There's just enough room between the arch and the seat for the access door.
Cargo box with drawer installed and cover in place.
Paint done. Latch hardware installed, plastic cover installed on drawer front.
Backside of latch. This was the first time I used this type of latch and required some effort to get it installed correctly.
Finished cargo box. Note that the plastic covering does not extend to the edge of the wood. This allows the "cubby hole" covers to rest on that lip for support.
Front of cargo box.
Drivers side access door opened.
Both doors opened, storage well access panel lifted out.
Post Mortem:
Looking back at the objectives, here is how this build scores:
1. Provide drawer-based access to gear from the rear of the vehicle. SUCCESS
2. Enable access to the storage well underneath the storage box. SUCCESS
3. Utilize Xterra cargo space more efficiently. SUCCESS
4. Reduce weight from previous build. FAIL.
This box weighs much the same as the previous box. The HDPE plastic is heavy, and both boxes use about the same amount of this material. I may need to look at using thinner sheets of HDPE in future boxes.
5. Reasonably good looking. SUCCESS
6. Durable. UNKNOWN. Time will tell.
7. Bolt-in. SUCCESS
8. Removable. PARTIAL SUCCESS.
The box really requires to persons to get it in and out of the truck.
9. Allow installation of air compressor, 2nd battery and inverter within the area enclosed by the cargo box. PARTIAL SUCCESS
My compressor (Smittybilt) will fit nicely in the front storage area on the passenger side. I intended to mount my inverter vertically onto the side of the cargo box, but it is not tall enough. This is easily fixed with a taller cargo box. I checked the dimensions of an Odyssey battery and it is too tall to fit in the front storage area, again making the box taller will address is this. The battery would likely have to sit on the access panel to storage well, need to give that some more thought.
Hopefully this gives everyone out there some ideas for their own cargo boxes. Enjoy!
")