
wiseguy3501
Bought an X
- Location
- Lakeville, MN
This winter a thread appeared on another forum where a guy had mounted a Nexus 7 tablet where his stock stereo used to be. His method was using a DAC(Digital to Analog Converter/to send the tablet sound to the RF amplifier) and permanently mounting and wiring it to his truck. Instantly I knew that I had to do that myself, and better. So the planning and research began.
Firstly, the problems that I had with his setup was that he lost functionality. Since he no longer had a normal stereo there(the Rockford Fosgate deck) he lost everything that provided. All he was left with was his tablet as a audio source, nothing else. Literally, everything went through the tablet; volume control, audio...etc.
I had an idea, it would be perfect if there was a stereo deck still involved. However, where do you put it when you want the tablet there? What if you can detach the faceplate and still have it work? So I went to Google and searched, "Faceplate Relocation." BINGO!!! That's what I wanna do!
So, I found the deck I wanted(Pioneer DEH-P9400BH), with the functions and options I wanted. Next step was to solder ethernet wires between the deck and the faceplate. Installation was a breeze, however custom every step of the way. Here are the pics....
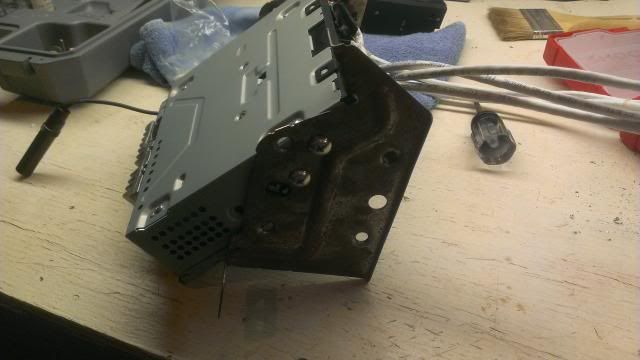
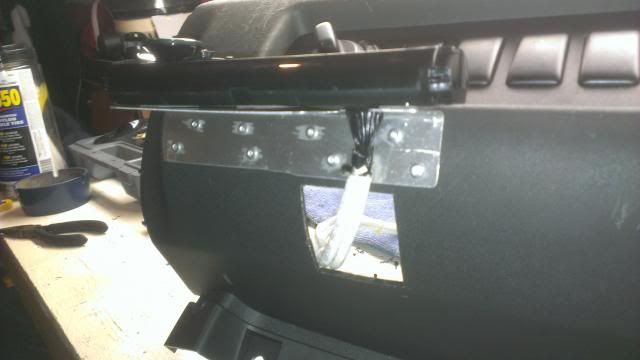
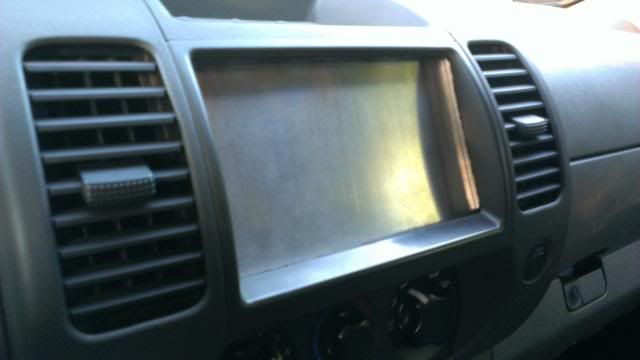
First was to make some new holes in the stock mount for the deck to sit at a unique angle
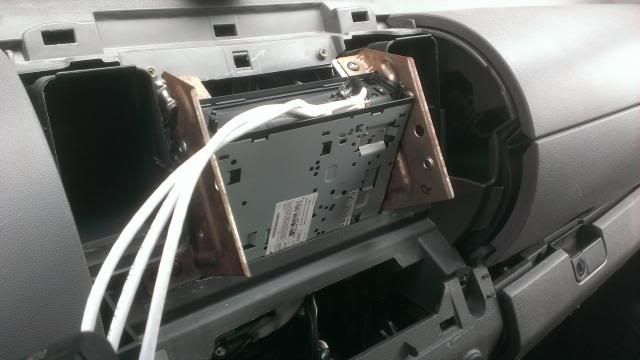
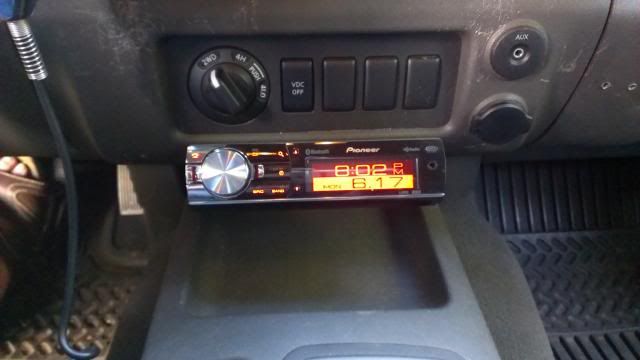
Installed in truck
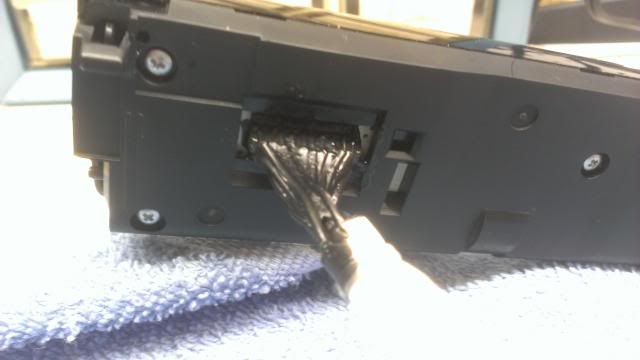
Deck end of ethernet cables closeup(soldered and liquid electrical tape)
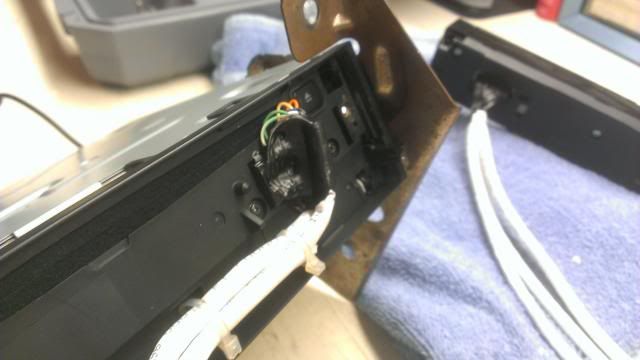
Faceplate end of ethernet cables closeup(also soldered and liquid electrical tape)
Faceplate double side taped to handmade aluminum bracket that I riveted just below the switch panel
Faceplate finished product
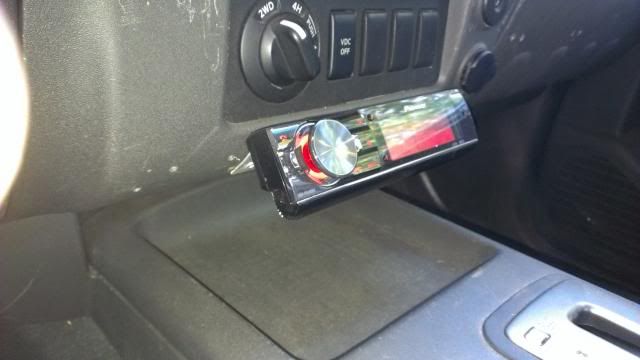
Faceplate finished product side view
The faceplate itself turned out really clean. You are unable to see the aluminum or the hole in the panel unless you are really looking for them. Personally I'm really happy with the way the entire stereo setup turned out. Pretty simple, but complex to accomplish.
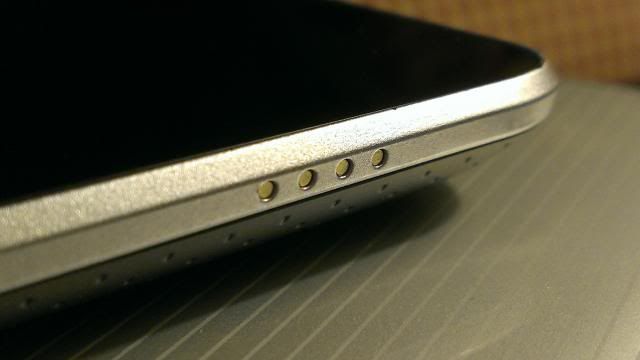
Next was the tablet. Again, wanting to be different I made it my goal to make the tablet fully removable within seconds. To accomplish this, I needed a critical part, the official Nexus 7 dock. The reason I needed this, is because it uses something called POGO pins to make a power and audio connection. These pins touch 4 tiny contacts on the bottom of the tablet making a instantaneous connection. It took me 2 months to find this dock. Problem was that it was on limited production since it was a new product, but I held strong and finally got one. Now, however, I believe they are widely available.
Next was the joy of figuring out how to make the dock work in the dash. The first attempt failed, I tried attaching the dock to the inside of the dash but the problem that developed was that the tablet didn't sit still enough to consistently remain connected to the pins. I spent 12 hours making that setup. So round two....screw the dock, make my own using the electrical components of the dock. Worked like a charm!
Essentially I took a aluminum sheet and bent it to match the dimensions of the tablet thus holding the tablet tightly on the bottom and sides. Then once that was done, I placed the POGO pin component on the aluminum. Spent maybe an hour getting it aligned perfectly and then tested it right there. FLAWLESS! Mounted the aluminum holder to the vent tubes, made the power connection and it was done.
POGO pin connections on the tablet(maybe 1mm in size)
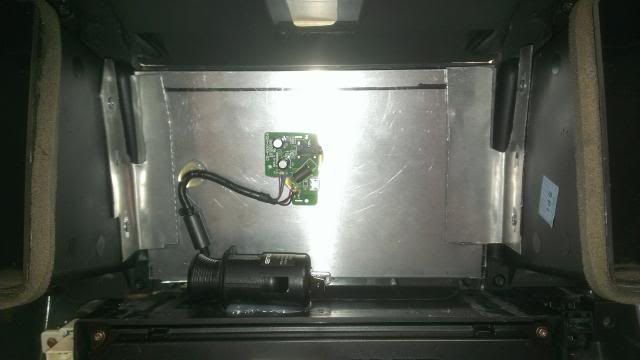
Rear view of the aluminum holder completed and installed(12V USB adapter and dock electronics attached)
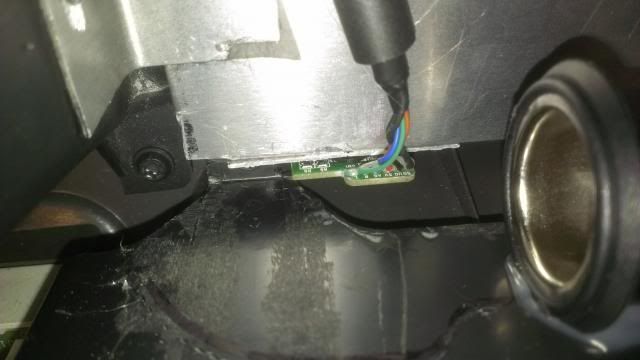
Close up of the POGO pin circuit board
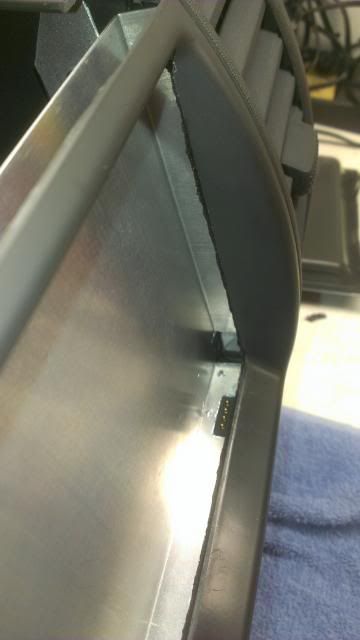
POGO pins inside the holder
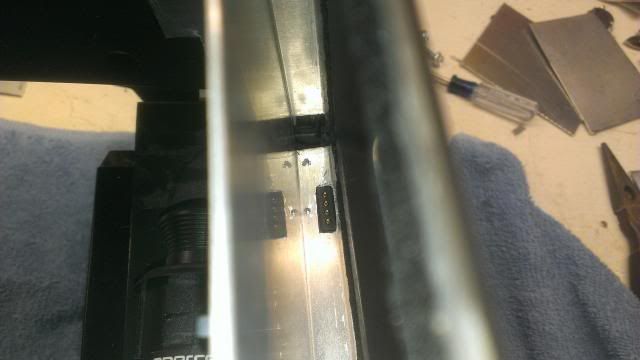
POGO pins inside the holder close up
Finished product without the tablet
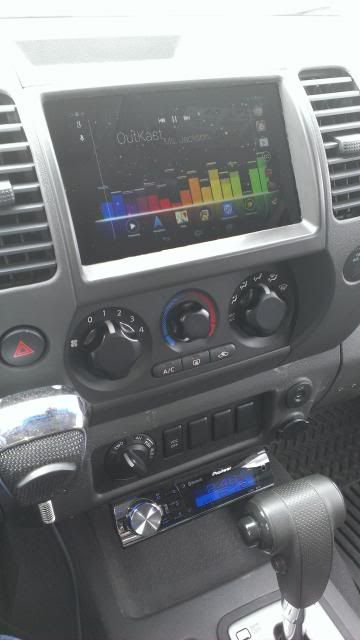
Completed overall product
Now, overall, I am super pleased with the entire project. I am using the Nexus 7 32GB with AT&T 4G service. It costs me a little bit a month but its well worth it to have the full functionality at all times. Removability was generally key to me, which surprisingly was the easiest part of the entire setup. Right through the top of the dash. All it took was making the center top piece removable.
As to the reason for making it removable, I live in MN, so it gets damn cold sometimes. Granted, most devices, including the Nexus 7 can take decently low temps without danger, but when it dips to -15 degrees or less sometimes, I would rather not take the chance.
Most of the time spent was actually setting up the programming on the tablet to match what I wanted. Since the tablet is powered off of my 12V in the armrest it switches on and off. Using an application called Tasker, its setup to wake and sleep depending on whether or not there is power. It also controls airplane mode. So whenever it isn't getting power the tablet fully goes to sleep.
Now for the audio, I initially had it hardwired through the POGO pins through 3.5mm headphone jack. However, that was a noisy setup. A lot of noise. So, since I got a deck with bluetooth, I gave it a shot. Surprisingly, the audio quality through the bluetooth is PERFECT! There is absolutely zero noise being setup that way.
Hopefully I covered everything, feel free to ask questions.
Firstly, the problems that I had with his setup was that he lost functionality. Since he no longer had a normal stereo there(the Rockford Fosgate deck) he lost everything that provided. All he was left with was his tablet as a audio source, nothing else. Literally, everything went through the tablet; volume control, audio...etc.
I had an idea, it would be perfect if there was a stereo deck still involved. However, where do you put it when you want the tablet there? What if you can detach the faceplate and still have it work? So I went to Google and searched, "Faceplate Relocation." BINGO!!! That's what I wanna do!
So, I found the deck I wanted(Pioneer DEH-P9400BH), with the functions and options I wanted. Next step was to solder ethernet wires between the deck and the faceplate. Installation was a breeze, however custom every step of the way. Here are the pics....
First was to make some new holes in the stock mount for the deck to sit at a unique angle

Installed in truck

Deck end of ethernet cables closeup(soldered and liquid electrical tape)

Faceplate end of ethernet cables closeup(also soldered and liquid electrical tape)

Faceplate double side taped to handmade aluminum bracket that I riveted just below the switch panel

Faceplate finished product

Faceplate finished product side view

The faceplate itself turned out really clean. You are unable to see the aluminum or the hole in the panel unless you are really looking for them. Personally I'm really happy with the way the entire stereo setup turned out. Pretty simple, but complex to accomplish.
Next was the tablet. Again, wanting to be different I made it my goal to make the tablet fully removable within seconds. To accomplish this, I needed a critical part, the official Nexus 7 dock. The reason I needed this, is because it uses something called POGO pins to make a power and audio connection. These pins touch 4 tiny contacts on the bottom of the tablet making a instantaneous connection. It took me 2 months to find this dock. Problem was that it was on limited production since it was a new product, but I held strong and finally got one. Now, however, I believe they are widely available.
Next was the joy of figuring out how to make the dock work in the dash. The first attempt failed, I tried attaching the dock to the inside of the dash but the problem that developed was that the tablet didn't sit still enough to consistently remain connected to the pins. I spent 12 hours making that setup. So round two....screw the dock, make my own using the electrical components of the dock. Worked like a charm!
Essentially I took a aluminum sheet and bent it to match the dimensions of the tablet thus holding the tablet tightly on the bottom and sides. Then once that was done, I placed the POGO pin component on the aluminum. Spent maybe an hour getting it aligned perfectly and then tested it right there. FLAWLESS! Mounted the aluminum holder to the vent tubes, made the power connection and it was done.
POGO pin connections on the tablet(maybe 1mm in size)

Rear view of the aluminum holder completed and installed(12V USB adapter and dock electronics attached)

Close up of the POGO pin circuit board

POGO pins inside the holder

POGO pins inside the holder close up

Finished product without the tablet

Completed overall product

Now, overall, I am super pleased with the entire project. I am using the Nexus 7 32GB with AT&T 4G service. It costs me a little bit a month but its well worth it to have the full functionality at all times. Removability was generally key to me, which surprisingly was the easiest part of the entire setup. Right through the top of the dash. All it took was making the center top piece removable.
As to the reason for making it removable, I live in MN, so it gets damn cold sometimes. Granted, most devices, including the Nexus 7 can take decently low temps without danger, but when it dips to -15 degrees or less sometimes, I would rather not take the chance.
Most of the time spent was actually setting up the programming on the tablet to match what I wanted. Since the tablet is powered off of my 12V in the armrest it switches on and off. Using an application called Tasker, its setup to wake and sleep depending on whether or not there is power. It also controls airplane mode. So whenever it isn't getting power the tablet fully goes to sleep.
Now for the audio, I initially had it hardwired through the POGO pins through 3.5mm headphone jack. However, that was a noisy setup. A lot of noise. So, since I got a deck with bluetooth, I gave it a shot. Surprisingly, the audio quality through the bluetooth is PERFECT! There is absolutely zero noise being setup that way.
Hopefully I covered everything, feel free to ask questions.