robcarync
Sliders
- Location
- Raleigh, NC
This, of course is a very easy task, but since it is a common mod, I figured I'd snap a few pics to make an official write up for it while I removed mine.
Introduction
The stock rear sway bar does not do a great job of anything. Most people can't detect a difference in ride quality after removal, and removing it increases articulation. The stock rear sway bar also has the potential to cause damage to the right rear shock, which is why many people choose to remove the sway bar.
If you are unsure, check out the thread that convinced me it had to go:
http://www.clubxterra.org/forums/showthread.php?t=37276
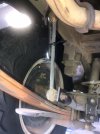
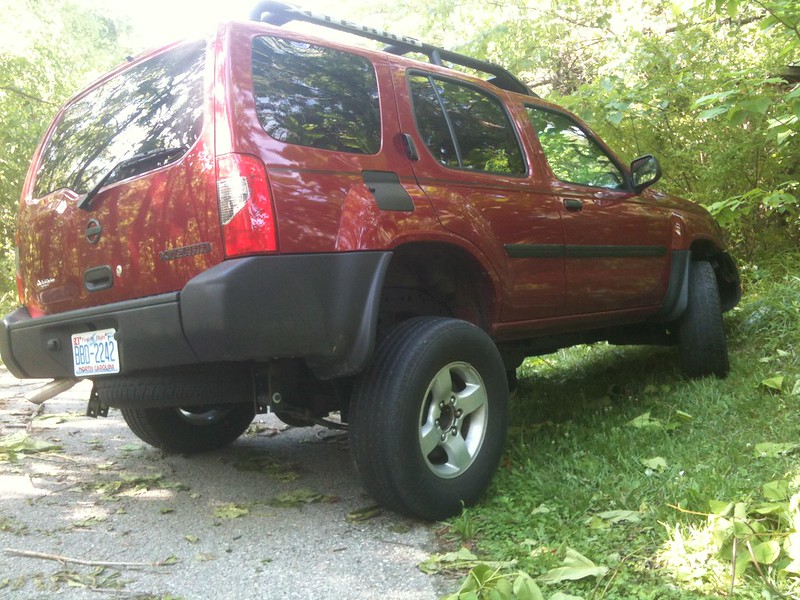
Step 1: Location
Locate the rear sway bar. It is on the rear of the car going along the rear axle and has a tie rod on each end connecting the bar to the frame.

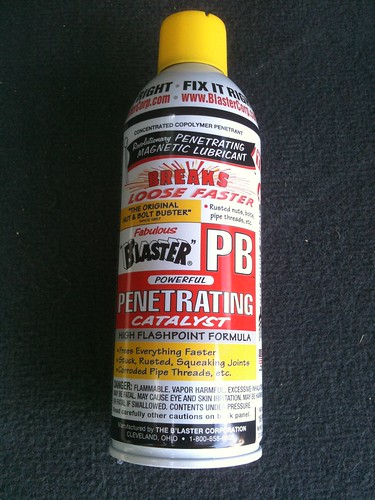
Step 2: PB Blaster!!!! If yours are really stuck, start early. Soak them, and leave them for a couple days, soak again and leave for a couple days, and have a go at them a week later with 3 really good soakings in PB Blaster. Leaving them alone for a few days seems to really help me with stuck hardware.
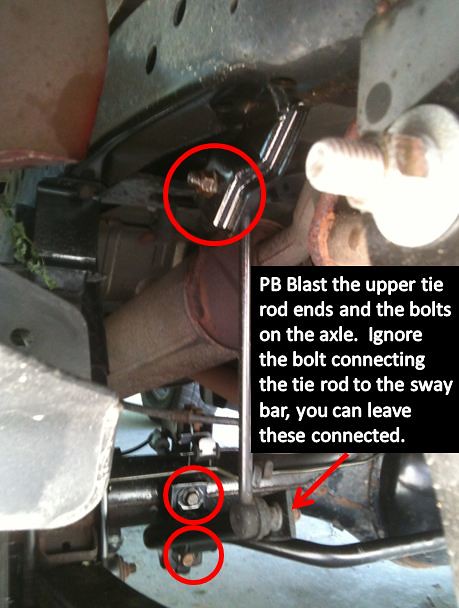
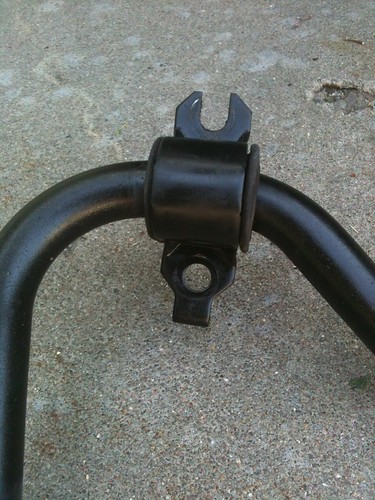
Step 3: PB Blast the circled bolts. Ignore the bolt with the arrow (repeat for each side):
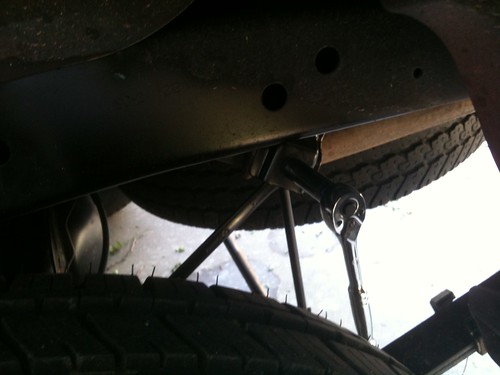
Step 4: Remove the tie ends from each side using a 14mm socket wrench and a 14mm open end wrench. The exposed nut is easily loosened with the socket wrench. However, on the flip side of the frame bracket is a bolt head which you need to hold with the open end wrench to keep it from twisting. Look at the reference pictures below if you need clarification.
Step 5: Loosen the top bolt on the axle clamp and remove the bottom bolt on the axle clamp. Look at the reference picture below for clarification as to why one is loosened and one is removed. Do this for both sides of the sway bar.

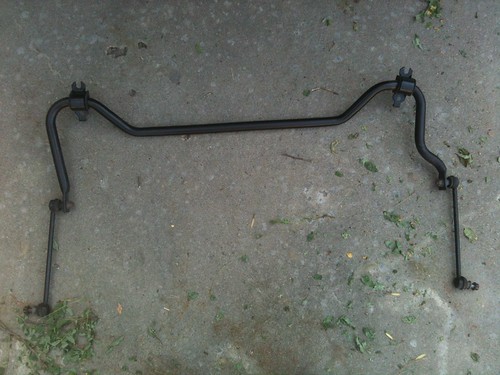
Step 6: Admire your removed sway bar:
For reference:
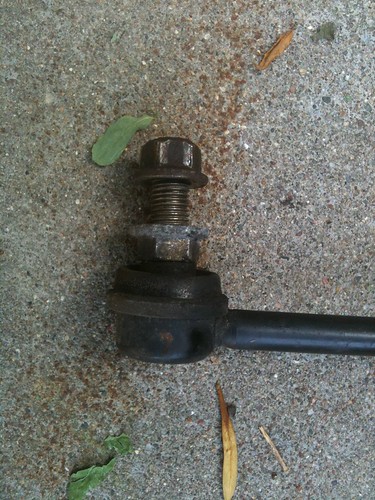
Tie ends...notice that you need to hold the bolt head with an open end wrench while removing the nut with a socket wrench.
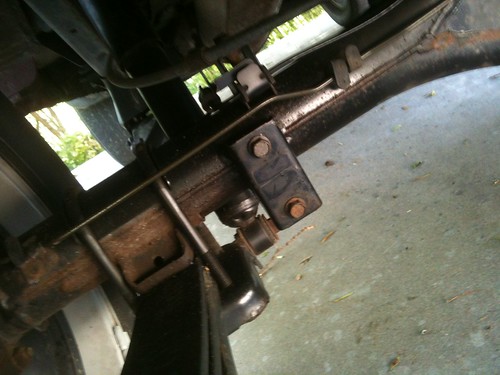
The axle brackets have a slot and a hole. The bottom bolts must be completely removed to allow the bracket hole to clear. The top bolts rest in the slot, thus they only need to be loosened.
Finally, ensure that you reinsert the bolts into the axle bracket with some anti seize compound. This just plugs the holes and threads and prevents rusting.
and LASTLY, ENJOY THE FLEX!
Introduction
The stock rear sway bar does not do a great job of anything. Most people can't detect a difference in ride quality after removal, and removing it increases articulation. The stock rear sway bar also has the potential to cause damage to the right rear shock, which is why many people choose to remove the sway bar.
If you are unsure, check out the thread that convinced me it had to go:
http://www.clubxterra.org/forums/showthread.php?t=37276
Step 1: Location
Locate the rear sway bar. It is on the rear of the car going along the rear axle and has a tie rod on each end connecting the bar to the frame.
Step 2: PB Blaster!!!! If yours are really stuck, start early. Soak them, and leave them for a couple days, soak again and leave for a couple days, and have a go at them a week later with 3 really good soakings in PB Blaster. Leaving them alone for a few days seems to really help me with stuck hardware.
Step 3: PB Blast the circled bolts. Ignore the bolt with the arrow (repeat for each side):
Step 4: Remove the tie ends from each side using a 14mm socket wrench and a 14mm open end wrench. The exposed nut is easily loosened with the socket wrench. However, on the flip side of the frame bracket is a bolt head which you need to hold with the open end wrench to keep it from twisting. Look at the reference pictures below if you need clarification.
Step 5: Loosen the top bolt on the axle clamp and remove the bottom bolt on the axle clamp. Look at the reference picture below for clarification as to why one is loosened and one is removed. Do this for both sides of the sway bar.
Step 6: Admire your removed sway bar:
For reference:
Tie ends...notice that you need to hold the bolt head with an open end wrench while removing the nut with a socket wrench.
The axle brackets have a slot and a hole. The bottom bolts must be completely removed to allow the bracket hole to clear. The top bolts rest in the slot, thus they only need to be loosened.
Finally, ensure that you reinsert the bolts into the axle bracket with some anti seize compound. This just plugs the holes and threads and prevents rusting.
and LASTLY, ENJOY THE FLEX!
")