
robcarync
Sliders
- Location
- Raleigh, NC
Lokked and Dropped
Warning: Very thorough and a lot to read. Many of the steps were easier said than done, so I tried to elaborate on my technique and what did and didn't work for me.
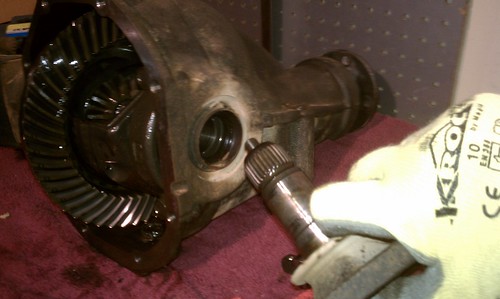
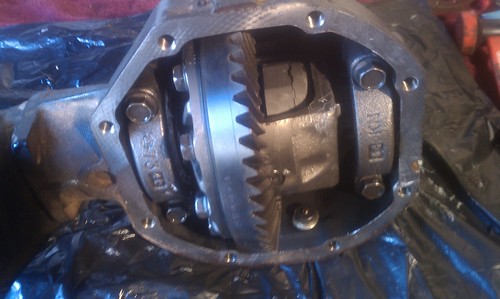
The Lokka install is often coupled with diff drop bushings, seeing as the differential will already be removed. Phrog Man has an awesome write up on installing the diff drop bushings. I will add a few of my thoughts throughout the process, but still recommend checking his tutorial out for a more thorough walk through specific to the bushings. I will also go into the differential tear down and install of the Lokka gears. Special thanks to cmilano for his help in getting this done. I am dividing the “How To” into 4 phases:
1. Removing Differential
2. Removing Stock Bushings
3. Installing the Lokka
4. Reassembly
Original diff drop DIY
http://www.clubxterra.org/forums/showthread.php?t=31336
Lokka
http://lokka.com/site/
Diff Drop Bushings
https://www.4x4parts.com/nissan/front-differential-drop-drown-bushings-p-5272.html
Removing Differential
The differential assembly is held in by 4 mounting bolts. It is also bolted to the CV axles on each side, and the front drive shaft. I drove my Xterra up on ramps to get more room under the truck to move around. Remove any skid plates that may be blocking access to the differential area.
The first step is to tackle the front drive shaft bolts. There are four bolts and four nuts holding the drive shaft U-joint to the differential. Put the transfer case into 4hi and/or lock your 4WD hubs to lock the drive shaft from rotating. My hardware had red Loctite on them, and was extremely tight. Spray PB Blaster on the hardware and let it soak for a minute. Use a rag to wipe up any remaining drips of PB Blaster. Use a propane torch directly on the nut side of the hardware to heat the nut up enough so you can break it loose. It is a good idea to keep a spray bottle of water nearby in case the PB Blaster flares up. Use a 14mm wrench to crack the nut loose, and remove the nut and bolt. Return the transfer case to 2hi and/or unlock your 4WD hubs so you can rotate the drive shaft to access another bolt. Return the transfer case to 4hi and/or lock your 4WD hubs to lock the drive shaft, and repeat. If the bolts still won’t break loose, use more heat. I had to keep the torch on the nut for what seemed like minutes. Tie off the drive shaft to support it after all hardware is removed.
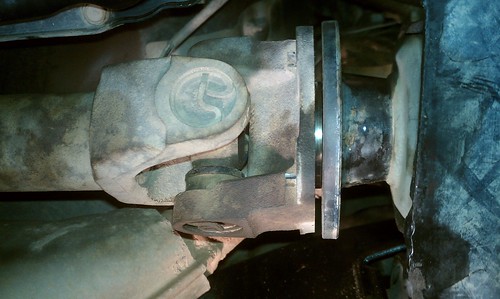
The CV axles are next. Each CV is held to the differential by 6 bolts, arranged in 3 groups of 2.
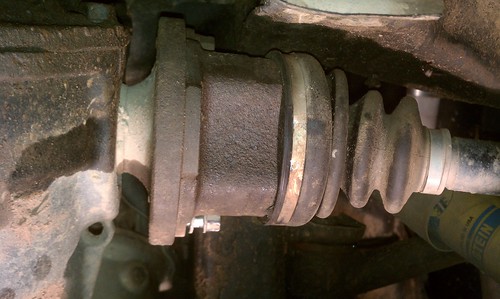
These bolts had blue Loctite on them but can be broken loose with a 12mm wrench. You need to lock your hubs to keep the CV axle from rotating when you put the wrench on it. If you have the stock auto locking hubs like I do, they will lock after a small amount of rotation. You will need to unlock your hubs to rotate the CV axle to access the other bolts. If you have the stock hubs you need to remove the outer hub with a 6mm hex wrench to rotate the CV axle. Re-install the outer hub to lock the CV axle in place. The outer hub should slide on smoothly all the way. If it doesn’t install completely, remove and try a new spline orientation. The hubs have to be aligned properly to completely sit flush on the hub. Repeat until both sides are completely unbolted. This can be tedious due to the amount of space you have to turn the wrench. Tie up the CV axles to the UCA to support them.
Note: If you have an impact wrench with an extension and a wobble joint, this will be a much faster task by removing the tires and going through the control arms with the wrench. Much quicker and easier.
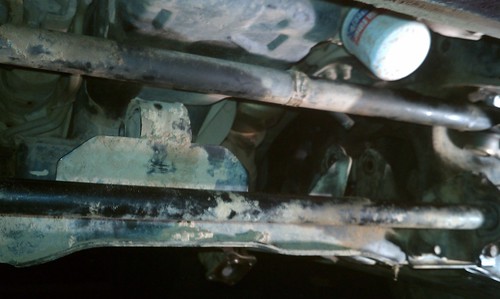
There are four bolts supporting the differential assembly. There are two on the cross member near the drive shaft, and two in the front right above the center link. Spray the nuts with PB Blaster and let them soak. I was able to break the cross member bolts free with a 17mm socket with a breaker bar. A 17mm wrench is needed to hold the bolt head on the other side. I had to use the propane torch on the front two mounting bolts. Once again, with care, direct the torch flame directly at the nut. When it is hot enough, use the 17mm socket and 17mm wrench to break them free. Loosen all of the nuts, but leave the bolts in to hold the assembly up.
Alternative: You can leave the front two bushings bolted and unbolt the entire front cross member instead. This will make it much easier to assemble the differential later, as you will be able to lift it straight up without having to rotate it.
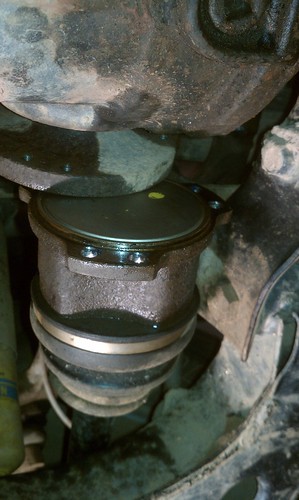
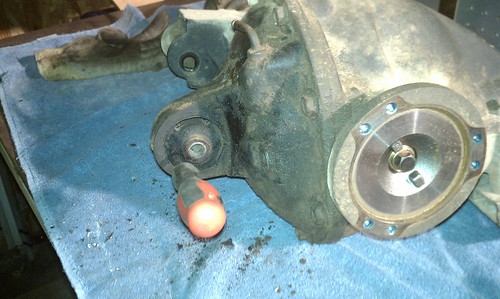
Use some pliers and a screw driver to remove the breather hose and clamp. This is on the front of the differential behind the oil filter.

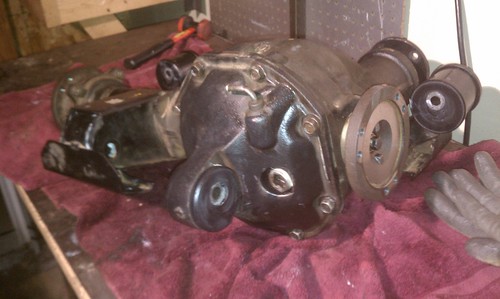
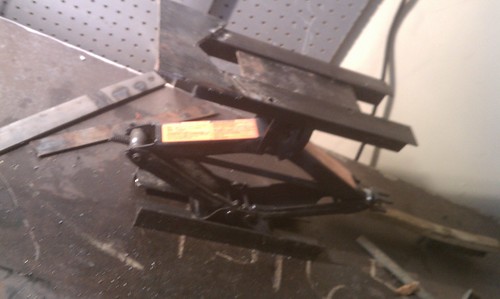
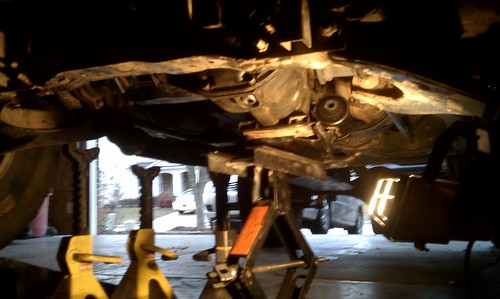
The differential is now ready to be dropped down. I used this time to back the Xterra off the ramps, so there was less distance for the differential to fall down on me. There is no real delicate way to do this, but I used a hydraulic jack and a couple of jack stands. The bolts were easy to tap out of the mounts, but it is difficult to gracefully lower the differential assembly down. Stay out from under this thing unless you have an extra set of hands. It is an awkward shape with no really convenient center of gravity. The drive shaft side ended up dropping down first, and the rest of the differential assembly followed.

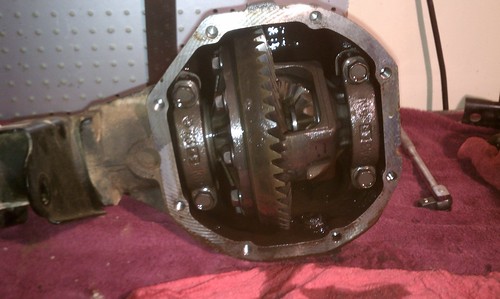
Removing Stock Bushings
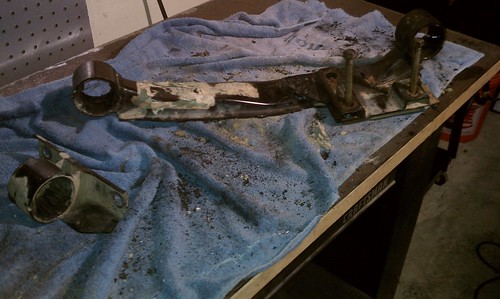
The first step to installing the diff drop bushings is to remove the old ones. There is one bushing on the differential case, two on the attached cross member, and one still attached to the front of the vehicle frame. Remove the bushing from the frame with a 17mm socket so you can have all four bushings on a bench.
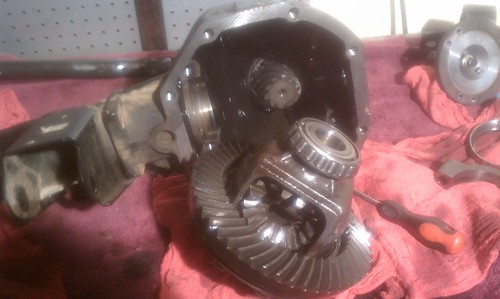
Remove the cross member from the differential housing using a 17mm wrench. Find your weapon of choice, and work on removing that rubber! I used a drill with a slow cutting speed close to the edge of the bushing. This seemed to rip the rubber off the outer metal sleeve, destroying more rubber in its path. I then used a propane torch to heat up the rubber making is softer, and went to work with a screw driver picking away at them. There is no science to this…however you want to destructively remove the rubber is up to you.
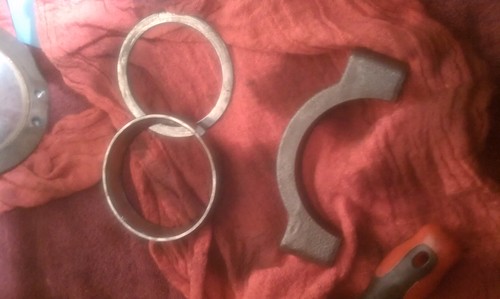
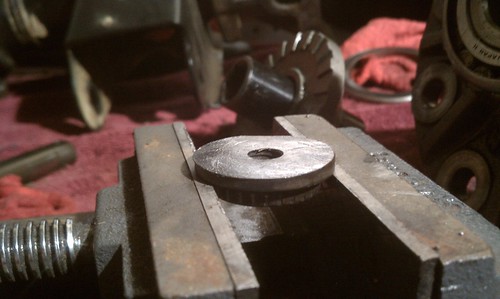
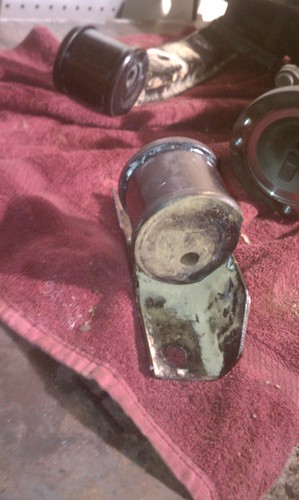
Once you remove the rubber core you need to get to work on the outer sleeve. Use a reciprocating saw or hack saw to cut a slot in the steel sleeve. With the sleeve having a slot cut into it, you should be able to take a cold chisel and hammer the sleeve out. It works best to turn the chisel at a 90 degree angle to the wall and try to push it down with the corner of the chisel. Cutting the slot seems to relieve enough pressure for it to slide out. If you bend the sleeve inwards, it tends to bind up and make it tighter...I tried that first and it took forever (photos below). Cut one slot and see if it slides out with a few hammer taps around the outer edge. I was able to remove one that was not bent or deformed at all, which is what I would recommend trying to do.
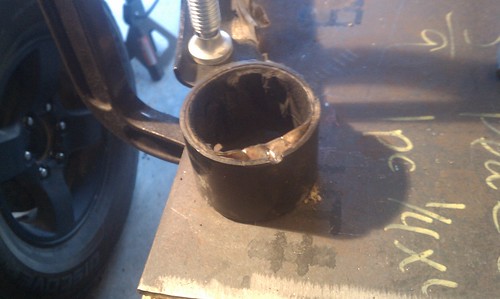

Note: Trying to bend the bushings inwards like this photo tends to bind up and make it more difficult. Cut one slot, and try to push straight down on the sleeve around the edges.
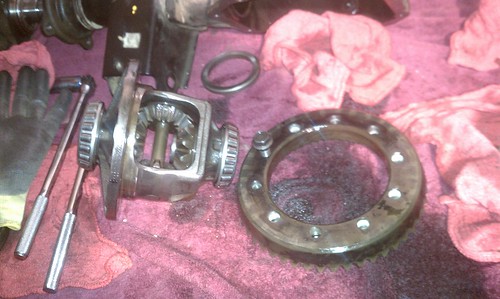
We will install the drop bushings as the last step before re-installing the differential…so you are now ready to move on to the Lokka!
Warning: Very thorough and a lot to read. Many of the steps were easier said than done, so I tried to elaborate on my technique and what did and didn't work for me.
The Lokka install is often coupled with diff drop bushings, seeing as the differential will already be removed. Phrog Man has an awesome write up on installing the diff drop bushings. I will add a few of my thoughts throughout the process, but still recommend checking his tutorial out for a more thorough walk through specific to the bushings. I will also go into the differential tear down and install of the Lokka gears. Special thanks to cmilano for his help in getting this done. I am dividing the “How To” into 4 phases:
1. Removing Differential
2. Removing Stock Bushings
3. Installing the Lokka
4. Reassembly
Original diff drop DIY
http://www.clubxterra.org/forums/showthread.php?t=31336
Lokka
http://lokka.com/site/
Diff Drop Bushings
https://www.4x4parts.com/nissan/front-differential-drop-drown-bushings-p-5272.html
Removing Differential
The differential assembly is held in by 4 mounting bolts. It is also bolted to the CV axles on each side, and the front drive shaft. I drove my Xterra up on ramps to get more room under the truck to move around. Remove any skid plates that may be blocking access to the differential area.
The first step is to tackle the front drive shaft bolts. There are four bolts and four nuts holding the drive shaft U-joint to the differential. Put the transfer case into 4hi and/or lock your 4WD hubs to lock the drive shaft from rotating. My hardware had red Loctite on them, and was extremely tight. Spray PB Blaster on the hardware and let it soak for a minute. Use a rag to wipe up any remaining drips of PB Blaster. Use a propane torch directly on the nut side of the hardware to heat the nut up enough so you can break it loose. It is a good idea to keep a spray bottle of water nearby in case the PB Blaster flares up. Use a 14mm wrench to crack the nut loose, and remove the nut and bolt. Return the transfer case to 2hi and/or unlock your 4WD hubs so you can rotate the drive shaft to access another bolt. Return the transfer case to 4hi and/or lock your 4WD hubs to lock the drive shaft, and repeat. If the bolts still won’t break loose, use more heat. I had to keep the torch on the nut for what seemed like minutes. Tie off the drive shaft to support it after all hardware is removed.
The CV axles are next. Each CV is held to the differential by 6 bolts, arranged in 3 groups of 2.
These bolts had blue Loctite on them but can be broken loose with a 12mm wrench. You need to lock your hubs to keep the CV axle from rotating when you put the wrench on it. If you have the stock auto locking hubs like I do, they will lock after a small amount of rotation. You will need to unlock your hubs to rotate the CV axle to access the other bolts. If you have the stock hubs you need to remove the outer hub with a 6mm hex wrench to rotate the CV axle. Re-install the outer hub to lock the CV axle in place. The outer hub should slide on smoothly all the way. If it doesn’t install completely, remove and try a new spline orientation. The hubs have to be aligned properly to completely sit flush on the hub. Repeat until both sides are completely unbolted. This can be tedious due to the amount of space you have to turn the wrench. Tie up the CV axles to the UCA to support them.
Note: If you have an impact wrench with an extension and a wobble joint, this will be a much faster task by removing the tires and going through the control arms with the wrench. Much quicker and easier.
There are four bolts supporting the differential assembly. There are two on the cross member near the drive shaft, and two in the front right above the center link. Spray the nuts with PB Blaster and let them soak. I was able to break the cross member bolts free with a 17mm socket with a breaker bar. A 17mm wrench is needed to hold the bolt head on the other side. I had to use the propane torch on the front two mounting bolts. Once again, with care, direct the torch flame directly at the nut. When it is hot enough, use the 17mm socket and 17mm wrench to break them free. Loosen all of the nuts, but leave the bolts in to hold the assembly up.
Alternative: You can leave the front two bushings bolted and unbolt the entire front cross member instead. This will make it much easier to assemble the differential later, as you will be able to lift it straight up without having to rotate it.
Use some pliers and a screw driver to remove the breather hose and clamp. This is on the front of the differential behind the oil filter.
The differential is now ready to be dropped down. I used this time to back the Xterra off the ramps, so there was less distance for the differential to fall down on me. There is no real delicate way to do this, but I used a hydraulic jack and a couple of jack stands. The bolts were easy to tap out of the mounts, but it is difficult to gracefully lower the differential assembly down. Stay out from under this thing unless you have an extra set of hands. It is an awkward shape with no really convenient center of gravity. The drive shaft side ended up dropping down first, and the rest of the differential assembly followed.
Removing Stock Bushings
The first step to installing the diff drop bushings is to remove the old ones. There is one bushing on the differential case, two on the attached cross member, and one still attached to the front of the vehicle frame. Remove the bushing from the frame with a 17mm socket so you can have all four bushings on a bench.
Remove the cross member from the differential housing using a 17mm wrench. Find your weapon of choice, and work on removing that rubber! I used a drill with a slow cutting speed close to the edge of the bushing. This seemed to rip the rubber off the outer metal sleeve, destroying more rubber in its path. I then used a propane torch to heat up the rubber making is softer, and went to work with a screw driver picking away at them. There is no science to this…however you want to destructively remove the rubber is up to you.
Once you remove the rubber core you need to get to work on the outer sleeve. Use a reciprocating saw or hack saw to cut a slot in the steel sleeve. With the sleeve having a slot cut into it, you should be able to take a cold chisel and hammer the sleeve out. It works best to turn the chisel at a 90 degree angle to the wall and try to push it down with the corner of the chisel. Cutting the slot seems to relieve enough pressure for it to slide out. If you bend the sleeve inwards, it tends to bind up and make it tighter...I tried that first and it took forever (photos below). Cut one slot and see if it slides out with a few hammer taps around the outer edge. I was able to remove one that was not bent or deformed at all, which is what I would recommend trying to do.
Note: Trying to bend the bushings inwards like this photo tends to bind up and make it more difficult. Cut one slot, and try to push straight down on the sleeve around the edges.
We will install the drop bushings as the last step before re-installing the differential…so you are now ready to move on to the Lokka!
Last edited:


") I thought while I have the diff out, I will replace my front CV axles since the rubber boots were shot. Of course, even with the diff removed, you still have to pop the upper ball joints to slide them out of the hub. So I might as well replace those since those rubber boots were shot. I also had to pop the outer tie rod ends out of the spindle to rotate the hub back enough to remove the CV joint...those are new for me...but you can see how it all snow balls
I thought while I have the diff out, I will replace my front CV axles since the rubber boots were shot. Of course, even with the diff removed, you still have to pop the upper ball joints to slide them out of the hub. So I might as well replace those since those rubber boots were shot. I also had to pop the outer tie rod ends out of the spindle to rotate the hub back enough to remove the CV joint...those are new for me...but you can see how it all snow balls