- Location
- machesney park IL
First some basics on the the breather. The breather is nothing more then a air vent for the rear axle. The breather equalizes the air inside of the diff case to the air outside as so its not under pressure. The axle heats up, hot air expands this pressure has to go somewhere. If it wasn't for the breather hot air would have to force it's way past the axle seals which would cause them to leak. So the breather vents this pressure.
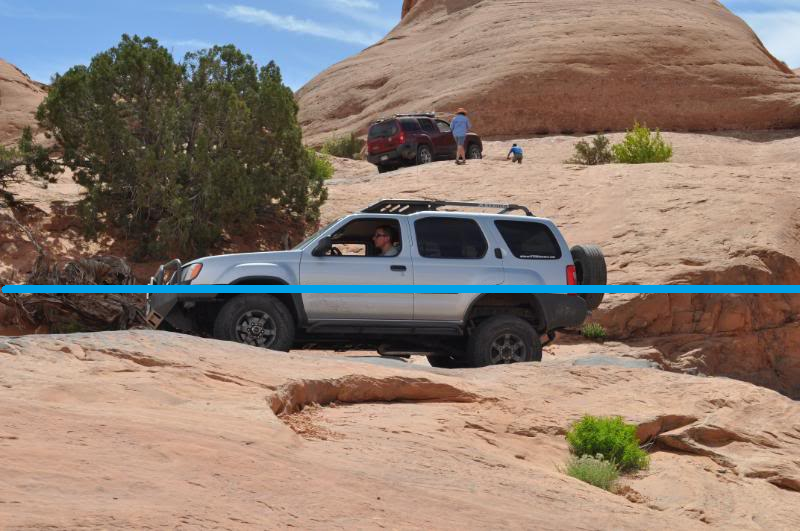
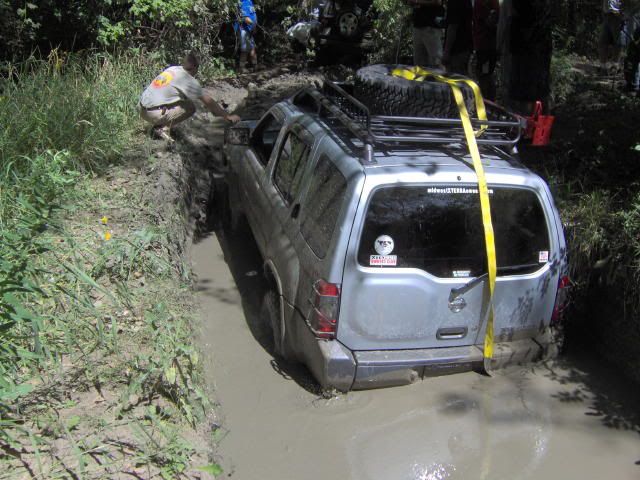
Whats wrong with the stock breather? The stock breather comes in two different designs according to model years the gen 1.0 version and the gen 1.5 version. The gen 1.0 is what I am documenting in these photos. The gen 1.0 allows the axle a fording depth of 30 inches (on my 3" lifted xterra) before water rushes in. You might say ahh I never ford water over 30 inches. But, face it crap happens. Say you get stuck in a mud pit and this water slowly seeps down the breather hose to the diff. You'll probably never know about it until it's to late. Meanwhile you'll be driving back and forth to work everyday with water in your gear oil until the gears or bearings fail. This exact situation happened to a fellow wheelin buddy in this mud pit. The bank was so steep on the way out it pushed the rear bumper under water on the exit. Two weeks later he had failure.
The Gen 1.5 uses a cap with no hose which puts the vent dangerously low.
So how might one prevent this issue from happening? By extending the breather hose to higher location of course.
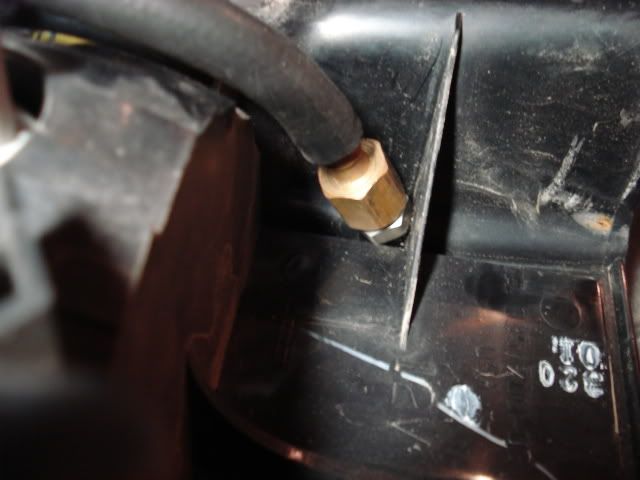
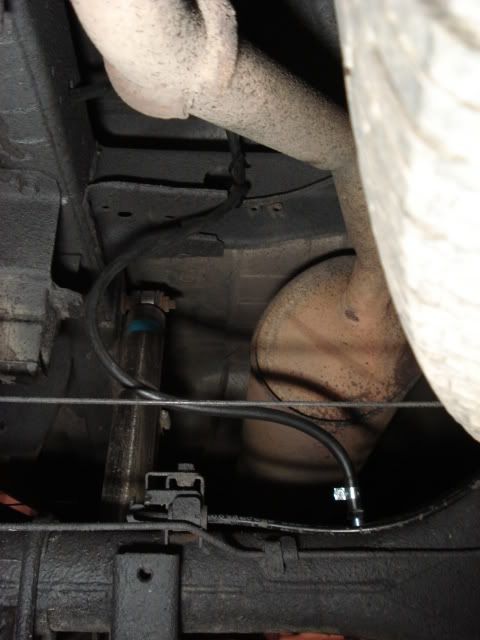
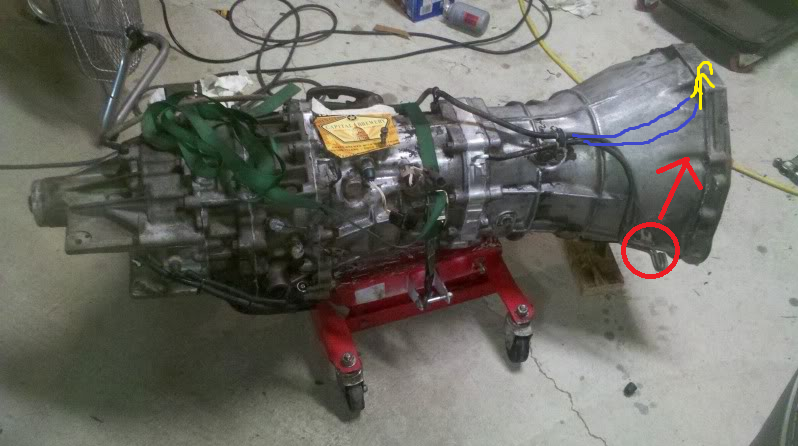
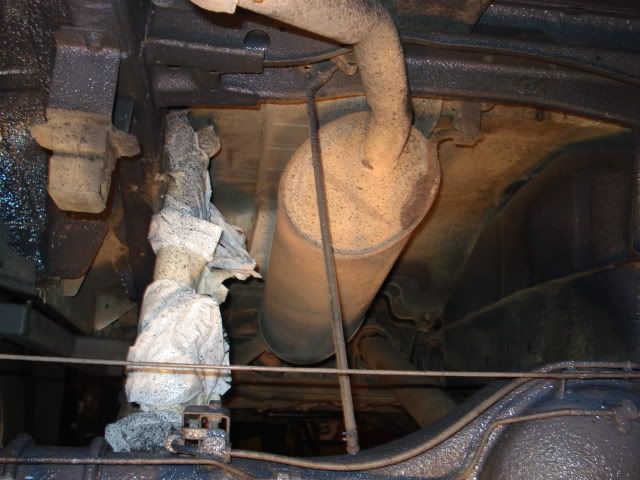
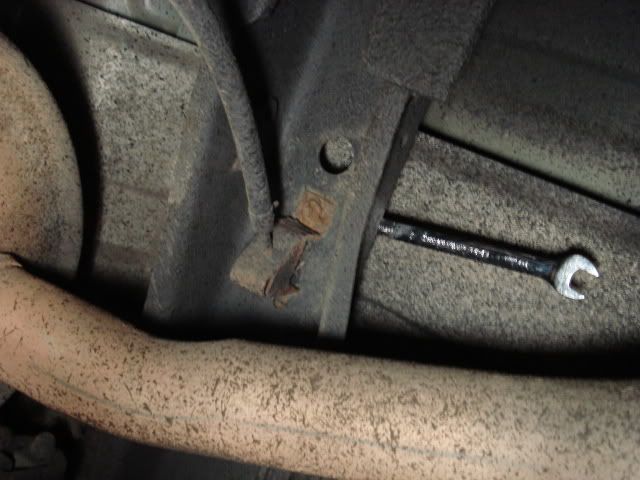
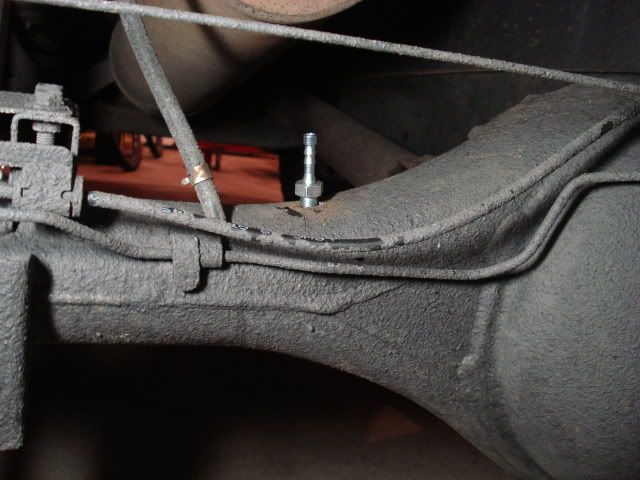
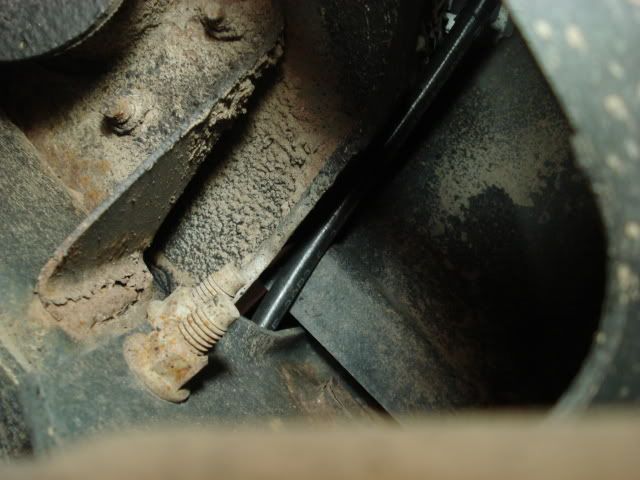
So start by climbing under your rig and locating the stock breather assembly.
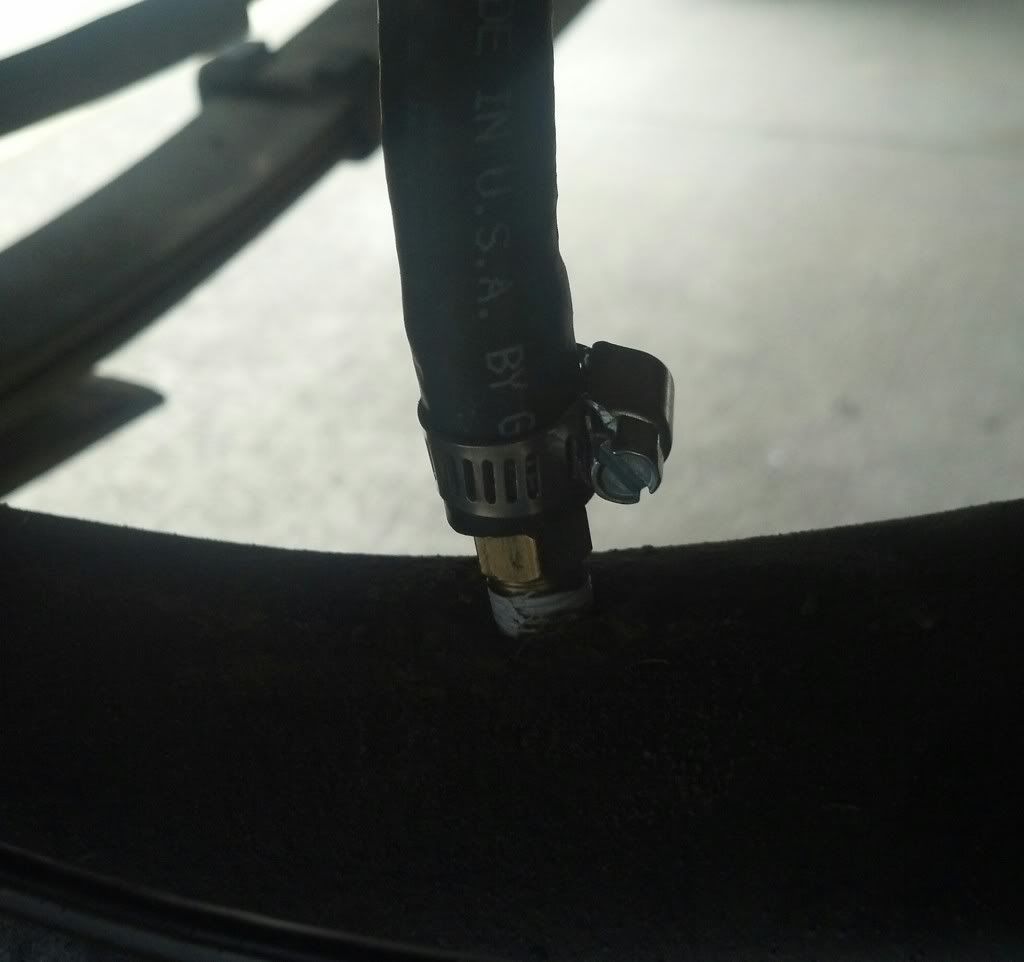
Remove the hose from the nipple. Its best to slit the hose with a razor as to not over stress the thin walls of the nipple.
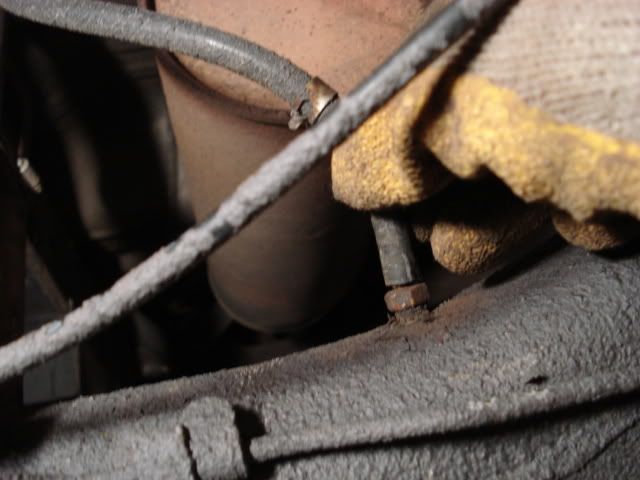
Or in my case bust the nipple off. Mine was a little rusted and as a result of trying to remove the hose it broke. If yours breaks remove it with a 13mm or 1/2" wrench.
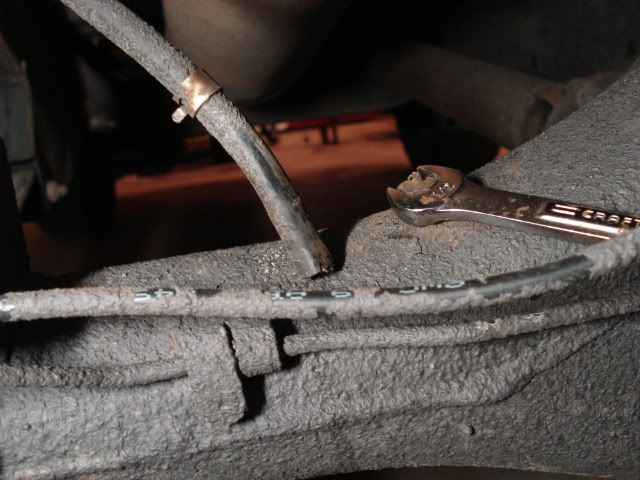
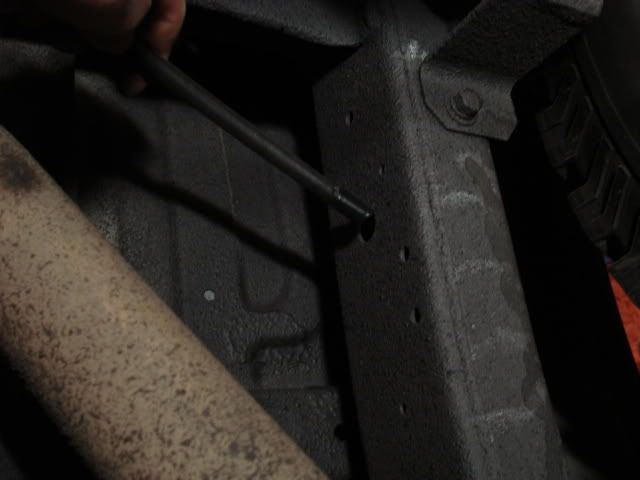
Reach over the frames cross member with a 10mm wrench to locate the screw to remove the breather assembly.
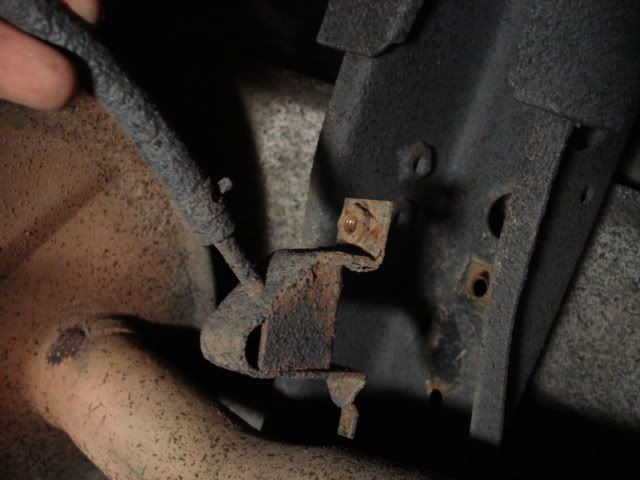
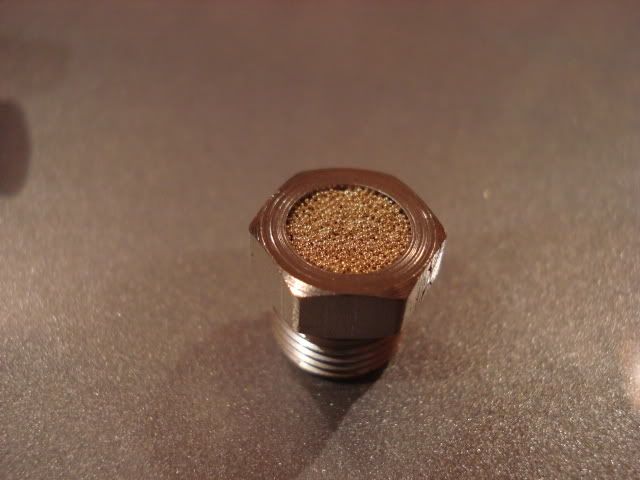
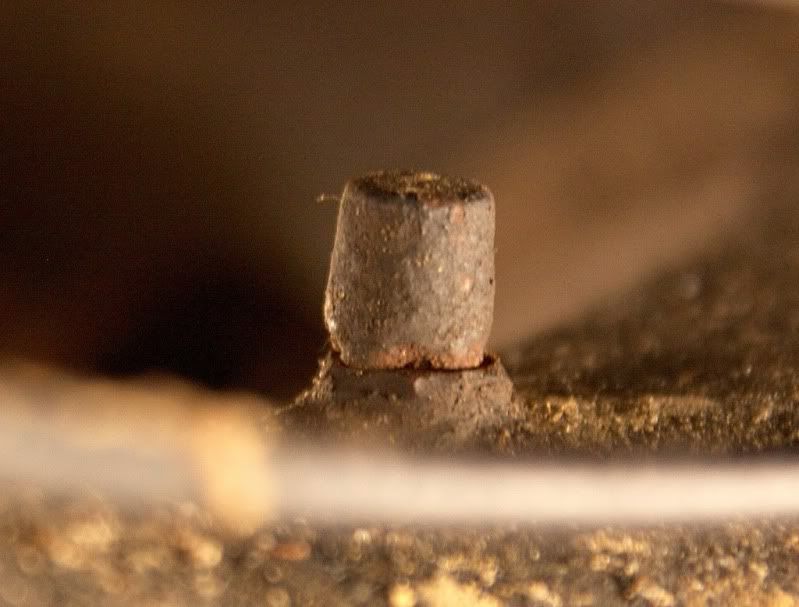
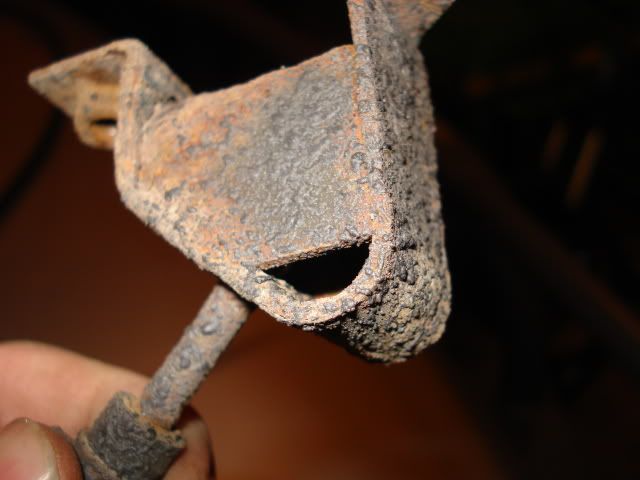
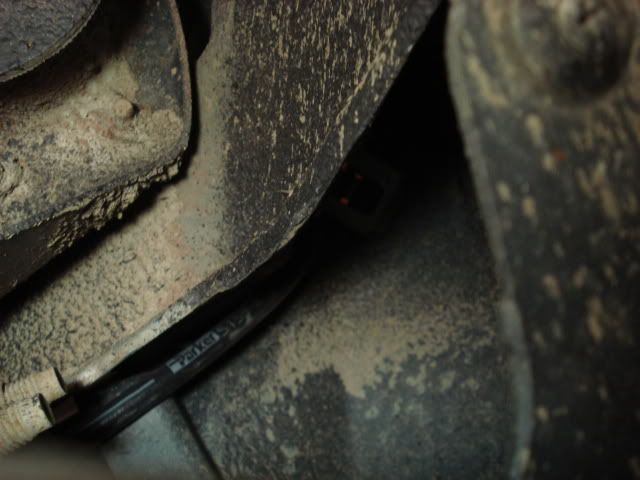
The design of the stock breather assembly is actually pretty ingenious. The bit of metal nipple extends to about the middle on that box. The box prevents water coming in. Much like putting a drinking glasses rim down in a bath of water, air gets trapped in the box and stops water from coming in. But, of course if its just little sideways water pours into the box. I debated to reuse this device but found it unnecessary.
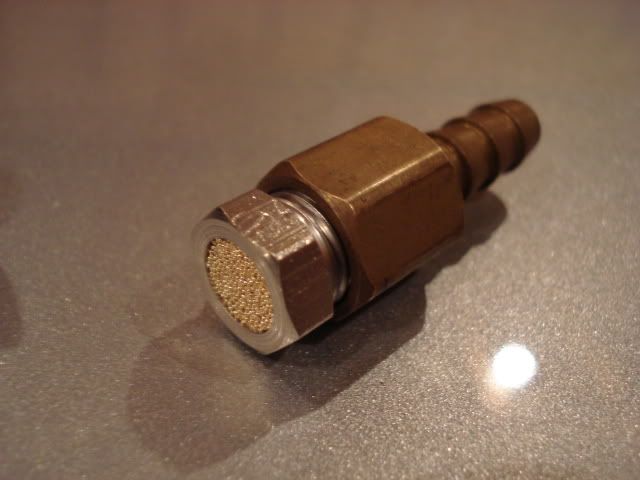
When shopping for new nipples you have a few options. I found the brass one at a local hardware store. I was just uncertain say worst case scenario a branch grabs a hold of the line, if it would survive as well as steel. The nipples were each under $2. I special ordered the steel nipple from Mcmaster.com
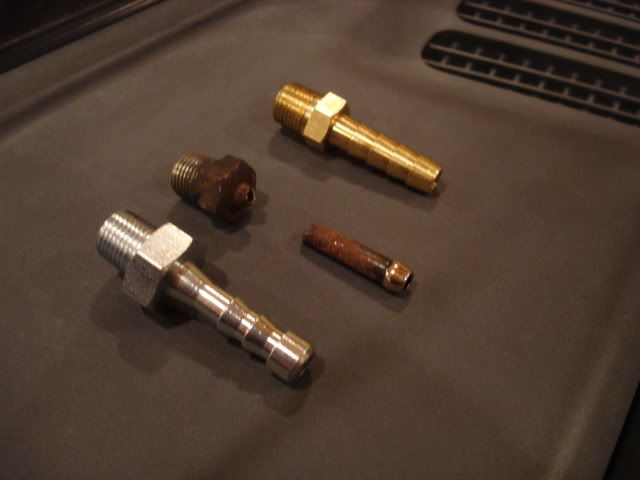
I couldn't completely find a exact match. 1/8 NPT was as close as I could find to stock nipple. The thread pitch is the same the taper of the threads is a little different.
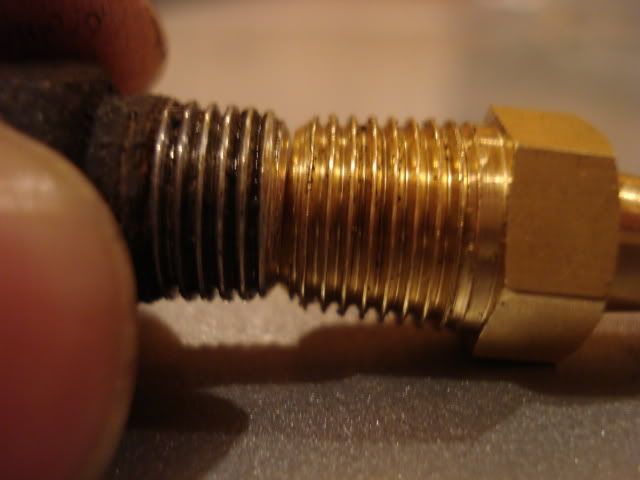
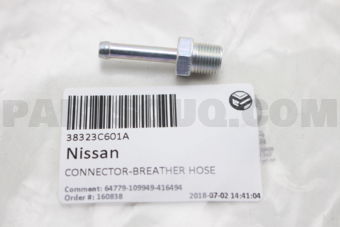
As a result the new nipples will only thread in about 1/4 of a inch. Which is plenty as that is close to the thickness of the axle tube. If it really bothers you, you could run a 1/8 NPT tap down the hole to adjust the taper. Or you could locate the correct fitting though probably more expensive. Or reuse the stock one. Or order a new stock one part number 38323-C601A , its around $3, threads in with no problems at all. Pipe dope or Teflon tape is recommended for the threads.
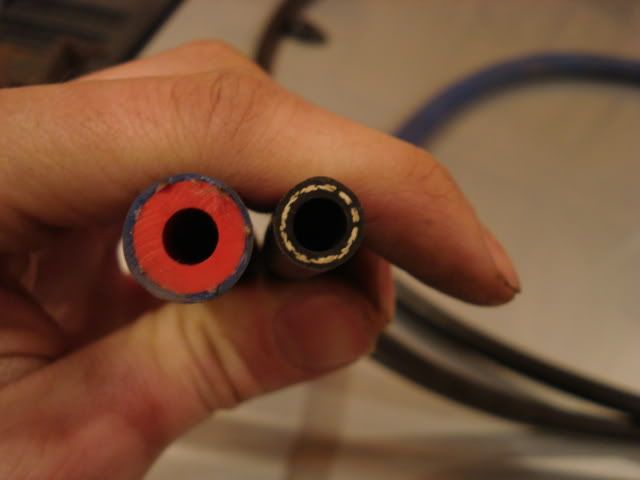
Buy 8 feet of rubber hose. I used 1/4 rubber hose.
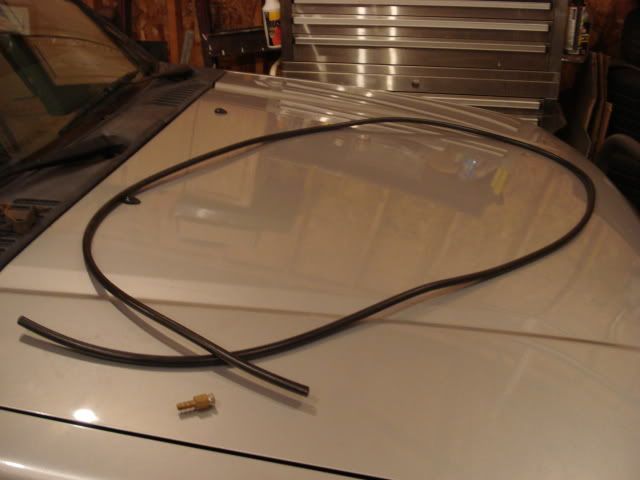
Wall thickness is your choice, I chose 3/8 OD as its closest to stock and remains very flexible which might make it have less of a chance of cracking or over stressing the nipple. Most hardware stores will sell you 1/2 OD as it more common. Stay with a hose deigned for petroleum, like fuel line hose, the hose has to be able to take the fumes of gear oil and withstand a aggressive weathering environment.
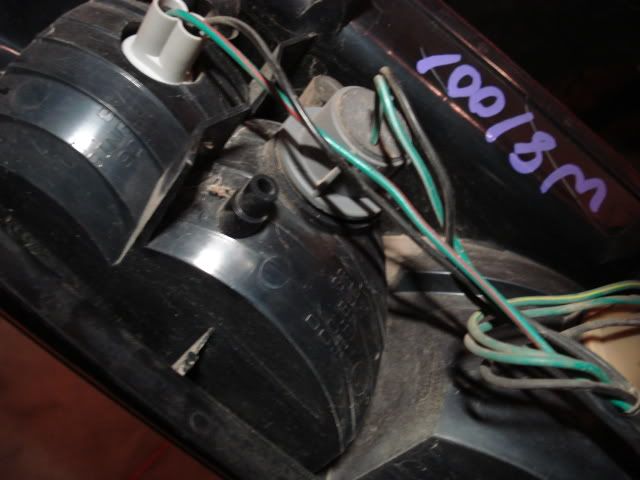
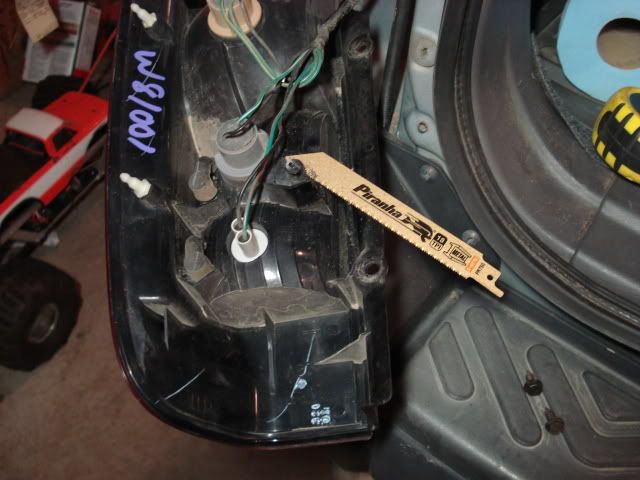
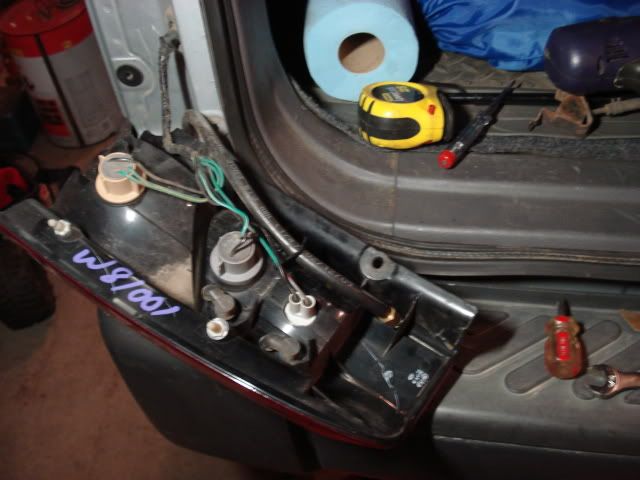
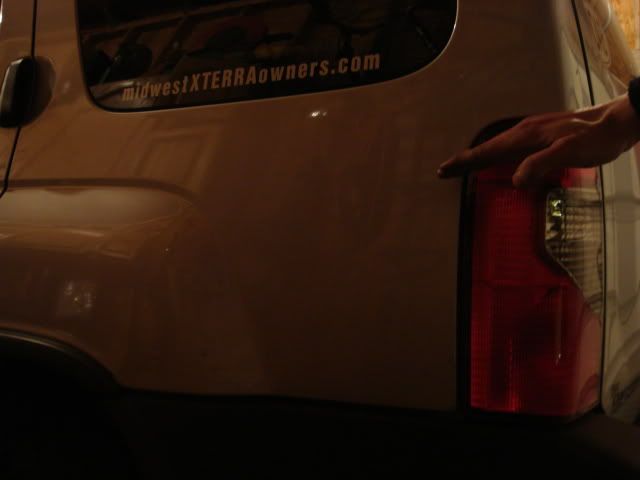
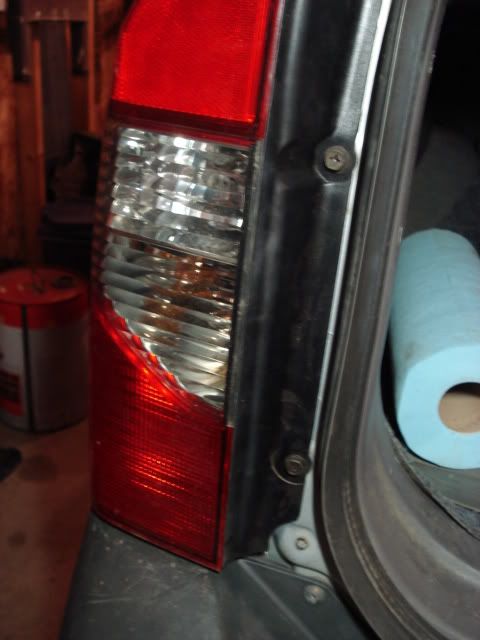
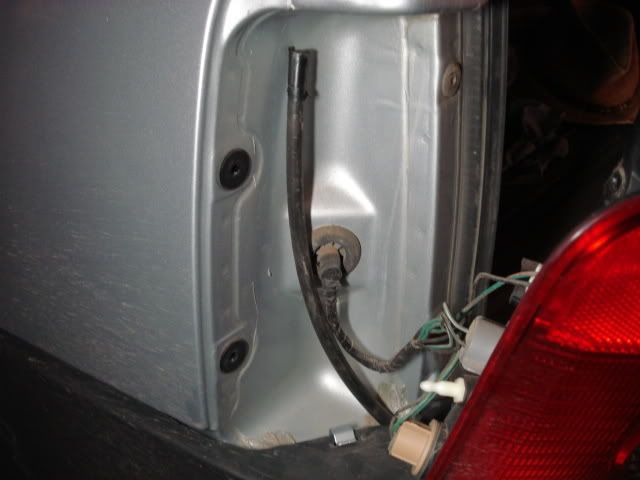
Start by removing the tail light. Remove the two Phillips head screws visible in the pic. After removing the screws pull directly straight back to release the tail light. You can either remove the tail light or just leave it there to hang out as I did.
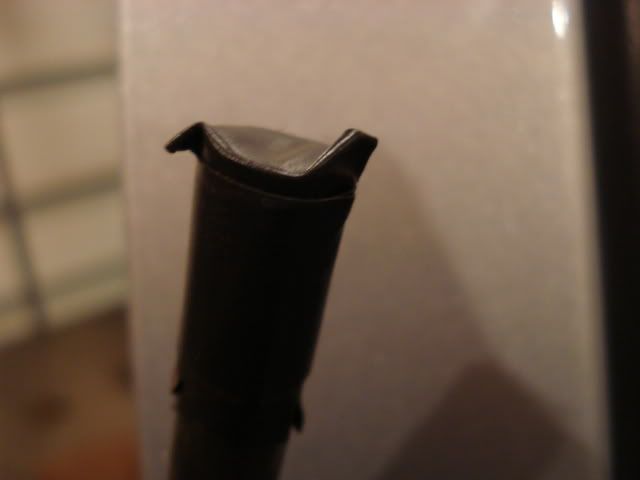
Tape off the end of the hose you plan to use. I did this so that the dirt in the frame won't find it's way into the tube.
Insert the tube into the frame hole just behind the cross member.
Push hose in until you see a pretty large section coming out the back of the rail near the rear shackle.

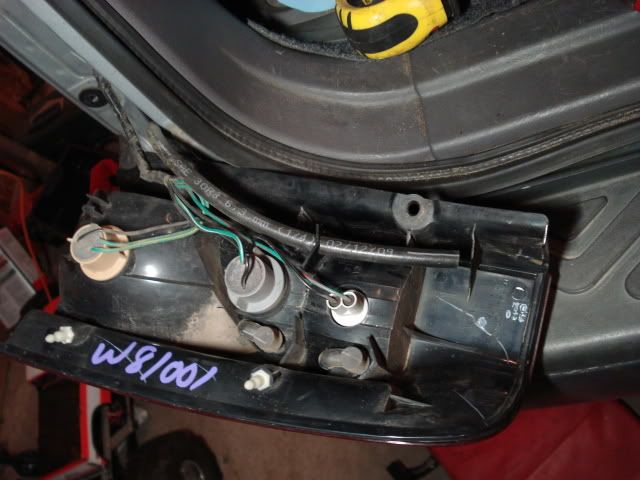
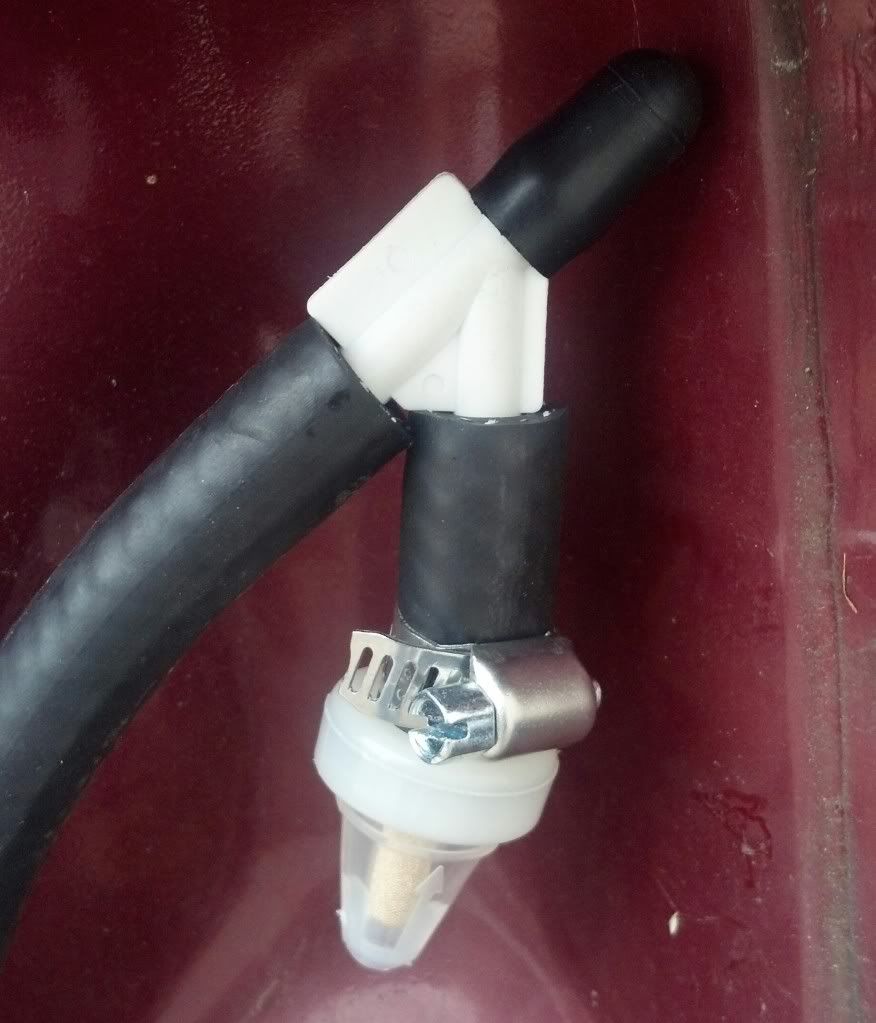
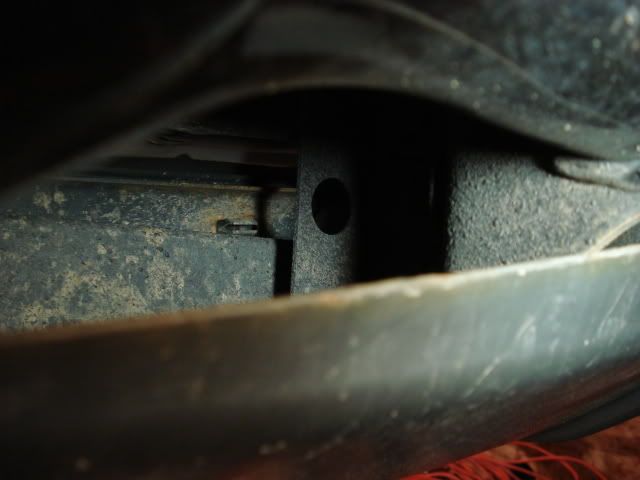
At the end of the rail there is hole facing straight up. Insert the tube into the hole and thread it over the frame towards the bumperette.
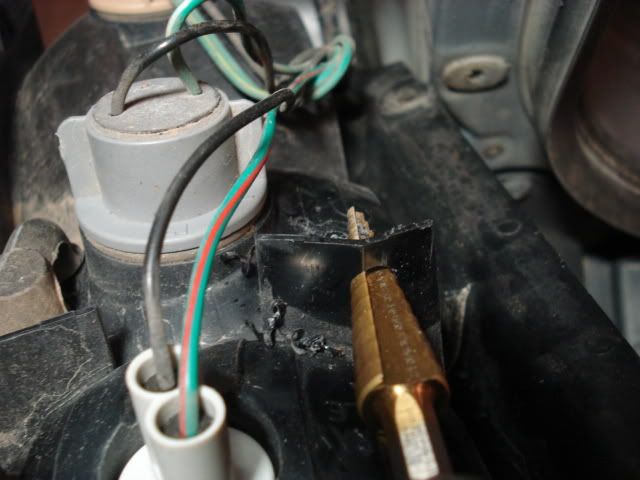
Thread it between the bumperette and the tail lamp assembly.
Whats wrong with the stock breather? The stock breather comes in two different designs according to model years the gen 1.0 version and the gen 1.5 version. The gen 1.0 is what I am documenting in these photos. The gen 1.0 allows the axle a fording depth of 30 inches (on my 3" lifted xterra) before water rushes in. You might say ahh I never ford water over 30 inches. But, face it crap happens. Say you get stuck in a mud pit and this water slowly seeps down the breather hose to the diff. You'll probably never know about it until it's to late. Meanwhile you'll be driving back and forth to work everyday with water in your gear oil until the gears or bearings fail. This exact situation happened to a fellow wheelin buddy in this mud pit. The bank was so steep on the way out it pushed the rear bumper under water on the exit. Two weeks later he had failure.
The Gen 1.5 uses a cap with no hose which puts the vent dangerously low.
So how might one prevent this issue from happening? By extending the breather hose to higher location of course.
So start by climbing under your rig and locating the stock breather assembly.
Remove the hose from the nipple. Its best to slit the hose with a razor as to not over stress the thin walls of the nipple.
Or in my case bust the nipple off. Mine was a little rusted and as a result of trying to remove the hose it broke. If yours breaks remove it with a 13mm or 1/2" wrench.
Reach over the frames cross member with a 10mm wrench to locate the screw to remove the breather assembly.
The design of the stock breather assembly is actually pretty ingenious. The bit of metal nipple extends to about the middle on that box. The box prevents water coming in. Much like putting a drinking glasses rim down in a bath of water, air gets trapped in the box and stops water from coming in. But, of course if its just little sideways water pours into the box. I debated to reuse this device but found it unnecessary.
When shopping for new nipples you have a few options. I found the brass one at a local hardware store. I was just uncertain say worst case scenario a branch grabs a hold of the line, if it would survive as well as steel. The nipples were each under $2. I special ordered the steel nipple from Mcmaster.com
I couldn't completely find a exact match. 1/8 NPT was as close as I could find to stock nipple. The thread pitch is the same the taper of the threads is a little different.
As a result the new nipples will only thread in about 1/4 of a inch. Which is plenty as that is close to the thickness of the axle tube. If it really bothers you, you could run a 1/8 NPT tap down the hole to adjust the taper. Or you could locate the correct fitting though probably more expensive. Or reuse the stock one. Or order a new stock one part number 38323-C601A , its around $3, threads in with no problems at all. Pipe dope or Teflon tape is recommended for the threads.
Buy 8 feet of rubber hose. I used 1/4 rubber hose.
Wall thickness is your choice, I chose 3/8 OD as its closest to stock and remains very flexible which might make it have less of a chance of cracking or over stressing the nipple. Most hardware stores will sell you 1/2 OD as it more common. Stay with a hose deigned for petroleum, like fuel line hose, the hose has to be able to take the fumes of gear oil and withstand a aggressive weathering environment.
Start by removing the tail light. Remove the two Phillips head screws visible in the pic. After removing the screws pull directly straight back to release the tail light. You can either remove the tail light or just leave it there to hang out as I did.
Tape off the end of the hose you plan to use. I did this so that the dirt in the frame won't find it's way into the tube.
Insert the tube into the frame hole just behind the cross member.
Push hose in until you see a pretty large section coming out the back of the rail near the rear shackle.
At the end of the rail there is hole facing straight up. Insert the tube into the hole and thread it over the frame towards the bumperette.
Thread it between the bumperette and the tail lamp assembly.