SlvrGen1_X
Test Drive
- Location
- Las Vegas
So with my recent trip to to Moab, UT for goneMOAB and several other wheeling trips around the southwest, I realized it was time to replace my clutch yet again. When I made this decision, I realized that there was no write up in the "How-To" sections of the different forums out there and after talking to a few friends with 1st Gen's that drive manuals I decided it would be a great time to do a How-To on it. I have taken a lot of pictures of the removal and few if any of the install. The reason being because the install is literally the complete opposite of it; so if you can remove it, you should be able to install it in the opposite order. Just below I have created a list of suggest tools and parts to accomplish this task.
TOOLS:
1/2" Drive Ratchet
1/2" Drive Breaker Bar
1/2" Drive 3", 6", 9" Extension (If you have or can find a 12", that too)
1/2" Drive Sockets:
21mm Deep
19mm Deep/Shallow
17mm Deep/Shallow
14mm Deep/Shallow
12mm Shallow
3/8" Drive Ratchet
3/8" Drive Breaker bar
3/8" Drive 3" & 2x 6" Extensions
3/8" Drive Sockets:
14mm Deep/Shallow
13mm Deep/Shallow
12mm Deep/Shallow
10mm Shallow
1/4" Drive Ratchet
1/4" Drive Sockets:
14mm Shallow
10mm Shallow
Wrenches:
19mm
17mm
14mm
13mm
12mm
10mm Reg./Stubby
Snap Ring Pliers
Different Size Pry Bars
Cheater Bar
Mini Sledge
Floor Jack
Engine Hoist
Jack Stands
Transmission Jack
Slide Hammer
Pilot Bushing Removal Tool
Couple Blocks of wood (Pressure Treated 4x4 works best usually)
Shop Press
1/2" Drive Impact Wrench (Cordless or Pneumatic)
Drain Pans for a lot of oil!!!
If you don't have these tools, it isn't a problem. Generally you can rent some of the specialty tools at O'Reilly Auto or Autozone. When I rented mine they basically told me if I wanted to keep the slide hammer and Pilot Bushing Removal Tool that I could and wouldn't get my money back; which is what I chose to do. Came out to be roughly 50 bucks for the two at O'Reilly. A while ago I purchased a cordless Impact Wrench/Drill Combo Kit from Craftsman for 240 Bucks. I will say and so will my buddy who helped me that the cordless impact wrench worked flawlessly and only switched batteries once. Highly recommend this tool! For the other stuff like the engine hoist, transmission jack, and shop press, I purchesed over the course of a few years because of other projects. These can be found at Harbor Freight for relatively low price: Trans jack (165) 12 Ton Shop Press w/ Plates (120) and 2 Ton Engine Hoist (150).
Clutch Parts:
Clutch Kit (Clutch Disk/Pressure Plate)
Throw Out Bearing
Pilot Bushing
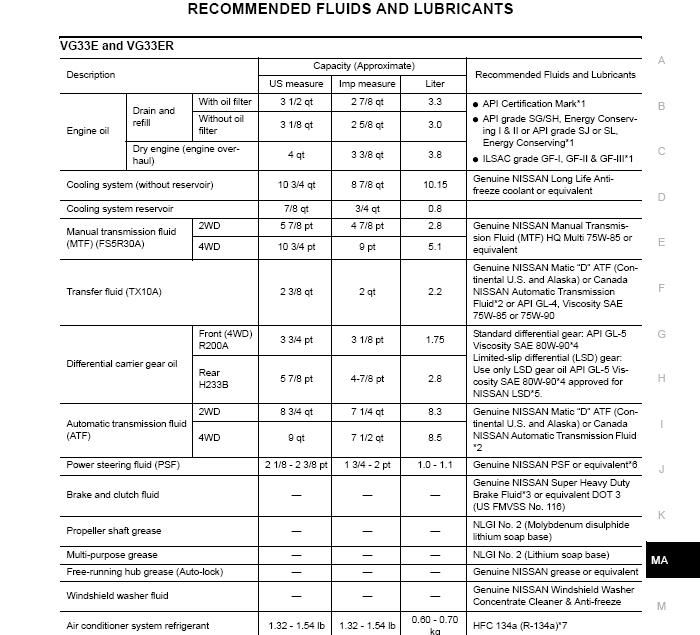
Gear Oil (Trans takes 5 3/8 qts roughly)
ATF (T-Case takes 2 1/2 qts roughly)
WD-40
QD Electrical Connector Cleaner
Brake Cleaner
A couple other tips for this install is to have plenty of time to complete this. If you're completing this on a flat bay I would suggest giving yourself a full two days to compensate for errors. I would also strongly suggest having a second set of hands or even a third; granted it can get pretty crowded underneath the X. This is my third time removing the transmission, but first time without a vehicle lift. This time it took me about 13 hours of total time including food breaks. Anyways time to get into it so here goes.
Step 1: Disconnect Negative battery connector
Step 2: Set Parking Brake and chaulk rear tires
Step 3: If equipped, remove front/radiator skid, engine/trans skid, and t-case skid
Step 4: Drain Transmission and Transfer Case
Step 5: Disassemble interior center console while fluids are draining.
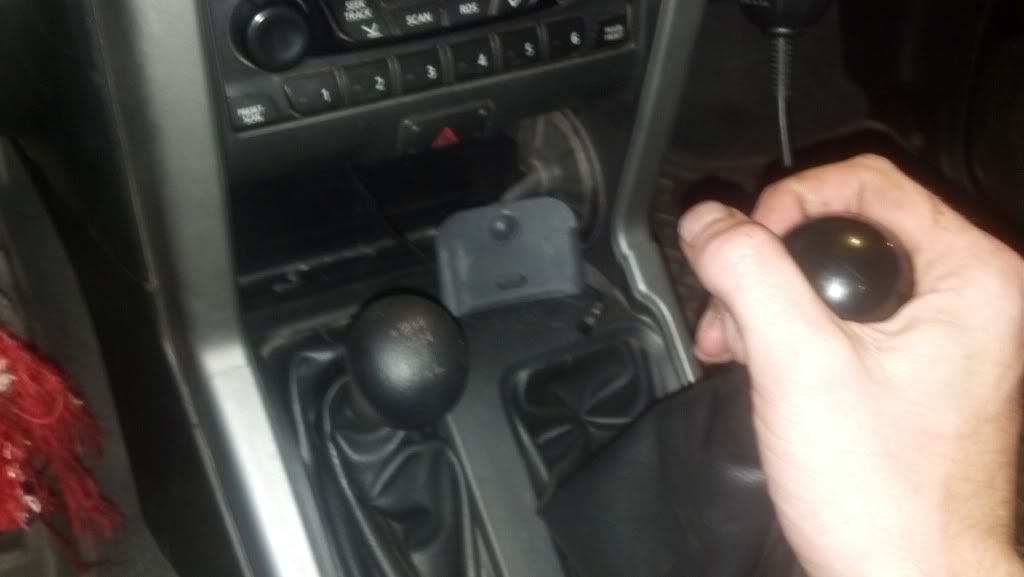
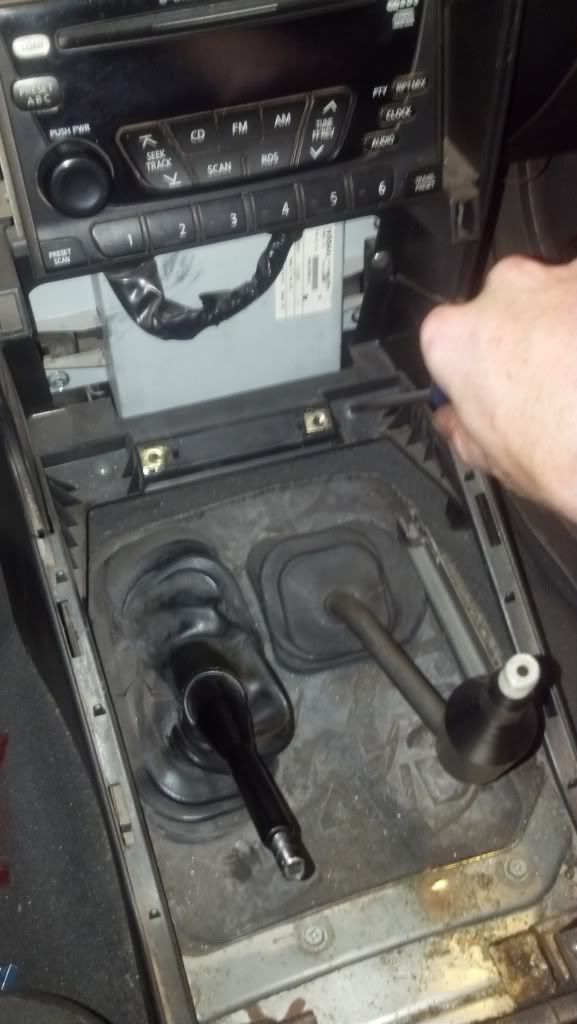
Remove both Transfer Case and Transmission Shift Knobs by twisting off.
Remove Shifter Cover Plate by giving it a slight yank upwards. Its held down by 4 compression clips.
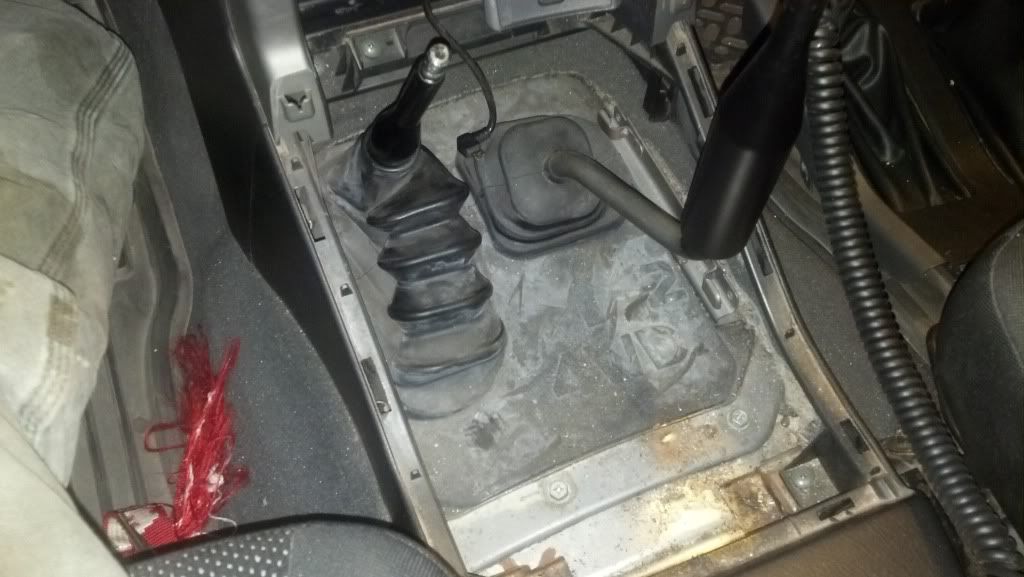
It should look like this afterwards
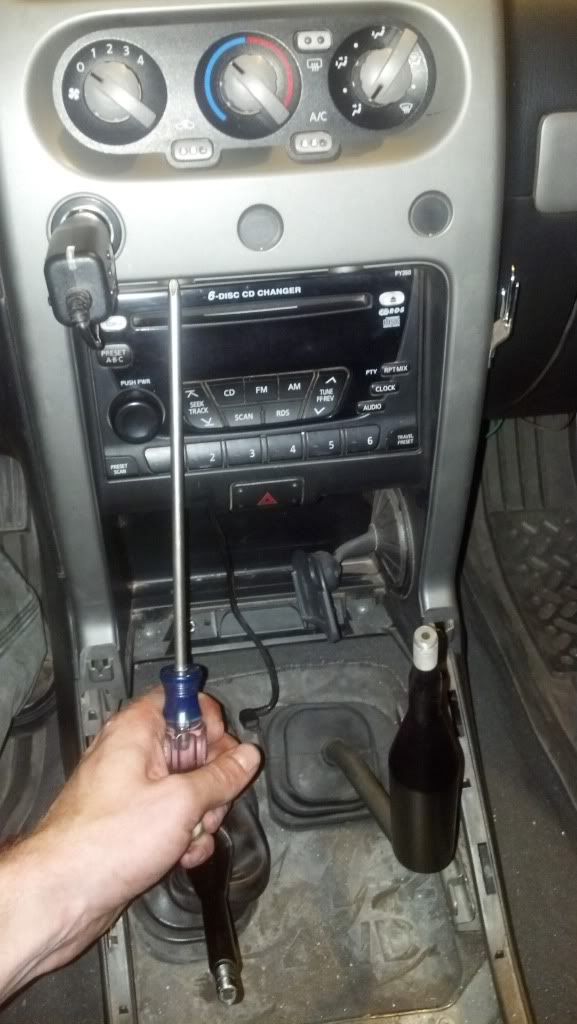
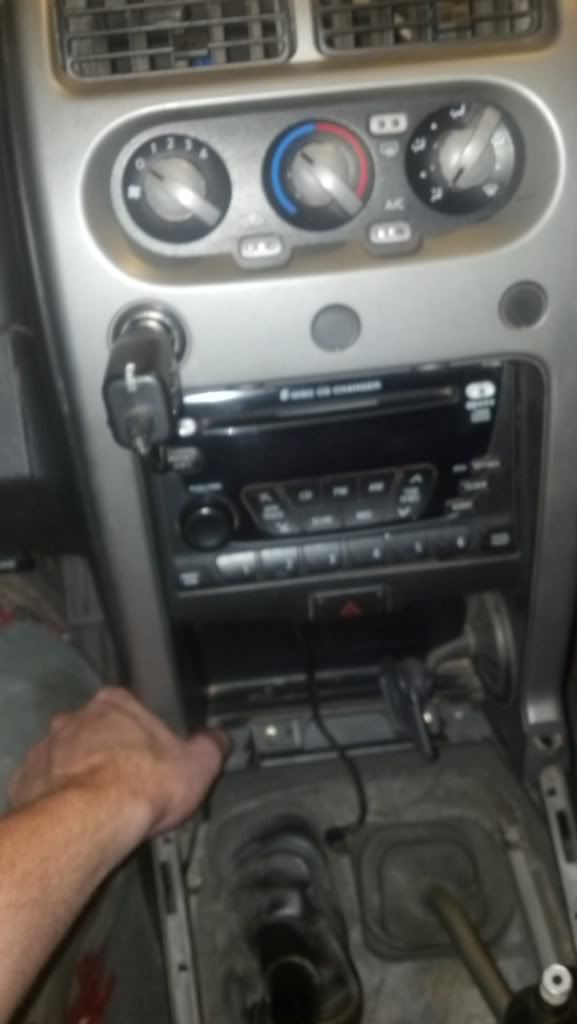
Next remove the center dash cover panel. There are a total of 4 screws that hold it in. The first two are on the bottom of the cover, located here:

The second to are just above the head unit, located here:
Once the four screws have been removed you can then give it a yank towards you and it should pop out just like the shifter cover plate.
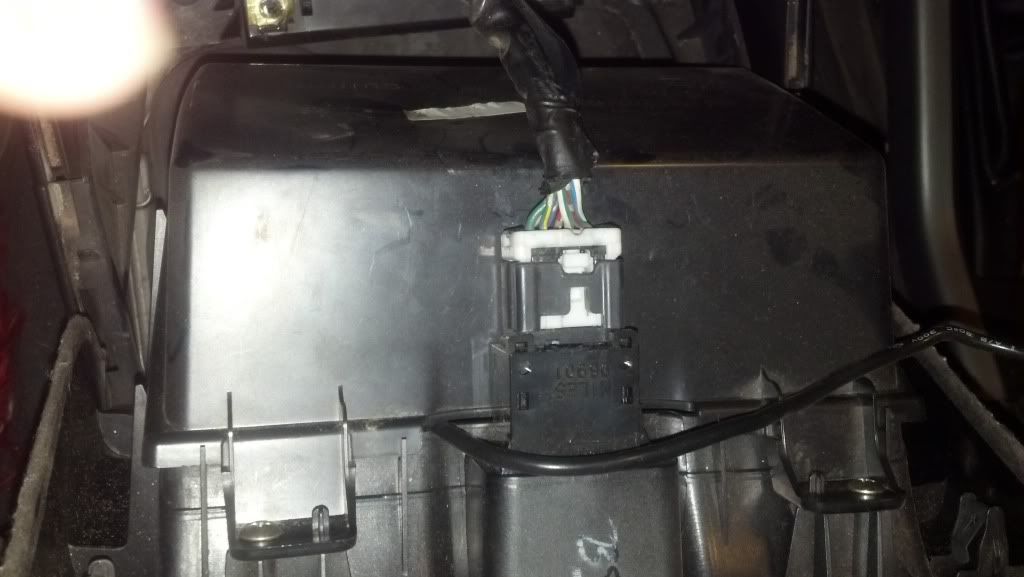
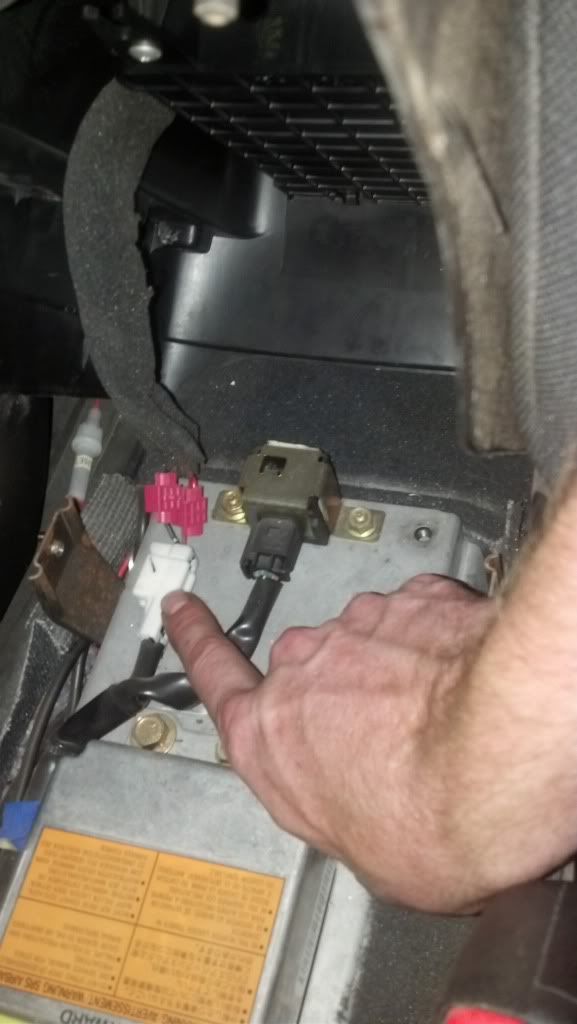
After it has been removed from the dash there will be two electrical connectors you will need to remove; 12v accessory (not pictured) and hazards switch.
Next will be the center console. There are six screws and one electrical connection that hold this in place.
The first two are located at the back of the console, you will need to move the front seats forward to access these.
Driver side:
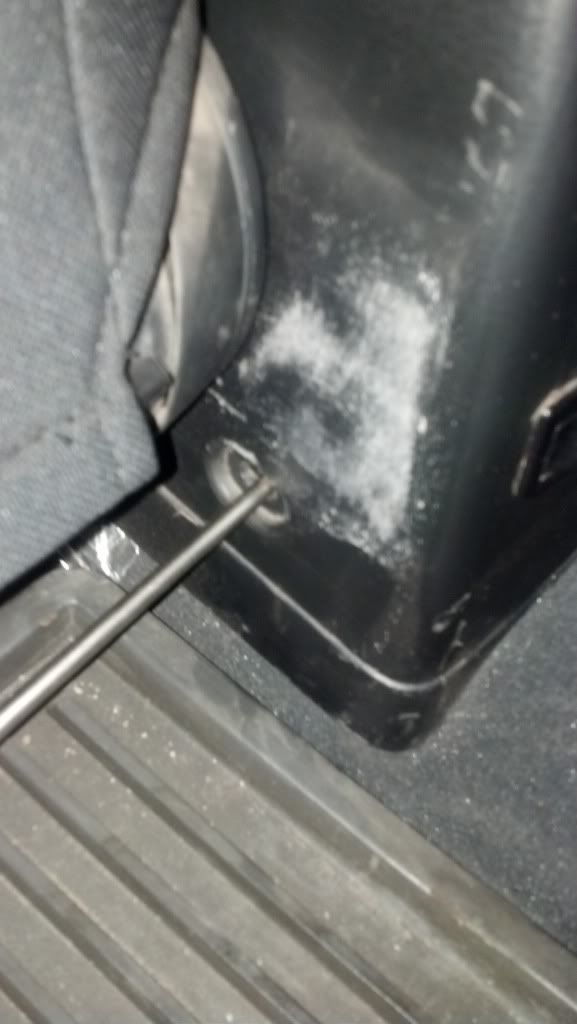
Passenger Side:

Next two are located right in front of the cup holders
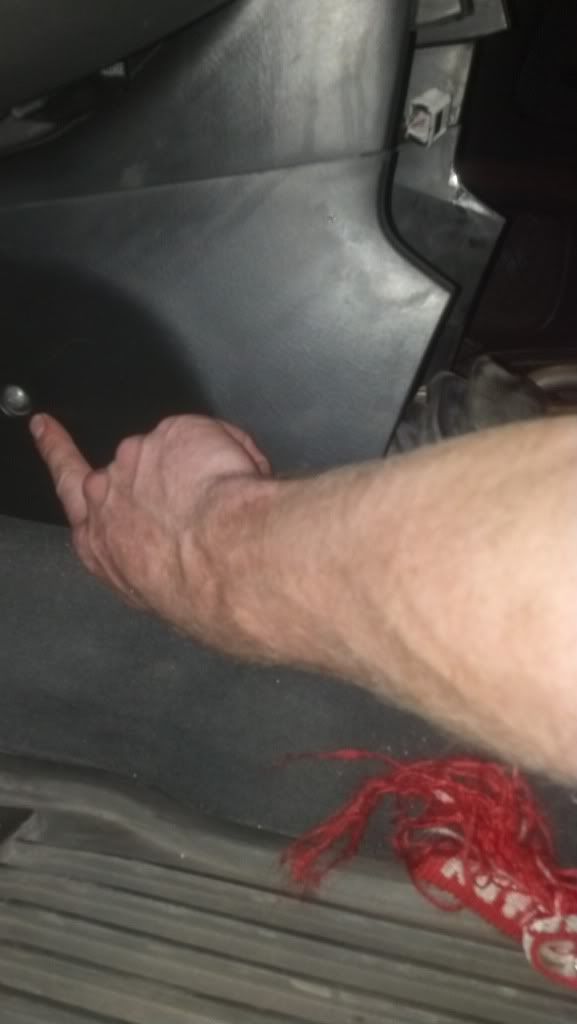
The last two are located towards the front, just in front of the shifters
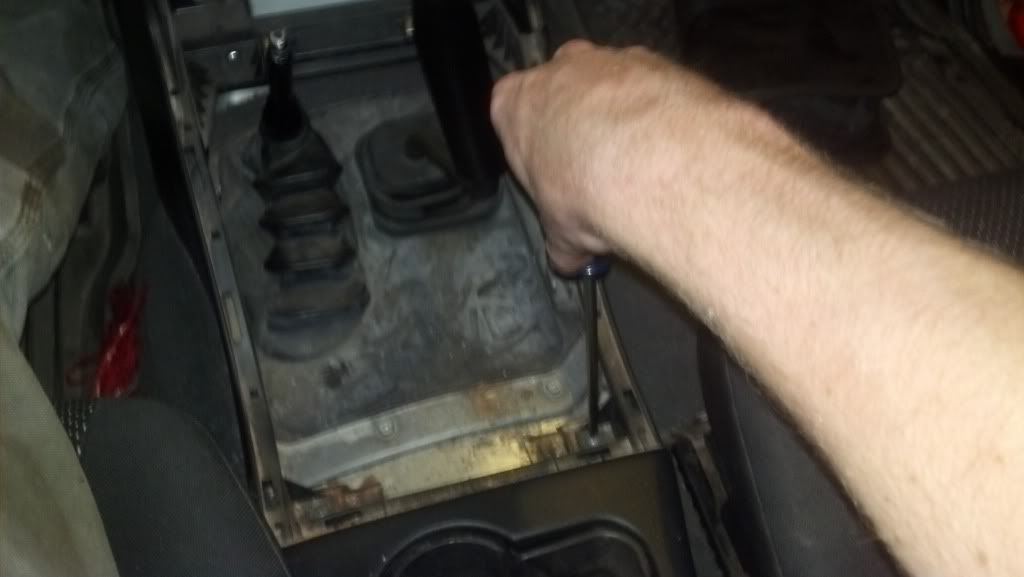
After all of the screws have been removed from the center console, you will need to lift it up at the same time as moving it back. Once you are clear from the dash you will need to lift the nose straight up and make it vertical. TIP: Make sure all of your change or any other items are removed from the center console. At this time you should be able to see the 12v accessory connector fastened to the transmission tunnel. This will need to be disconnected.
Next you will need to remove the lower forward dash cover. This is held on by 4 screws.
First two located on the sides of the computer just below the head unit.

The last two located on the cowls side; driver and passenger near the floor vents
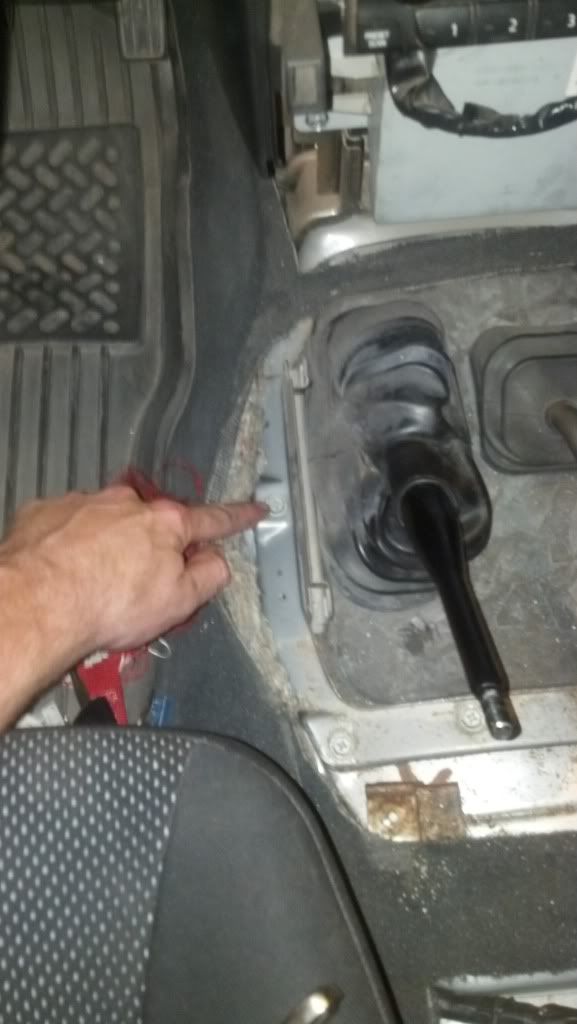
Once all of the center console has been removed you will need to remove the weather seal bracket and weather seal, The bracket is held on by seven 10mm machine screws. There are two located on the sides of the bracket, here:
two located under the head unit and 3 located opposite of this (not pictured)

TOOLS:
1/2" Drive Ratchet
1/2" Drive Breaker Bar
1/2" Drive 3", 6", 9" Extension (If you have or can find a 12", that too)
1/2" Drive Sockets:
21mm Deep
19mm Deep/Shallow
17mm Deep/Shallow
14mm Deep/Shallow
12mm Shallow
3/8" Drive Ratchet
3/8" Drive Breaker bar
3/8" Drive 3" & 2x 6" Extensions
3/8" Drive Sockets:
14mm Deep/Shallow
13mm Deep/Shallow
12mm Deep/Shallow
10mm Shallow
1/4" Drive Ratchet
1/4" Drive Sockets:
14mm Shallow
10mm Shallow
Wrenches:
19mm
17mm
14mm
13mm
12mm
10mm Reg./Stubby
Snap Ring Pliers
Different Size Pry Bars
Cheater Bar
Mini Sledge
Floor Jack
Engine Hoist
Jack Stands
Transmission Jack
Slide Hammer
Pilot Bushing Removal Tool
Couple Blocks of wood (Pressure Treated 4x4 works best usually)
Shop Press
1/2" Drive Impact Wrench (Cordless or Pneumatic)
Drain Pans for a lot of oil!!!
If you don't have these tools, it isn't a problem. Generally you can rent some of the specialty tools at O'Reilly Auto or Autozone. When I rented mine they basically told me if I wanted to keep the slide hammer and Pilot Bushing Removal Tool that I could and wouldn't get my money back; which is what I chose to do. Came out to be roughly 50 bucks for the two at O'Reilly. A while ago I purchased a cordless Impact Wrench/Drill Combo Kit from Craftsman for 240 Bucks. I will say and so will my buddy who helped me that the cordless impact wrench worked flawlessly and only switched batteries once. Highly recommend this tool! For the other stuff like the engine hoist, transmission jack, and shop press, I purchesed over the course of a few years because of other projects. These can be found at Harbor Freight for relatively low price: Trans jack (165) 12 Ton Shop Press w/ Plates (120) and 2 Ton Engine Hoist (150).
Clutch Parts:
Clutch Kit (Clutch Disk/Pressure Plate)
Throw Out Bearing
Pilot Bushing
Gear Oil (Trans takes 5 3/8 qts roughly)
ATF (T-Case takes 2 1/2 qts roughly)
WD-40
QD Electrical Connector Cleaner
Brake Cleaner
A couple other tips for this install is to have plenty of time to complete this. If you're completing this on a flat bay I would suggest giving yourself a full two days to compensate for errors. I would also strongly suggest having a second set of hands or even a third; granted it can get pretty crowded underneath the X. This is my third time removing the transmission, but first time without a vehicle lift. This time it took me about 13 hours of total time including food breaks. Anyways time to get into it so here goes.
Step 1: Disconnect Negative battery connector
Step 2: Set Parking Brake and chaulk rear tires
Step 3: If equipped, remove front/radiator skid, engine/trans skid, and t-case skid
Step 4: Drain Transmission and Transfer Case
Step 5: Disassemble interior center console while fluids are draining.
Remove both Transfer Case and Transmission Shift Knobs by twisting off.

Remove Shifter Cover Plate by giving it a slight yank upwards. Its held down by 4 compression clips.

It should look like this afterwards
Next remove the center dash cover panel. There are a total of 4 screws that hold it in. The first two are on the bottom of the cover, located here:

The second to are just above the head unit, located here:

Once the four screws have been removed you can then give it a yank towards you and it should pop out just like the shifter cover plate.

After it has been removed from the dash there will be two electrical connectors you will need to remove; 12v accessory (not pictured) and hazards switch.

Next will be the center console. There are six screws and one electrical connection that hold this in place.
The first two are located at the back of the console, you will need to move the front seats forward to access these.
Driver side:

Passenger Side:

Next two are located right in front of the cup holders

The last two are located towards the front, just in front of the shifters

After all of the screws have been removed from the center console, you will need to lift it up at the same time as moving it back. Once you are clear from the dash you will need to lift the nose straight up and make it vertical. TIP: Make sure all of your change or any other items are removed from the center console. At this time you should be able to see the 12v accessory connector fastened to the transmission tunnel. This will need to be disconnected.

Next you will need to remove the lower forward dash cover. This is held on by 4 screws.
First two located on the sides of the computer just below the head unit.

The last two located on the cowls side; driver and passenger near the floor vents

Once all of the center console has been removed you will need to remove the weather seal bracket and weather seal, The bracket is held on by seven 10mm machine screws. There are two located on the sides of the bracket, here:

two located under the head unit and 3 located opposite of this (not pictured)

Last edited:


") (ATF also works of course)
(ATF also works of course)