
Here is the How to for a 2 inch lift with spacers and Add A Leaf on a second generation Xterra. ")

I’m sure you have heard about the lower front shock bolts not wanting to come off. It is a really good idea to start hitting all of the bolts with PB Blaster at LEAST 2 weeks before you plan to do your lift. I did this and was able to break both lower bolts off with a breaker bar and cheater bar. Also you will want to clear all of your bolt threads of dirt and Wooly’s mud.
It is not a bad idea to plan on having to cut the bolts off. There are places to order them online and save you some cash. I went to Nissan and got hosed on my nuts and bolts. (I didn’t need them, but it was good to know I had them if I did.)
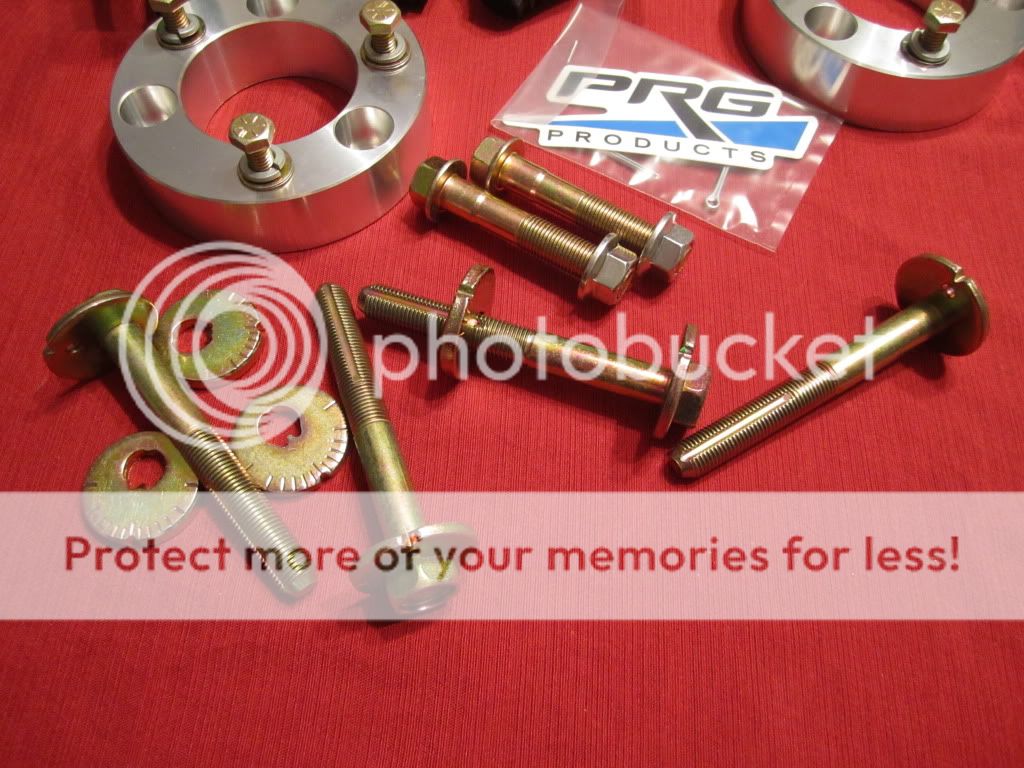
Also get a set of camber bolts and washers. I know everyone says every truck is different, but ask yourself “how much did I spend on my tires?” and then you can decide from there. I did get the camber kit and once again glad I did. My camber was so far off it was not funny, and my tow kicked in so far it did not fell like my truck driving the 1.1 miles to the Firestone.
Why Nissan cut the corner on the camber bolts after 05? I really don’t know, but it seams really crappy.
THE FRONT – PRG 2” SPACERS.
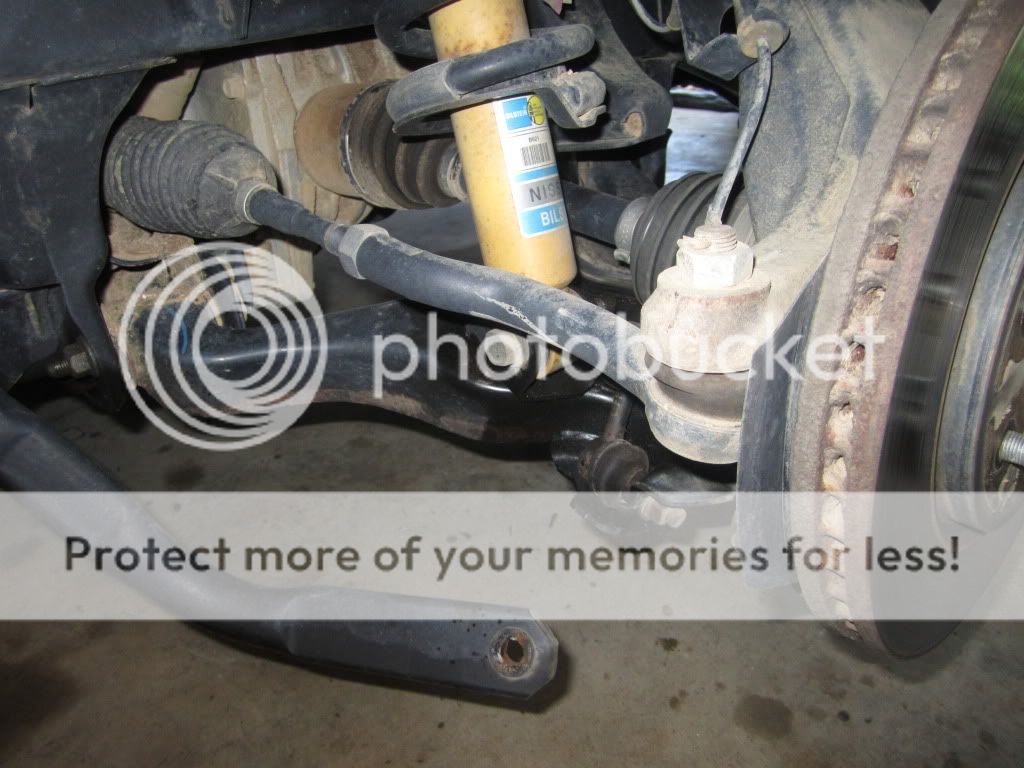
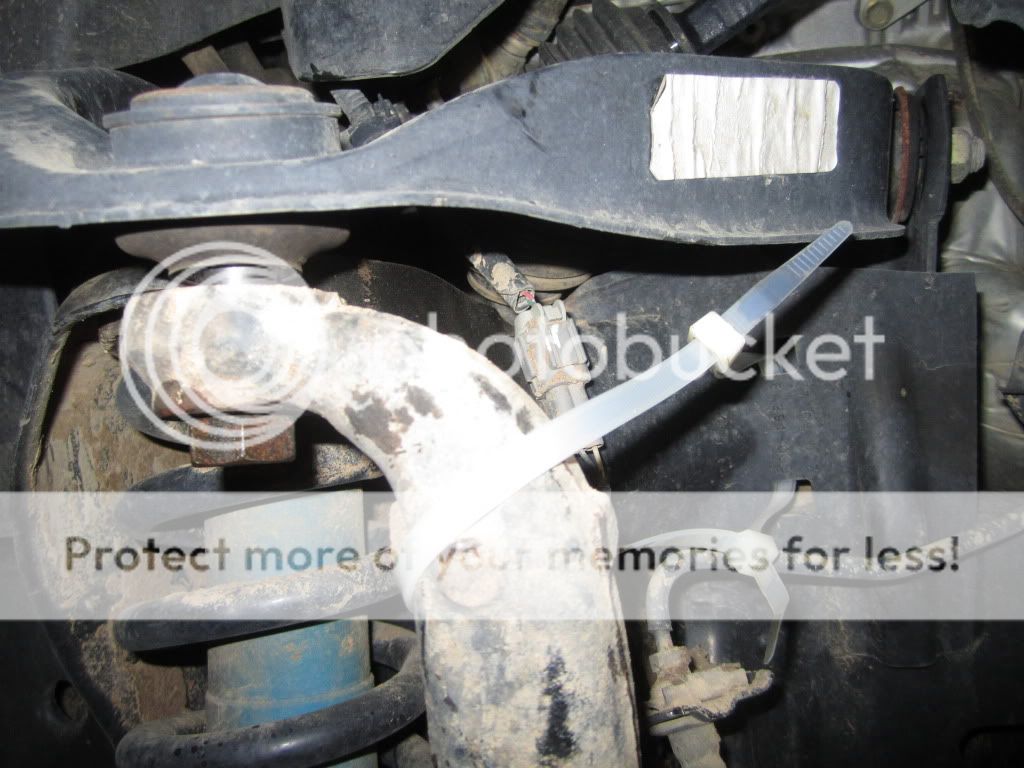
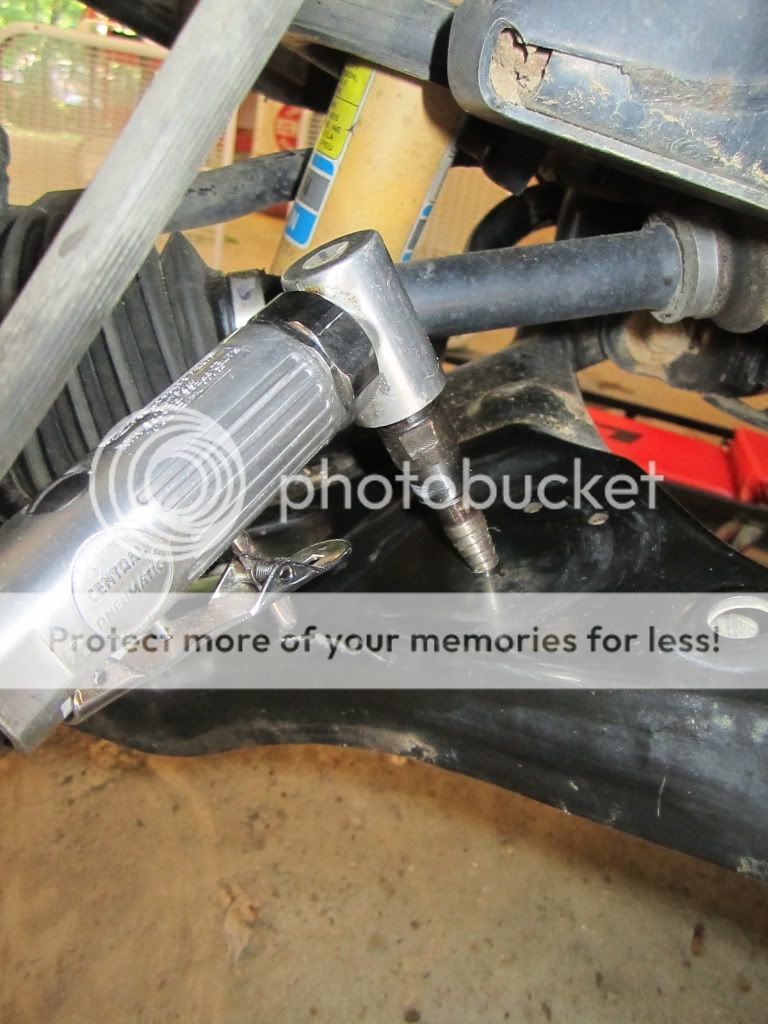
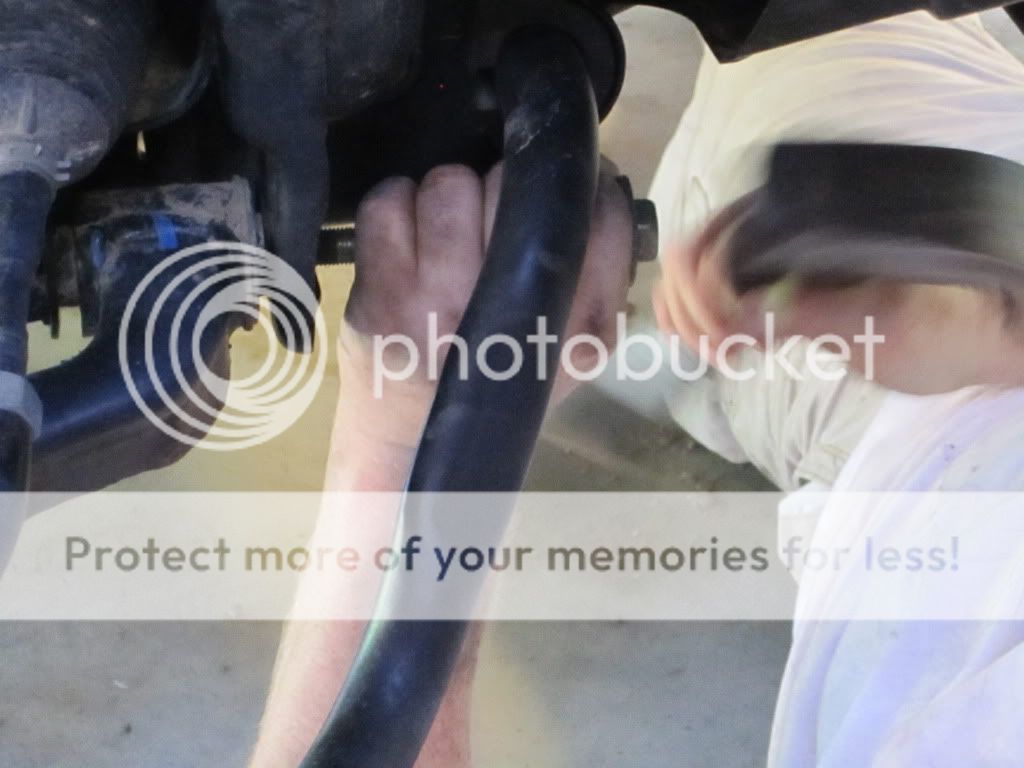
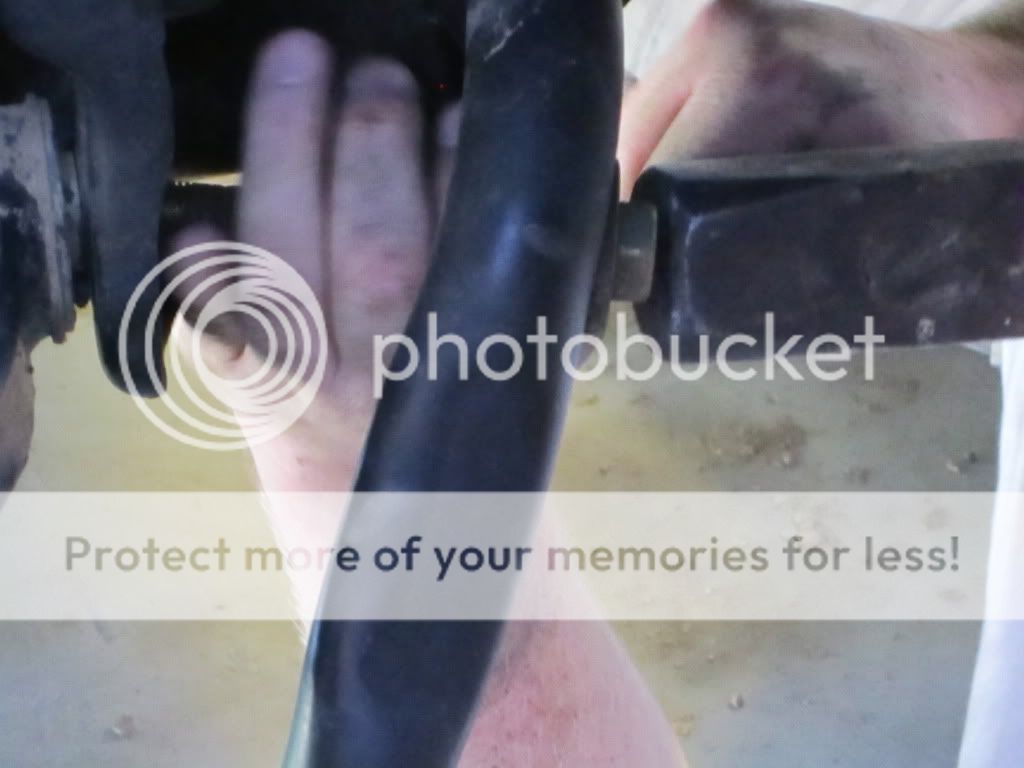
First before jacking up the truck. Slide under and remove the top sway bar end link bolts. (17mm) You can get more room to work under there if you turn the wheel full driver lock and do the driver side bolt. Then turn the wheel full passenger lock and remove the passenger side bolt. Swing the sway bar up and out of the way. This helps with two things. One it gets the end links out of the way when you have to deal with the lower shock bolts. Two it allows more flex to get the spring back in once you have installed the spacers.
Next jack up only one front corner by the frame lifting the tire about 3 to 4 inches off the ground and support the truck with a jack stand on the frame. By keeping 3 tires on the ground it is safer for the a mount of pushing, pulling, beating and crying that lower bolt can offer. Once you have lowered the truck onto the jack stand and pulled your jack out from under the truck stand up and push on you truck to make sure it is stable. You are responsible for your own safety and it is better to have the truck fall off the jack stand with the wheels on still and YOU NOT UNDER IT! You will see my jack stands are not tall enough so I placed wood that is twice the size of the jack stands under there for more height.

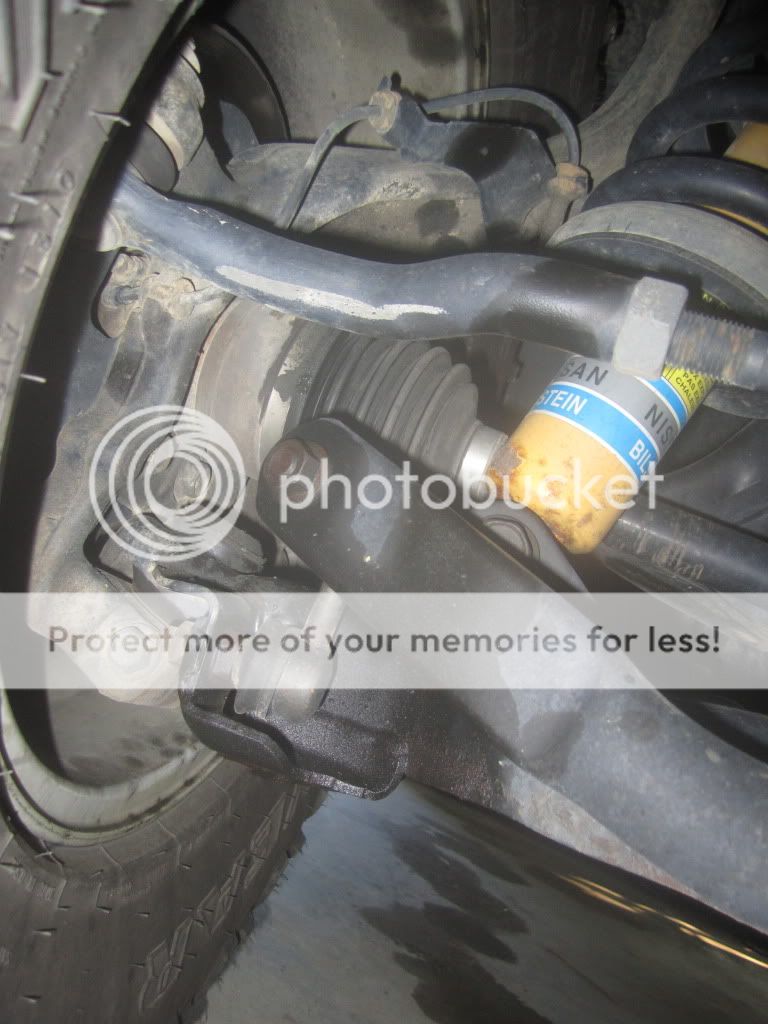
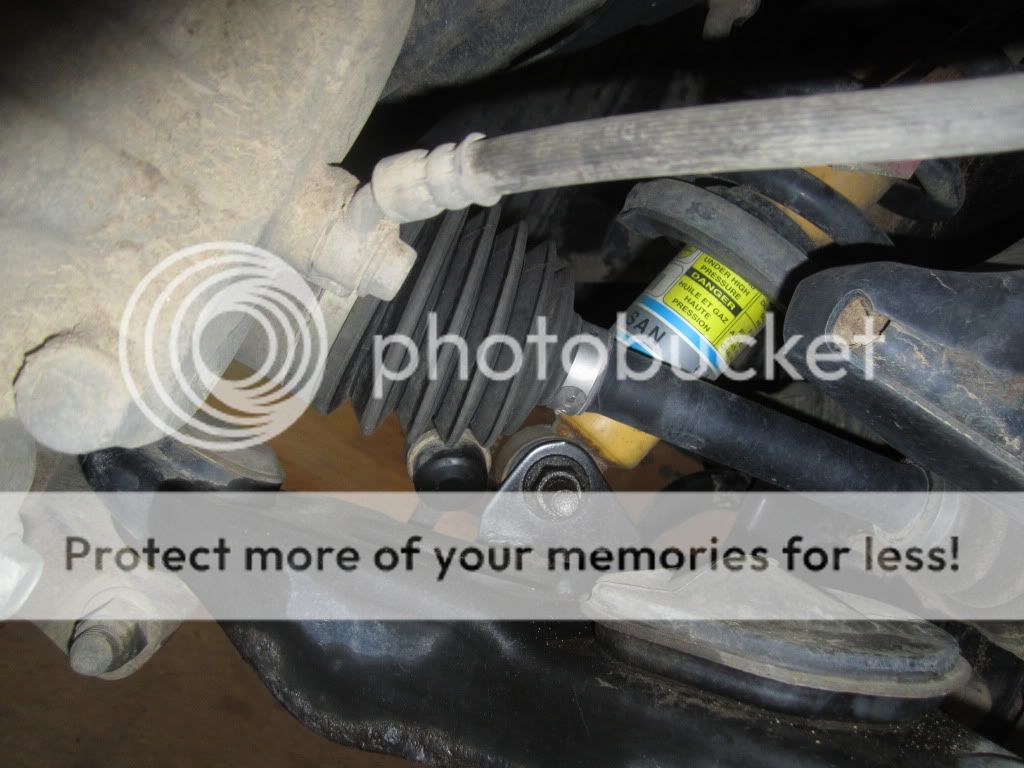
Now remove the wheel. The first thing I did after removing the wheel was to start on the lower shock bolt. (19mm) You just want to brake it free not remove it right now. The reason I started here was because I knew how much force it was going to take and it was easier with the front suspension assembled that if everything else was loose. (It is the nut at the lower end of the long yellow thing)
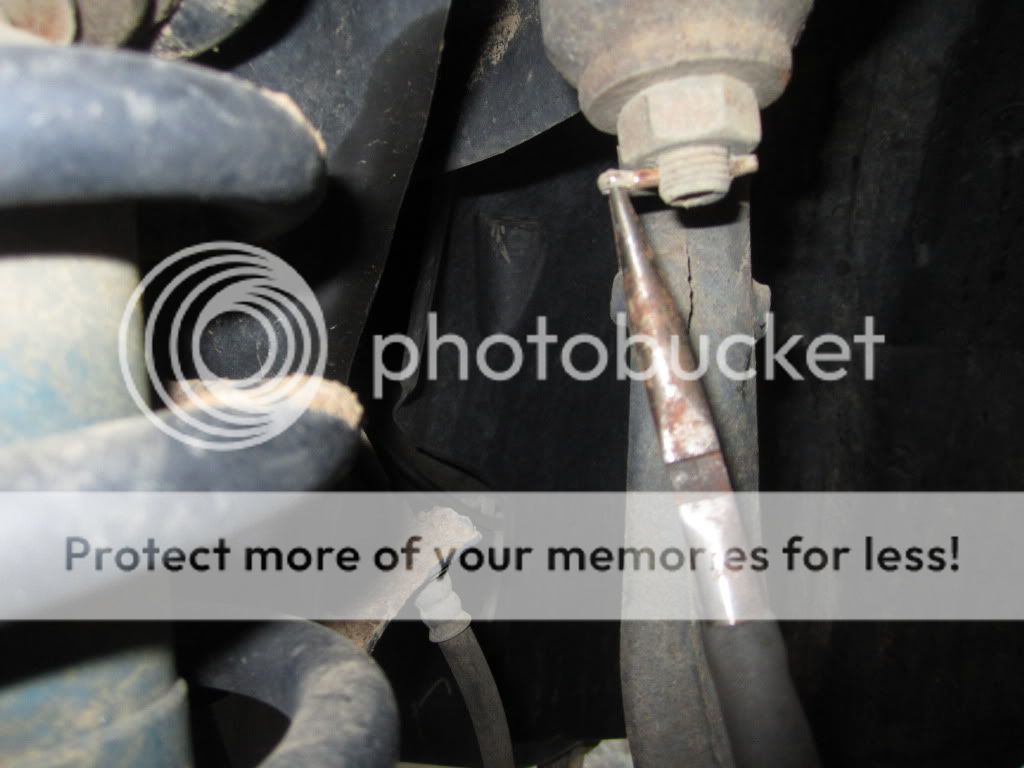
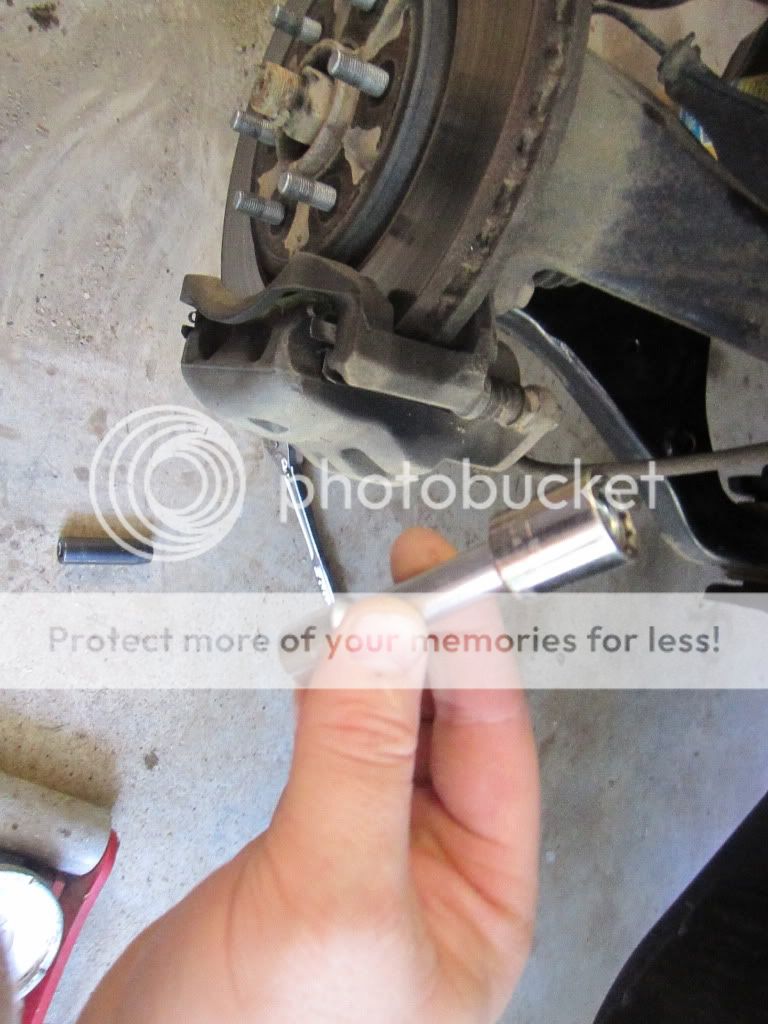
Next I moved to the upper ball joint that connects the spindle. First remove the cotter pin, DO NOT REUSE THE COTTER PIN! PRG supplies you with new ones, if you are using a kit that didn’t come with new pins dive to the parts store and grab a few for like $2. I straightened out the pin then stuck the tip of my needle nose pliers in the loop and tapped it with a hammer.
Now grab a 22mm and break the nut free. Do not fully remove it just back it off to the end of the ball joint stud. The next step I got from Greg, Hit the top of the spindle with a BFH (big freakin hammer) on the front side about 5 or 6 times and the joint should free itself. Then before you finish removing the nut grab some big zip ties or wire and secure the top of the spindle because once the nut is removed the assembly will drop and want to swing away. You want to watch and not over extend your brake lines, ABS lines or put extreme stress on your half shafts.

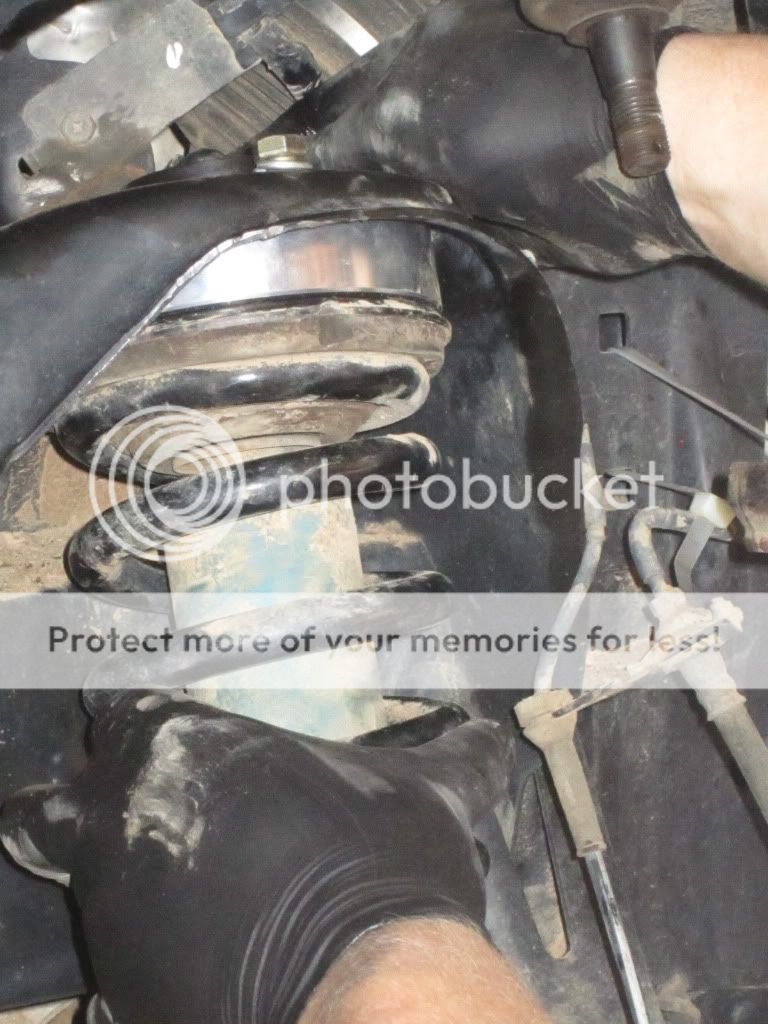
Now start removing the three bolts on the top of the strut. Before you start make sure there is no dirt or debris on the threads. (Mine were covered) A little advice here, remove the back two first, then remove the front one. This will make things so much easier for you. Pay attention as you finish the last bolt because the assembly may drop even more.

Next you want to go ahead with the lower strut bolt and remove the spring assembly from the truck. The top of my strut was also covered with Wooly’s mud so I had to clean them out and clean the top strut mount.

Also clean out the top strut mount.
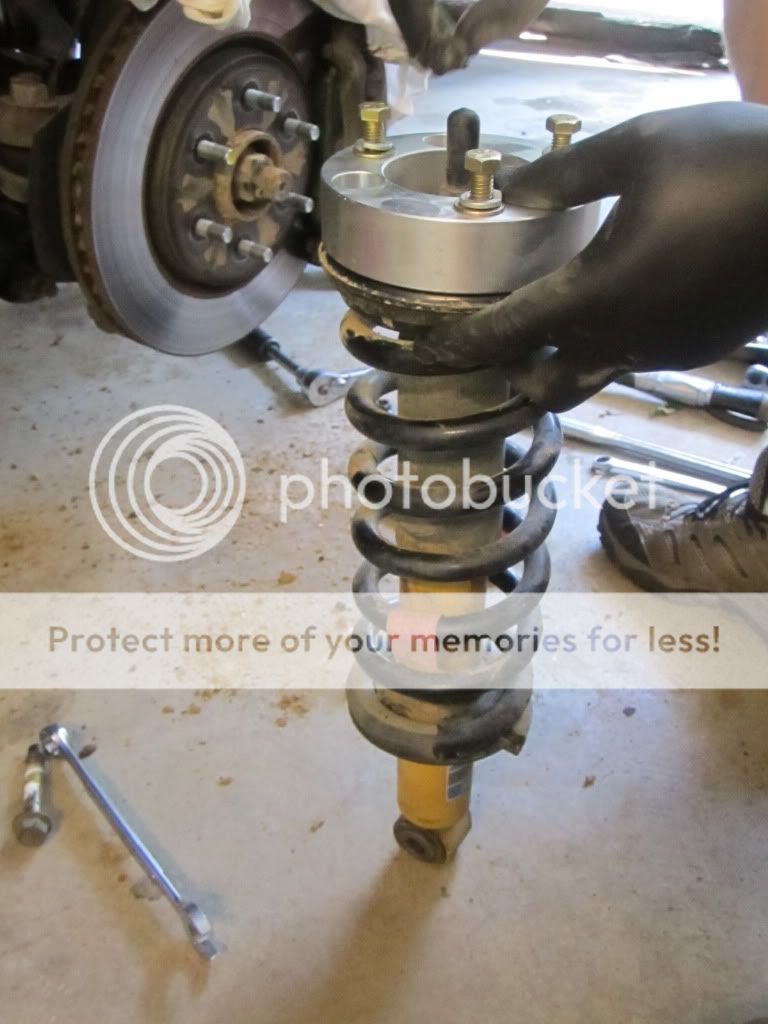
Now you can grab your spacer and use the stock bolts to attach it. The PRG spacers are Aluminum so DO NOT over tighten them they will strip. Remove the bolts that came with the spacer and remember the order of the washers for reassembly.
You want to put the top of the strut back in first. You have to put the strut assembly in backwards (180) from the stock position. Start by threading the front bolt in about 50% then move to the back two. Get all three in about 50% and then move to the lower bolt.
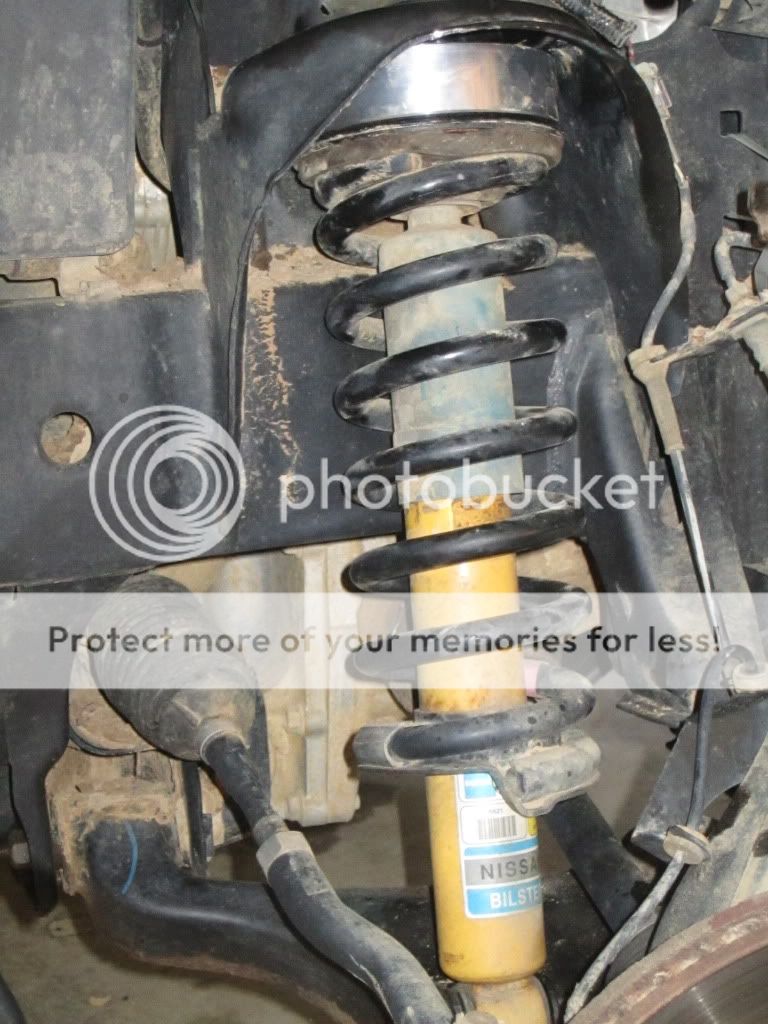
A floor jack will be useful here to lift the spindle back up to the bottom of the strut, line it up and replace the bolt. Then tighten the top three bolts to 30flb.

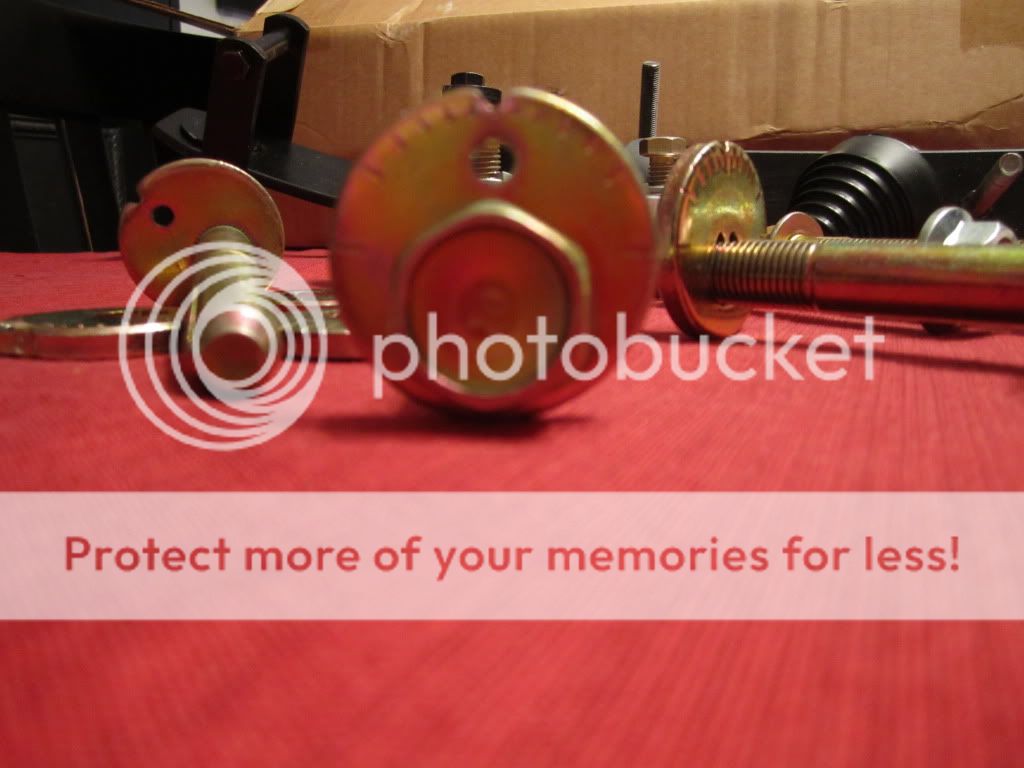
Now you need to remove the old bump stop. Get a deep well 12mm and break it free. At some point it will become loose enough that you will need to stop it from spinning. I used a pair of vice grips and clamped onto the old bump stop and finished removal. The PRG bump stop stud is thicker than the stock one so you will need to drill the hole out a little. I like to use step bits when enlarging holes and it didn’t fail me this time either.
Next I took a 14mm socket and extension to hold the nut up to the bottom of the lower control arm and work the bump stop down to it. As you start to tighten the nut you will run out of socket and need to swap to a deep socket to finish the job at 10ftlb with a 14mm.

Next I put the upper ball joint back together. Once again a floor jack will be very useful to lift up the spindle and put the nut back on. Once you have tightened the nut down put in a NEW cotter pin. DO NOT REUSE THE OLD COTTER PIN!!!


This is where I found it easiest to replace the camber bolts. Break the nuts free and remove the nut and washer on the nut side. Get a screwdriver (I used an old suspension bolt from a Nissan 240sx) to push the old bolt out. When you do this it helps keep the holes aligned for reassembly with the camber bolt. I pushed the new bolt back in the same way I pushed to old bolt out. (just incase you forget the nuts go on the front the bolt inserts from the back.) Once I completed the front on each side the back was pretty easy, I also swapped from the old 240 bolt to the first removed Xterra bolt because it was much longer.
Finally recheck the torque on all of your bolts and you can replace the wheel and move to the other side.
After you finish the other side don’t forget to hook your sway bar back up. When doing so just finger tighten the nuts until you have both sides on then torque to spec.
END OF PART ONE...
TO BE CONTINUED......
I’m sure you have heard about the lower front shock bolts not wanting to come off. It is a really good idea to start hitting all of the bolts with PB Blaster at LEAST 2 weeks before you plan to do your lift. I did this and was able to break both lower bolts off with a breaker bar and cheater bar. Also you will want to clear all of your bolt threads of dirt and Wooly’s mud.
It is not a bad idea to plan on having to cut the bolts off. There are places to order them online and save you some cash. I went to Nissan and got hosed on my nuts and bolts. (I didn’t need them, but it was good to know I had them if I did.)
Also get a set of camber bolts and washers. I know everyone says every truck is different, but ask yourself “how much did I spend on my tires?” and then you can decide from there. I did get the camber kit and once again glad I did. My camber was so far off it was not funny, and my tow kicked in so far it did not fell like my truck driving the 1.1 miles to the Firestone.
Why Nissan cut the corner on the camber bolts after 05? I really don’t know, but it seams really crappy.
THE FRONT – PRG 2” SPACERS.
First before jacking up the truck. Slide under and remove the top sway bar end link bolts. (17mm) You can get more room to work under there if you turn the wheel full driver lock and do the driver side bolt. Then turn the wheel full passenger lock and remove the passenger side bolt. Swing the sway bar up and out of the way. This helps with two things. One it gets the end links out of the way when you have to deal with the lower shock bolts. Two it allows more flex to get the spring back in once you have installed the spacers.
Next jack up only one front corner by the frame lifting the tire about 3 to 4 inches off the ground and support the truck with a jack stand on the frame. By keeping 3 tires on the ground it is safer for the a mount of pushing, pulling, beating and crying that lower bolt can offer. Once you have lowered the truck onto the jack stand and pulled your jack out from under the truck stand up and push on you truck to make sure it is stable. You are responsible for your own safety and it is better to have the truck fall off the jack stand with the wheels on still and YOU NOT UNDER IT! You will see my jack stands are not tall enough so I placed wood that is twice the size of the jack stands under there for more height.
Now remove the wheel. The first thing I did after removing the wheel was to start on the lower shock bolt. (19mm) You just want to brake it free not remove it right now. The reason I started here was because I knew how much force it was going to take and it was easier with the front suspension assembled that if everything else was loose. (It is the nut at the lower end of the long yellow thing)
Next I moved to the upper ball joint that connects the spindle. First remove the cotter pin, DO NOT REUSE THE COTTER PIN! PRG supplies you with new ones, if you are using a kit that didn’t come with new pins dive to the parts store and grab a few for like $2. I straightened out the pin then stuck the tip of my needle nose pliers in the loop and tapped it with a hammer.
Now grab a 22mm and break the nut free. Do not fully remove it just back it off to the end of the ball joint stud. The next step I got from Greg, Hit the top of the spindle with a BFH (big freakin hammer) on the front side about 5 or 6 times and the joint should free itself. Then before you finish removing the nut grab some big zip ties or wire and secure the top of the spindle because once the nut is removed the assembly will drop and want to swing away. You want to watch and not over extend your brake lines, ABS lines or put extreme stress on your half shafts.
Now start removing the three bolts on the top of the strut. Before you start make sure there is no dirt or debris on the threads. (Mine were covered) A little advice here, remove the back two first, then remove the front one. This will make things so much easier for you. Pay attention as you finish the last bolt because the assembly may drop even more.
Next you want to go ahead with the lower strut bolt and remove the spring assembly from the truck. The top of my strut was also covered with Wooly’s mud so I had to clean them out and clean the top strut mount.
Also clean out the top strut mount.
Now you can grab your spacer and use the stock bolts to attach it. The PRG spacers are Aluminum so DO NOT over tighten them they will strip. Remove the bolts that came with the spacer and remember the order of the washers for reassembly.
You want to put the top of the strut back in first. You have to put the strut assembly in backwards (180) from the stock position. Start by threading the front bolt in about 50% then move to the back two. Get all three in about 50% and then move to the lower bolt.
A floor jack will be useful here to lift the spindle back up to the bottom of the strut, line it up and replace the bolt. Then tighten the top three bolts to 30flb.
Now you need to remove the old bump stop. Get a deep well 12mm and break it free. At some point it will become loose enough that you will need to stop it from spinning. I used a pair of vice grips and clamped onto the old bump stop and finished removal. The PRG bump stop stud is thicker than the stock one so you will need to drill the hole out a little. I like to use step bits when enlarging holes and it didn’t fail me this time either.
Next I took a 14mm socket and extension to hold the nut up to the bottom of the lower control arm and work the bump stop down to it. As you start to tighten the nut you will run out of socket and need to swap to a deep socket to finish the job at 10ftlb with a 14mm.
Next I put the upper ball joint back together. Once again a floor jack will be very useful to lift up the spindle and put the nut back on. Once you have tightened the nut down put in a NEW cotter pin. DO NOT REUSE THE OLD COTTER PIN!!!
This is where I found it easiest to replace the camber bolts. Break the nuts free and remove the nut and washer on the nut side. Get a screwdriver (I used an old suspension bolt from a Nissan 240sx) to push the old bolt out. When you do this it helps keep the holes aligned for reassembly with the camber bolt. I pushed the new bolt back in the same way I pushed to old bolt out. (just incase you forget the nuts go on the front the bolt inserts from the back.) Once I completed the front on each side the back was pretty easy, I also swapped from the old 240 bolt to the first removed Xterra bolt because it was much longer.
Finally recheck the torque on all of your bolts and you can replace the wheel and move to the other side.
After you finish the other side don’t forget to hook your sway bar back up. When doing so just finger tighten the nuts until you have both sides on then torque to spec.
END OF PART ONE...
TO BE CONTINUED......
Last edited:


