- Location
- Virginia
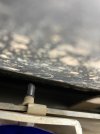
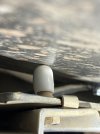
This is going to be quick, and for many people possibly common sense/obvious, but I had been circling for a couple weeks. The tl;dr version: drill four holes and put in bolts with washers.
Disclaimer: What worked for me may not work for you. Always check your tolerances before drilling.
Problem: I installed the Shrockworks radiator skid, and of course the stock skid had four places to bolt the stock bumper down. My bumper was now loose and rubbing, and had a good 1/4-1/2” of play.
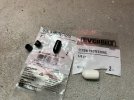
Materials: Drill with 1/8” drill bit, Impact with 1/4” driver, four #8 x 1/2” self-drilling screws, four 1/8” x 1” fender washers, sharpie
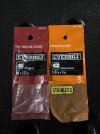
Steps:
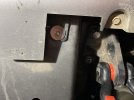
1. Take off the oil filter hatch and use your phone or a mirror and verify you have room to drill. Don’t drill a hole in your radiator.
2. Hold the bumper as close to “normal” as possible. I don’t know if it will hurt, but I didn’t want to put tension inward or outward.
3. Mark the center of each hole with the Sharpie while holding the middle of the bumper in place.
4. Drill out the four holes with the 1/8” bit.
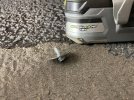
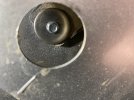
5. Use the impact on the lowest setting with a self drilling screw and fender washer to finish the last little bit of drilling and catch the threads.
6. Repeat for the other three!
7. Enjoy a bumper with no play and no rattling.
Disclaimer: What worked for me may not work for you. Always check your tolerances before drilling.
Problem: I installed the Shrockworks radiator skid, and of course the stock skid had four places to bolt the stock bumper down. My bumper was now loose and rubbing, and had a good 1/4-1/2” of play.
Materials: Drill with 1/8” drill bit, Impact with 1/4” driver, four #8 x 1/2” self-drilling screws, four 1/8” x 1” fender washers, sharpie

Steps:
1. Take off the oil filter hatch and use your phone or a mirror and verify you have room to drill. Don’t drill a hole in your radiator.
2. Hold the bumper as close to “normal” as possible. I don’t know if it will hurt, but I didn’t want to put tension inward or outward.
3. Mark the center of each hole with the Sharpie while holding the middle of the bumper in place.
4. Drill out the four holes with the 1/8” bit.
5. Use the impact on the lowest setting with a self drilling screw and fender washer to finish the last little bit of drilling and catch the threads.
6. Repeat for the other three!
7. Enjoy a bumper with no play and no rattling.


