
Replacing the front brakes.
Tools needed: Lug wrench, Ratchet, 9/16 socket, 17mm wrench, 2- C clamps, and thin piece of wood.<br>Im sure there are better ways to do this but this is how I do it.
Est time 45 mins
1. You will need to loosen your lug nuts. (Loosen do not remover) Just a turn will do! (21mm)
2. Jack the front of the Xterra up till the side of the Xterra you are working on is slightly off the ground. Finish removing the lug nuts and place them aside in a secure area.
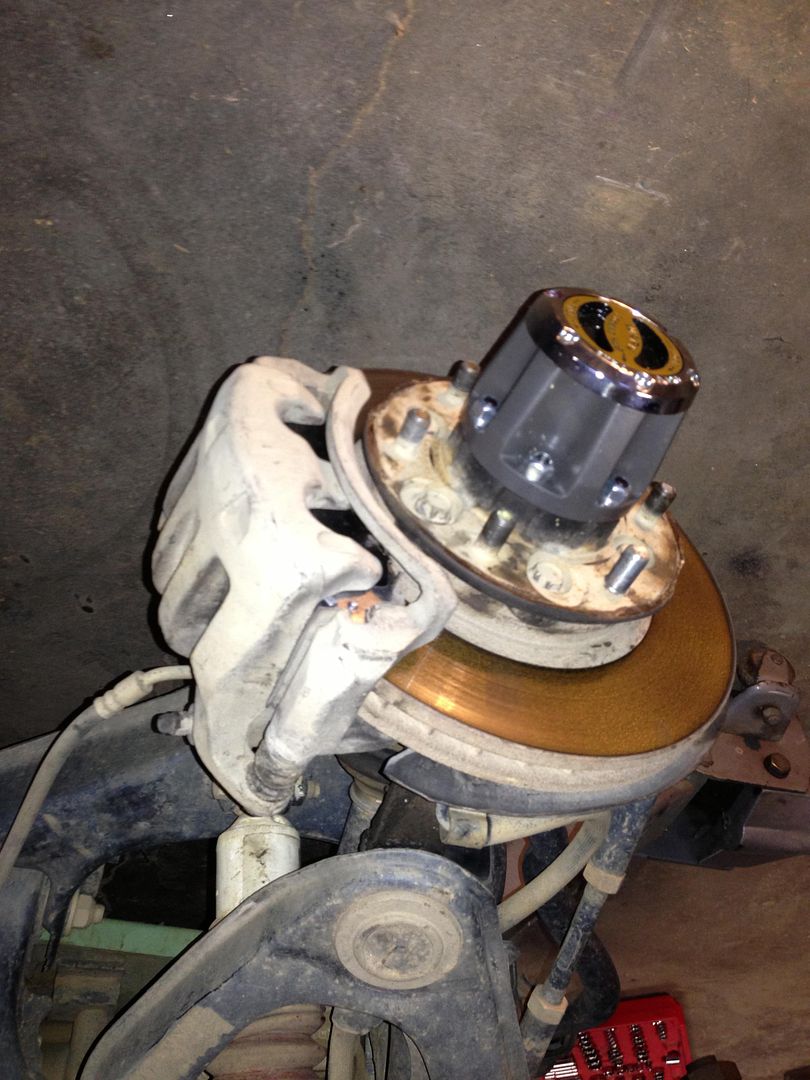
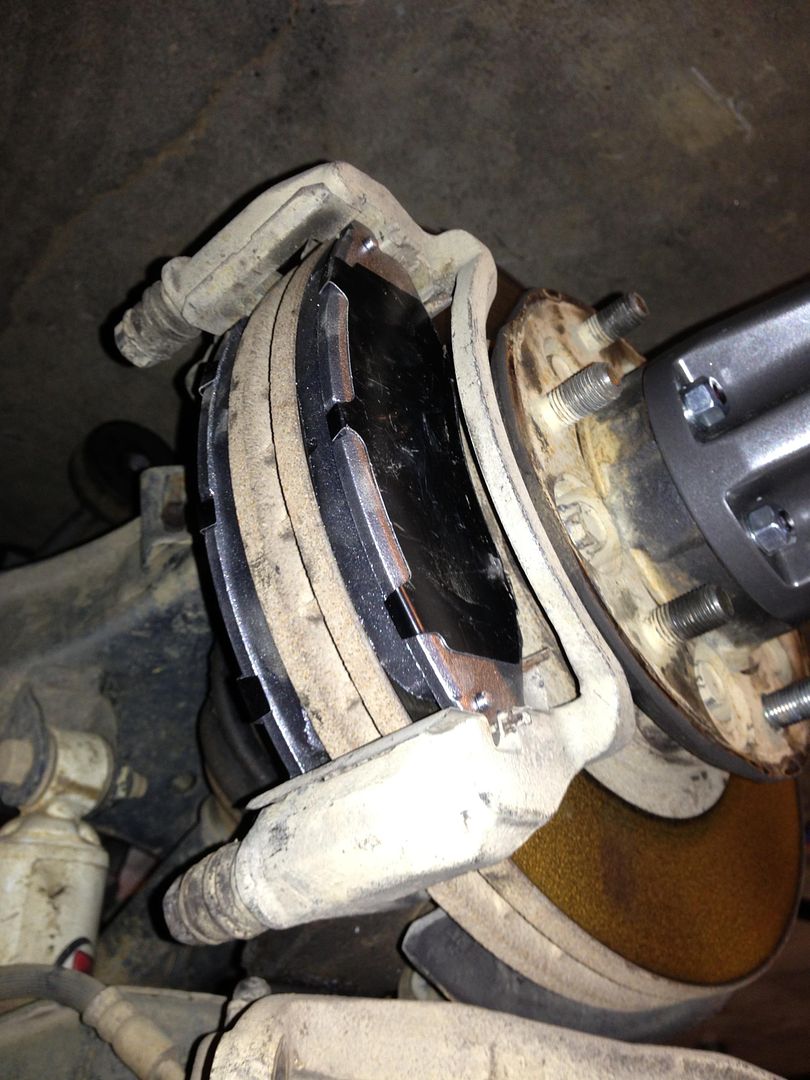
3. Pull the tire off the lug bolts exposing the rotor and brakes. At this time you will see the area you are about to work in.
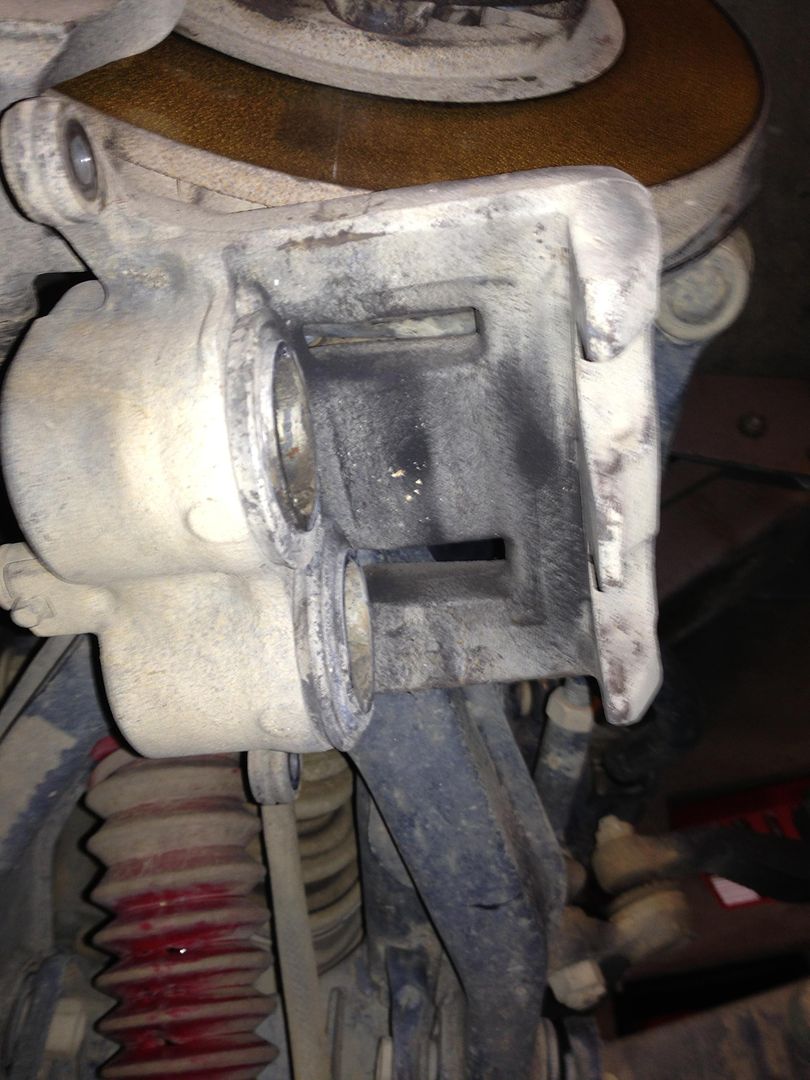
4. You will need your 9/16 socket to break the bolt loose.
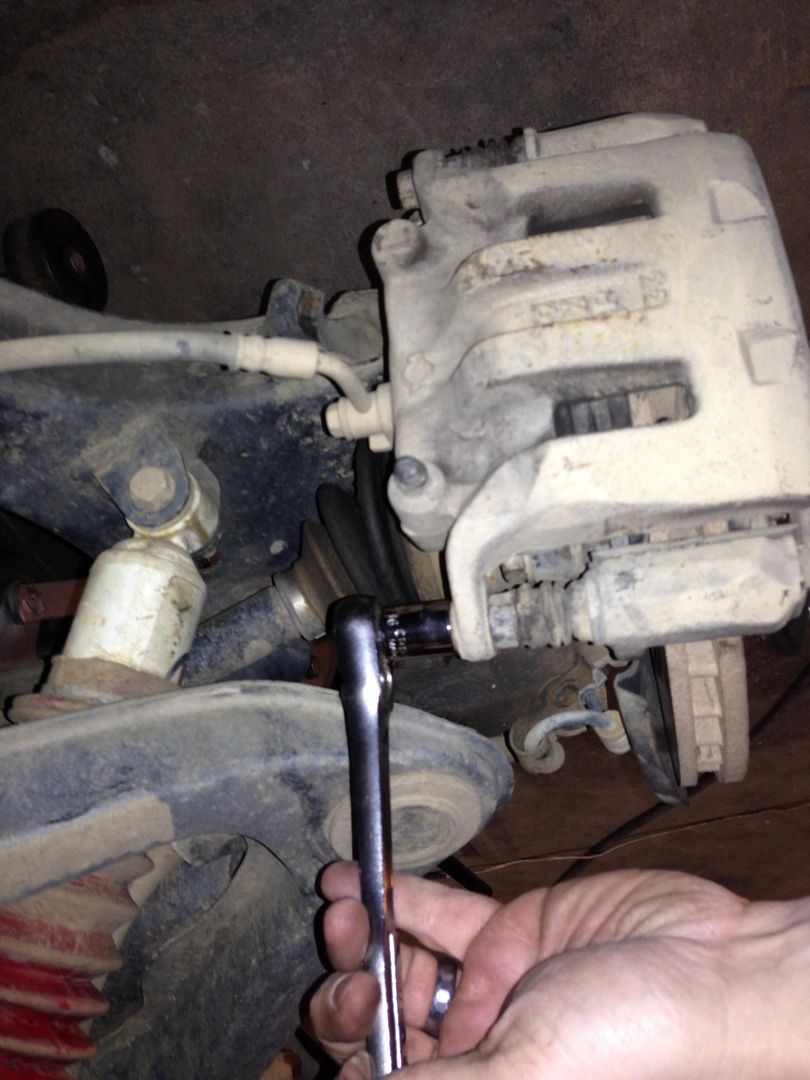
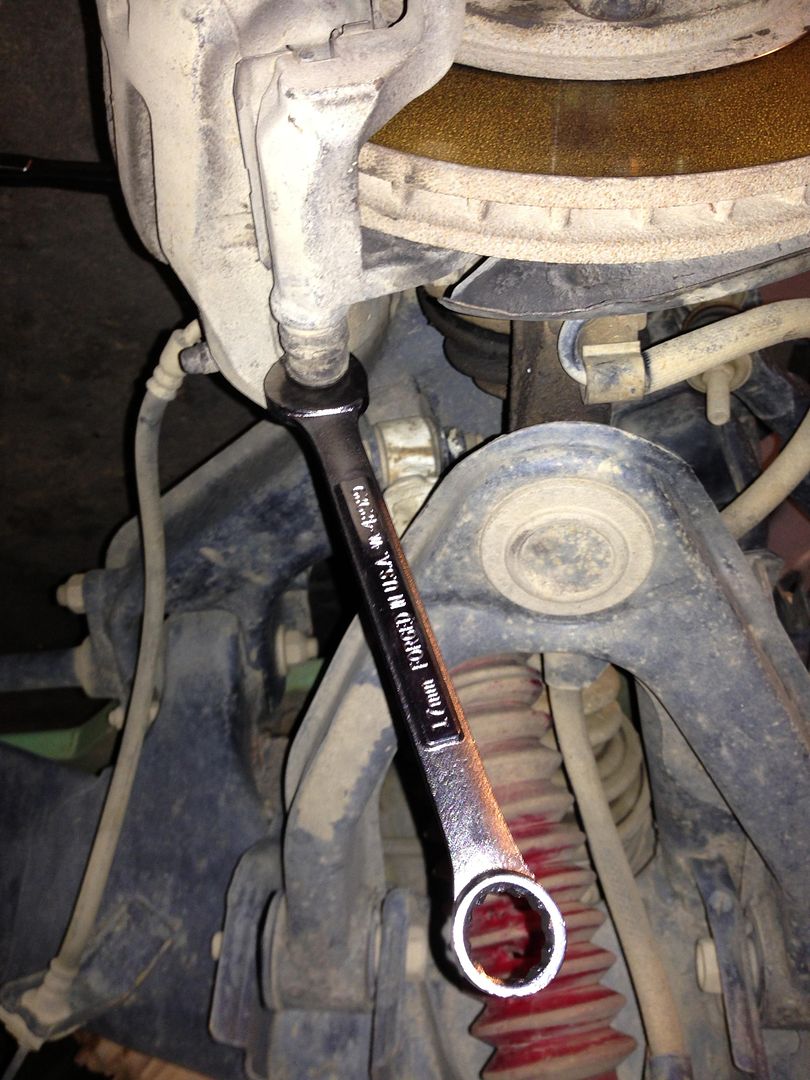
You will also need the 17mm wrench to hold on the nut between the 9/15 nut and the mount.
Break free the top and bottom bolts and remove them. The will allow the top of the brake to be removed exposing the pads.
Place the bolts in a secure area!

5.Slide the old pads out of the notched area of the brake.
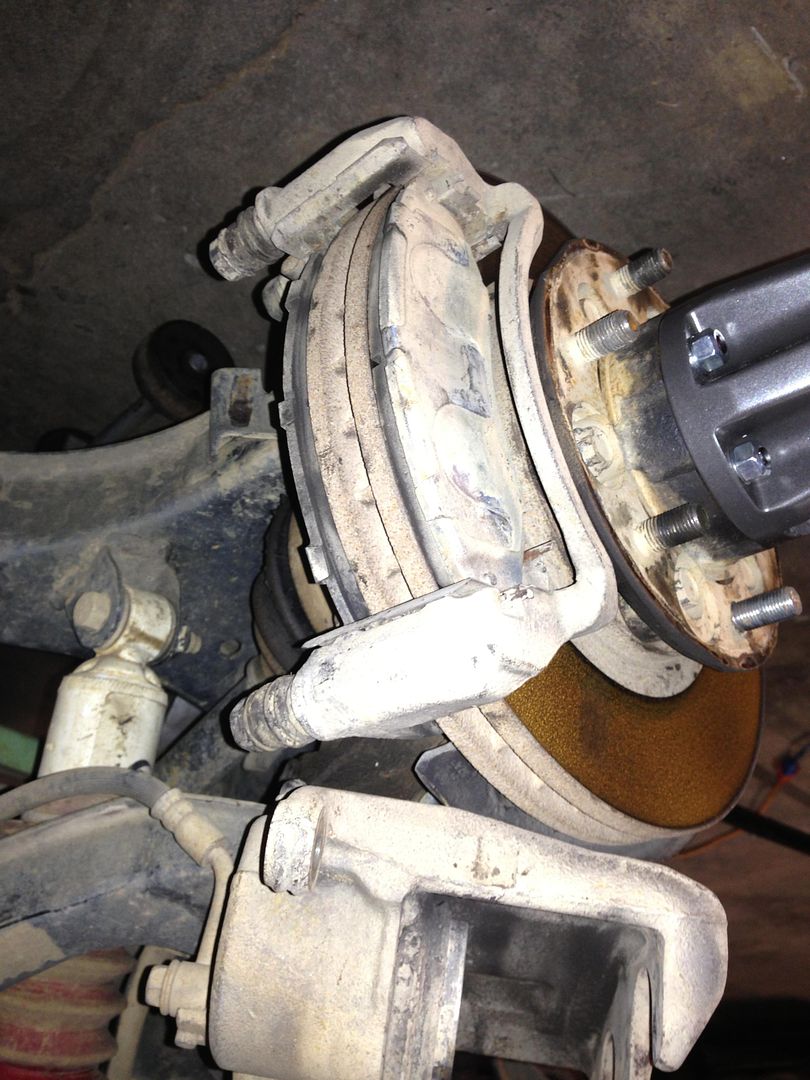
Add the new brake pads to the notched area of the system. Each pad is different so pay attention to the pad you pull and add..
The front pad has not metal clip, The rear pad has the metal clip. I meant to take a picture but it slipped my mind.
6. The top half of the brake is what applies pressure to the pads and will need the pistons pushed back in so you can slide this part back over the new pads. There probably a better way of doing this, but over the years this method seems to work for me.
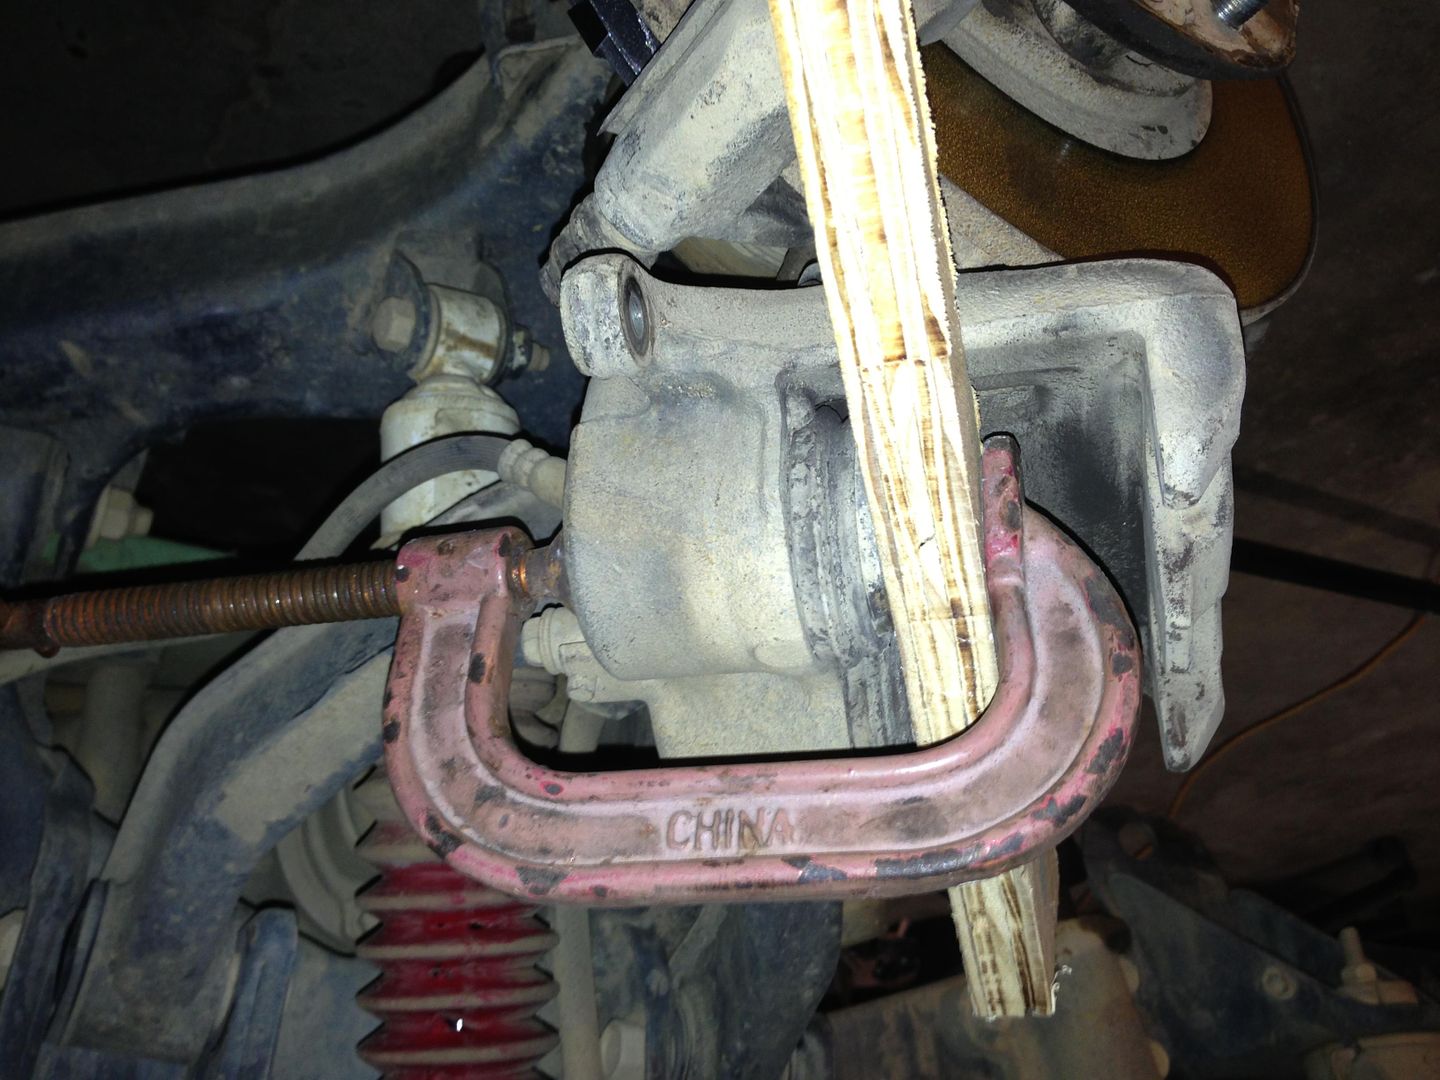 You will need one c clamp over each piston.. Twist both C clamps till the pistons are flush.
This does not take much pressure to do..
7. Slide the top back over the pads and re apply both 9/16 bolts back into place. (See step 4. do in reverse order)
Reapply the rim back to the lugs and set the Xterra back on the ground. Repeat this on the other side of the Xterra....
After you have both brakes done you will need to "Reset" the pressure to the system
8. Start the Xterra and leave it in PARK. You will push on the brake pedal and the pedal will sink to the floor.. Pump the pedal till the brake pedal feels hard again.. At this time the system should be back to normal.
Be sure to Check pedal pressure before heading out on the road again..
Tools needed: Lug wrench, Ratchet, 9/16 socket, 17mm wrench, 2- C clamps, and thin piece of wood.<br>Im sure there are better ways to do this but this is how I do it.
Est time 45 mins
1. You will need to loosen your lug nuts. (Loosen do not remover) Just a turn will do! (21mm)
2. Jack the front of the Xterra up till the side of the Xterra you are working on is slightly off the ground. Finish removing the lug nuts and place them aside in a secure area.
3. Pull the tire off the lug bolts exposing the rotor and brakes. At this time you will see the area you are about to work in.
4. You will need your 9/16 socket to break the bolt loose.
You will also need the 17mm wrench to hold on the nut between the 9/15 nut and the mount.
Break free the top and bottom bolts and remove them. The will allow the top of the brake to be removed exposing the pads.
Place the bolts in a secure area!
5.Slide the old pads out of the notched area of the brake.
Add the new brake pads to the notched area of the system. Each pad is different so pay attention to the pad you pull and add..
The front pad has not metal clip, The rear pad has the metal clip. I meant to take a picture but it slipped my mind.
6. The top half of the brake is what applies pressure to the pads and will need the pistons pushed back in so you can slide this part back over the new pads. There probably a better way of doing this, but over the years this method seems to work for me.
This does not take much pressure to do..
7. Slide the top back over the pads and re apply both 9/16 bolts back into place. (See step 4. do in reverse order)
Reapply the rim back to the lugs and set the Xterra back on the ground. Repeat this on the other side of the Xterra....
After you have both brakes done you will need to "Reset" the pressure to the system
8. Start the Xterra and leave it in PARK. You will push on the brake pedal and the pedal will sink to the floor.. Pump the pedal till the brake pedal feels hard again.. At this time the system should be back to normal.
Be sure to Check pedal pressure before heading out on the road again..
Last edited: