
- Location
- Bloomington, IN
I needed a second garage door opener for my other car so I decided to go ahead and get fancy and installed a custom "Homelink" setup. Maybe this will spark some cool ideas for y'all.
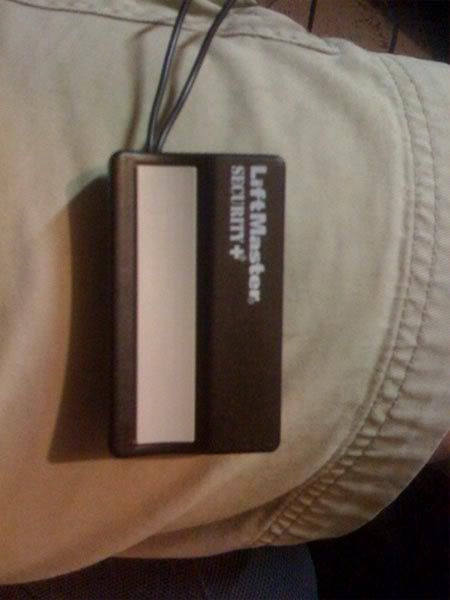
I have a Craftsman garage door opener so I went with the Liftmaster 971LM opener (you will need to get a compatible opener for your GDO). I suggest you program the opener before proceeding just so you don't waste you time on a broken unit.
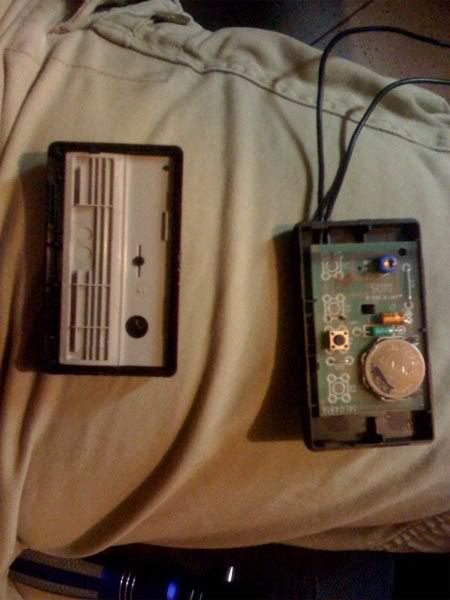
Simply pop the case open to reveal the board inside.
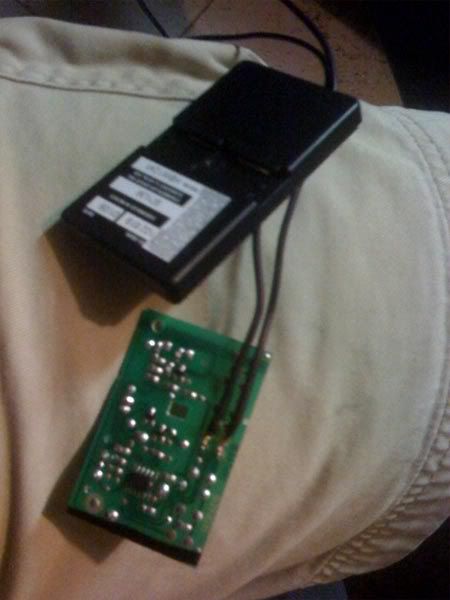
I soldered two 18ga wires to the necessary places on the board that will allow the momentary contact switch to operate the button remotely.
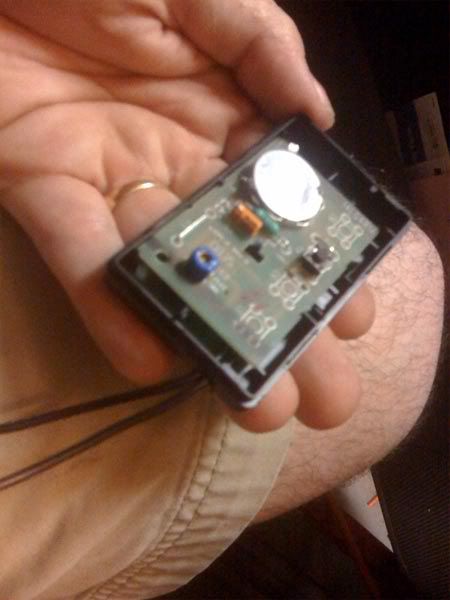
I routed the wiring out of the case so that I could keep the case on to protect the board inside the dash. You can do as you wish. I also kept it like this so if I ever need to take this out, I can.
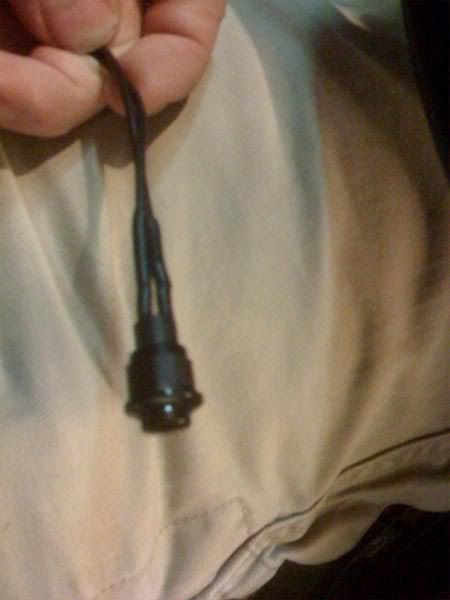
I picked up a momentary contact switch from Radio Shack. This switch was small enough to fit in the knockouts on the center dash area. I soldered a couple wires to it as well as seen below.
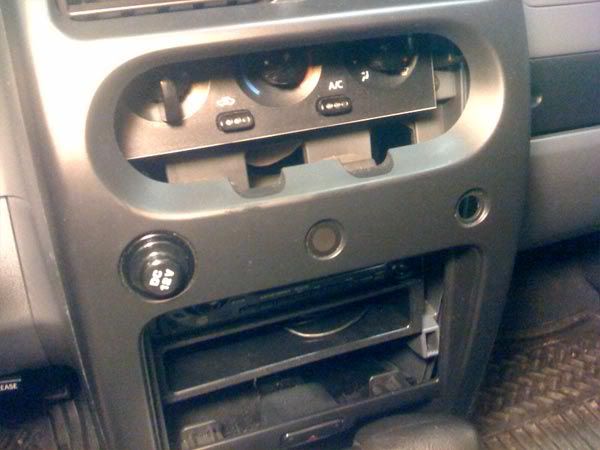
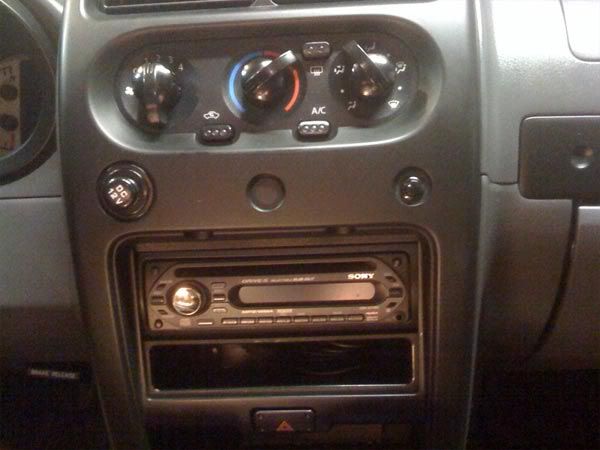
Once I had the wiring done, I popped open the dash (look for another write-up to find out how to open this up) and knocked out the hole cover on the right side of the panel. You can see this below. At this point I fed the wiring of the switch through the front of the hole and secured it to the panel from behind. After that I attached the wiring from the switch to the opener with a couple of wirenuts and wrapped them in electrical tape so they won't make noise inside the dash area.
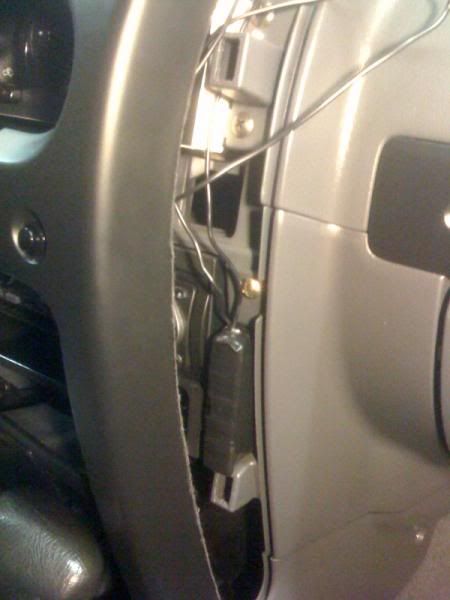
I wrapped the opener in electrical tape as well to make a snug fit in the location shown below and ran the excess wire into... [REMOVED CONTENT = "the open space in front of the shifter"]
***UPDATE*** DO NOT RUN WIRING DOWN BEHIND THE SHIFTER. It will kill your range dramatically. I have since gone back and routed the excess wiring upwards. They are now run up to the right side the control knobs and taped into the void behind the vents at the top of the dash. Range has improved exponentially.
UPDATED PIC: New wiring location.
Flipped the opener so the wiring is facing up.
Wire being routed up.
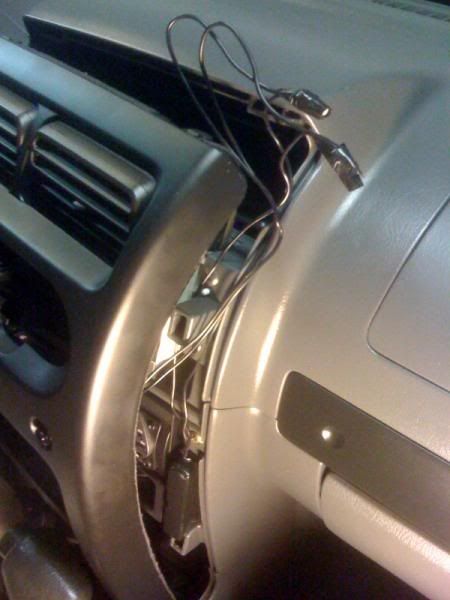
Wire in void at the top of the dash.

That's all there is to it. Here is the finished product.
I have a Craftsman garage door opener so I went with the Liftmaster 971LM opener (you will need to get a compatible opener for your GDO). I suggest you program the opener before proceeding just so you don't waste you time on a broken unit.
Simply pop the case open to reveal the board inside.
I soldered two 18ga wires to the necessary places on the board that will allow the momentary contact switch to operate the button remotely.
I routed the wiring out of the case so that I could keep the case on to protect the board inside the dash. You can do as you wish. I also kept it like this so if I ever need to take this out, I can.
I picked up a momentary contact switch from Radio Shack. This switch was small enough to fit in the knockouts on the center dash area. I soldered a couple wires to it as well as seen below.
Once I had the wiring done, I popped open the dash (look for another write-up to find out how to open this up) and knocked out the hole cover on the right side of the panel. You can see this below. At this point I fed the wiring of the switch through the front of the hole and secured it to the panel from behind. After that I attached the wiring from the switch to the opener with a couple of wirenuts and wrapped them in electrical tape so they won't make noise inside the dash area.
I wrapped the opener in electrical tape as well to make a snug fit in the location shown below and ran the excess wire into... [REMOVED CONTENT = "the open space in front of the shifter"]
***UPDATE*** DO NOT RUN WIRING DOWN BEHIND THE SHIFTER. It will kill your range dramatically. I have since gone back and routed the excess wiring upwards. They are now run up to the right side the control knobs and taped into the void behind the vents at the top of the dash. Range has improved exponentially.
UPDATED PIC: New wiring location.
Flipped the opener so the wiring is facing up.
Wire being routed up.
Wire in void at the top of the dash.
That's all there is to it. Here is the finished product.