How To Remove Abs System

Like2_4Wheel

Test Drive
Location
PEI Canada
Hey guys, my abs never worked ever since I have owned my X a year or two ago. I want to remove the system completely. Has any one done this on a Xterra before? I'm not sure if removing the ABS module will mess up any electronics. Would I need any extra parts? Or can I just bolt the brake lines directly into the master cylinder.

Yes I know its probably not the safest, but I don't really like ABS anyway. Plus its not my daily anymore. I,ll mostly use it offroad. Thanks
 

BEEFY

I Smile when Gasoline Can Freeze
Check out some of the sas builds. Removal of the abs system is part of doing it along with master cylinder upgrades. If you were to just remove the abs module and keep the stock mc you would need a t for the front brake lines as the mc only has 1 port for front and 1 for rear.
 

Bklyn.X

Skid Plates
Moderator
Supporting Member
Founding Member
Location
Brooklyn, NY
Yeah^

I took mine out and tried running without upgrading the master cylinder for a little while.

Before:

ABS+Delete+1.JPG


MC+2.jpg


MC+3.jpg


MC+5.jpg


MC+6.jpg


After:

ABS+Delete+2.JPG


I’m pretty sure it would have stopped the truck just as well without the SAS. It worked but did not instill any confidence with the solid axle. I went with a Wilwood MC after a few months.

MC+13.jpg


...the "ABS" light on the dash is always lit...


After I cleaned up the tubing a bit I had room to put a battery isolator where the ABS module was:

NOCO+IGD140HP.jpg
 
Last edited:

Like2_4Wheel

Test Drive
Location
PEI Canada
Yeah^

I took mine out and tried running without upgrading the master cylinder for a little while.

Before:

ABS+Delete+1.JPG


MC+2.jpg


MC+3.jpg


MC+5.jpg


MC+6.jpg


After:

ABS+Delete+2.JPG


I’m pretty sure it would have stopped the truck just as well without the SAS. It worked but did not instill any confidence with the solid axle. I went with a Wilwood MC after a few months.

MC+13.jpg


...the "ABS" light on the dash is always lit...


After I cleaned up the tubing a bit I had room to put a battery isolator where the ABS module was:

NOCO+IGD140HP.jpg

Cool thanks for the pictures! I'm going to run 36 inch military tires. Do you think the stock mc would be fine still?
 

Bklyn.X

Skid Plates
Moderator
Supporting Member
Founding Member
Location
Brooklyn, NY
They’re pretty beefy IMHO…certainly beefier than the ones on my D44. They might be okay.

I think that your concern when trying to run 36” tires would be the rest of your front end; steering and suspension. It wasn’t made to run anything bigger than around a 30” tire.

Your steering is going to be the biggest issue, it just can’t take the abuse. Then ball joints, control arms…I don’t think any of that stuff can handle that large a tire. I had aftermarket steering and UCA's and still was changing stuff out almost yearly with just 33's.

Just my opinion…
 

mantree

Wheeling
Location
Fort Collins
Yeah^

I took mine out and tried running without upgrading the master cylinder for a little while.

Before:

ABS+Delete+1.JPG


MC+2.jpg


MC+3.jpg


MC+5.jpg


MC+6.jpg


After:

ABS+Delete+2.JPG


I’m pretty sure it would have stopped the truck just as well without the SAS. It worked but did not instill any confidence with the solid axle. I went with a Wilwood MC after a few months.

MC+13.jpg


...the "ABS" light on the dash is always lit...


After I cleaned up the tubing a bit I had room to put a battery isolator where the ABS module was:

NOCO+IGD140HP.jpg
Do you have a write up on removing yours? Mine hasn't worked from day one.
 

Bklyn.X

Skid Plates
Moderator
Supporting Member
Founding Member
Location
Brooklyn, NY
Sorry, no step by step write up. As the pictures above illustrate, it’s pretty straight forward.

Copper brake line, fittings, a coupler, a block, a piece of random steel to secure the block and maybe some zip-ties to keep the lines from rattling.

A tube cutter, tube bender, a flaring tool, some rags and some open-end wrenches.

Brake fluid, brake cleaner and a set up for bleeding the system.

Disconnect the lines to the ABS module and remove. Cut the two lines to the front brakes in a spot that you can get to with the flaring tool and that will make it easy to route to a block. Cut the line the rear in a spot that you can get to with the flaring tool.

There are two lines out from the MC; one for the front, one for the back. One MC line to the block, two front caliper lines to the block. One MC line to a coupler, the rear drum line to the coupler. Bleed the system (pita).

I think that’s it.

Flaring and bending brake lines takes a bit of patience until you get the hang of it..I am no expert in any sense of the word. Dave and Andy did most of it while I handed them beers.

Let me know if you have any specific questions or I forgot some obvious step...
 

mantree

Wheeling
Location
Fort Collins
Sorry, no step by step write up. As the pictures above illustrate, it’s pretty straight forward.

Copper brake line, fittings, a coupler, a block, a piece of random steel to secure the block and maybe some zip-ties to keep the lines from rattling.

A tube cutter, tube bender, a flaring tool, some rags and some open-end wrenches.

Brake fluid, brake cleaner and a set up for bleeding the system.

Disconnect the lines to the ABS module and remove. Cut the two lines to the front brakes in a spot that you can get to with the flaring tool and that will make it easy to route to a block. Cut the line the rear in a spot that you can get to with the flaring tool.

There are two lines out from the MC; one for the front, one for the back. One MC line to the block, two front caliper lines to the block. One MC line to a coupler, the rear drum line to the coupler. Bleed the system (pita).

I think that’s it.

Flaring and bending brake lines takes a bit of patience until you get the hang of it..I am no expert in any sense of the word. Dave and Andy did most of it while I handed them beers.

Let me know if you have any specific questions or I forgot some obvious step...
I guess I was wondering if you remember what the fittings are. I'm guessing 3/8 since most things like brake lines are suppose to be sae on USA market trucks.
 

Bklyn.X

Skid Plates
Moderator
Supporting Member
Founding Member
Location
Brooklyn, NY
Bah, like an idiot I never wrote that stuff down. I took the cut off fitting to NAPA and matched it up to what I needed. I should have written it down, sorry.
I think the fittings are 10mm X 1.0 thread pitch and 3/16 line.
I'm looking for a receipt...
 
Last edited:

Slapdash Racing

Bought an X
Location
Eastern CT
Hoping to revive an old thread here, but I'm about to do this on my rig after blowing a hard line at the right rear. So I'm going to be putting all new lines in and deleting my ABS module as well.

Question to you Bklyn.X, what is the purpose of running the lines from the MC to the block? If I'm doing all new lines, could I skip that part and just run the front to the front and the rear, the rear?

Cheers
 

Bklyn.X

Skid Plates
Moderator
Supporting Member
Founding Member
Location
Brooklyn, NY
There are two lines out of the MC that go to the ABS module and three lines come out. Two of the three go to the front, one to the rear block.
 

Xtre

Test Drive
Location
Bend
I messed up one of my wheel sensors on my 2000 jetta so my abs was coming on all the time, instead of take each off to figure out which one it was, I just removed the ABS fuse; dunno if it would work on the nissan thou. I do not recommend it thou the abs light stays on all the time
 

Slapdash Racing

Bought an X
Location
Eastern CT
There are two lines out of the MC that go to the ABS module and three lines come out. Two of the three go to the front, one to the rear block.
Ahhh, OK, I get it now. So it's like a splitter. Does the 'block' have a different name when I search for it, like sometimes 'the diff' is called 'final drive'? Is it a distribution block? Thanks for shedding some light!
 

Slapdash Racing

Bought an X
Location
Eastern CT
I messed up one of my wheel sensors on my 2000 jetta so my abs was coming on all the time, instead of take each off to figure out which one it was, I just removed the ABS fuse; dunno if it would work on the nissan thou. I do not recommend it thou the abs light stays on all the time
Haha, my ABS light has been on for a couple years now, so that part doesn't really bother me. And I like the idea of having extra space in there for something else, or just more room to work around other stuff. I'll pull the bulb if I ever need to pull the cluster.
 

Bklyn.X

Skid Plates
Moderator
Supporting Member
Founding Member
Location
Brooklyn, NY
Yes, "distribution block".

A cursory glance at the FSM shows the front line out of the MC (<front of truck) for the rear brakes and the rear line (>back of truck) front calipers.

In the picture from above:

ABS+Delete+2.JPG


you can see that is how I ran the lines from the OEM MC.


The block you show seems as good as any. I took the cut ends to NAPA and had them match it up so I don't know the specs off hand.

If you cut the OEM hard lines make sure you leave yourself enough room to get your flaring tool in there.

Good luck
 
Last edited:

Slapdash Racing

Bought an X
Location
Eastern CT
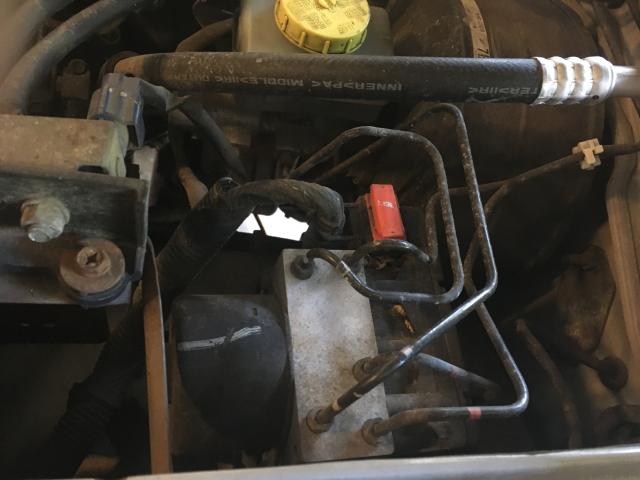
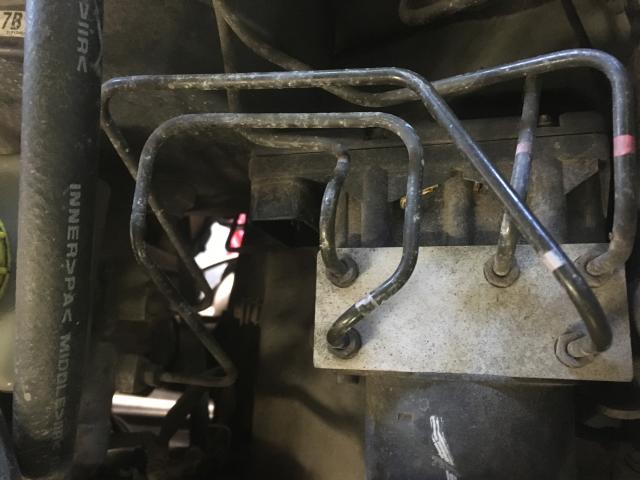
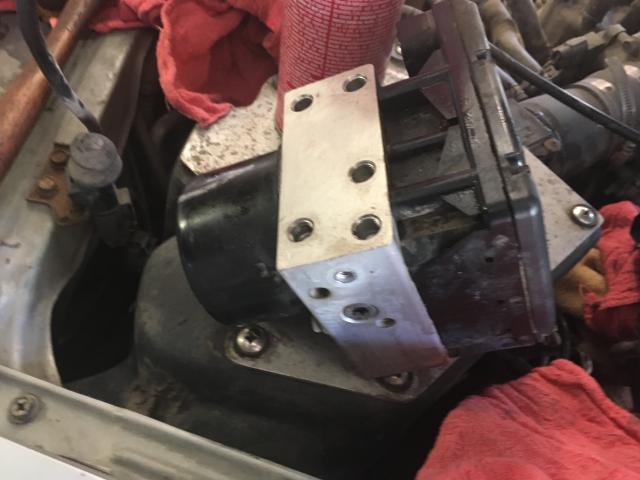
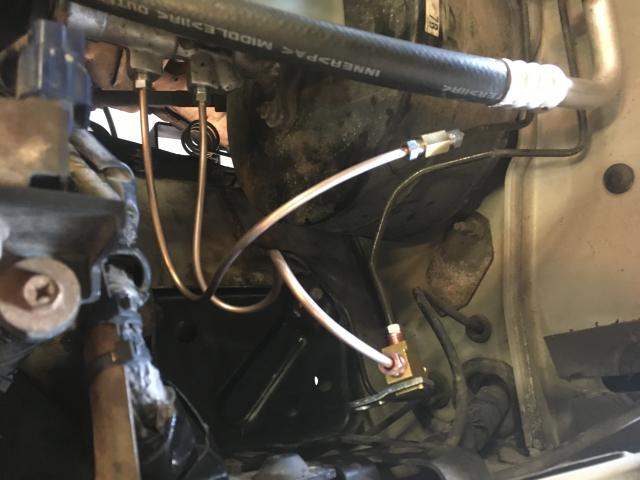
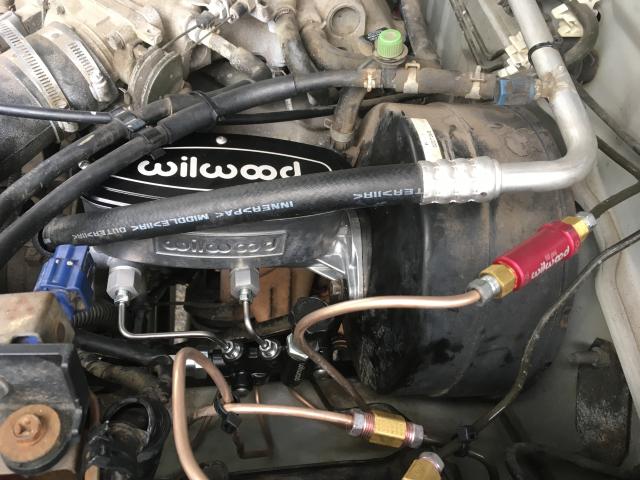
Much appreciated! For some reason, I didn't see this line in your previous post: "There are two lines out from the MC; one for the front, one for the back. One MC line to the block, two front caliper lines to the block. One MC line to a coupler, the rear drum line to the coupler. Bleed the system (pita)."

So that makes all sorts of sense to me now.

Also, this line from your previous post seems to match the other research I've done as well: "I think the fittings are 10mm X 1.0 thread pitch and 3/16 line."

So I ordered all of that.

I am doing most of the work on this myself, but will also have adult supervision (ironically from a fella who is 18 years younger than I am), so I am sure he will leave room for the flaring and so on (he as done this sort of thing many times before).

One big success tonight is I was able to sneak off the brackets that run on the frame rail, adjacent to the fuel tank, relatively easily (lots of PB and patience, the latter I don't usually have). It's a New England truck, so the bolts and brackets look like they came off the Titanic, so I'll be rebuilding at least one of them.

For those who need to replace all their lines, for future reference, I soaked the bracket bolts with PB the night before, the morning after, then again right before I attempted removal. I saw on another channel somewhere, a dude who was replacing his exhaust manifolds. I wish I could remember his name, so I could link, but he soaked the bejesus out of his header nuts, then actually tightened the nuts first, then loosened a little, tightened again, sprayed again, tightened > loosened > tightened > loosened > sprayed > tightened, etc. Anywho, this method totally worked with this application as well.

Thanks again for waking up an old thread!

Cheers
 
Top