
Not sure if this warrants a how to, but might be helpful for others. I didn't plan on a write up so the pictures are minimal.
I just wanted to share how I have installed a couple RAM ball mounts that we use for a phone or small tablets.
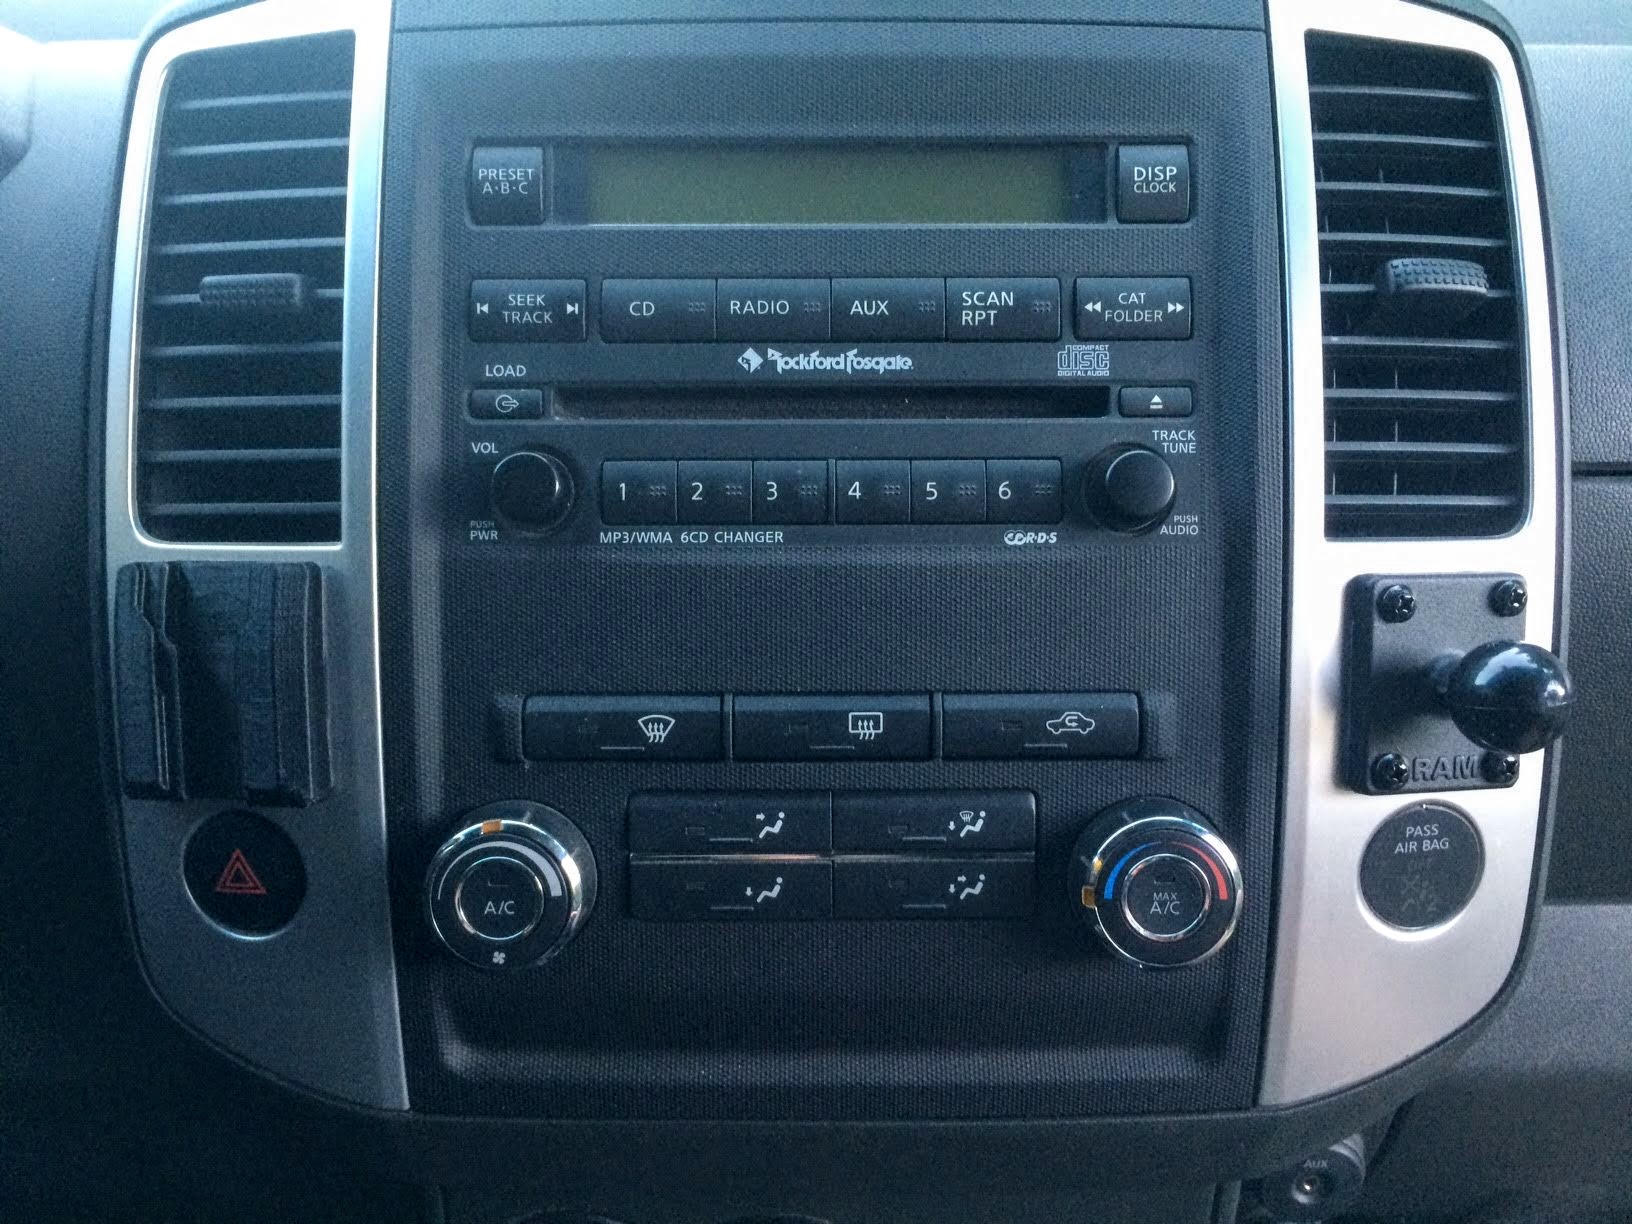
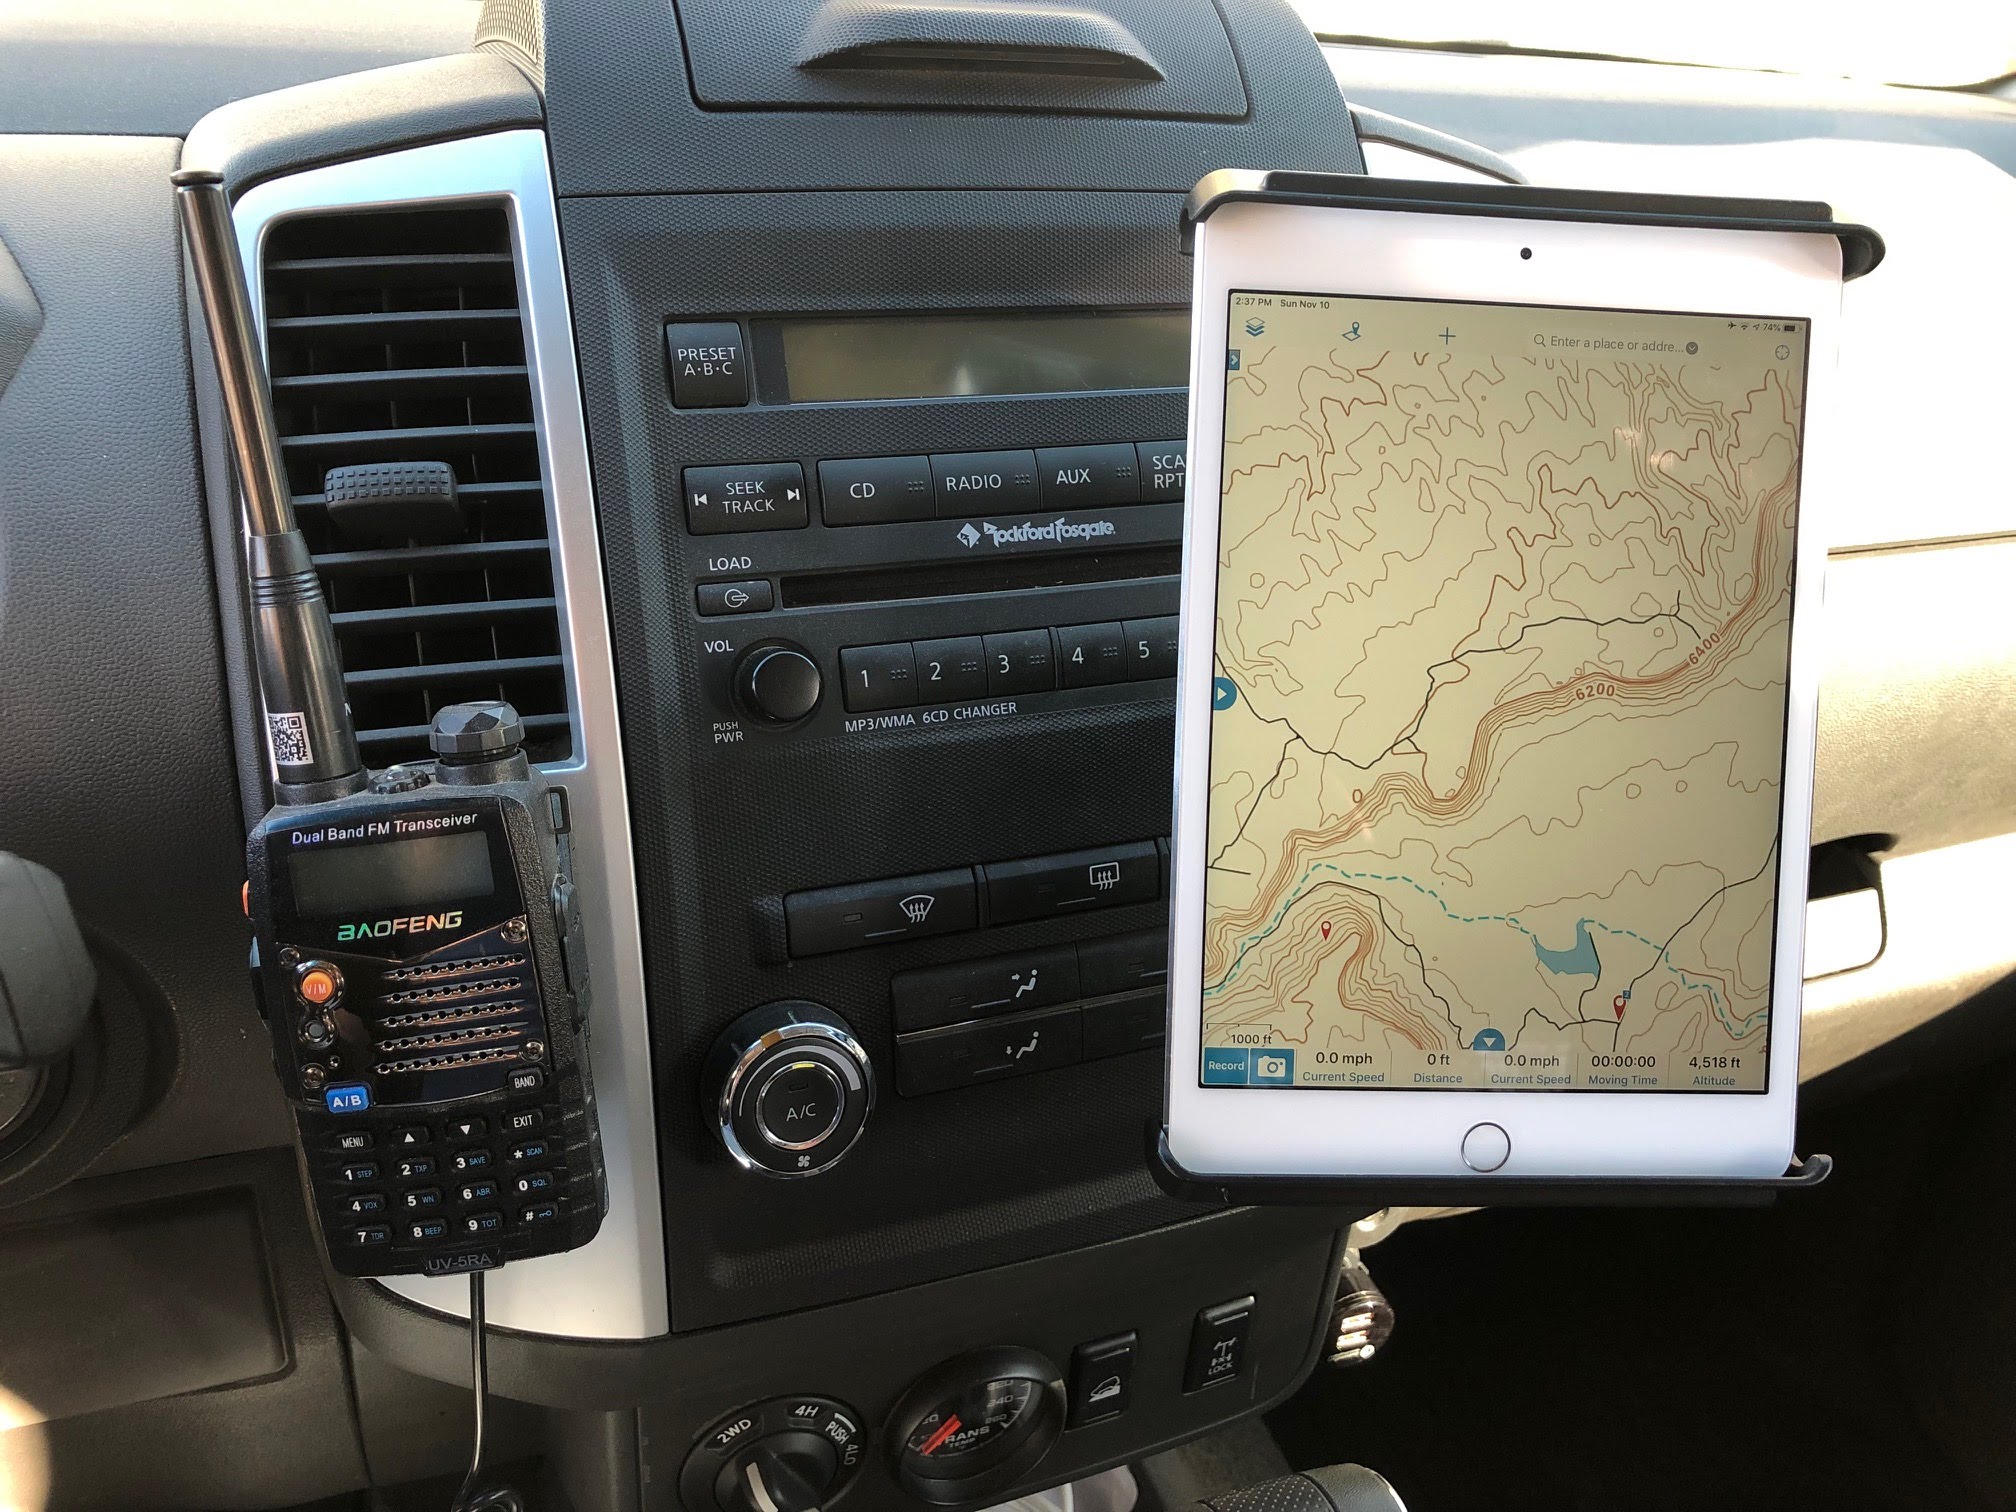
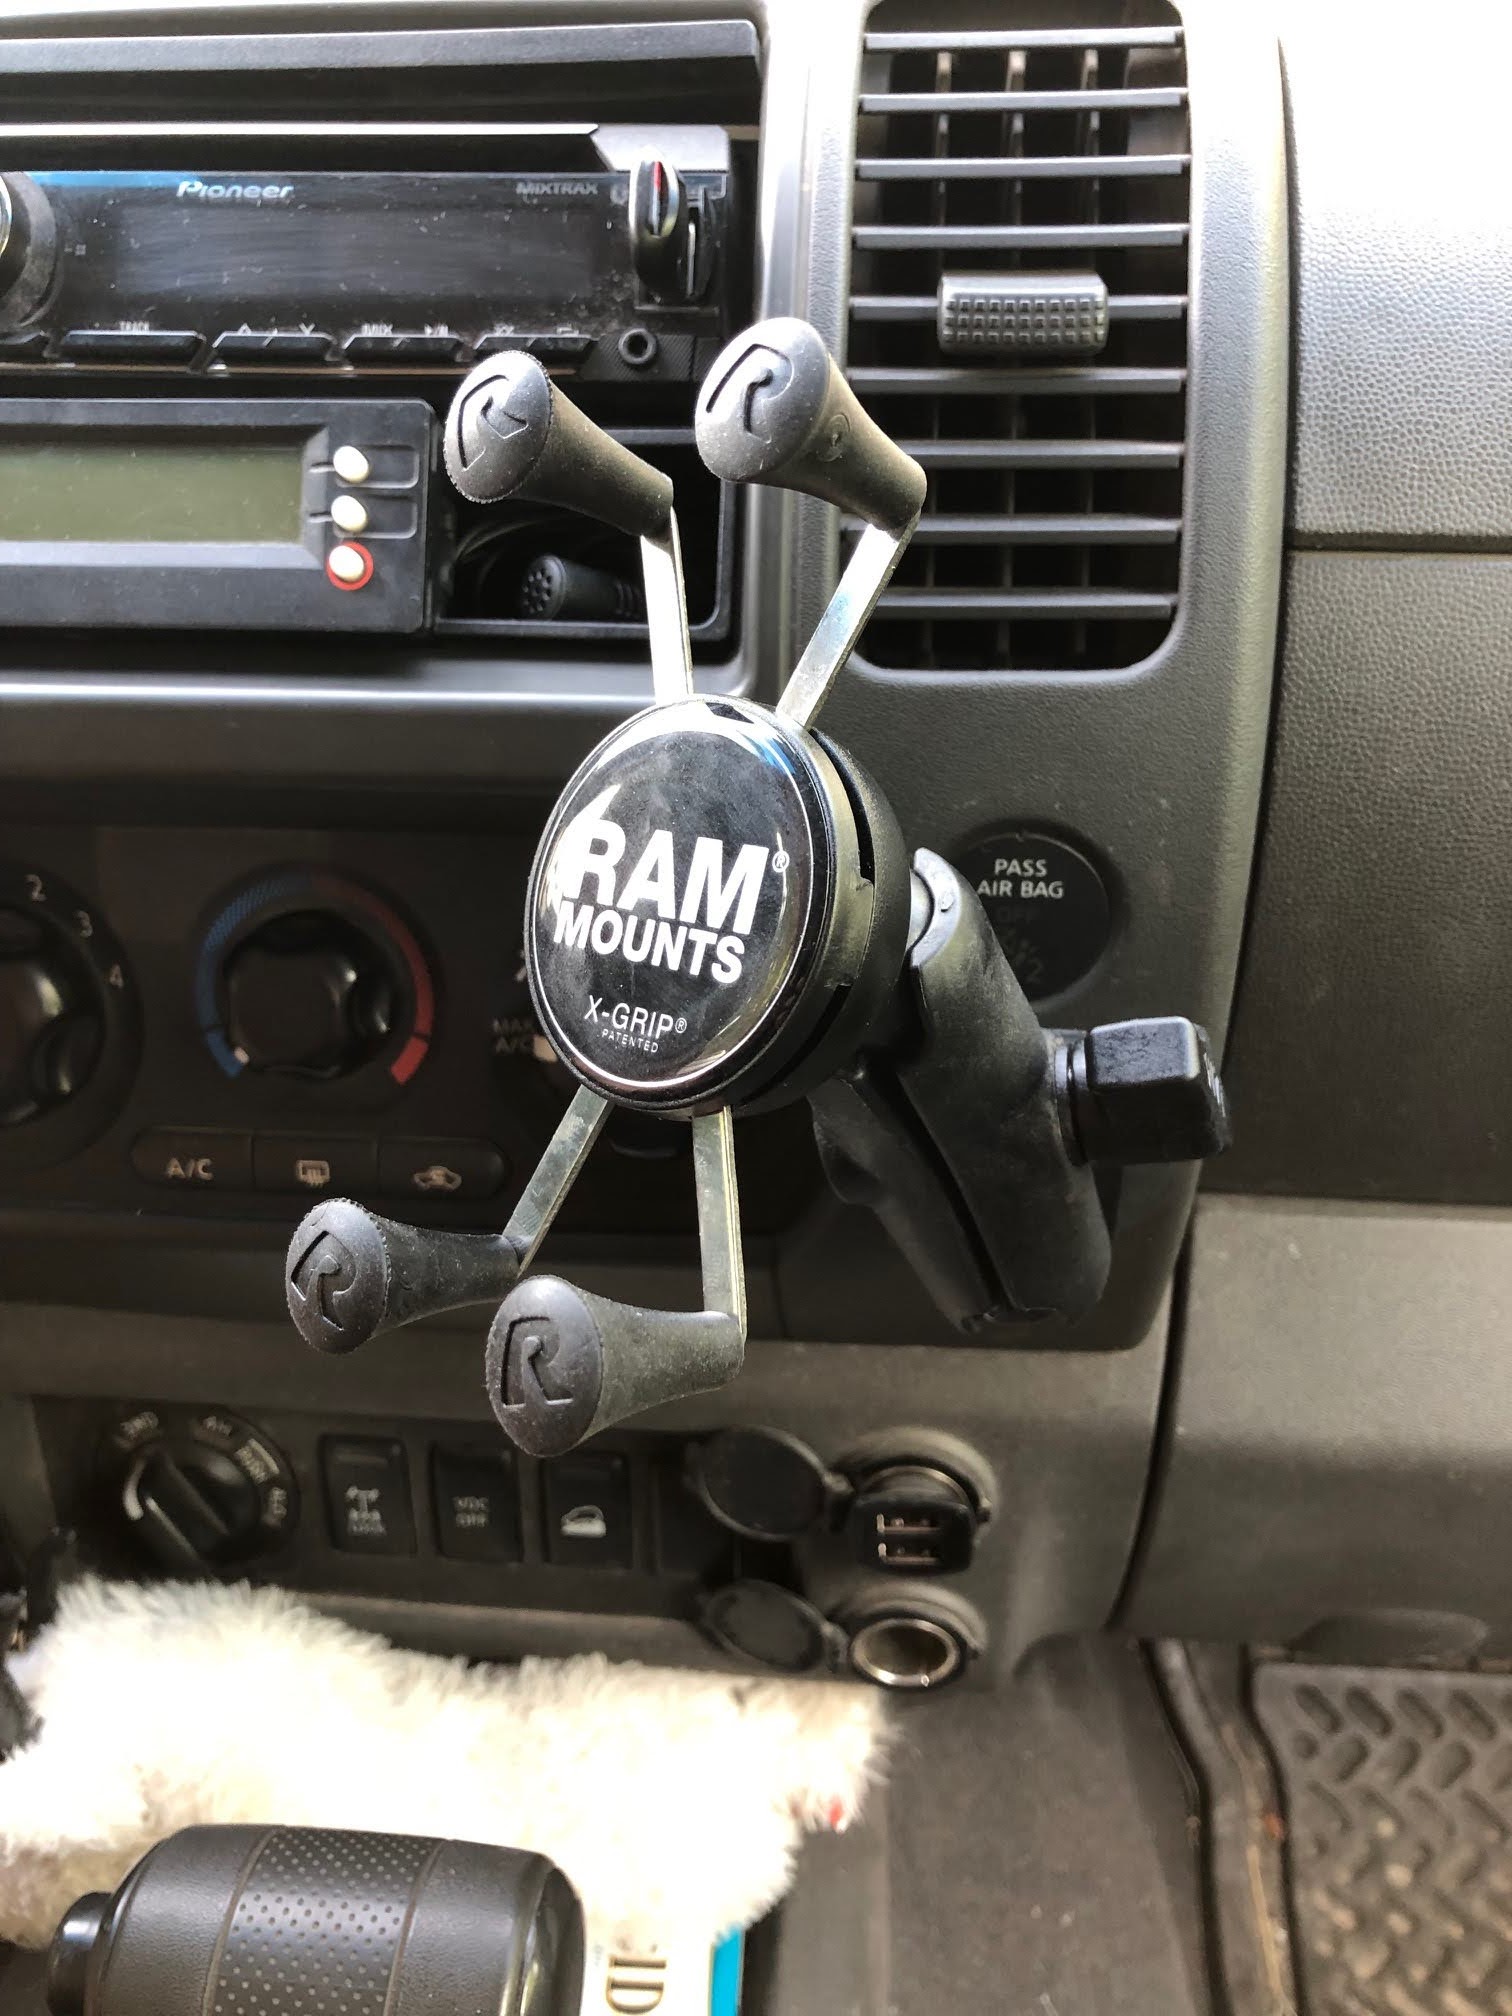
2009-2015 dash:
The space above the airbag light has nothing behind it so it's fine to use some self tapping screws there. On my 2009 I mounted a RAM ball mount using some 3M double sided tape and screws. It's really solid in this location.
2005 - 2008 dash (some trim levels may have this dashboard beyond 2008):
On my 2006 the plastic seems thinner and is brittle from sun and heat, so I wanted to reinforce behind the mount. I removed the plastic that surrounds the stereo and HVAC controls (pull up top tray, remove one screw, pull towards you, disconnect wiring plugs from hazard flasher switch, HVAC, and airbag light). Then remove Torx screws holding HVAC controls and airbag light to allow easier access to area below the airbag light.
Here's a view of the back of the plastic trim piece, showing the area below the airbag light.
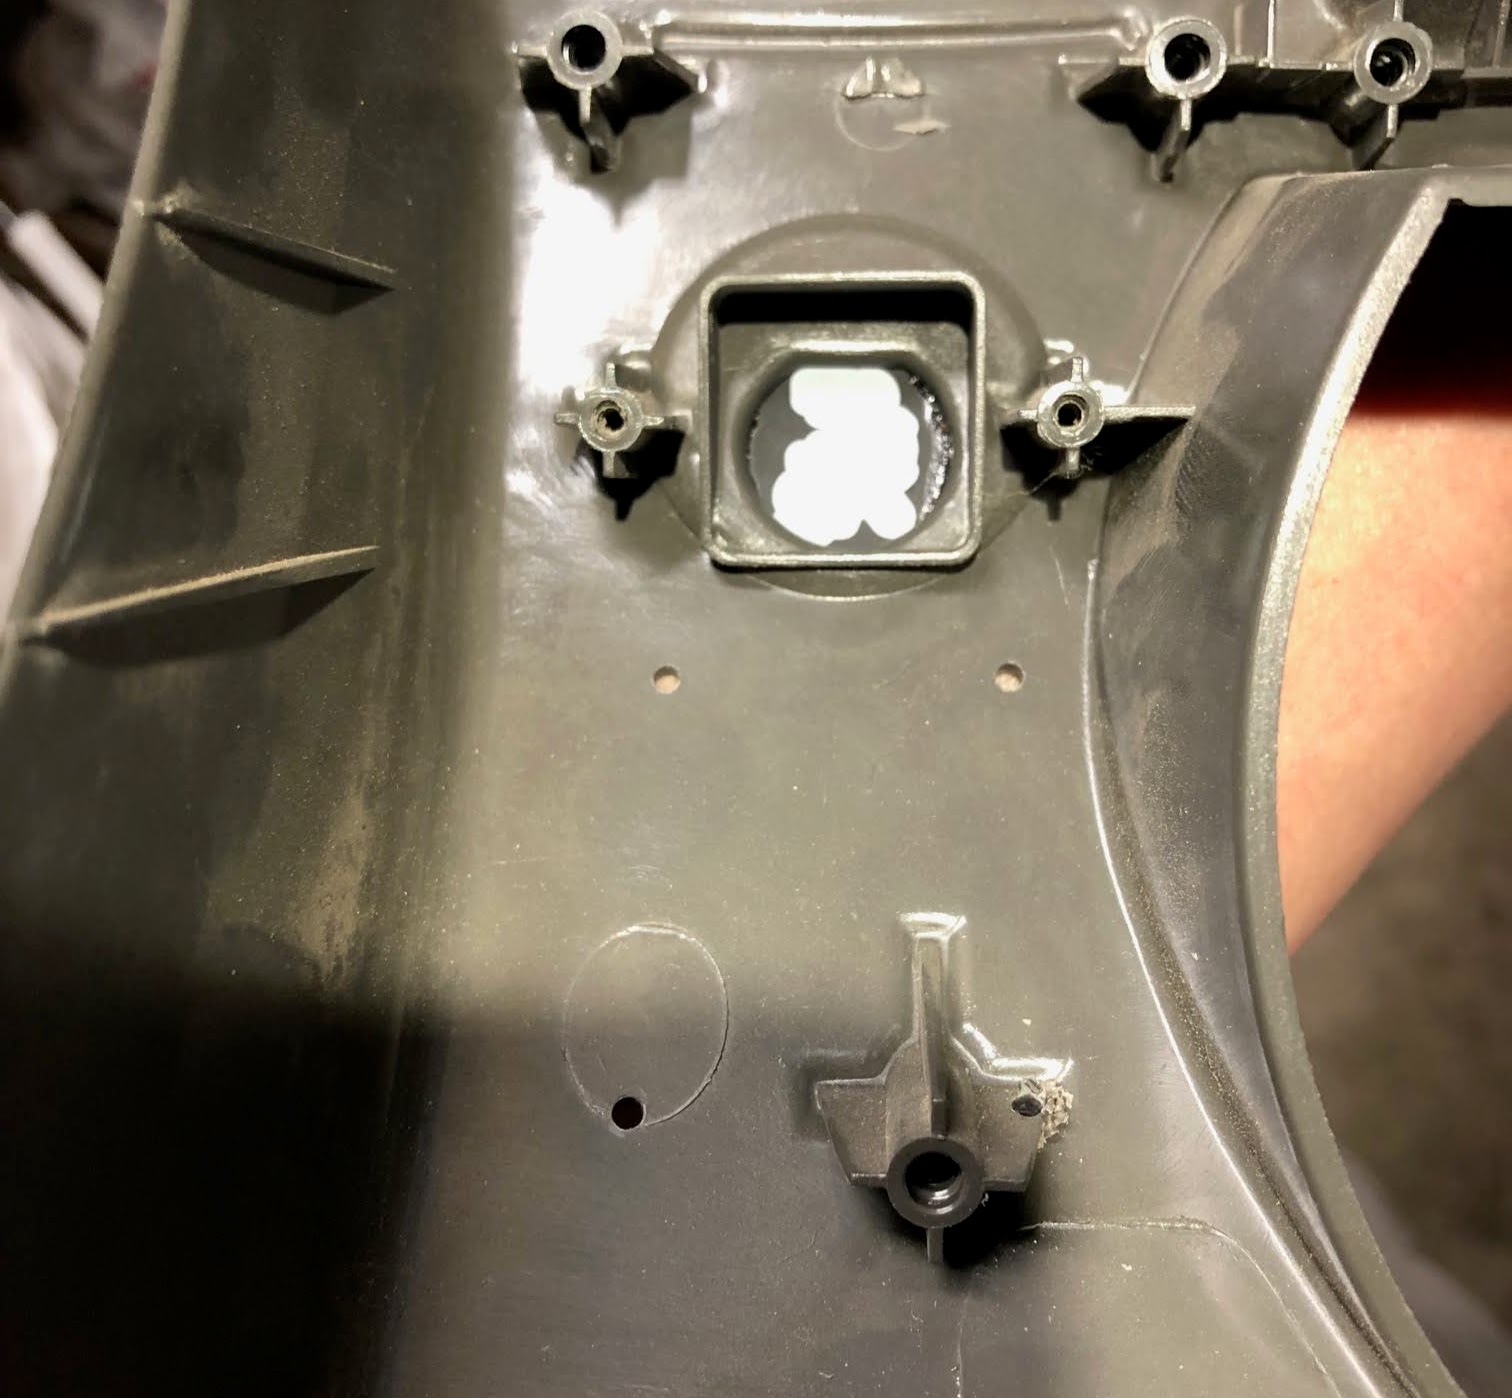
I cut a sheet metal backing plate to provide some support behind 3 of the 4 screws.

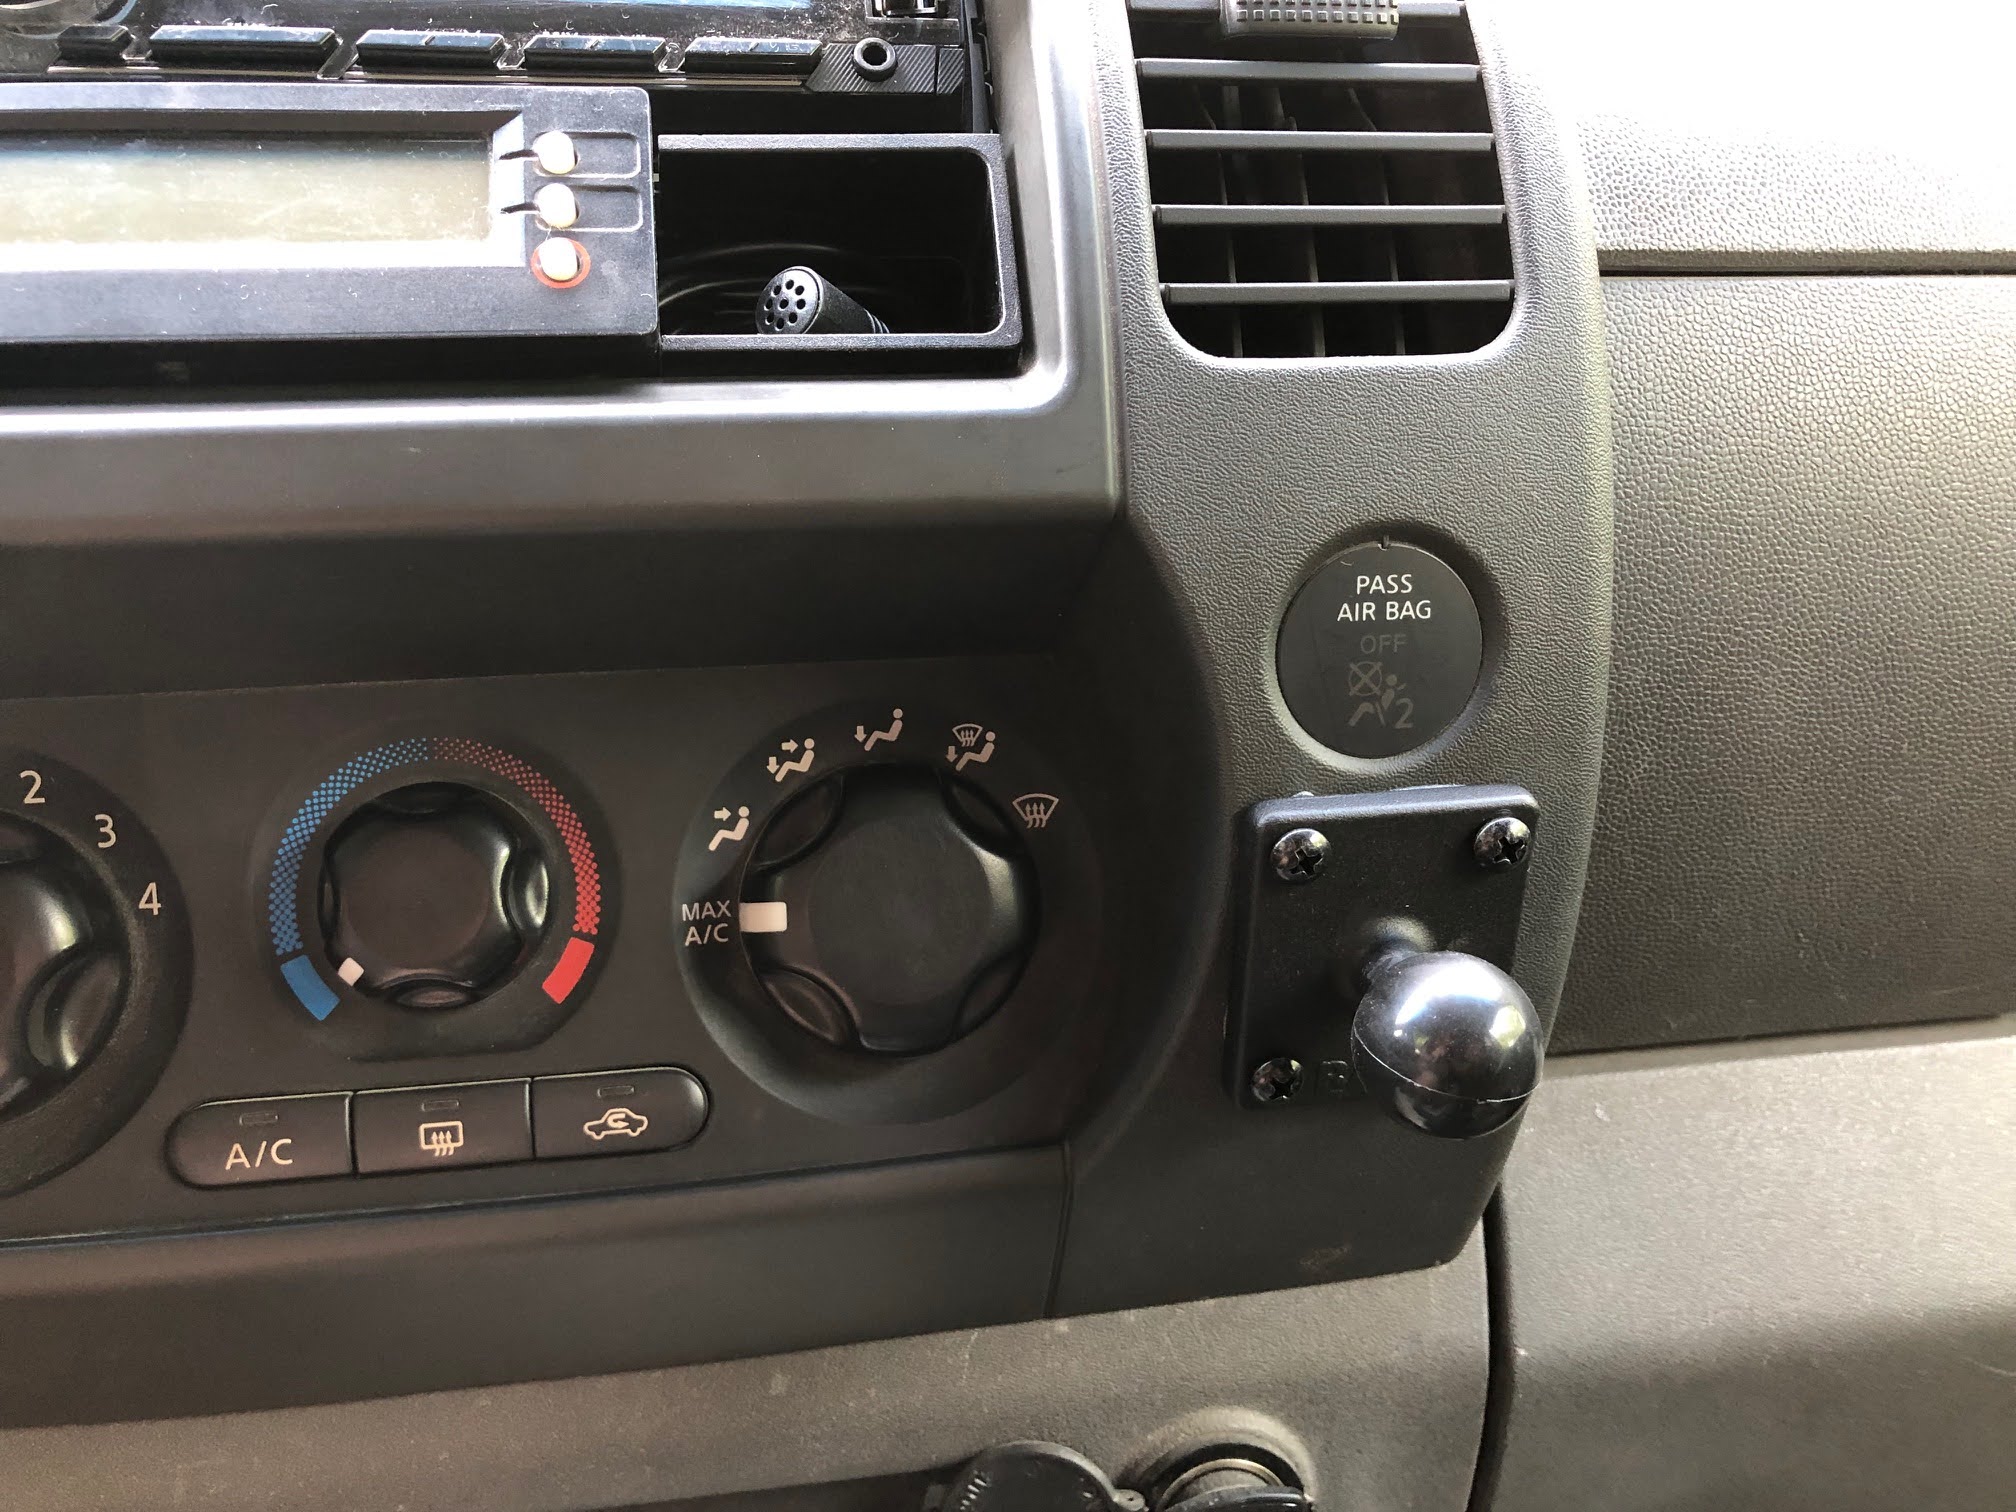
Applied 3M double sided tape to the back of the RAM mount and doubled up on it where needed to more closely match the rounded profile of the dash plastic.
Self tapping screws through the plastic and the metal behind it and it's now very solid.
I just wanted to share how I have installed a couple RAM ball mounts that we use for a phone or small tablets.
2009-2015 dash:
The space above the airbag light has nothing behind it so it's fine to use some self tapping screws there. On my 2009 I mounted a RAM ball mount using some 3M double sided tape and screws. It's really solid in this location.
2005 - 2008 dash (some trim levels may have this dashboard beyond 2008):
On my 2006 the plastic seems thinner and is brittle from sun and heat, so I wanted to reinforce behind the mount. I removed the plastic that surrounds the stereo and HVAC controls (pull up top tray, remove one screw, pull towards you, disconnect wiring plugs from hazard flasher switch, HVAC, and airbag light). Then remove Torx screws holding HVAC controls and airbag light to allow easier access to area below the airbag light.
Here's a view of the back of the plastic trim piece, showing the area below the airbag light.
I cut a sheet metal backing plate to provide some support behind 3 of the 4 screws.
Applied 3M double sided tape to the back of the RAM mount and doubled up on it where needed to more closely match the rounded profile of the dash plastic.
Self tapping screws through the plastic and the metal behind it and it's now very solid.
Last edited:
