How To: 1st Gen 3.3 Clutch Install

SlvrGen1_X

Test Drive
Location
Las Vegas
So with my recent trip to to Moab, UT for goneMOAB and several other wheeling trips around the southwest, I realized it was time to replace my clutch yet again. When I made this decision, I realized that there was no write up in the "How-To" sections of the different forums out there and after talking to a few friends with 1st Gen's that drive manuals I decided it would be a great time to do a How-To on it. I have taken a lot of pictures of the removal and few if any of the install. The reason being because the install is literally the complete opposite of it; so if you can remove it, you should be able to install it in the opposite order. Just below I have created a list of suggest tools and parts to accomplish this task.

TOOLS:
1/2" Drive Ratchet
1/2" Drive Breaker Bar
1/2" Drive 3", 6", 9" Extension (If you have or can find a 12", that too)
1/2" Drive Sockets:
21mm Deep
19mm Deep/Shallow
17mm Deep/Shallow
14mm Deep/Shallow
12mm Shallow
3/8" Drive Ratchet
3/8" Drive Breaker bar
3/8" Drive 3" & 2x 6" Extensions
3/8" Drive Sockets:
14mm Deep/Shallow
13mm Deep/Shallow
12mm Deep/Shallow
10mm Shallow
1/4" Drive Ratchet
1/4" Drive Sockets:
14mm Shallow
10mm Shallow
Wrenches:
19mm
17mm
14mm
13mm
12mm
10mm Reg./Stubby
Snap Ring Pliers
Different Size Pry Bars
Cheater Bar
Mini Sledge
Floor Jack
Engine Hoist
Jack Stands
Transmission Jack
Slide Hammer
Pilot Bushing Removal Tool
Couple Blocks of wood (Pressure Treated 4x4 works best usually)
Shop Press
1/2" Drive Impact Wrench (Cordless or Pneumatic)
Drain Pans for a lot of oil!!!

If you don't have these tools, it isn't a problem. Generally you can rent some of the specialty tools at O'Reilly Auto or Autozone. When I rented mine they basically told me if I wanted to keep the slide hammer and Pilot Bushing Removal Tool that I could and wouldn't get my money back; which is what I chose to do. Came out to be roughly 50 bucks for the two at O'Reilly. A while ago I purchased a cordless Impact Wrench/Drill Combo Kit from Craftsman for 240 Bucks. I will say and so will my buddy who helped me that the cordless impact wrench worked flawlessly and only switched batteries once. Highly recommend this tool! For the other stuff like the engine hoist, transmission jack, and shop press, I purchesed over the course of a few years because of other projects. These can be found at Harbor Freight for relatively low price: Trans jack (165) 12 Ton Shop Press w/ Plates (120) and 2 Ton Engine Hoist (150).

Clutch Parts:
Clutch Kit (Clutch Disk/Pressure Plate)
Throw Out Bearing
Pilot Bushing
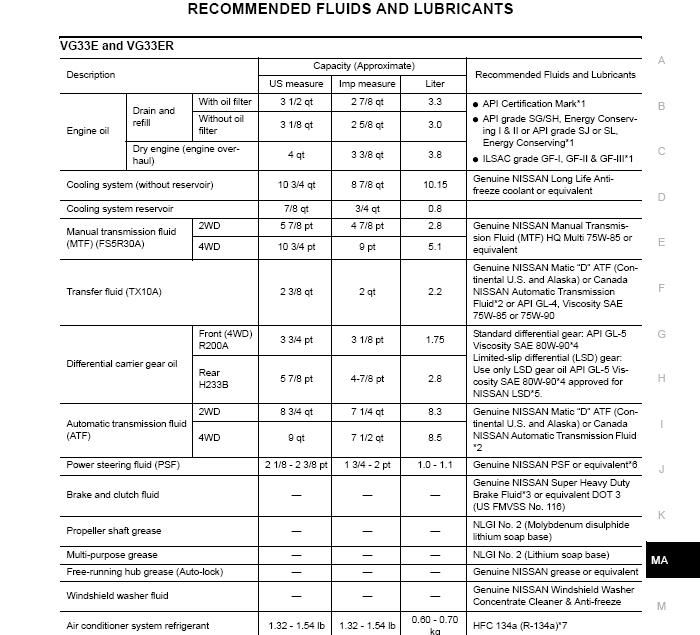
Gear Oil (Trans takes 5 3/8 qts roughly)
ATF (T-Case takes 2 1/2 qts roughly)
WD-40
QD Electrical Connector Cleaner
Brake Cleaner

A couple other tips for this install is to have plenty of time to complete this. If you're completing this on a flat bay I would suggest giving yourself a full two days to compensate for errors. I would also strongly suggest having a second set of hands or even a third; granted it can get pretty crowded underneath the X. This is my third time removing the transmission, but first time without a vehicle lift. This time it took me about 13 hours of total time including food breaks. Anyways time to get into it so here goes.

Step 1: Disconnect Negative battery connector

Step 2: Set Parking Brake and chaulk rear tires

Step 3: If equipped, remove front/radiator skid, engine/trans skid, and t-case skid

Step 4: Drain Transmission and Transfer Case

Step 5: Disassemble interior center console while fluids are draining.

Remove both Transfer Case and Transmission Shift Knobs by twisting off.
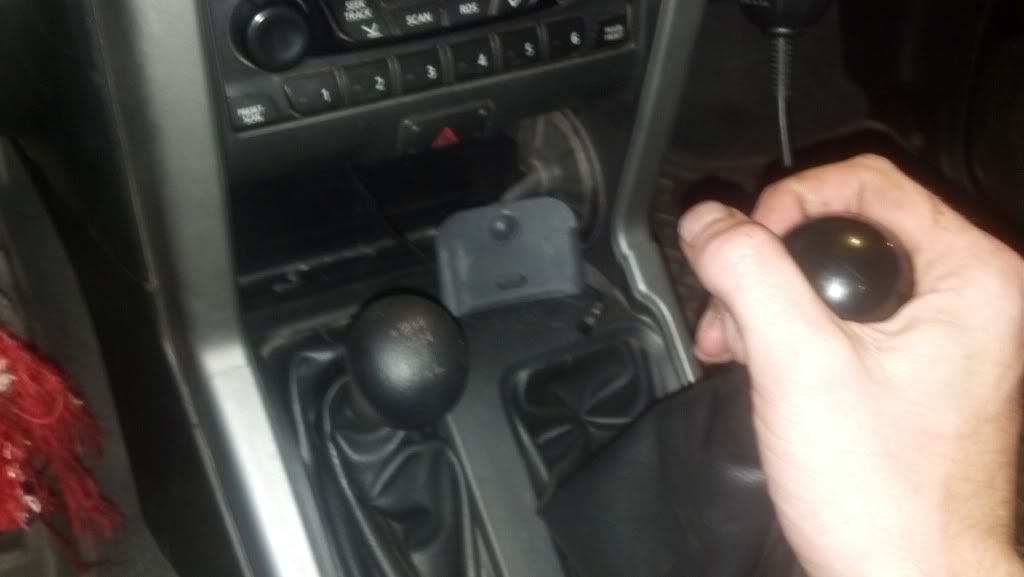

Remove Shifter Cover Plate by giving it a slight yank upwards. Its held down by 4 compression clips.
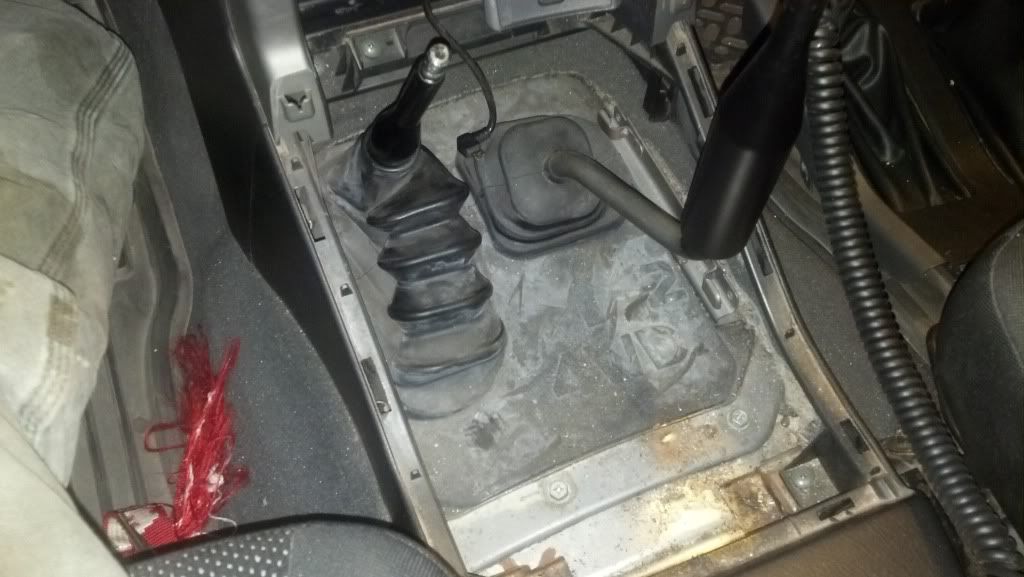

It should look like this afterwards


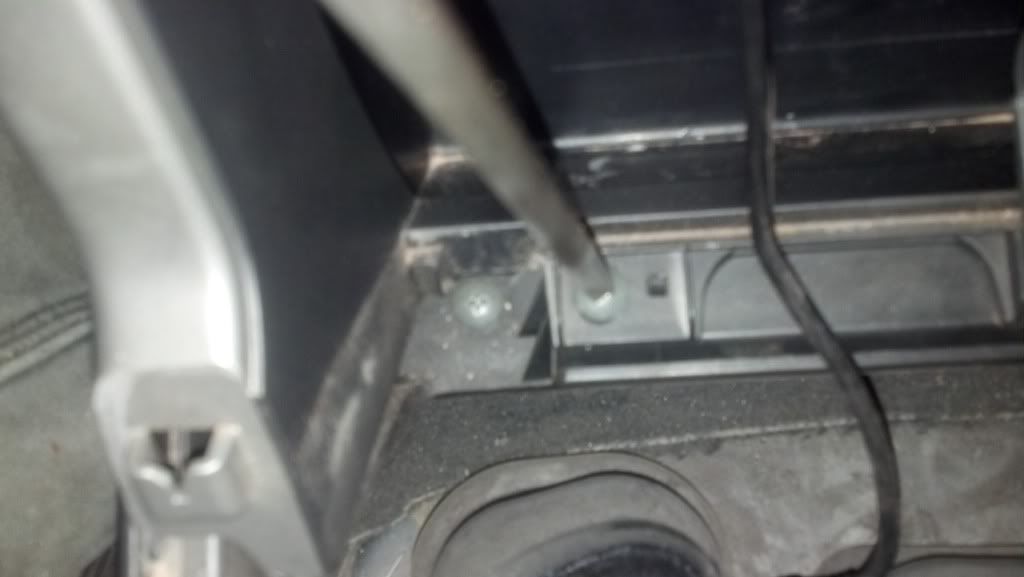
Next remove the center dash cover panel. There are a total of 4 screws that hold it in. The first two are on the bottom of the cover, located here:

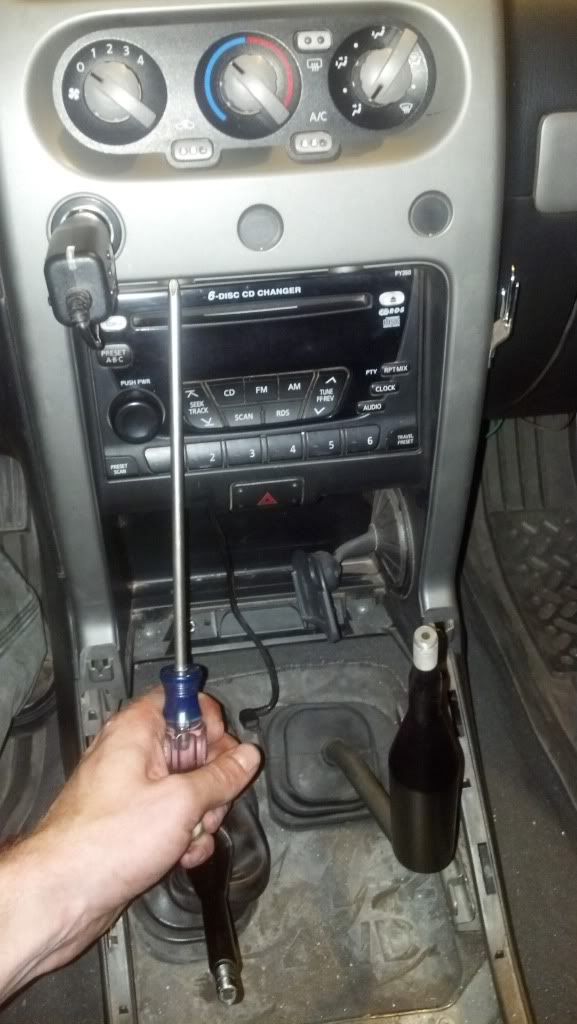
The second to are just above the head unit, located here:

Once the four screws have been removed you can then give it a yank towards you and it should pop out just like the shifter cover plate.
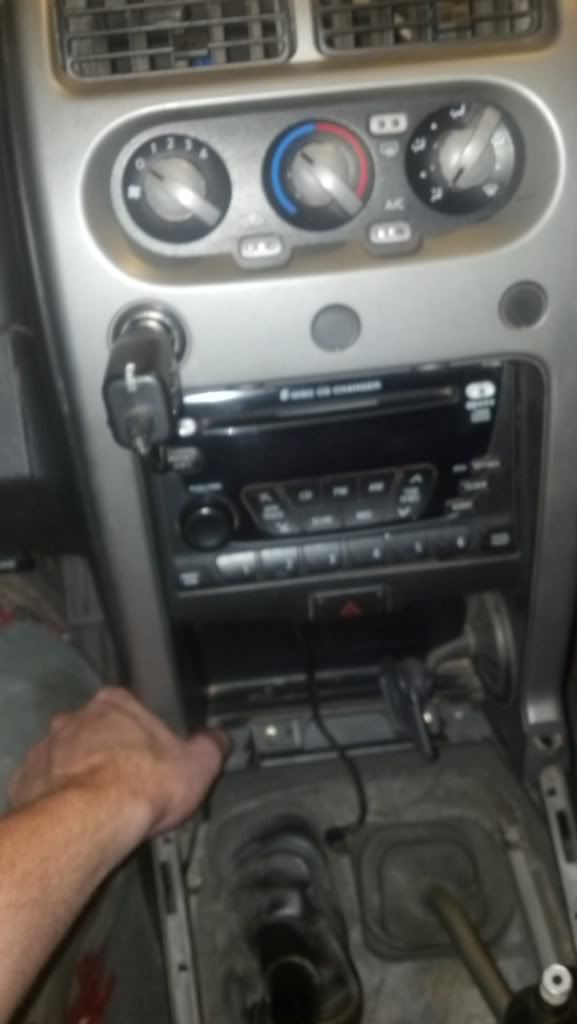

After it has been removed from the dash there will be two electrical connectors you will need to remove; 12v accessory (not pictured) and hazards switch.
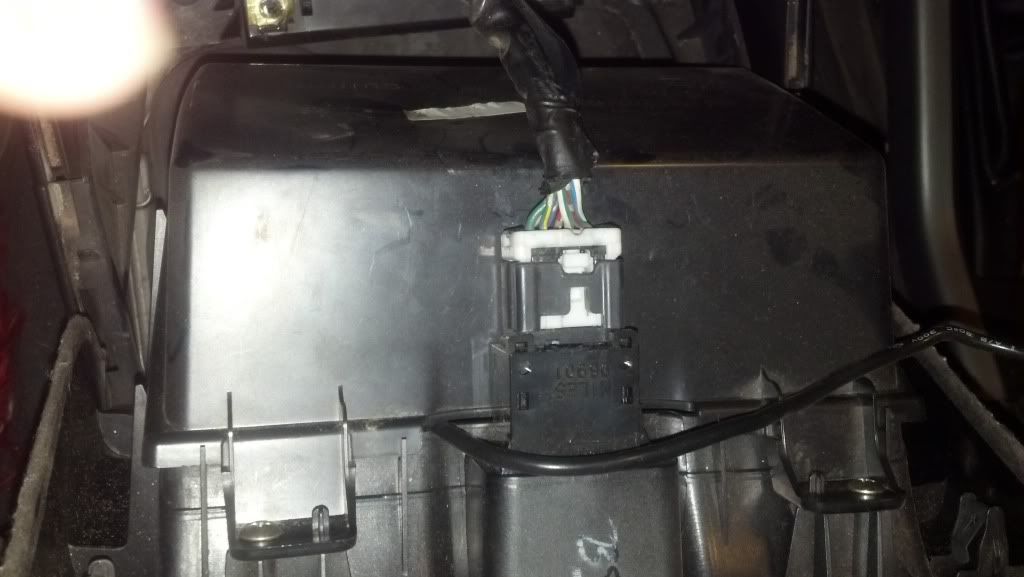

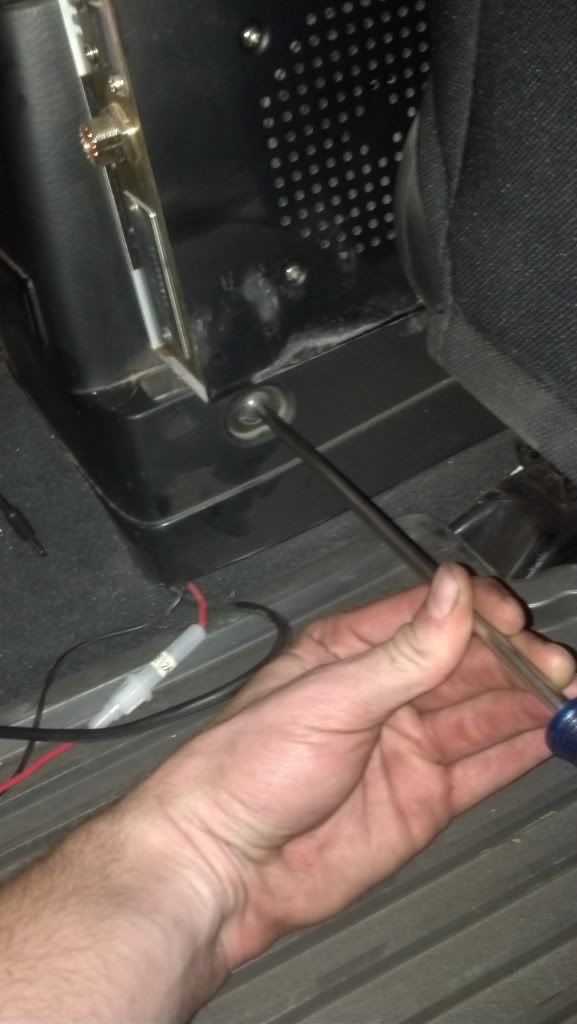
Next will be the center console. There are six screws and one electrical connection that hold this in place.
The first two are located at the back of the console, you will need to move the front seats forward to access these.
Driver side:
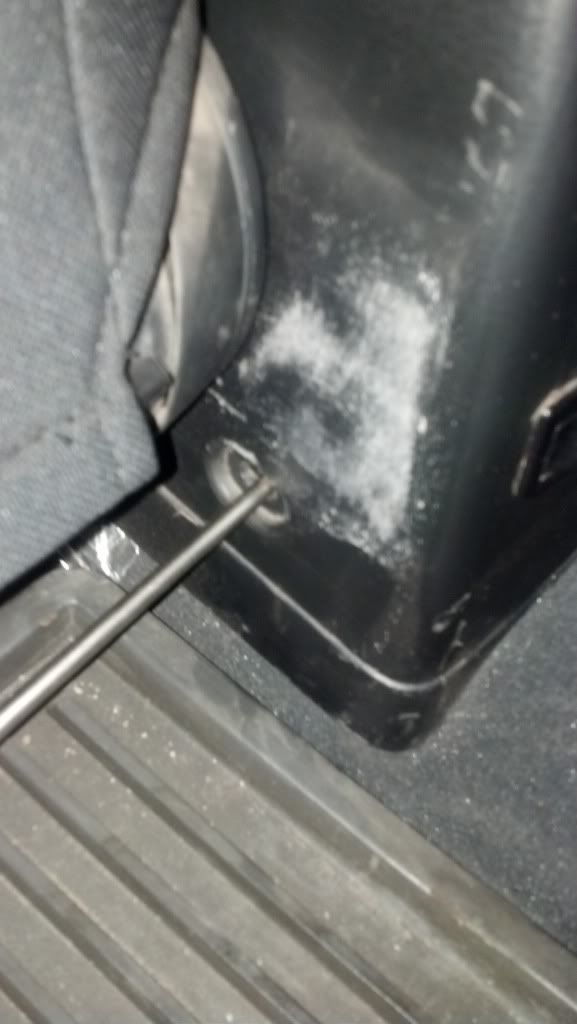

Passenger Side:

Next two are located right in front of the cup holders
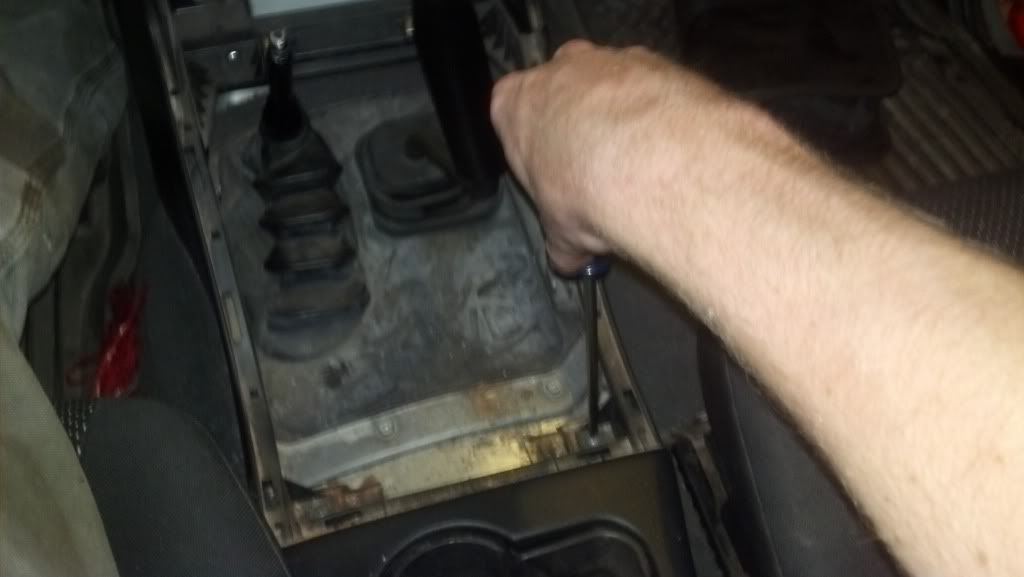

The last two are located towards the front, just in front of the shifters
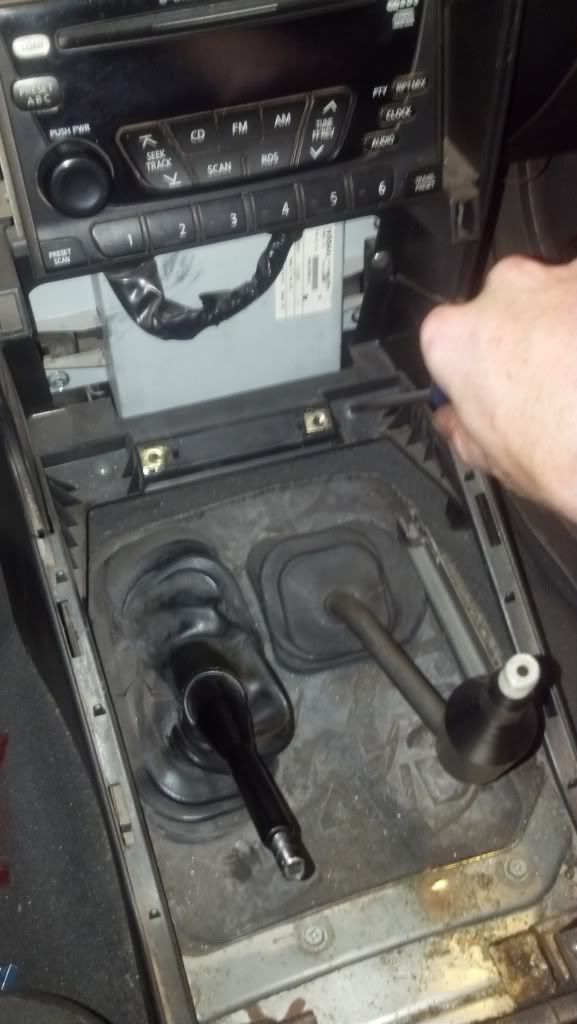

After all of the screws have been removed from the center console, you will need to lift it up at the same time as moving it back. Once you are clear from the dash you will need to lift the nose straight up and make it vertical. TIP: Make sure all of your change or any other items are removed from the center console. At this time you should be able to see the 12v accessory connector fastened to the transmission tunnel. This will need to be disconnected.
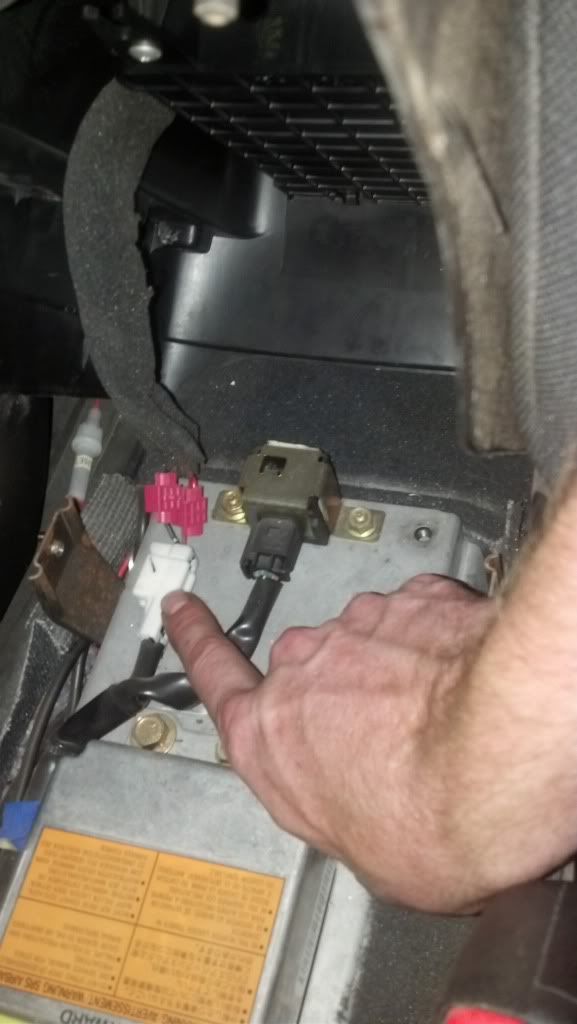

Next you will need to remove the lower forward dash cover. This is held on by 4 screws.
First two located on the sides of the computer just below the head unit.


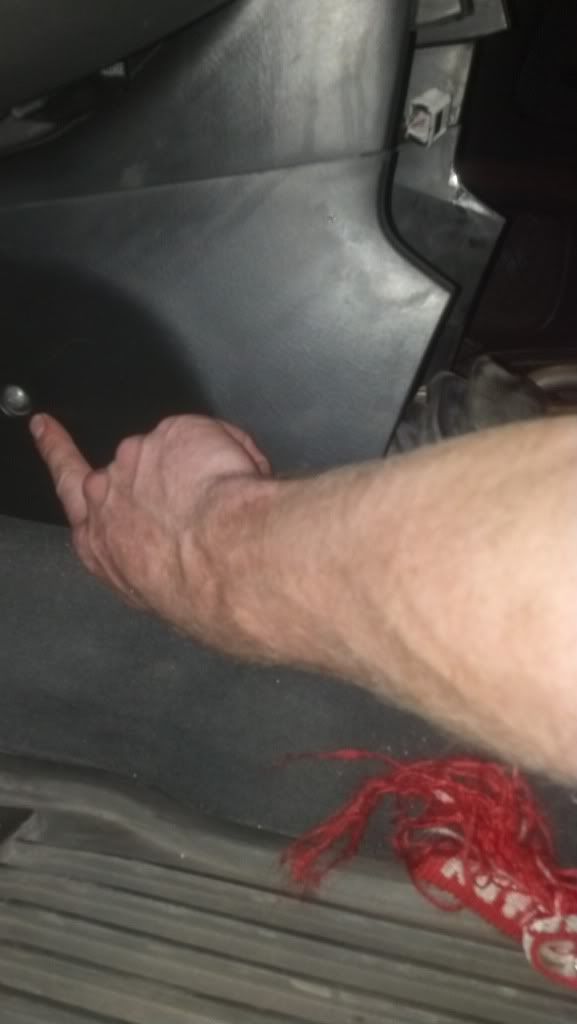
The last two located on the cowls side; driver and passenger near the floor vents

Once all of the center console has been removed you will need to remove the weather seal bracket and weather seal, The bracket is held on by seven 10mm machine screws. There are two located on the sides of the bracket, here:
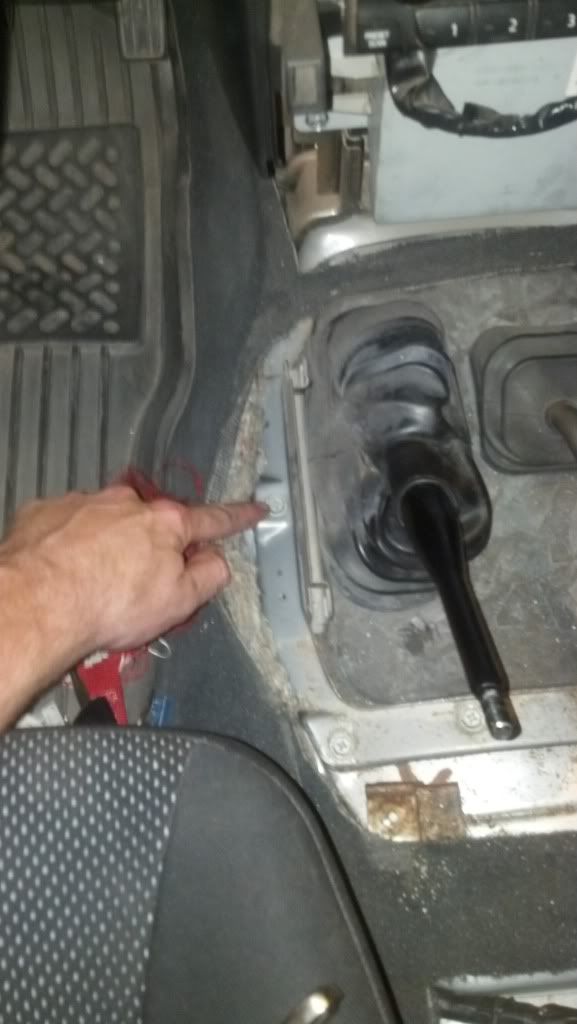

two located under the head unit and 3 located opposite of this (not pictured)
 
Last edited:

SlvrGen1_X

Test Drive
Location
Las Vegas
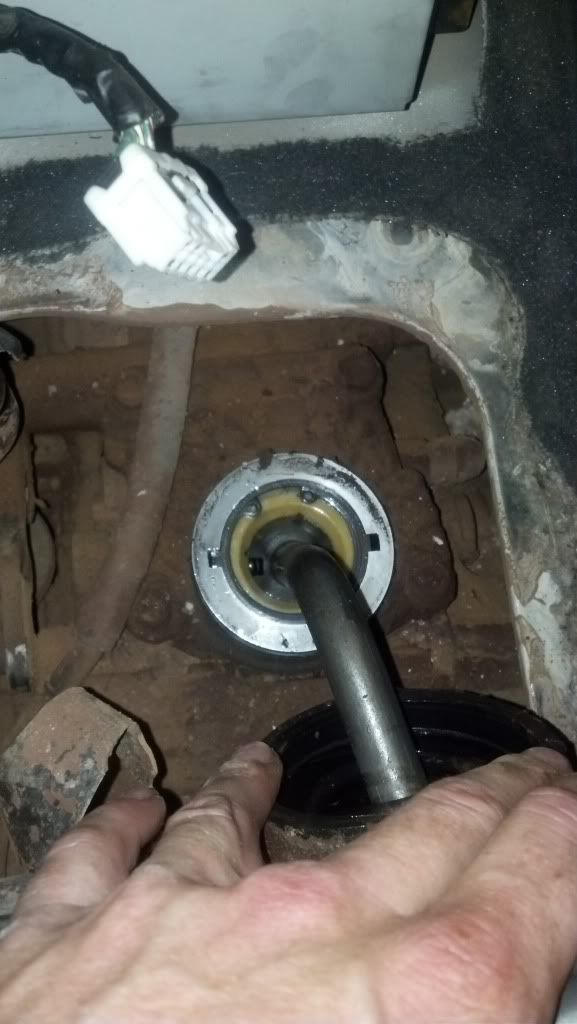
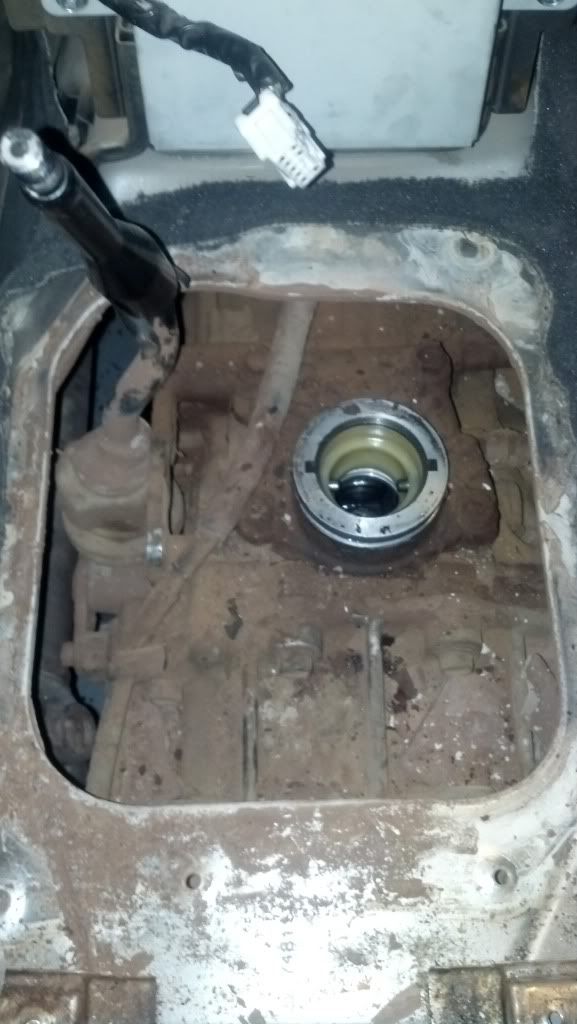
Once the weather seal has been removed you can now access the shifter to be removed. There is a rubber boot that surrounds the trans shifter and held on by a clamp (not pictured) remove this, then you can see the snap ring that holds the shifter in place. After the snap ring is removed the shifter literally just pops up with a pull. Set these two items aside.


After this is complete you should now be able to start working on the transmission portion of this project.

Step 6: Jack up front of your X and place jack stands on the forward cross-member so you can remove the front tires with a 21mm socket or tire iron.

Step 7: Replace Transmission and Transfer Case Drain plugs

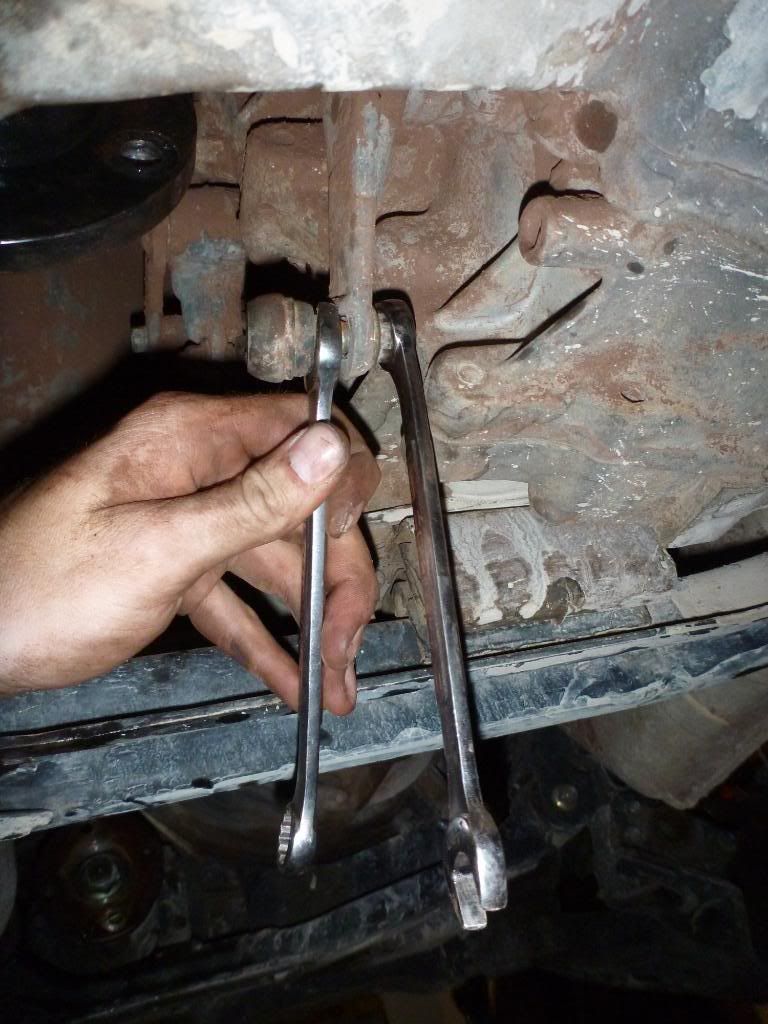
Step 8: Remove Transfer Case Shifter Assembly. There are two 14mm bolts on the side of the T-Case


and a 14mm nut on the bottom of the shifter linkage attached to the T-Case. You will need to use two 14mm open/boxed end wrenches to remove the linkage nut.


Step 9: Remove front and Rear Drive Shafts.
The Rear drive shaft (If not modified) is a slip yoke and attached to the rear carrier with four 17mm bolts and nuts. Remove these bolts and the rear drive shaft should slide out. Once removed, be ready for some residual ATF to come out the back of the T-Case.


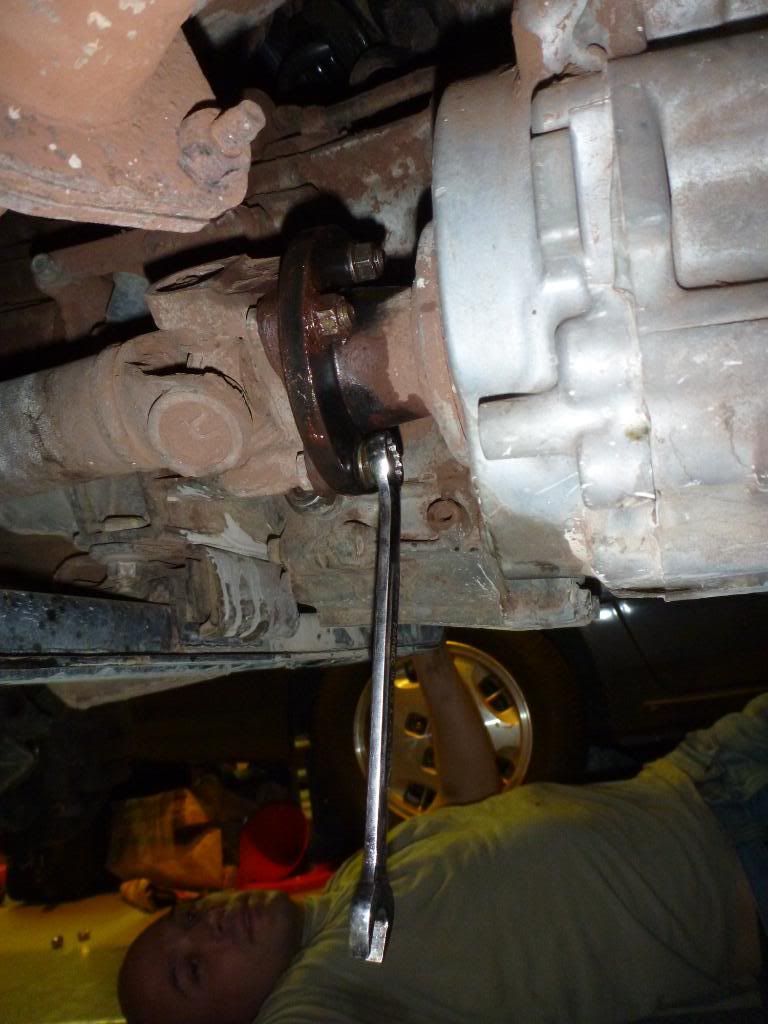
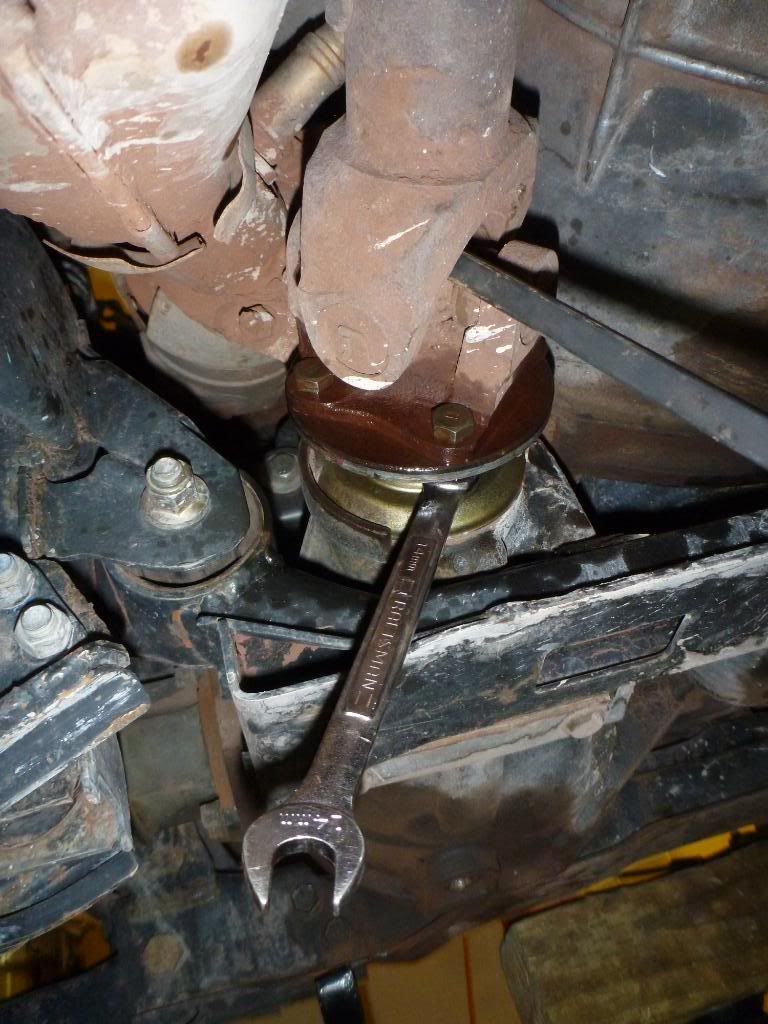
The front drive shaft is held on at the T-Case and Front Diff with a total of eight 14mm bolts, easily accessed by a 14mm open/boxed end wrench. I would suggest a cheater to help break these and a breaker bar with a second set of hands to keep the drive shaft from moving. Do not fully remove or loosen the T-Case side of the drive shaft. It will help stabilize the DS when loosening the front four bolts.


Differential Side of DS:


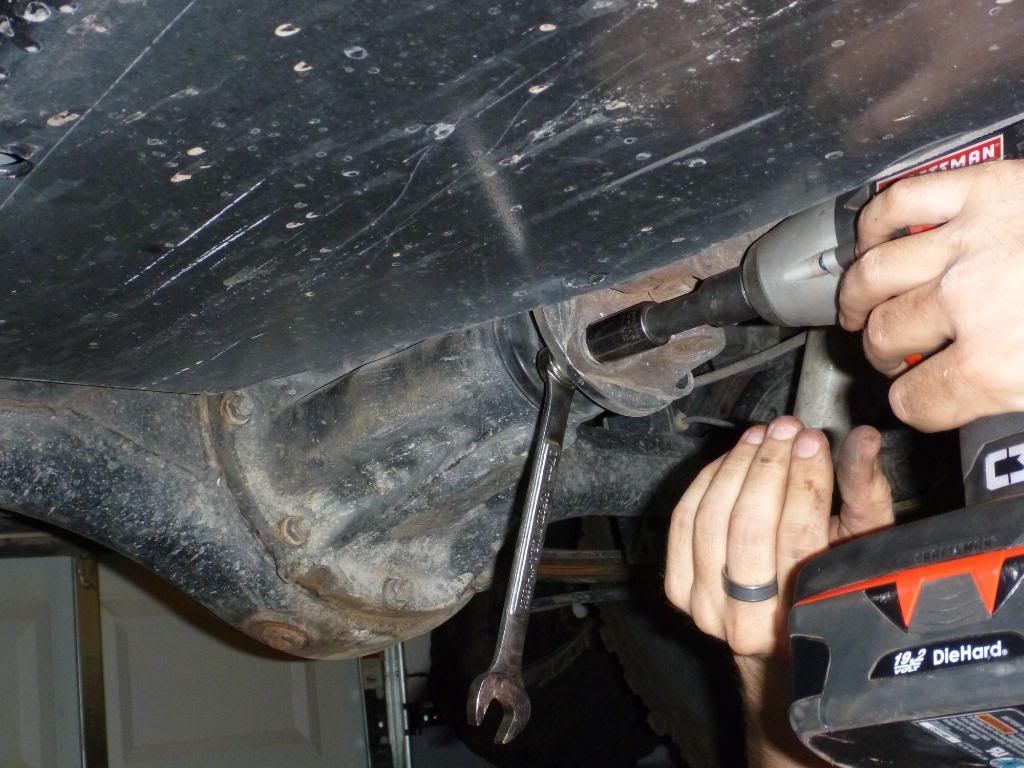
Step 10: Remove Torsion Bars. I'm not really going to go into detail here because there are other "How-To's" about T-Bars removal and marking their positions as well as re-keying them. Tools for this portion consist of a 19mm (deep or shallow) and a 19mm wrench. Be careful when place the wrench on the jam nut of the adjustment bolt when using an impact wrench, if your not careful you will smash your fingers and hand....not fun!!


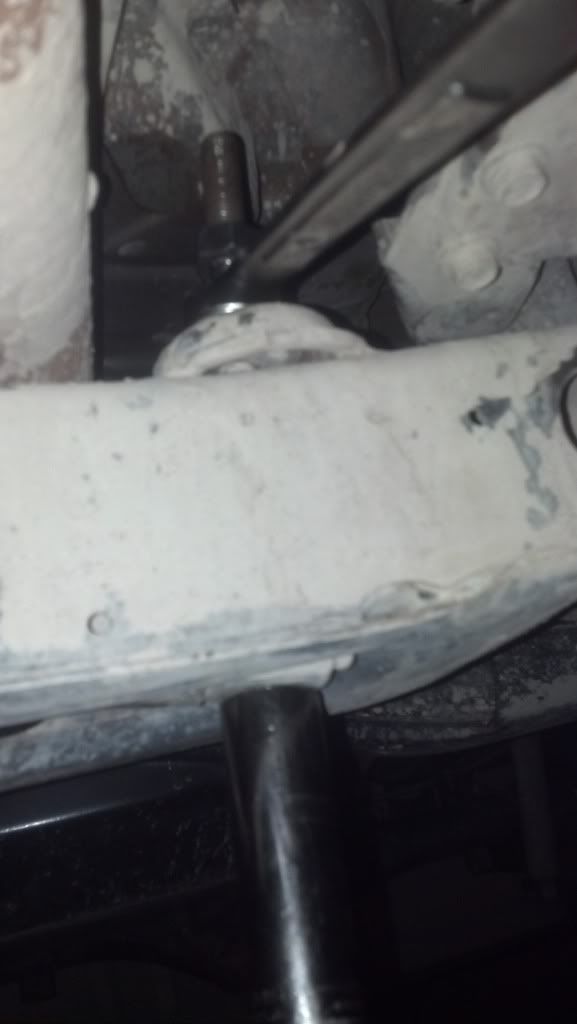
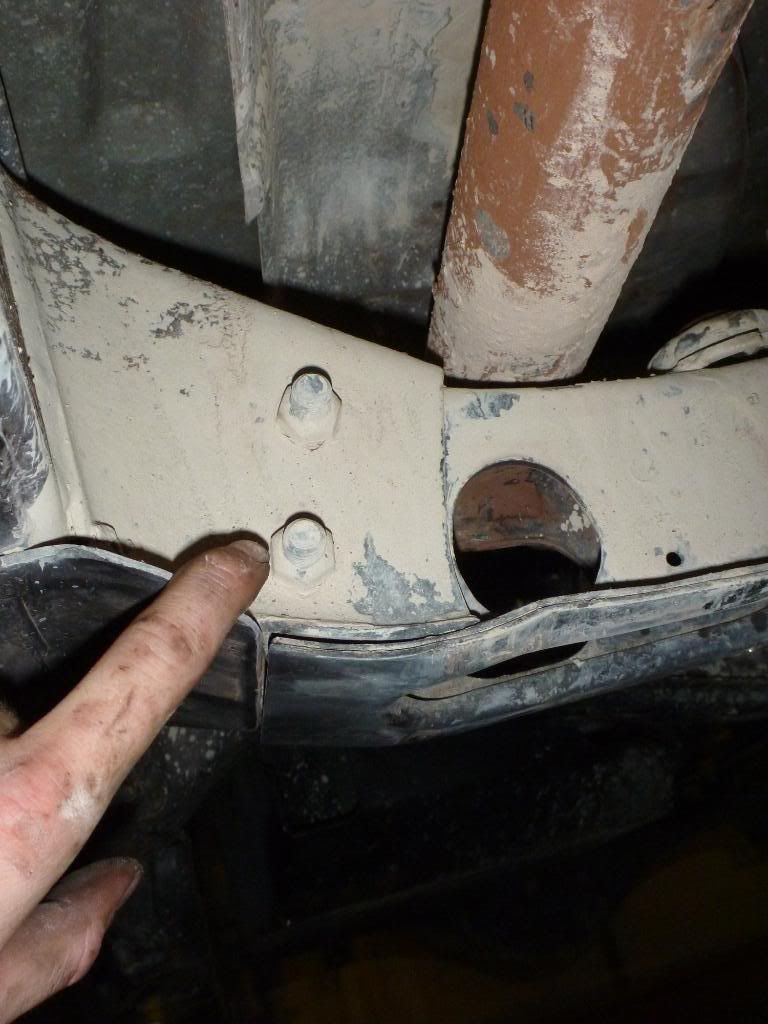
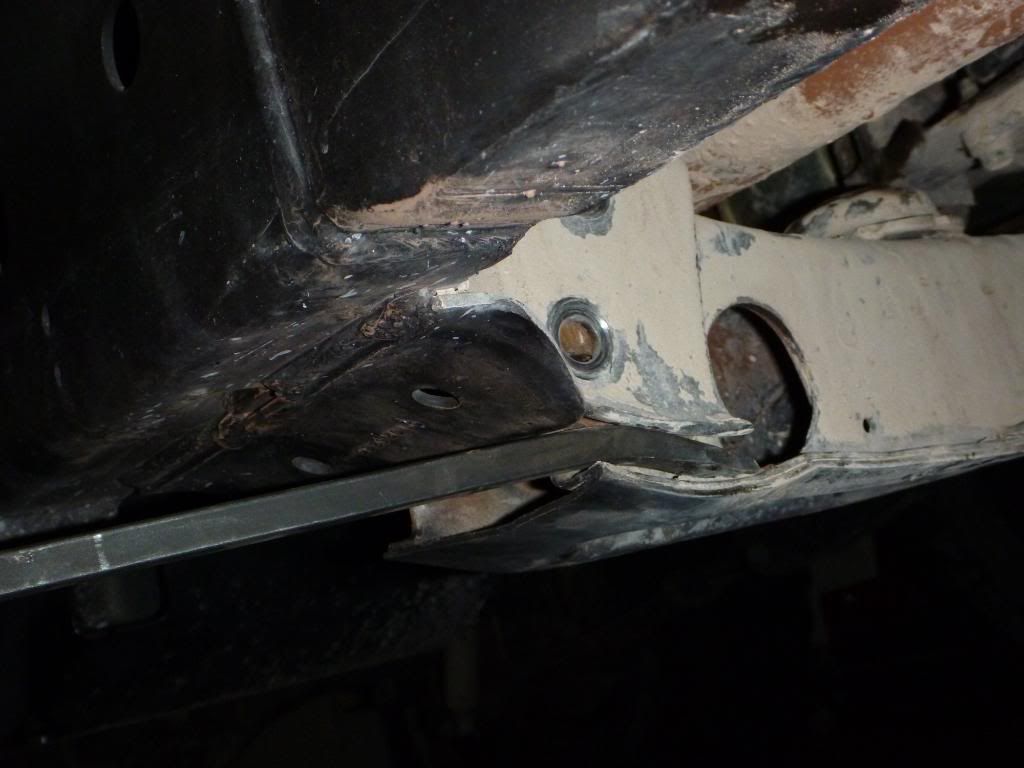
Step 11: Remove Torsion Bar Cross-member. There are four 17mm Bolts and Nuts. Pay attention to how the bolts go in and be sure to place them the same way when it comes time to install this cross member again.


When removing the cross-member, it is going to take the love of a nice size pry bar on both sides. When its time to install this cross member, I found it easiest to use a floor jack slowly and coating the mating surface with a copper grease to prevent further rusting and freezing. Be careful when applying pressure with the jack to CM because it will start to lift the vehicle.


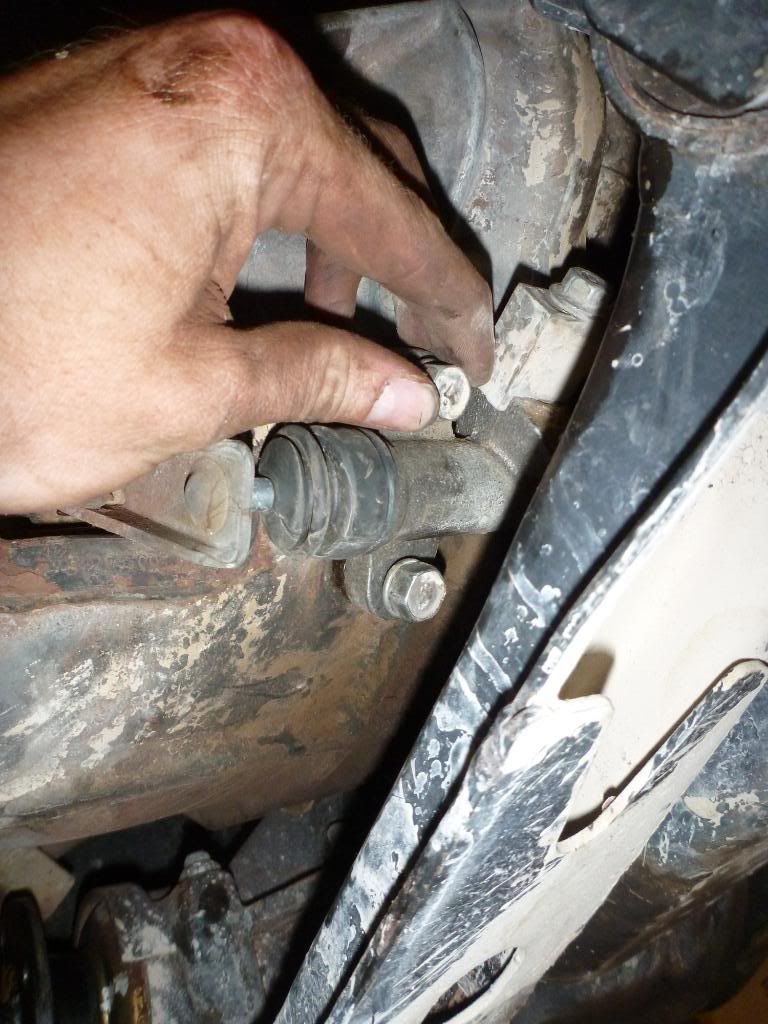
Step 12: Remove Clutch Slave Cylinder, located on the lower right hand side of the transmission. This is held on by two 14mm bolts. I used a wrench to break these and switched to a a 1/4" drive ratchet and socket to continue.


Step 13:Remove Starter Motor and bolts from transmission. This is held on to the transmission with two 14mm bolts and each has two washers on them. There isnt a need to disconnect the starter though, just the bolts is all.


Step 14: Support the engine some how preferably with an engine hoist or fender brace support beam.
 
Last edited:
SlvrGen1_X

Test Drive
Location
Las Vegas
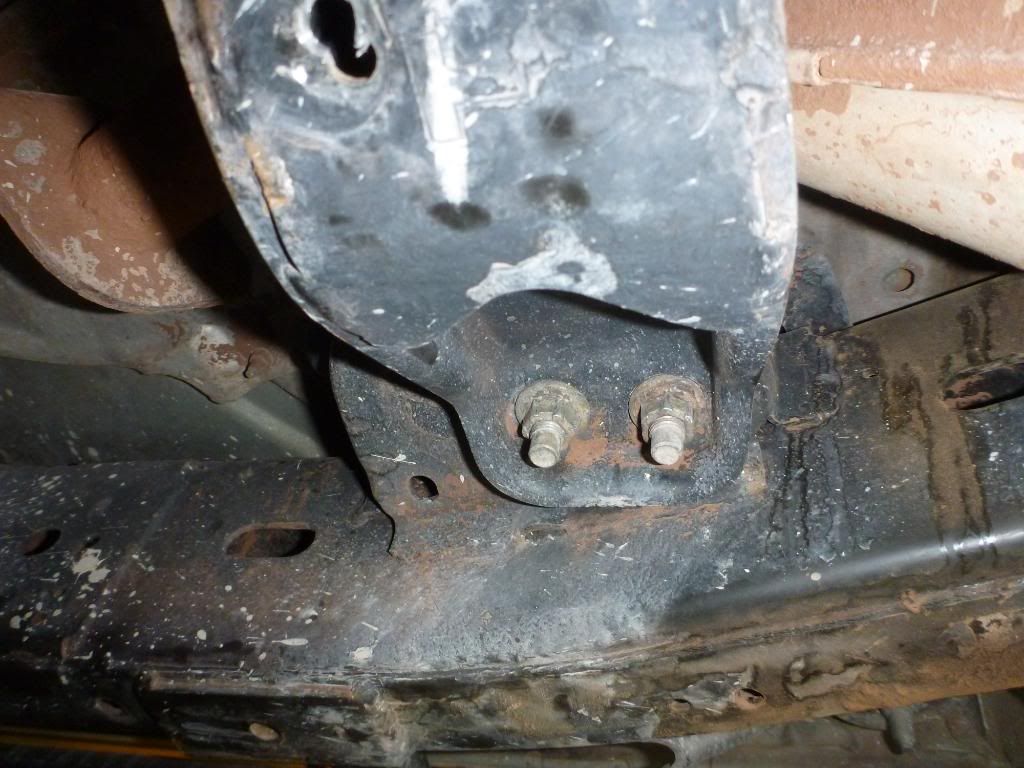
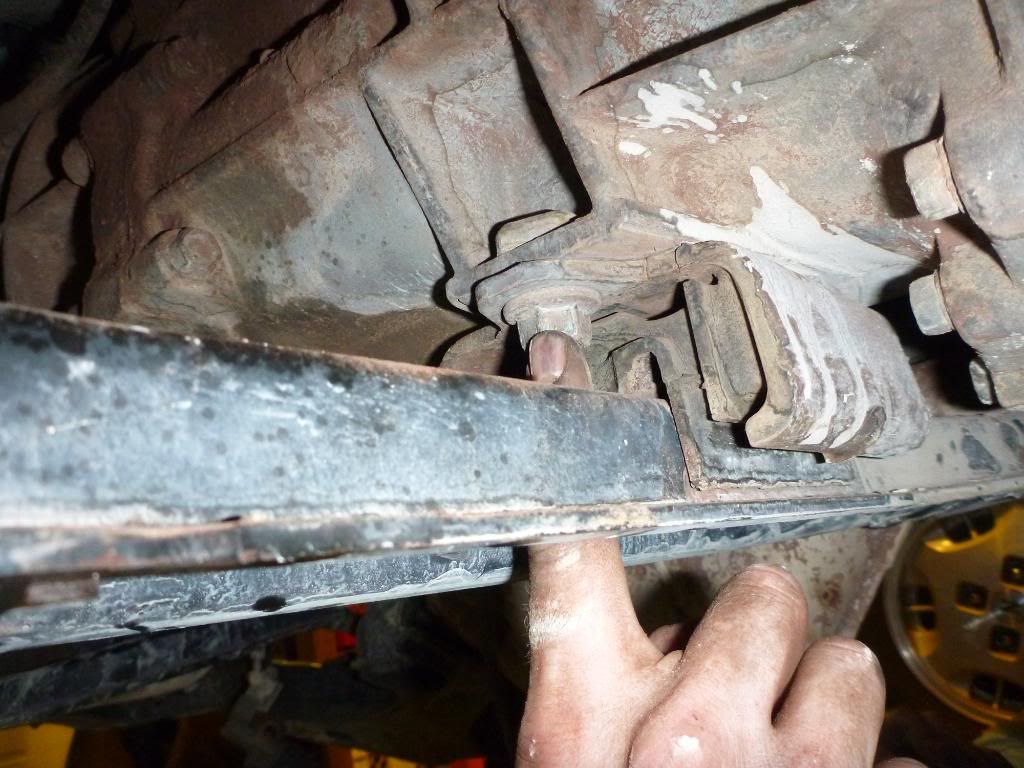
Step 15: Remove Transmission Cross-Member. Support Transfer Case with a floor jack, leaving enough room to be able to get the transmission jack where the cross-member was. The coss-member is held on by four 17mm nuts and bolts, two on both sides of CM, there are also two 19mm nuts that hold the trans to the the mount on the CM.
CM Bolts on the frame:


Transmission Mount nuts:


Once the CM is removed be sure to place the trans jack under it. I would also suggest ratchet strapping the Trans/T-Case to the jack just for some added security.

Step 16: Remove Y-Pipe of the Exhaust. It is held on by 6 bolts the actual pipes themselves. There is also a mount on the backright side of the T-Case. This mount is held on by two 12mm bolts. There is another mount for the muffler that is held on two 12mm bolts as well that if removed can make life easier to remove the Y-Pipe. I'm not going to say the size of the bolts and nuts because I am sure they vary from vehicle to vehicle. Mine were a mix of 14mm and 17mm. So your guess is as good as mine. Sorry no pictures on this!

Step 17: Remove right bank secondary catalytic converter. To make life easier on yourself, I would suggest disconnecting the O2 sensor from in the engine bay and remove the connector from the tab and finagle the wire down to the sensor itself. After that remove the three nuts that connect the pipe to the exhaust manifold/catalytic converter combo. Mine were 14mm nuts as well, but again yours may be different. Sorry no photos for this as well.

Step 18: Remove Right side electrical connections. There are a total of 7 connections. When you remove these be sure to label the connections so there is no confusion where they will go when it comes time to reconnect them. Mine were caked in dried mud so I needed to use razor blade and slice the dirt out of the seams and separate them. Be sure to get some QD Electrical Connector Cleaner and clean these out. There are 6 connections that are easy to get to, here:
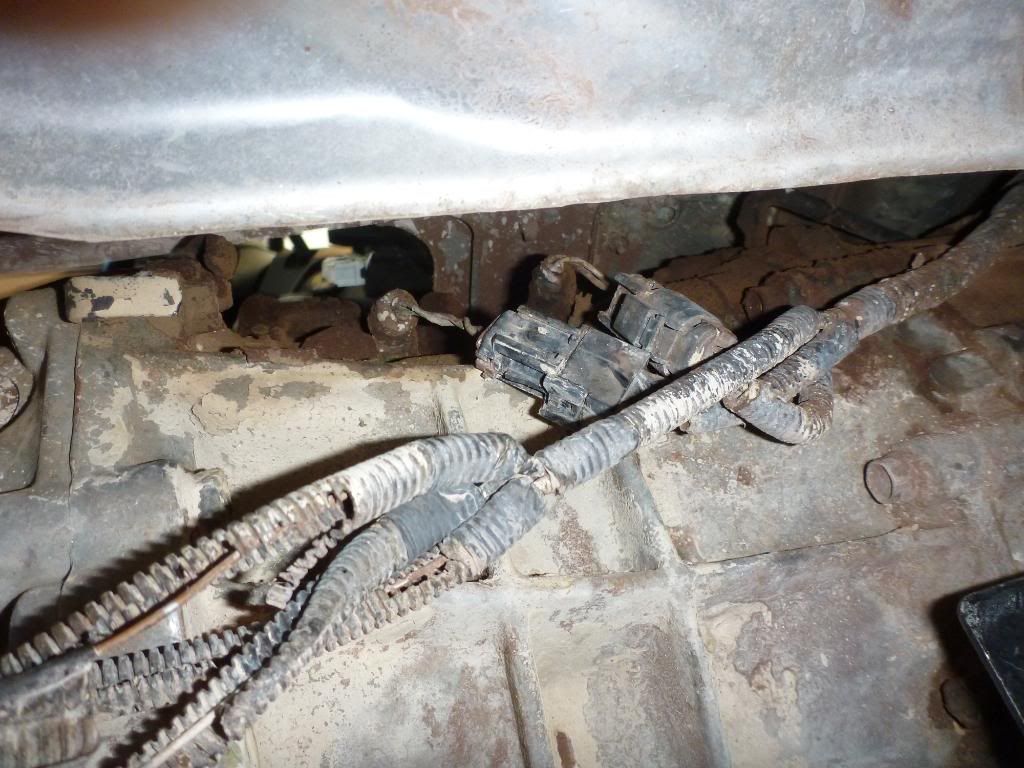
There are three located on the right side:


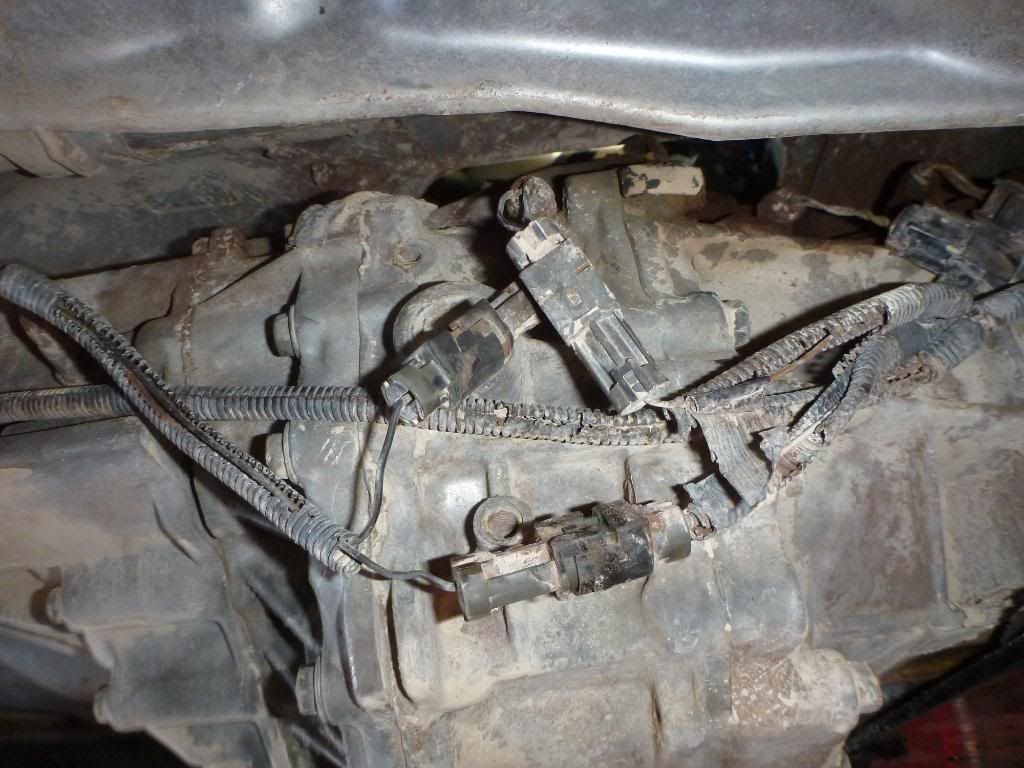
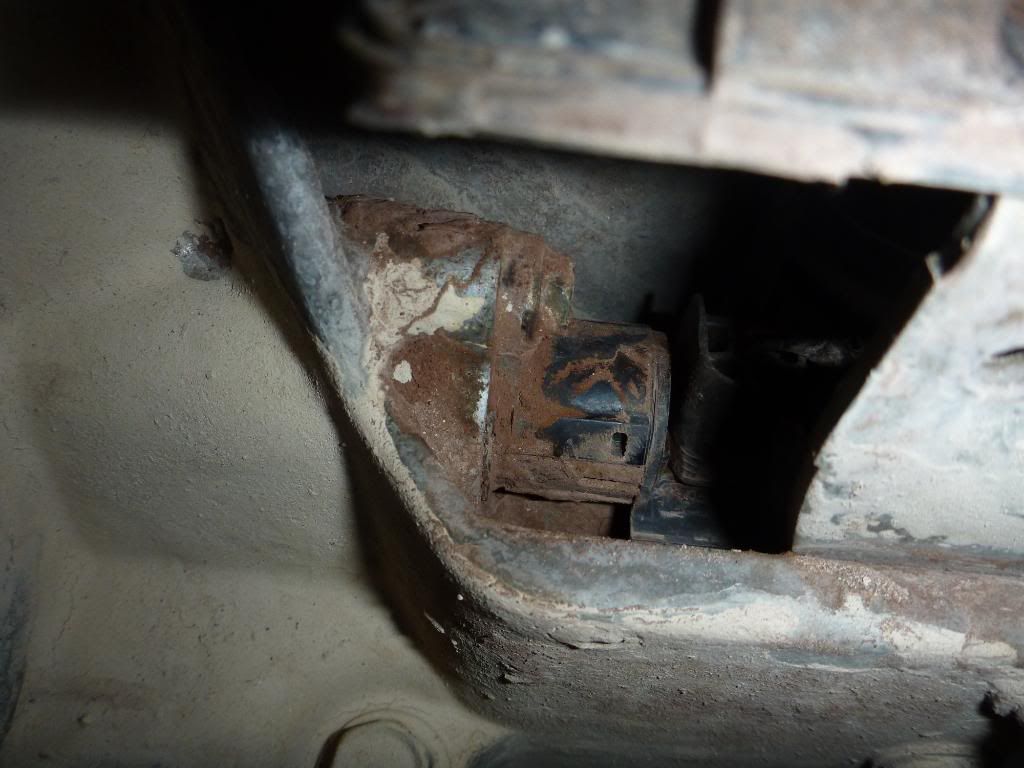
Two more located on the right side towards the top and in the center of the trans:


The last one is connected to the speedometer gear on the back of T-Case. You basically have two choices here, either take the chance of trying to pull off the connector and break it or just take a 1/4" Drive ratchet and 10mm socket to remove the bolt that holds in place and just take the whole assembly out to set aside.


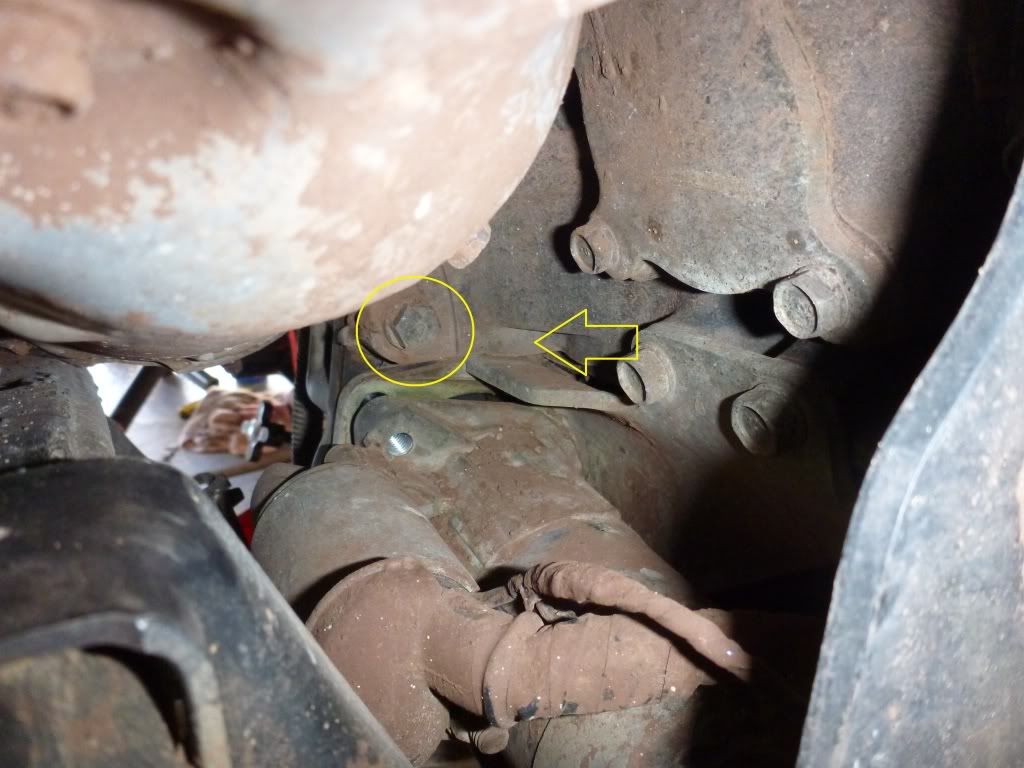
Step 19:Remove right side Bell housing bolts. There are three on the side and two are not the easiest to get to unless you use a combination of extensions with shallow or deep 14mm sockets. The first one is located below the starter and just above the right side of the oil pan plate, here:


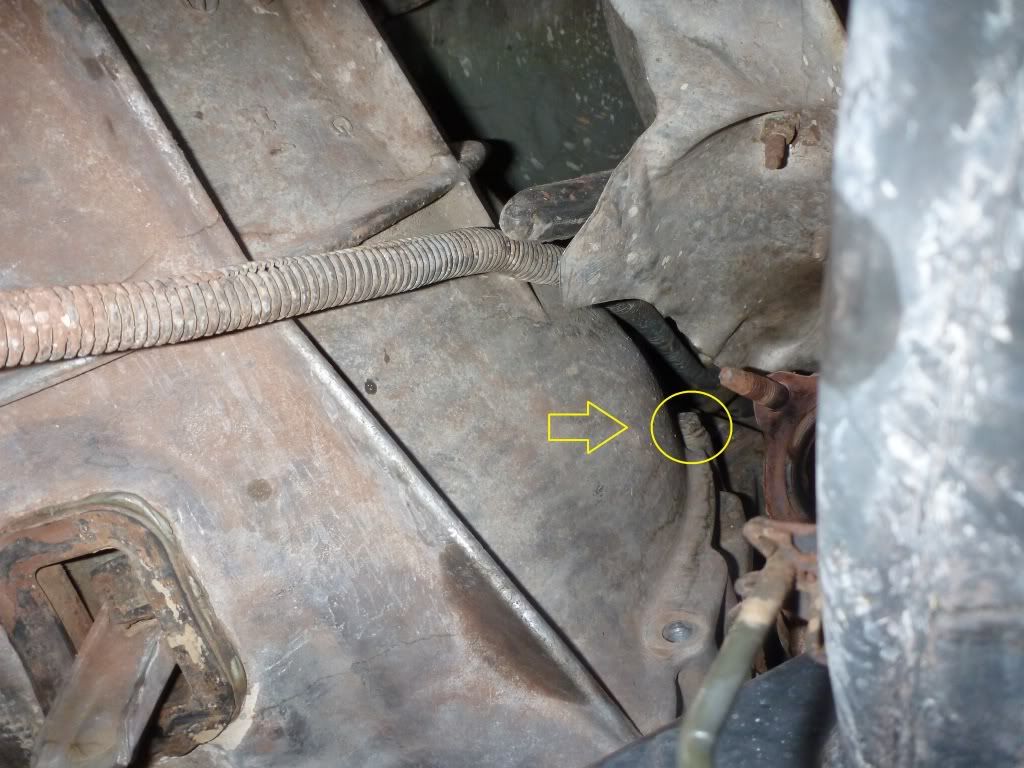
The second one is located above the starter, here:


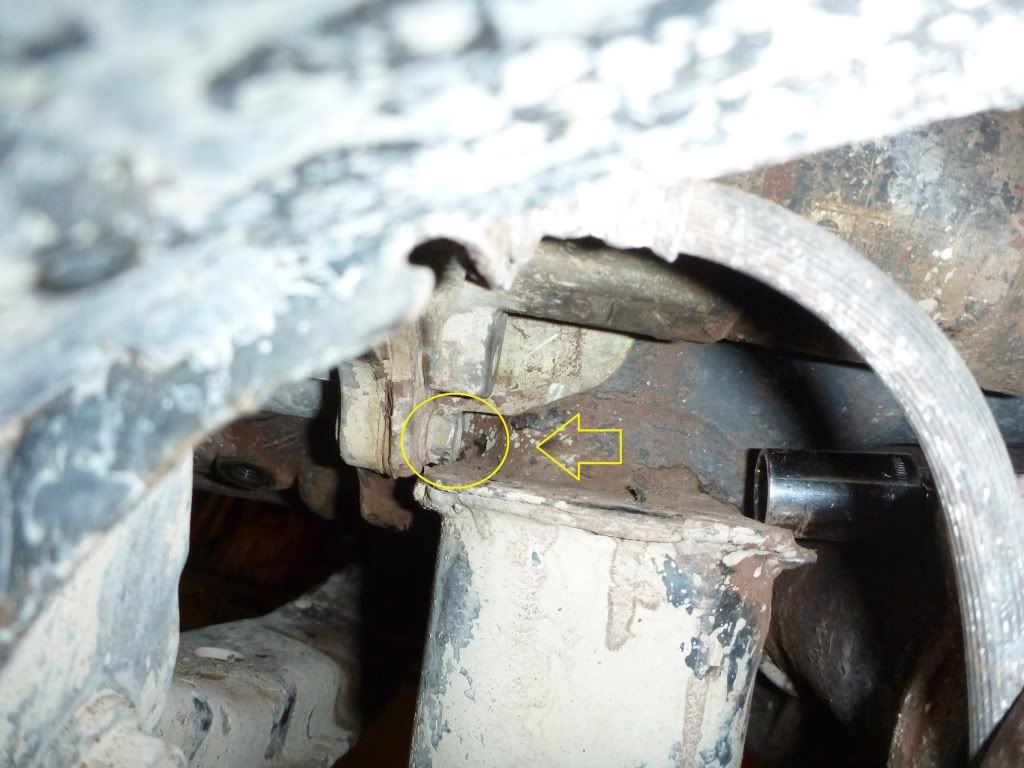
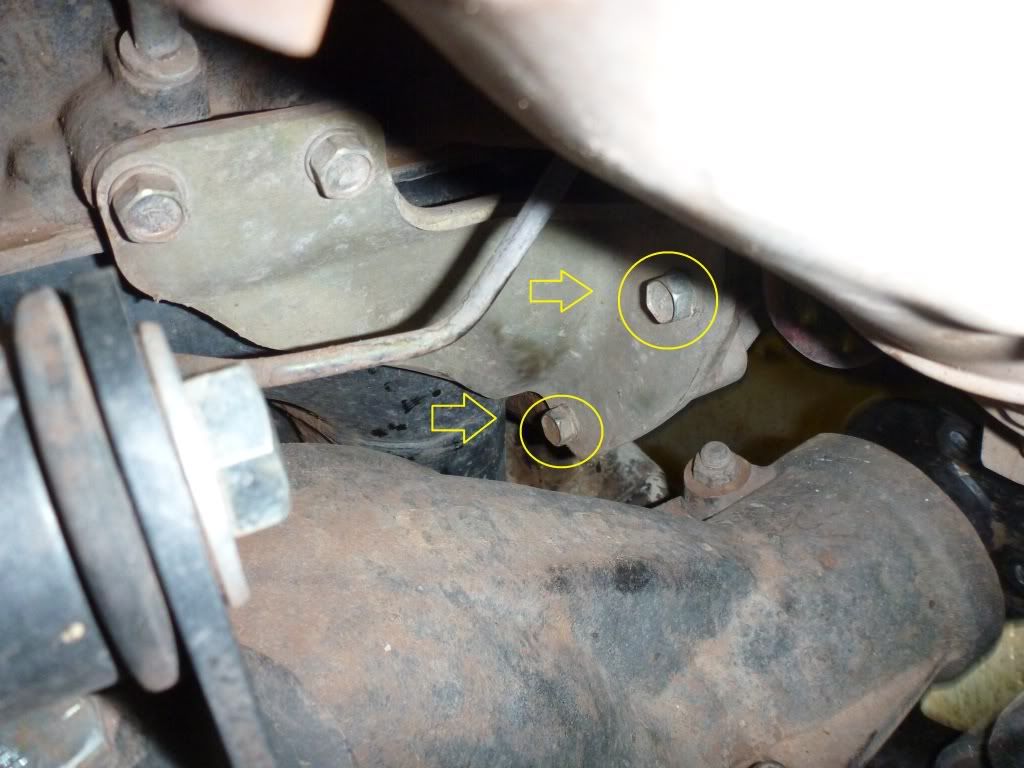
The third bolt is located on the same side as the starter bolts and just above by about 3", here:


Step 20: Remove Left Side lower support brace bolts. Coming through the left front tire well, there are two 14mm bolts that hold this brace to the transmission bell housing. I find it easiest to break these bolts with a wrench and switching over to a 1/4" Drive ratchet with a 14mm socket.


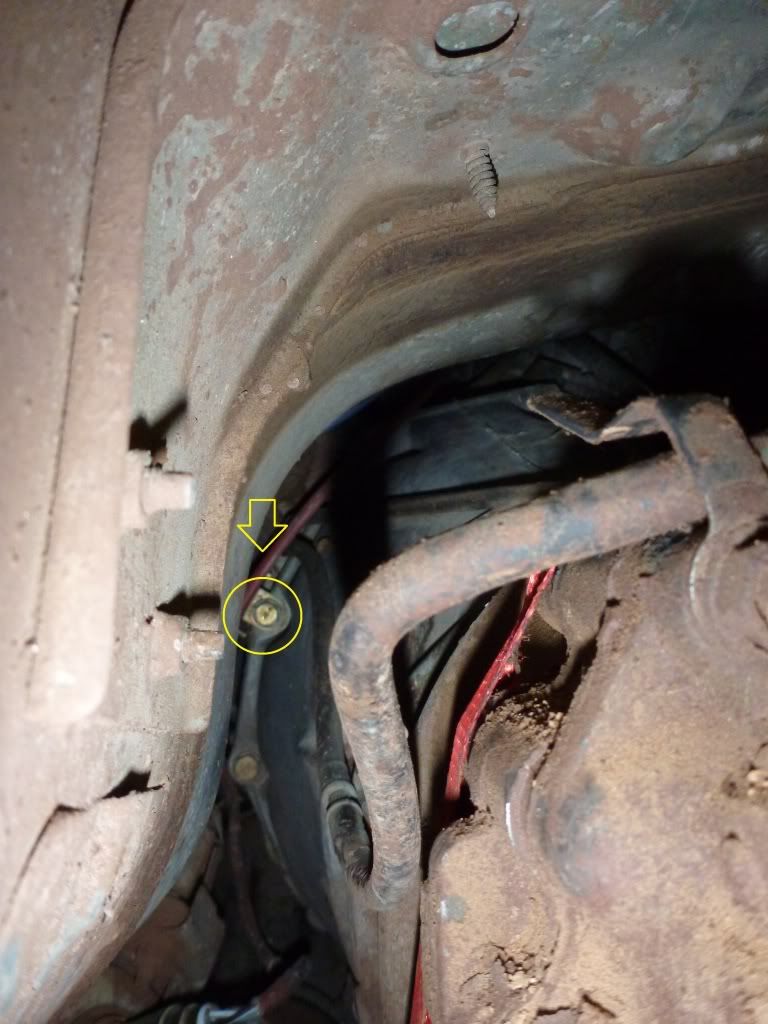
Step 21: Remove Crank Angle Position Sensor. Coming from the left wheel well you can see a sensor covered by a heat shield that has a 10mm bolt to attach it to the bell housing. You will need to remove this, It can be a pain to get to and I found it easiest to lower the transmission a little ways to free up the room need to fit an arm and hand up there with a 10mm wrench. You will need to remove this sensor first before you can get to one of the bell housing bolts since the sensors heat shield blocks the bolt. Make sure to set this sensor out of the way when it is removed. Believe me from personal experience that when it comes time to assemble and the sensor has fallen in between the bell housing and block your gonna run into problems and the sensor will be crushed. It is a 30 dollar sensor and Autozone usually has them in stock, it just makes for an unneeded stop at the parts store and added money to the cost of the clutch.


Step 22: Remove left side bell housing bolts. There are a total of two of them. Both are 14mm bolts and easily accessible with a series of extensions.
The lower one is here:


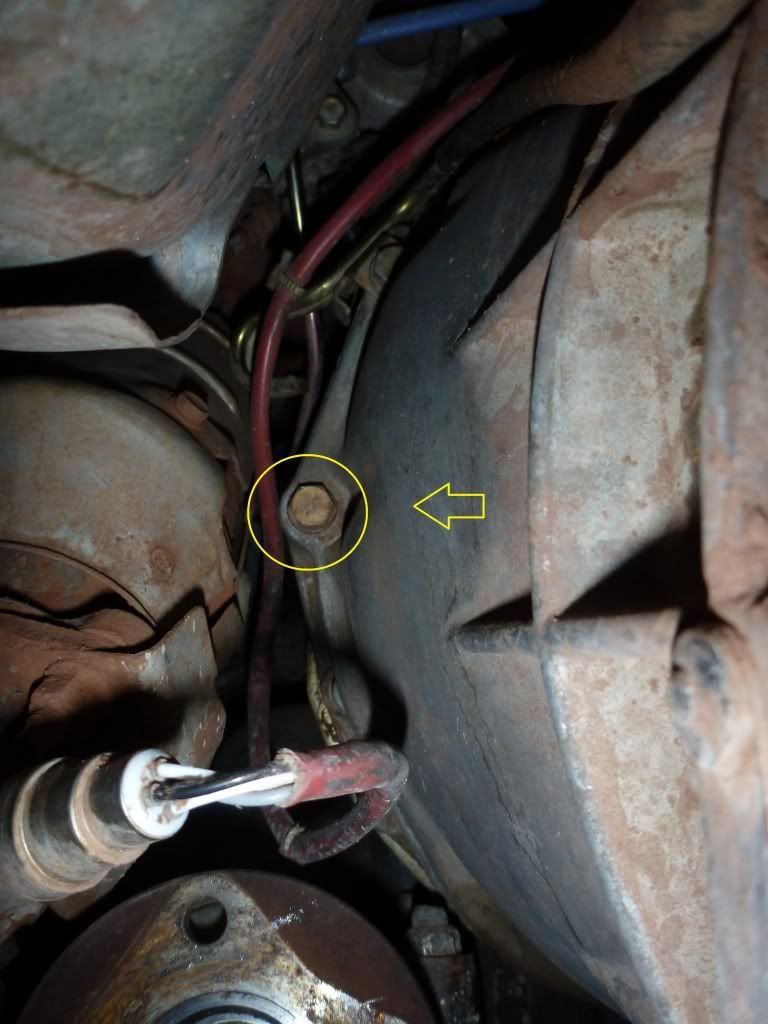
The upper one is here:


Step 23: Remove the top two bell housing bolts, both 14mm. I found it easiest to crawl back up in the cab and use a series of extensions and go through the shifter whole of the transmission tunnel. These are the last two bolts that hold the transmission to the block. Unfortunately I do not have pictures or cant find them. If I can find them, I will be sure to post it here.

Step 24: Remove the transmission. This is where it helps to have a second set of hands to help you stabilize the transmission and shake it free. Dont worry you will see the engine, truck, and transmission move a lot. Its going to happen. Be careful though because the trans will just drop a little bit. Once this happens, it is free and able to pull away from the motor.

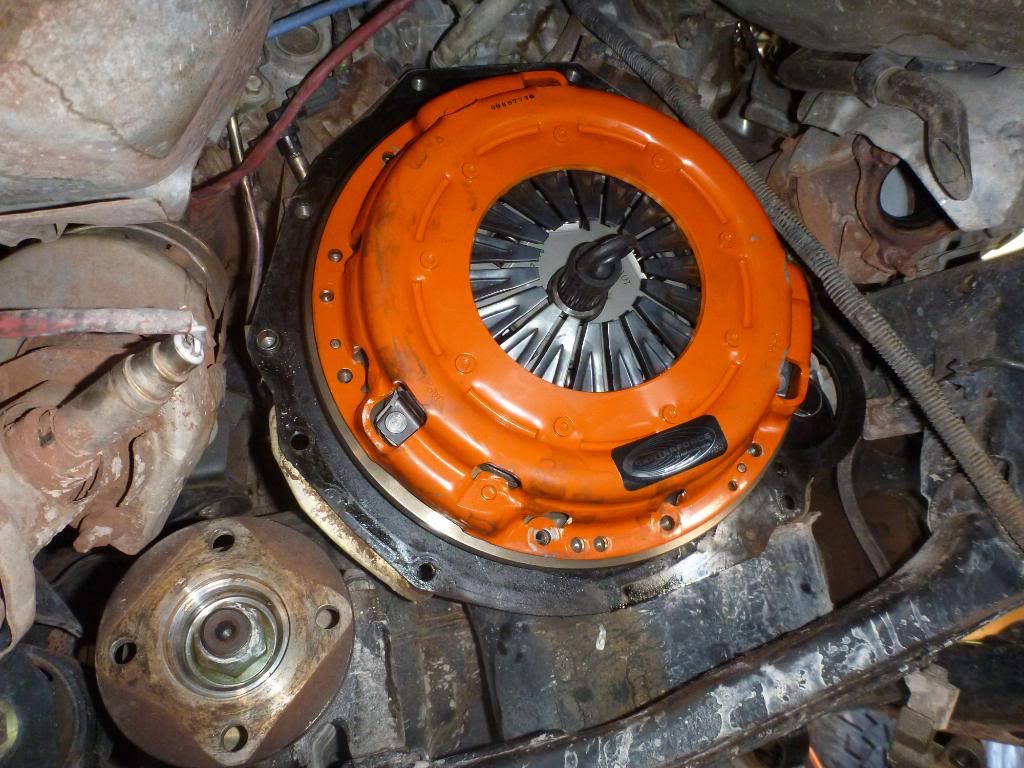
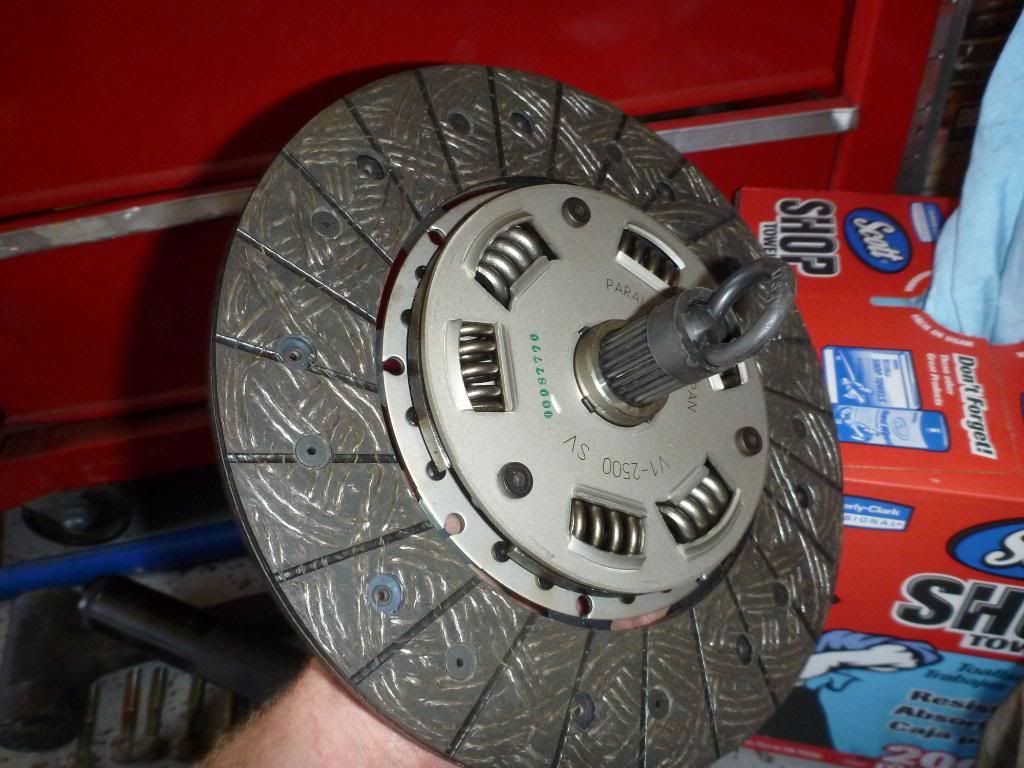
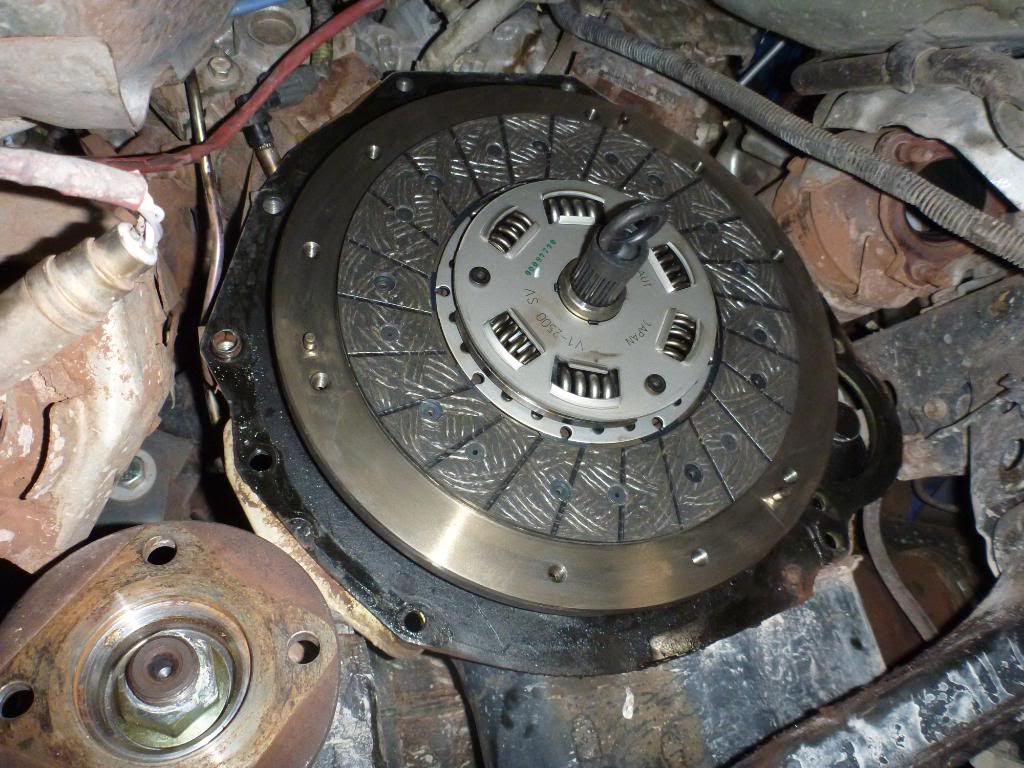
Step 25: Once the trans is away from the engine and there is room to access the clutch you will be ready to remove the pressure plate from the flywheel. A tip before removing the pressure plate is too stick the clutch alignment tool in the clutch disk so it is held in place and doesnt drop on you. The PP is held in place by nine 12mm bolts.
(excuse the picture, it is the new one going in but you get the idea)


Step 26: Remove clutch disk from flywheel.

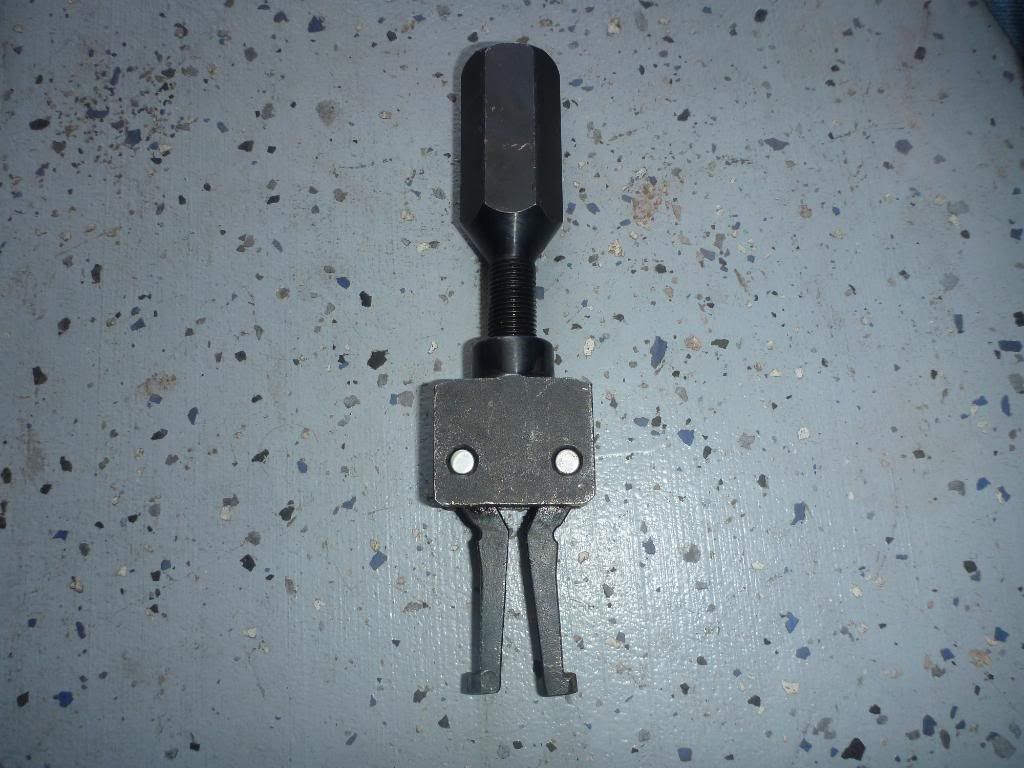
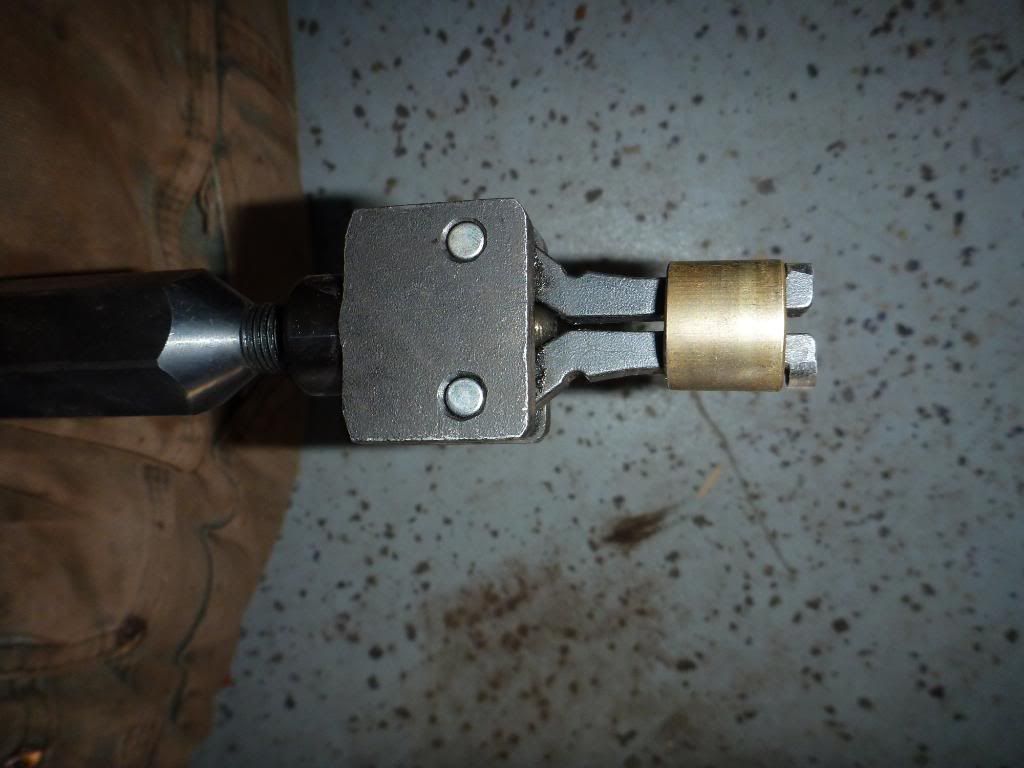
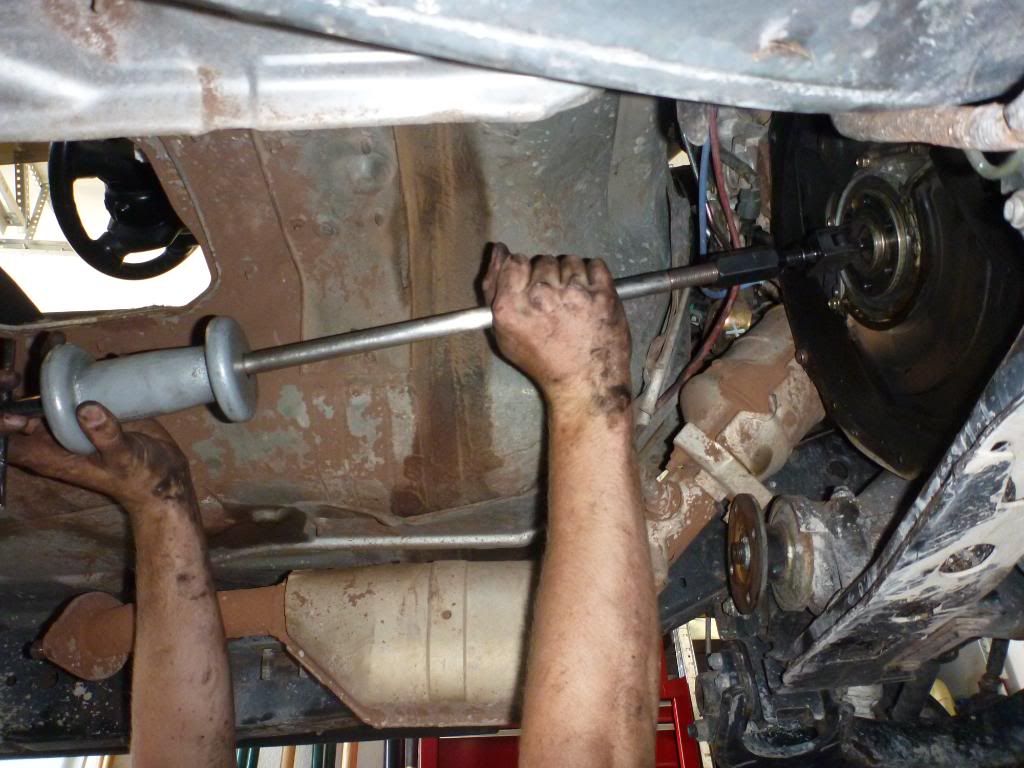
Step 27: Remove Pilot Bushing from back of crankshaft. Make note of where the face of the bushing is resting, take a picture.This is where the slide hammer and special removal tool comes in handy. Before you try to force this tool into the bushing, make sure it fits through the bushing first. I had to grind mine done to fit. I have pictures of how it works and what the tool actually looks like.
Tool:


What it looks like when it is trying to pull the bushing:


removal tool attached to the slide hammer and set inside of bushing:


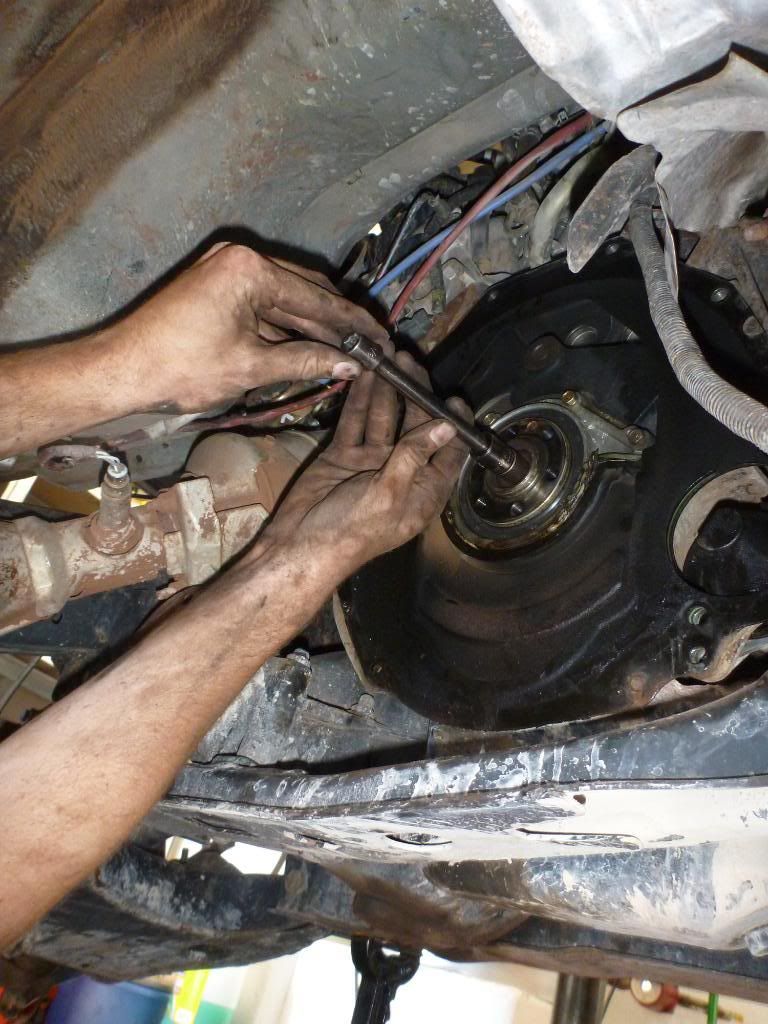
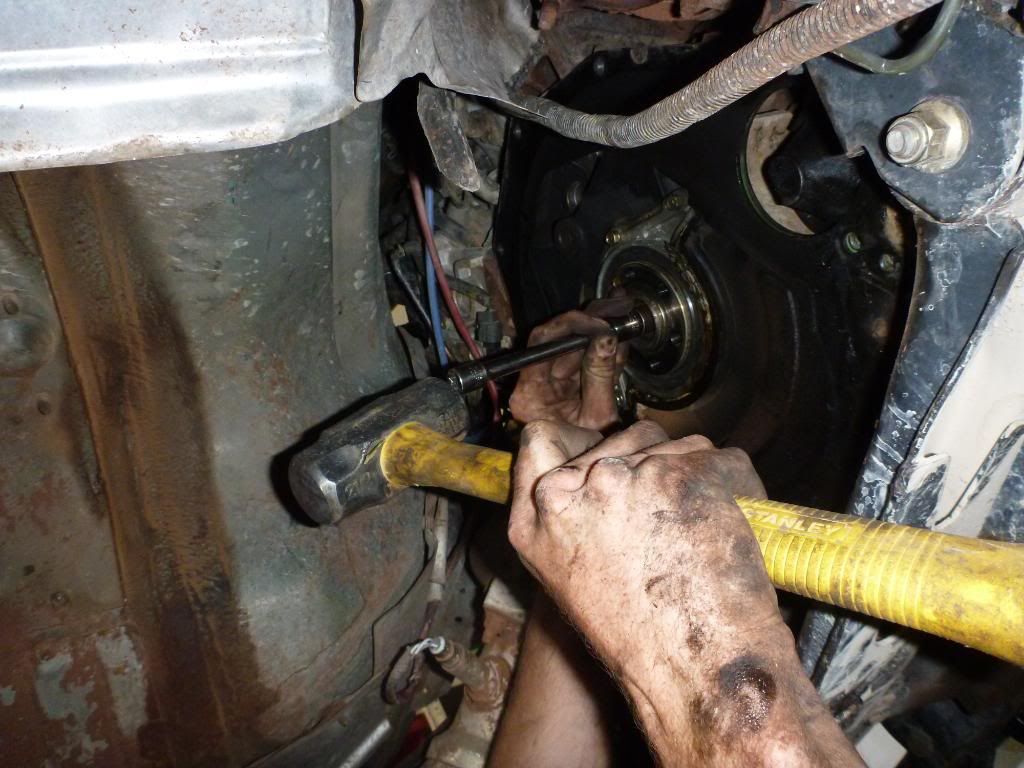
Step 28: Install new pilot bushing. remember the take not portion of step 27??? this is where it helps. Set the bushing in place and tap in with a hammer just enough to where it grabs. After that use a socket the size of the bushing and turn it around. Stick an extension in it and tap the end with the hammer making sure it seats evenly.

Tapping bushing:


Seated bushing:


NOTE: I only removed flywheel to show a better picture. you do not have to remove the flywheel.

Step 29: Remove Throwout bearing with color. If you look inside the bell housing you will see a bearing pressed on to collar that is resting on the input shaft. To remove this from the input shaft, just give it a pull and it will slide right off the input shaft and clutch fork. (No Pictures)
You will need to press the old bearing off and press the new one on. If you dont have a press, most machine shops will do it for a relatively cheap price if not free. They will know how to do it and wont need to explain anything. Once you have the throwout bearing back you can than stick it on the input shaft again. There should be a spring attached to the collar the bearing is pressed on and those two clips of the springs need to slide over the clutch fork. and pushing the bearing until it is full seated against the back of the input shaft.

Step 30: Clean Flywheel with lint free rag and brake cleaner.

Step 31: Install clutch alignment tool in the disk


Step 32: Install disk to flywheel


Step 33: Install new pressure plate


The rest is wrestling the trans into place and bolting everything back together. Be sure to follow the torque specs for factory settings so everything doesnt fall apart haha. Anyways just follow all of this in reverse and it should go quite smoothly. If you got any questions just reply to the post. Hope you guys enjoy! Thanks!
 
Last edited:
Muadeeb

Nissan al Gaib
Admin
Location
Dallas
HOLY CRAP that looks like it sucks. Makes me glad I have an AT right now. Also, if you have a MT, shouldn't your transfer case have gear oil in it? I thought the theory was the transfer uses whatever is in the tranny?
 

SlvrGen1_X

Test Drive
Location
Las Vegas
Ya this is no fun job by any means. It was my third time doing it and first time with out a vehicle lift. I say third time because i did not replace the pilot bushing the first time and it went out about a month later. This last time was a lot longer. And the tcase fluid runs on ATF, the factory service manual from nissan even calls for it. There is a separating chamber between the two cases that seals them off from each other so they will not mix their fluids.
 

Xtacular

Bought an X
Founding Member
Location
Washington
Very nice writeup. The FSM says you can run a GL-4 75w90 or 75w85 in the transfer case same as the tranny :) (ATF also works of course)

Muadeeb maybe what you're thinking of is some people say to run the same in the transfer and tranny in case there is a small leak between the two.
 

Muadeeb

Nissan al Gaib
Admin
Location
Dallas
No, I know there are seals between them, but I was under the impression Nissan uses the same fluid in the transfer as the tranny for ease of maintenance.
 

Xtacular

Bought an X
Founding Member
Location
Washington
No, I know there are seals between them, but I was under the impression Nissan uses the same fluid in the transfer as the tranny for ease of maintenance.

Like I said, you can, but ATF works also

XFluids.jpg
 

SlvrGen1_X

Test Drive
Location
Las Vegas
Yes, in order to get to the rear main seal you will have to remove the transmission. If you look at the picture with the flywheel off you can see the 4 or 5 bolts that hold the cover on. O'reilly's sells a felpro kit for around 15 bucks, which I purcheased since I had a leak. My oroginal plan was to replace the seal but since it was still a good seal and my leak is from the oil pan i decided against it. I dont intend to replace a seal just because I am there, if the seal is good there is no need to risk creating a bad seal ya know?
 

SlvrGen1_X

Test Drive
Location
Las Vegas
one of the reasons why I said to use ATF is because it is half the price almost. Gear oil is not cheap and already buying 6 qts will run about 60 bucks so to throw on another 2 or 3 would bring it it up to close to 100 bucks with taxes. As Xtacular said you can use a different variety of oils tho. It was just a tip on my part, sorry I should have been a little more detailed haha
 

Roninjiro

Need Bigger Tires
Location
Austin,TX
holy crap... i always thought it would be easier to pull the auto... that looks stressful compared to doing the auto. Then again it might be all the mud
 

SlvrGen1_X

Test Drive
Location
Las Vegas
Its actually not all that bad. The mud is the worst part because of everything falling on you all of the time. So note to each person if your intending on doing your clutch to not drive through mud holes and especially red mud from Moab or Sedona, AZ. I was actually planning on cleaning the trans up but it would clear the fram rails on the jack and it is HEAVY!!! so i didnt want to take it off the jack. I think the Auto would be worst then the manual becuase of the hassle of the Auto Shifter.
 

Silver dude

Sliders
Founding Member
Nice write up! I've been reviewing this a bit today dropping the trans as it broken. Thank you for your time typing and editing this up. I've dropped the transmission 3 times now over the years and you've covered everything there is to know.
 
Last edited:
Roninjiro

Need Bigger Tires
Location
Austin,TX
Its actually not all that bad. The mud is the worst part because of everything falling on you all of the time. So note to each person if your intending on doing your clutch to not drive through mud holes and especially red mud from Moab or Sedona, AZ. I was actually planning on cleaning the trans up but it would clear the fram rails on the jack and it is HEAVY!!! so i didnt want to take it off the jack. I think the Auto would be worst then the manual becuase of the hassle of the Auto Shifter.

The auto is about the same I suppose. the shifter is easier to deal with then you shifter was, as you just disconnect the shifter cable on the side of the transmission. I had the additional step of taking 4 bolts off of the torque converter though. All in all since use autos have the extra step I will have to say we are equals. The worst part about taking the transmission out on the xterra I think; is the cross members and torsion bars. Good write up!
 
Top