- Location
- Rochester, NY
Hell, that’ll fill in with dirt in a week. No worries there5/64 bit. That’s the smallest that my cordless drill can actually grip.
Hell, that’ll fill in with dirt in a week. No worries there5/64 bit. That’s the smallest that my cordless drill can actually grip.
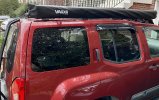
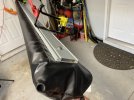
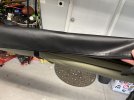
Dayam! That looks fantastic. Makes me want to paint the cover for my arb...View attachment 19225
Painted my awning cover black! Turned out incredible. (Previously desert tan.) I used SEM Marine Vinyl paint, which is super flexible and used for boat seats, rafts, etc. where flexibility and UV protection are important. Masking was a pain but it turned out really well. 24 hours later I can pinch it, fold it, or whatever and it looks like it’s always been black.
View attachment 19226
View attachment 19227
The logo sticker is temporary. I’m working with Graveyard Graphics to get a slightly bigger one, and when I get that and put it on, I’m using clear coat flexible vinyl spray to “lock” it in place so the edges won’t peel up and it will be protected from trail rub.
I did video the whole process and will be editing it eventually.
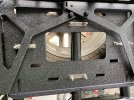
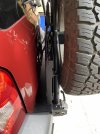
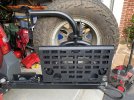
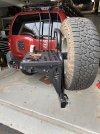
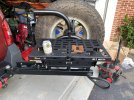
Looks nice! You're pretty tall, how would the height be for us average Joes?I installed the Smittybilt tailgate table on the rear tire carrier. Extremely pleased with the function, even if the quality/design is kinda meh. But at $130 vs $320+ for the Frontrunner version I’ll take it.
Surface area is 24” x 14” so plenty of room for a stove plus other stuff while camping. Very sturdy.
I used 504 stainless u-bolts, and they and the tire carrier are wrapped with silicone extreme tape anywhere there is contact.
View attachment 19277View attachment 19278View attachment 19279View attachment 19280View attachment 19281
Above average?Looks nice! You're pretty tall, how would the height be for us average Joes?
That was the first thing the Mrs. pointed out. For me it’s like standing desk height. For anybody else, you can install it the other way and have it drop down instead of rise up. I think that’s actually the intended way based on how the logo was facing and that you can install all four cup holder cradles that way. Opening upward you can only do the two because the outer two would hit the support arms. The arms are notched on both sides so it locks either way.Looks nice! You're pretty tall, how would the height be for us average Joes?
I like that ! Seem's more convenient then putting the High lift out back to get rusty/crusty.That was the first thing the Mrs. pointed out. For me it’s like standing desk height. For anybody else, you can install it the other way and have it drop down instead of rise up. I think that’s actually the intended way based on how the logo was facing and that you can install all four cup holder cradles that way. Opening upward you can only do the two because the outer two would hit the support arms. The arms are notched on both sides so it locks either way.
The blue Kayak has a round looking seat in the middle with a black lid . Does the lid lift up to double as a toilet ; or a bidet when your going over the rapid's ?? LolThis was the main motivation for getting the Gobi rack:
View attachment 19381
Dude, those are gonna look sick on there.Stainless brake lines in from Crown Performance. When I ordered “red” I figured they’d be bright red, but I’m pleasantly surprised that it’s a damn near perfect match to my cayenne red.
View attachment 19447
Thanks! Without a doubt, the grille light is the biggest difference maker. I still need to update my main post, but I now have the Diode Dynamics 18” combo lightbar in there replacing the 22” Rigidhorse.Great build thread. I'm considering getting the Diode Dynamics SS3 fogs and have a couple questions.
I don't do a lot of night driving, but when off pavement after dark I have found myself wanting more forward lighting. I feel like upgrading the fogs with the SS3's might be the best upgrade path. You have a lot of awesome looking lighting upgrades, but if you could just use one, which is the most useful for just generally being able to see when off pavement in the dark? Fogs? Light bar? Roof lights?
Thanks! Without a doubt, the grille light is the biggest difference maker. I still need to update my main post, but I now have the Diode Dynamics 18” combo lightbar in there replacing the 22” Rigidhorse.
My roof lights are Sport, so not the brightest available, but I also have four of them. They have a good, tight cutoff so they’re not glaring on my windshield and hood, but that means they don’t fill up the area in front of me as well as the grille light can. And if there is rain/snow/fog, there of course is some reflection right in your face.
The fogs are great and a huge improvement on road (even the Sport versions) but again to be street legal they don’t flood.
With the grille light on, my headlights and fogs are totally negated. The DD grille light is a little brighter (I think their light bars are effectively equivalent to “Pro” in their pods) and the color temp is better than the Rigidhorse, but I’d still pick the Rigidhorse (under $50 last I checked) over the roof, ditch, or fog lights for off-pavement at night.
Ooh yeah, the winch kinda kills the location. That’s tough. What are your thoughts on ditch lights? I know not everybody is a fan. With flood pattern pointed forward, it may light up the hood but if enough gets out in front it may not matter. If you did the SS3 they have a combo pattern now, and if you did the Pro version of that it would probably kick out plenty out front.Great feedback, thank you. I don't love the look of a lightbar, but it's probably the best option for what I'm looking to achieve.

One challenge is that I have a winch mount I need to work around. Technically supposed to have a front plate in Utah, but it's not really enforced. I need to make sure if I mount something there it doesn't interfere with the winch.
I'll have to give those options some thought, thanks again and sorry for cluttering your build thread. I can remove the picture / post if you would prefer.
If a used aluminum Hefty ever pops up for a reasonable price I’m definitely doing it. I can’t justify the full new price right now though.Well that’s an easy fix for more lighting......
View attachment 20048
HeftyFab bumper. Room for fog lights, bumper lights, lower driving lights, and room to spare for the winch. And makes me look like X-Vader (sorry for off build-topic)
I do, but I was worried about the size of the SS3 there. Since then I’ve seen some Xterras with them there and I think they look okay. I probably would’ve gotten used to them, but ended up with the C2 and pointed outward and downward. They’re great for that purpose and I can only see half of one of them from the driver seat. There’s also the Maxterra brackets that sit farther forward as well.Not sure on ditch lights. Do you like them? Also I have considered installing an antenna in the area they usually get mounted. I think I’d go for something in the fog light location first.
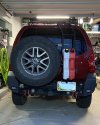
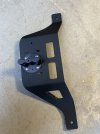
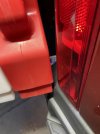
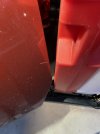
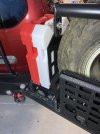
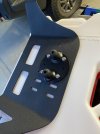
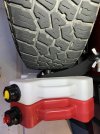
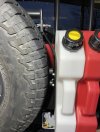
Thanks man. Other than “I wonder if I can use these mounts for a Rotopax holder” this was all others. @TerryD told me to get a fabricator to do something curved, and Eric at Freaky Tree Fabrication did the rest of the magic, including the idea to leave a bigger gap in case of future larger tires and using rubber bump stops squeezed down to eliminate shake. He also made it adjustable up/down and front/back for different sized containers and put it in the middle of the slotted top so it may work for the same mount on a Shrock bumper.That is a VERY clever idea. I'm sure Dave would be quite interested in it. Seriously man, excellent work. I'm duly impressed, I can't think of very many times I've typed that on the forums.
Dude, that looks fantastic. I might look into doing something similar when I redo my swing-out.View attachment 20661
This was the test weekend before powder coating. With the drinking water inverted and spigot it made a perfect little camp kitchen. When closed it had about a half inch between the spigot and hatch.
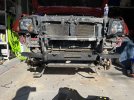
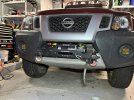
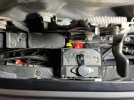
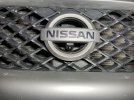
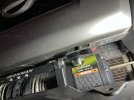
https://www.amazon.com/dp/B07H852D49/ is the camera. I took off the badge and drilled the hole in the support behind it. If I had done in the actual badge it would’ve had a gap in the front, but I should have done that and cut one of the gaskets that came with it to fill it. Where it’s at now is obscured along the bottom but I can still see the ground about 1.5-2 feet in front of the truck.Do you have a build out for the front camera? I wawnt it.
What are you connecting to inside the truck?https://www.amazon.com/dp/B07H852D49/ is the camera. I took off the badge and drilled the hole in the support behind it. If I had done in the actual badge it would’ve had a gap in the front, but I should have done that and cut one of the gaskets that came with it to fill it. Where it’s at now is obscured along the bottom but I can still see the ground about 1.5-2 feet in front of the truck.
My bad. I have a JVC head unit with Android Auto/Apple CarPlay that has dual camera inputs. I already had a rear camera wired and this one is just running the video in cable and power cable along the fender and through the firewall plug and up to behind the unit.What are you connecting to inside the truck?
