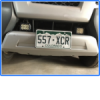
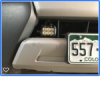
Intro Comments: Tonka is a daily driver so it has remained a mostly stock Xterra. I do take it off road mainly doing roads that are rated 4 and below, which Colorado has tons of for fun exploring. We’ve been over Tincup Pass, Tomichi Pass, Cumberland Pass (and to the top of the hill there), up many of the roads in the Buena Vista, Fairplay, Alma, Como area. Username: Brunnie Xterra Nickname: Tonka Make: Nissan Year: 2011 Model: Xterra Trim: S Color: Avalanche White Factory Options: Mud Flaps (removed) Suspension/Steering: Front: Pro 4 suspension Moog Sway Bar Links Lift spacer Rear: Pro 4 Shocks Re-arched Springs with an extra leaf added Nisstec Adjustable Lift Shackles (set for 1.5 inches of lift) Tires: 265/70R16 Firestone Destination AT Interior Mods: LED interior lighting Upgraded the LED lighting in the Map Light LED “junk tray” lighting 2 Additional power outlets DeLorme InReach SE mount in rear area Auto Dimming Mirror w/Temperature & Compass Pathfnder Overhead Temperature and Compass display 2 Garmin Nuvis GPS mount Hep Design Rear window Molle panel Raingler Ceiling Cargo Net A Krieger 1100W inverter Exterior Mods: Aftermarket Fog Lights Aftermarket LED floodlights Rear Differential Breather mod (Nissan P/N 38323-C6010 or 3823-C601A barbed nipple for a C200 axle) 16" Bosch Rear Window Wiper (Bosch p/n R1617) and new spring (Ace Hardware spring #162) Nisstec Front Recovery points Nisstec Shock Skids Gas Hood Strut Kit Pro-4 Skid plates Quick Fist Rubber Clamps Hi-Lift Jack Mounts ARB 1250x2100 Awning Backup & Forward Facing Camera Parts TOGUARD Backup Camera Kit, 7’’ LCD Rear View Monitor https://www.amazon.com/gp/product/B07FMV43D2/ref=ppx_yo_dt_b_asin_title_o00_s00?ie=UTF8&psc=1 Extra Forward Facing Camera https://www.amazon.com/gp/product/B07DVCBNGR/ref=ppx_yo_dt_b_asin_title_o00_s00?ie=UTF8&psc=1 16ft Camera Cable https://www.amazon.com/gp/product/B06ZZMSQ78/ref=ppx_yo_dt_b_asin_title_o01_s00?ie=UTF8&psc=1 Misc Stuff: Funtreks Colorado Backroads &4 WD Trails Books Funtreks Moab Backroads & 4 WD Trails Book Numerous Trails Illustrated Maps All the NFS maps for Colorado Boulder Tire Deflators Viair 400P Portable Compressor GearAmerica Recovery Tow Strap motormic Shackle Receiver Home Built Cooler Retainer, recently modified by adding a small shelf (see below) Hi-Lift 48" jack Uniden Pro520XL cb and 4' Firestick antenna 2 Tire Inflator/Deflator Ram Mount Track Dash Mount Parts - for Backup Camera Monitor and GPS RAM-B-345U-TRA1 https://www.themountdepot.com/ProductDetails.asp?ProductCode=RAP-B-354U-TRA1 RAP-TRACK-DR-16U https://www.themountdepot.com/ProductDetails.asp?ProductCode=RAP-TRACK-DR-16U RAP-B-379U-252025 https://www.themountdepot.com/ProductDetails.asp?ProductCode=RAP-B-379U-252025 RAM-B-201U https://www.themountdepot.com/ProductDetails.asp?ProductCode=RAM-B-201U Ram Mount for iPad Mini https://www.gpscity.com/ram-mount-apple-ipad-mini-vehicle-mount-ram-b-316-1-ap14u
Flood Lights and GPSs These are the floodlights up front, snagged them from the local Pnp for a whopping $8. I have a Nuvi 2555 for street Nav: It is mounted in the upper junk tray using a RAM Mount HOL-GA52U, 2 ball mounts and a 3 inch Double Socket Arm. For trail Nav I have a Garmin Drive 60: There is no RAM mount for it, so I used the RAM X mount, 2 ball mounts and another 3 inch Double Socket Arm.
Hi-Lift Jack & Mounts, Shovel Mounts I also came across a deal on Craigslist for a Hi-Lift jack. So that meant I had to get mounts for it and here is how that turned out. The mounts are at an angle for 2 reasons. 1 - Easier to load and unload the jack while standing on the ground. 2 - They clear the garage door. I also have a need to carry a shovel at times but being the frugal person I am I didn't want to spend a bunch of money for a way to hold it. A trip to a local 4wd store and I found Quik Fist Clamps. One original size and one mini size and the shovel rides ontop of the stock crossbars.
Cooler Holder Prepping for Road Trips, and this fall's trip, I got to thinking about how to keep the cooler from sliding around. Last year I didn't have any problems, even going back to Crystal Mill by Marble, CO, however I still wanted something to keep things in place so I came up with this idea. First I put in a tie point from a Pathfinder. Then I measured how far out from the track it was to the small storage space on the right side, 13" in this case, and I cut two "legs" and attached them to a 24X12 inch board. The board fits into the track so that keeps it from moving. I covered the board with black material, used for headliners, that I got from a fabric store. I glued it in place, and touched up a bit with staples. Added a little shelf to the end that goes near the wheel well. The 5 lb. propane tank sits in the section between the legs and we put a gallon water jug on the shelf. (Got a little sloppy with the spray glue. *ugh*) So here it is in actual final configuration. I used a strap to go from the tie point around the cooler and to the seat latch.
Lights and Temperature Module A couple of weeks ago was "install a mod I was testing on the bench" day. The LED lights I put in the Map Light just weren't bright enough for me so.... it is off to the bench and grab a spare map light fixture and start experimenting. A while back I purchased this LED reel from Amazon for another project. SUPERNIGHT LED Light Strip Cool White 7000K The project left me with a surplus of light strip so I got the bright idea for modding the map light. The nice part about this led strip is that you can cut to length, at the marks, with 3 LEDs being the minimum. That length just fits inside the Map Light. A bit of cutting and modding the fixture itself, adding a piece of matte board cut to fit, some 30 ga wire for strip to strip connections, and finally 26 ga wire for power and ground to the posts in the fixture and it looks like this. Now everyone knows about adding a Gentex Self Dimming Temperature/Compass mirror (and I did the same) but few know about the adaption of a Pathfinder Temperature Compass Module. This took a bit of engineering as I had to come up with an oscillator circuit to simulate the input from the speedometer. I love the fact that the "ICE" warning will stay on when the temperature drops that low. The Mirror display doesn't keep the Ice warning up very long.
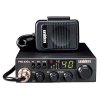
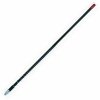
CB and Antenna Everybody has their opinion on where to mount a CB inside the rig, I'm no different, so where you mount yours is a matter of taste for you. I bought a Uniden Pro520XL radio. It has the features I wanted, and an inexpensive price tag. Then to make it "work" I bought a 4' Firestick antenna. Now where to mount the antenna is a different subject. I had seen where some had put the mount behind the tail light housing, but that also involved a bunch of filing to make a notch plus it had the potential of breaking the housing. So I opted to put the mount above the housing. That did involve a bit of pounding with a 2 lb sledge on an anvil to get the bracket "reshaped" a bit so it didn't hit the body. To get into the garage, I used a quick disconnect on the antenna. It all works just fine.
Nice daily build! I've got the S without fogs and am considering buying a kit off Amazon and maybe getting a higher lumen yellow/amber bulb so I can see better in the actual snow and fog. Did you have wiring to the lights before you installed the aftermarket housings? I'm assuming you having an S trim, you were without fogs as well..? Thanks, Lucas
Thanks. I got the fog lights from Amazon, and used the wiring that came with the kit. That was way less expensive than trying to find the correct light stalk with fog lights switch.
After seeing the Deflator/Inflator that PhullD had, I just had to build one. Sure makes deflating/inflating a lot easier. Parts List: 3/8-in Barb Tee - Qty 2 3/8-in Barb x MIP adapter Fitting - Qty 4 1/4 to 5/8-in Screw Hose clamps - Qty 10 Steel NPT 1/4-in Industrial - Qty 1 3/8-in (ID) 50' PVC Air Hose - Qty 1 1/4-in NPT Mini Ball valve - Qty 1 Joe's Racing 32307 (0 to 60 PSI) Tire Pressure Gauge - Qty 1 Harzole 1 Pake AC-205F Lock on air chuck - Qty 4 1/4" NPT Female / FPT X 4 Way Cross Intersection Brass Fitting Teflon Tape - Qty 1 roll Total cost came to about $110.
Hmm.. That's pretty..cool, I think. I just got the OGorilla set that screw onto the stem but haven't done a test run yet. Do you use this here thingama'jiger to air back up too? I'm going to have to go track down PhullD's build..
When we met up in Moab, I had a set of deflators and he brought out his setup. He was down to 18 lbs before I had 2 of mine down to 20. Later in the day, when we were back on hard road in Arches NP, he had his tires back up to pressure before I could get 3 of mine back up to 37 lbs. As the week wore on my GF and I developed a system for deflation that didn't use the deflators I had. They were just too slow. Inflation went quicker as she took care of the stem caps while I did the inflation and pressure measurements. Now with this setup I know that while all 4 tires are airing up I can be doing some other minor chores. What parts I couldn't get at Lowes I got from Amazon.
Yeah, that's a pretty sweet setup.. Bout 60-70$ more than this set I've got but shoot, I bet I spend 45 mins running around trying to get 40# all around and always end up settling at 35ish just to move on. I went with a jump pack that had OBA instead of getting a dedicated pump. Now I wish I hadn't bought that big thing and went with better quality, smaller units. We'll have to get together and hit some trails sometime, there's a million miles of trail I haven't seen yet in these parts~
Haha nice! My only regret is not getting the ARB twin compressor, but I can fill all 4 of my 315/75R16's from 13-15psi to 35psi in 7min here. With the higher elevation in CO and UT it took a bit longer.
Installed a pair of Nisstec Adjustable Shackles. Now I slope nose down for a bit until I can install spacers up front. So for a while I'll get better gas mileage 'cause I'm always runnin' downhill.
I like what you've done with your X so far! How are you liking the ride quality with the shackle/spacer lift and the 4600's? I myself don't do anything crazy off-road, eventually I would like to lift the X 1-2 inches for more clearance/aesthetics.
Ride quality overall hasn't changed much. It is stiff, sometimes stiffer, but that also depends on tire pressure and road conditions. The general impression I get is that I can tell I sit a bit higher, but that is it. I know I sit a bit higher than a friend's stock '14 Pro4. I haven't been out on any backroads yet but there's plenty of time for that.
That shackle is set on the lowest setting. With the spacer added you might want to put it on the middle setting to preserve the rake. The OEM leaf packs are notoriously weak, if you find it a bit bouncy or soft when loaded up, Hellwig 550 helper springs are a good solution until the OEM leafs wear out. I got another two years out of my springs with the helpers. Also I see you took the rear sway bar off, did you notice it when you took it off?
For normal daily driving I haven't noticed any difference. I need to get it out on a trail and see what it does. I did some measuring before adding the shackle and then after the shackle and spacer and the rake is almost the same.
What spacer are you running up front? and are you still running stock UCA's? With the AAL and Shackles on the lowest setting, how much lift did you get out of it in the back? Sorry for all of the questions lol.
The spacer is about 1/2 inch thick (I think). I didn't measure it. PhullD had it and sent it to me. Right now I still have stock UCAs, but I am going to install a set of SPCs that I have sitting on the shelf when the weather gets warmer. When I had the springs rebuilt, and the shop added an extra leaf, I gained about an inch of lift in the back. Now the lift is almost 2 inches. The spacer in the front raised that by about an inch. Last night my GF's 2013 Xterra was sitting next to mine and it was very easy to see that I was about 2 inches taller than hers. Our vehicles have the same tires, so no difference there, just the suspension changes to mine.
Thanks for the info. Notice any driveline vibrations with 2 inch lift in the back? I have my eye on this kit from Nisstec: http://nissteclifts.com/2-Spacer-AAL-Kit-With-UCAs-05-Xterra_p_479.html I noticed it comes with the axle shims. One last question LOL, did you install Cam bolts?
Haven't needed cam bolts yet... (knock on wood)... but they are on the shelf when and if I need them. I haven't noticed any driveline vibration at all.
More rake lol! You want like 1-1.5" when loaded, about 2" difference unloaded IMO. That rear axle needs room to articulate, it's the bread and butter offroad. That's just my opinion though. I never understood the people that wanted it the same front and rear, it always looks weird like the truck is taking a dump. With the front spacer only giving about an inch of lift, you might not need the cam bolts at all. It's truck specific though, Nissan didn't build them exactly the same. That goes for trimming the coil buckets with the SPC arms installed. Some people claim to not have to grind anything, others like myself had to grind about a half inch. I will say though, for the effort it is easier to just install them, the alignment shops tend not to understand that the SPC arms are adjustable too. As for Vibrations anything at about 2" and under you are usually ok. The vibrations you do feel when accelerating will typically "move" when the suspension settles and tend to be more when you are going approx. 60-65mph. You can try shimming, but understand that from 1-3" of lift, the shim just moves where the vibrations go, it doesn't eliminate them. Over 3" you are getting into custom shaft territory. Had Nissan put the cv joint on the other end you could correct it with shims like most 4x4 trucks, but alas the engineers who designed it likely had little offroad experience did not think about this. A double cardan or custom driveshaft can solve this issue but it will cost about 600-1200$ depending on which route you go.
I could be wrong but I was under the impression that rear lift from shackles usually doesn't change pinion angle enough to require any shimming, while lift from leaf springs changes it enough to often require shims. FWIW on my '06 with OME springs and leafs (1.5" lift) I definitely have positive camber in the front that has slightly changed the wear of the tires, and I definitely had vibrations in the rear (around 35-40 MPH) that went away, pretty much completely and at all speeds, with the addition of shims. Which backs up your comment that it's truck specific.
Some of the older 2nd gens came with cam bolts from the factory as well. Makes you wonder why the later models did not. It doesn't matter which method lifts the rear, you are essentially moving the axle down (creating the lift) which changes the pinion angle. Shackles move it down from the rear by creating a longer arch on one end, the AAL can either increase the stiffness reducing the sagging and/or has a deeper arch pushing the leaf pack down (and of course the extra space it uses in the pack itself). A new leaf pack can do all those things, ie stiffer, longer, more arched. Even more confusing in regards to pinion angles some leaf packs have a combo of the above mentioned that makes it very difficult to rectify the shim equation that typically goes 1 degree per inch (looking at you Alcans!). If I had to choose I would always recommend the shackle on OEM setups initially because when the pack is done you can re-use it on the next setup. In regards to your vibrations, there are a lot of factors that play into them. There is no consistent relation with a specific lift and vibrations from one truck to the next but the rule is usually 1 degree per lift. Usually under 2" of lift a shim will correct the angle enough that the vibrations are so subtle they are no longer noticeable, or have moved to a speed that you hardly notice. It's a rotating mass, whenever it decides to resonate varies per setup and vehicle. Above that 3" driveshaft length is also a factor, and even if you don't feel them vibes over all the other noises and such (wind noise, knobby tires) it may start eating u-joints.
Got around to moving the lift bolt to the 1.5 inch hole. With the jack mounts on the rack, I've got about 1 inch of clearance when I pull into the garage. Rake is now about 2.5 inches, give or take a bit. I need to get over to Garden of the Gods or someplace scenic and take a few photos.
Santa brought a project. A Krieger 1100W inverter Pics to come after installation. PS... he also brought a new garage door torsion spring. *ugh* I sure wasn't counting on that breaking.
So the trip to Moab, down Shafer Trail (no shade), and a lunch stop, planted the idea that we really needed an awning. Some SuperStrut from Lowes 4 Ubolt pipe clamps from McMaster Carr and a bit of cutting and drilling and it is mounted on the passenger side of Tonka, similiar to this: Once the weather is nicer, I'll take full pics and update this.
If you can, try to get it so it is spring loaded like the roll-up awnings on the old campers. I hate unfolding mine, especially if there is a bit of wind.
Well, it has been a while since any updates and with this Covid stuff rather hard to get any decent or good photos. SO.... For Christmas my GF gave me a 1100W inverter. It took me the longest time to decide where I wanted it, thinking about how we had the back end set up and how to get the wiring to it, but I finally got it all done today. I put the inverter on a pair of strap aluminum pieces that I bolted to the rear driver side wall. It is out of the way for the kitchen/pantry stuff and not in the way of where the stove is kept. To get power to it, I redid the battery terminals to a set of Marine terminals and then ran the power to a 100A fuse block. Power and Ground wires go through the firewall on the driver's side using the rubber grommet then down the door channel to the back. Also, a while ago, I said I installed an ARB awning. Well here is a photo.
Added a couple of Dragon Touch Vista 5 action cameras (a GoPro knock off at 1/4th the price). One on the airdam: And one on the windshield, but it is going to get moved. Just something else for doo-dads.
It has been a couple of months, but that doesn't mean that mods haven't taken place. Some summer road trips and a trip to Ouray, and the packing involved, showed me that the 4 tire deflater/inflator just wasn't the "cat's meow" for me. My son-in-law made a suggestion on how to reconfigure it, so once home out came the knife, and 5/16 hose clamp driver. Now the deflator has one long hose (like before) for the rear tire and a shorter hose for the front tire. So from the front I can do one side of the Xterra at a time. It stores a lot neater and more compact too. We've also changed up some electronics. I bought an iPad Mini solely for running GAIA GPS. This also meant that I had to buy a Ram Mount Seat pedestal post and iPad mini mount. A little cutting on the passenger seat mount framework, and some cutting on the Ram mount plate, and it all fits together. To cut down on the vibration as much as possible I used a 1/2in conduit clamp to hold the stem against the center console. The next big project was the installation of a backup/forward facing camera system. Toguard has a 7 inch monitor and camera system and I bought an extra camera and 16ft cable to put a camera up front. I had to "tear out" almost all the rear passenger side trim to get the cable and backup light trigger wire run from the camera through a hole behind the taillight then through the interior to the front and to the camera. I used a Ram mount track system to mount the monitor, and relocated a GPS to it, to make a neat, uncluttered dash installation. Right now the front camera is held in place with a C clamp until I can get it aimed left/right where I want it. In the planning stage is a 4 drawer kitchen/pantry cabinet based on this cabinet: Two 2 drawer cabinets stacked, overall 29 inches tall X 16 inches wide X 24 inches deep. The reason for 2 cabinets is for ease of taking them out of the back when not needed. And possibly a Dometic CFX3-75 fridge/freezer. EDIT: Posted photos.
Wel l l l l l l l l l.......... The cabinet isn't looking anything like the photo BUT it is my cabinet. Now I'll admit that I do not have the best wood-working tools in the world (or maybe even in the forum) but I make do as best I can. So without further ado, here is one part of the cabinet. A few dimensions changed, it is 18 inches wide so the drawer(s) will be 14ish inches wide. This particular drawer will be 5 inches tall and 22 inches deep and is made from 1/2in poplar and will have a 1/4in. bottom. I changed the cabinet from 1/2in. to 3/4in. plywood for strength purposes. More to come, work continues tomorrow.
Back out in the garage today to continue working on the cabinet. First job was to "paint" yesterday's cabinet with bedliner so it will look like this: Right side: (The left side looks just like it.) Back: And a Drawer: Here is what the cabinet looks like with one drawer installed: The front edge of the plywood will be covered with something, still deciding what to use, to prevent splintering and to make it look a bit more finished. More to come.... (if it only didn't take several hours to build one drawer)
Quick update: Now I need the other halfs input if she wants a medium and a small drawer up-top, or 2 small drawers, or another large one. So no more photos until totally finished. Almost there.