
UofA_Xterra
Bought an X
- Location
- NV
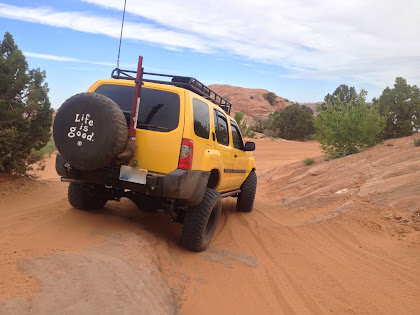
UofA_Xterra Build (Anconeus) *SAS Finished! 8/27/14*
Make: Nissan
Year: 2001
Model: Xterra
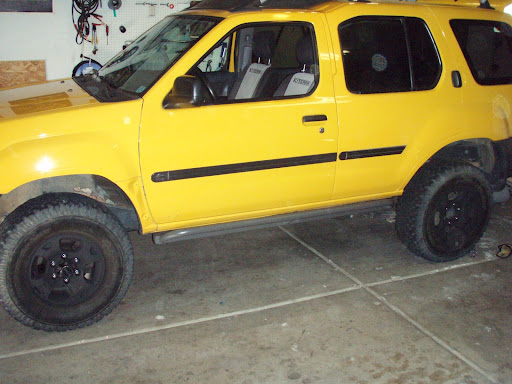
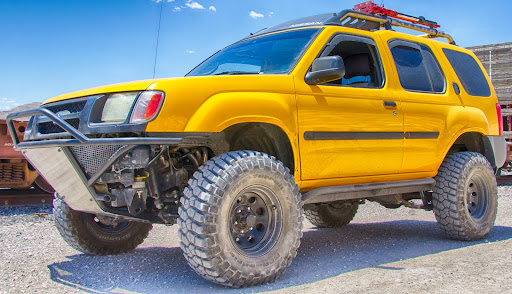
Color: Solar Yellow
nickname: Anconeus
Drivetrain
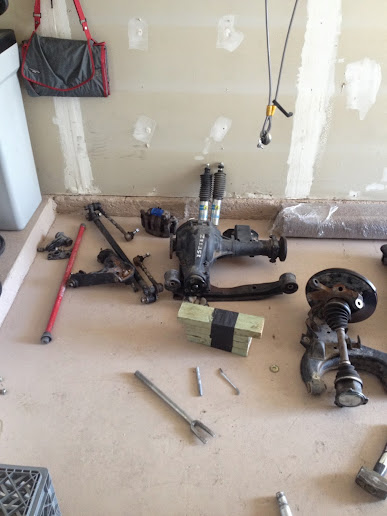
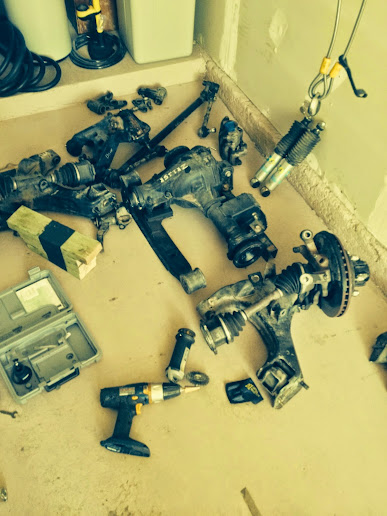
86 Waggy D44 Front Axle WITH ARB locker, 5:13 gears, and Chromoly Axle shafts
Rear H233B WITH ARB locker and 5:13 gears
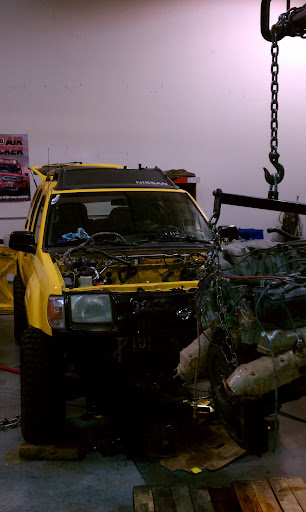
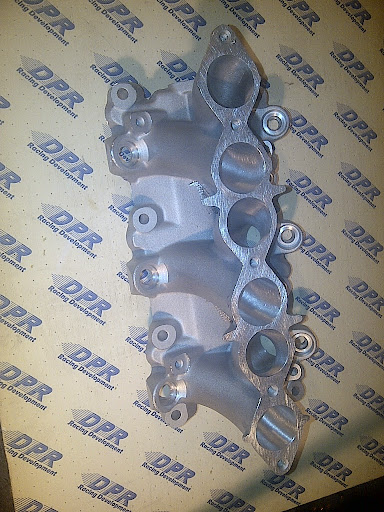
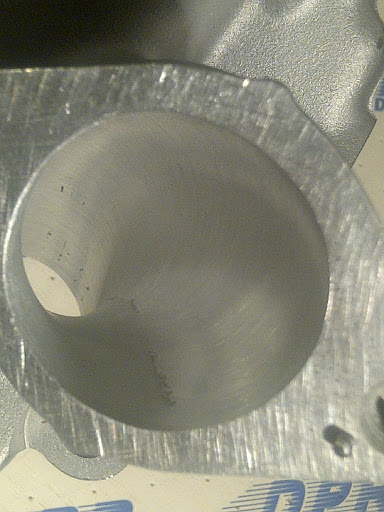
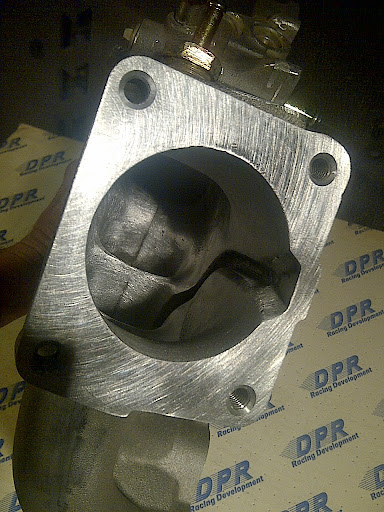
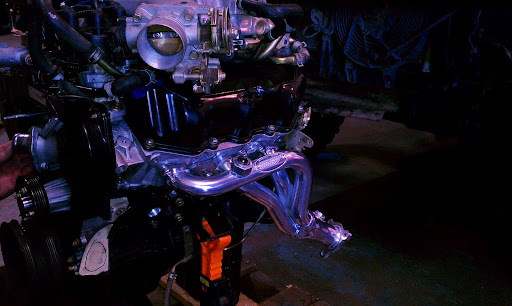
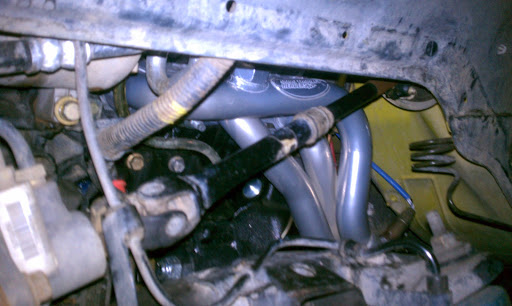
Complete intake ported/polished (Throttle body and intake manifold (lower/upper)
Heads ported/poilised (intake/exhaust side) and combustion chamber reworked
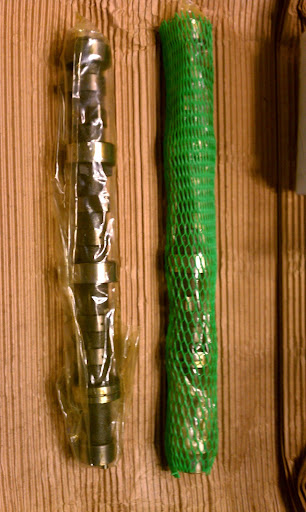
Wolf Technology S1 Camshafts
Doug Thorley headers
2.5" custom exhaust with Flowmaster Y pipe
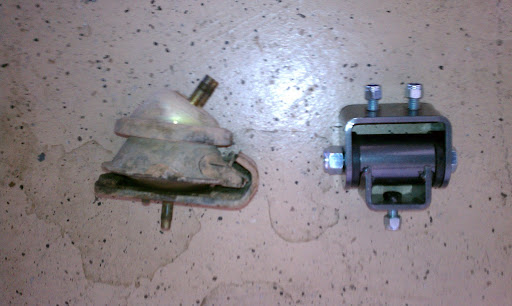
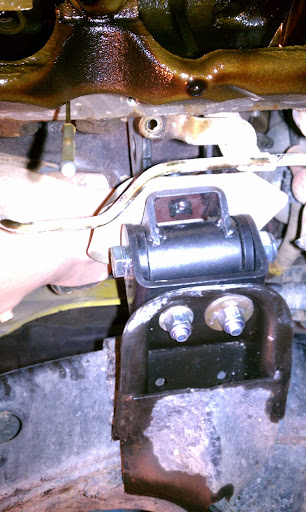
Rugged Rock HD engine mounts
Supercharger radiator
AC transfercase crawler gears (best mod I've done prior to SAS!!)
Front Tom Words Driveshaft
Rugged Rocks front differential drop kit (Deleted since SAS)
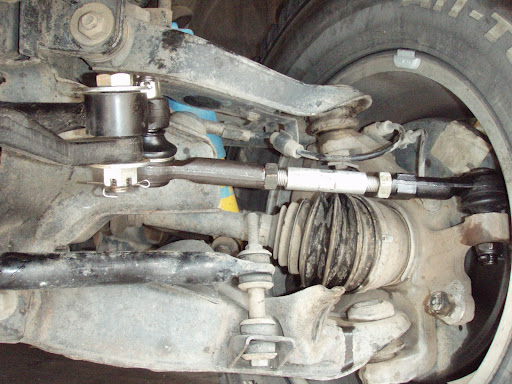
Suspension
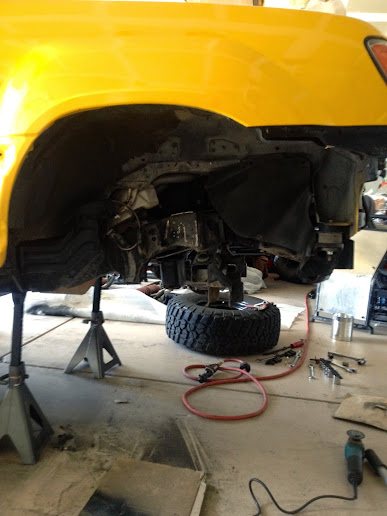
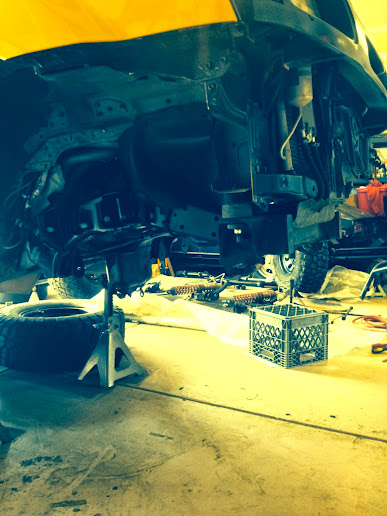
Modified Calmini SAS kit modified to fix the breaking radius arm issue
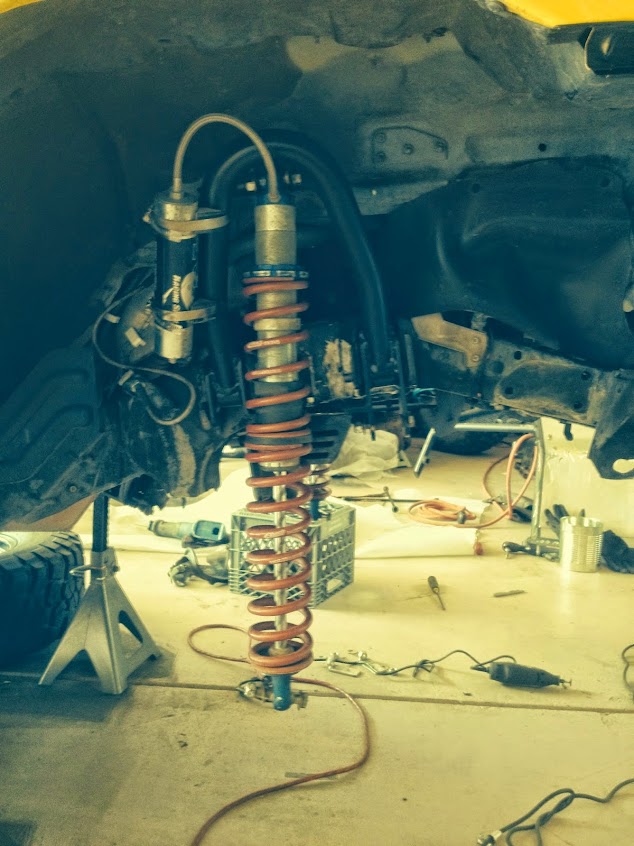
Fox Coil Over Shocks
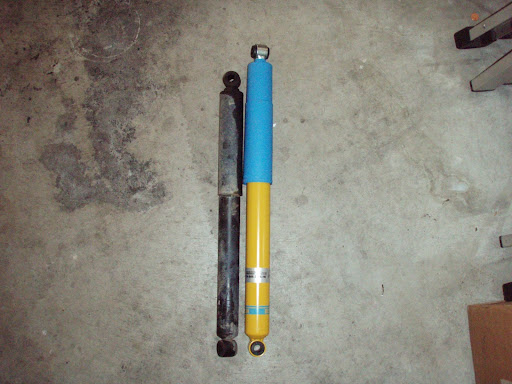
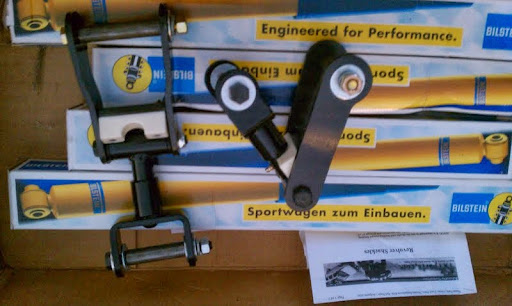
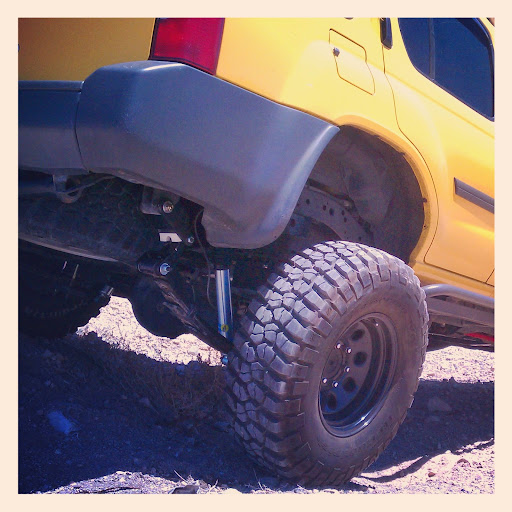
SOA with Revolver Shackles and longer Bilstein 5100 Shocks
BF Goodrich 315/75/16 KM2's on Craiger Soft 8’s, 16x8
1" body lift
AC braided SS brake lines
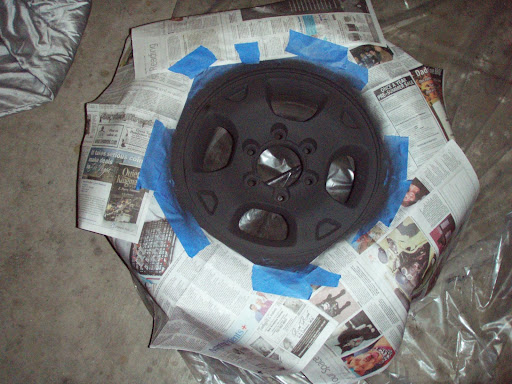
32 x 11.5 R15 BFG KM2’s on black steel wheels (Deleted since SAS)
Spencer Low Racing 3" lift with Bilstein 5100 shocks (Deleted since SAS)
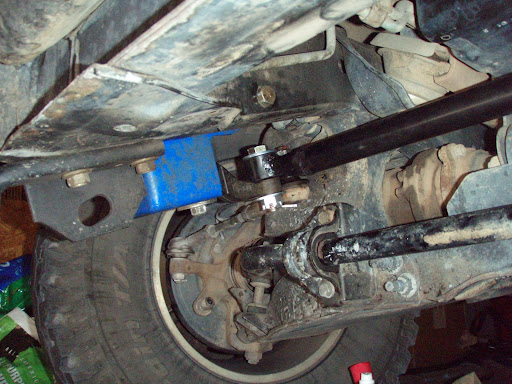
Steering
Chevy 1-ton stuff
Grassroots 4x4 centerlink (Deleted since SAS)
AC HD tierod adjusters (Deleted since SAS)
Calmini idler arm brace (Deleted since SAS)
Armor
Shrockworks sliders
Shrockworks gas tank skid plate
Shrockworks rear bumper with tire carrier and Hilift mount
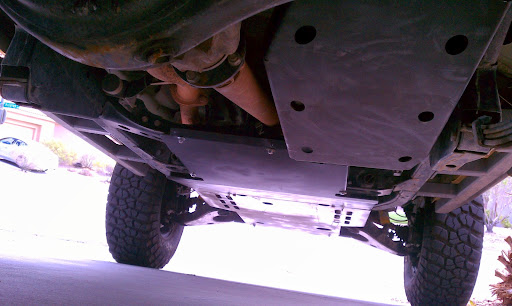
Calmini SAS belly pan skid plate
Custom front bumper with winch plate
Custom front bumper with skid plate (Deleted since SAS)
Shrockworks engine skid plate (Deleted since SAS)
Shrockworks transfer case skid plate (Deleted since SAS)
Electrical
Nissan Quest alternator upgrade
Totron 5" 3x2 lights (2 flood and 2 spot pattern)
Custom LED rock light set up (still in the works)
Bluesea fuse block mounted in glovebox area
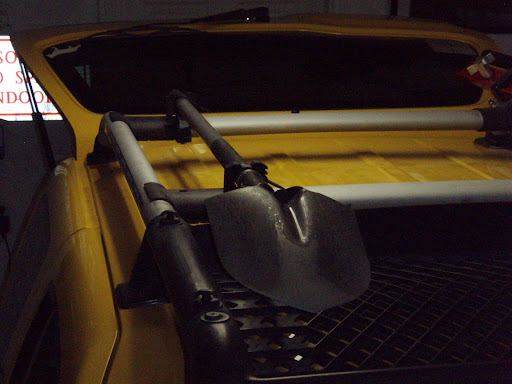
Cobra CB with 3' Firestik antenna mounted to roof rack
Miscellaneous
Xoskel first generation Xterra roof rack
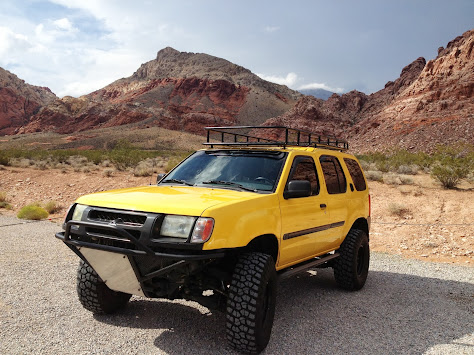
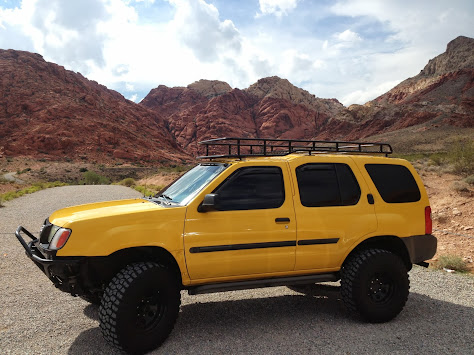
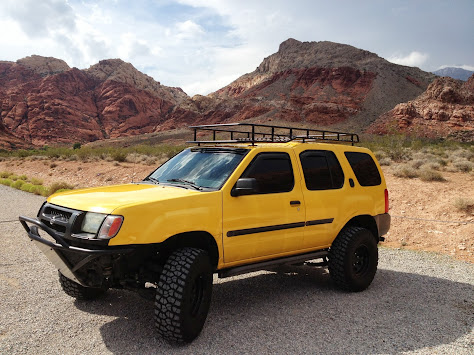
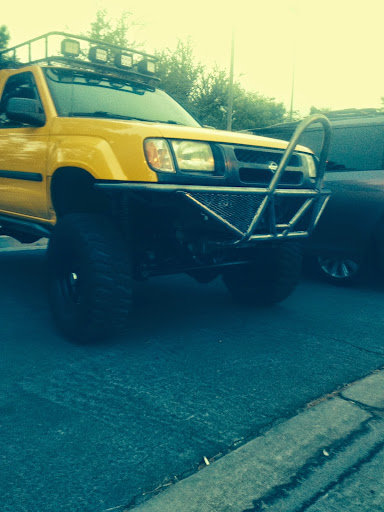
How she sits now:
I’ve had my X for so long I figure it is about time I do a build thread..... and here we go...
A long time ago (June 2005) in a galaxy far far way (Berkley California) we bought our 2001 Nissan Xterra (AKA Anconeus) with 33,000 miles on the odometer. We bought it for my wife when she graduated from college.
The first thing we did was take off the mud flaps and stock step rails, then headed out on The Eagle Peak trail with some Bay Area XOC members.
The first “real” mod we did was Shrockworks sliders and a PML. We kept it that way for many years and mainly took it snowboarding, with the occasional mellow trail wheeling.
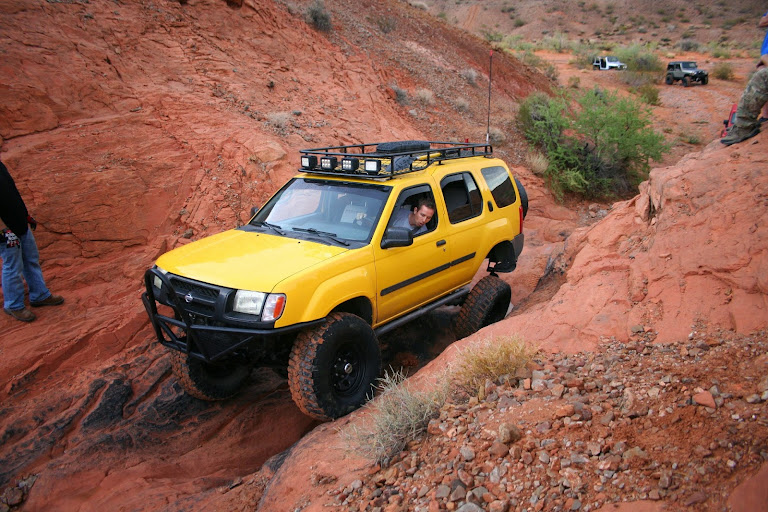
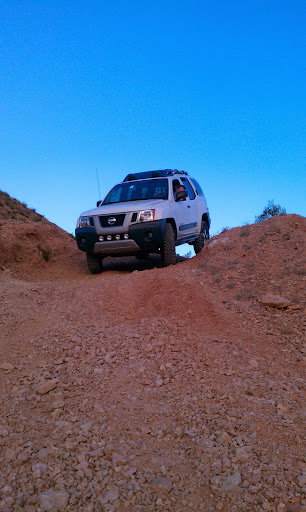
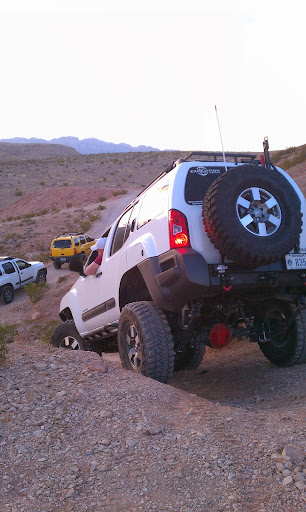
Once it was passed to me the major modifications began and more aggressive trails were tackled. Here is some pictures and write-ups:

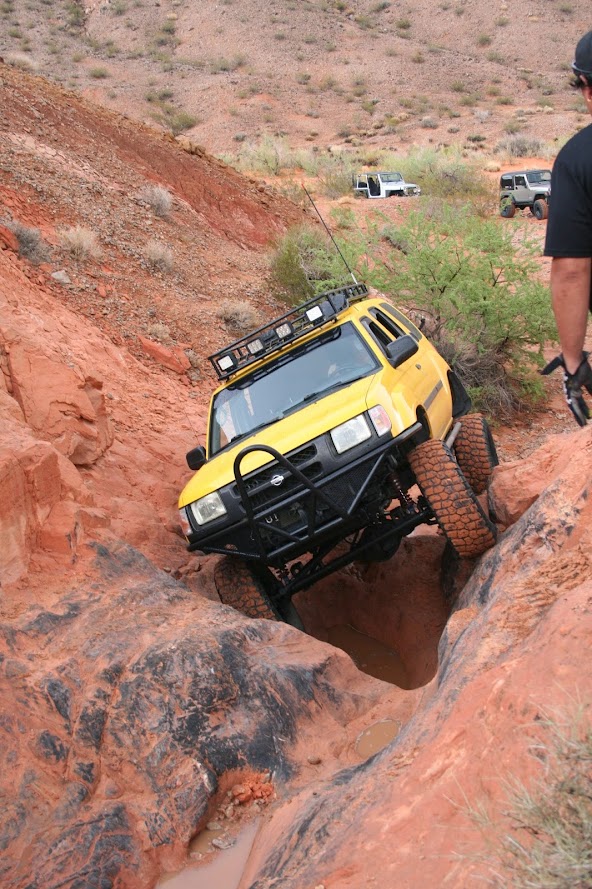
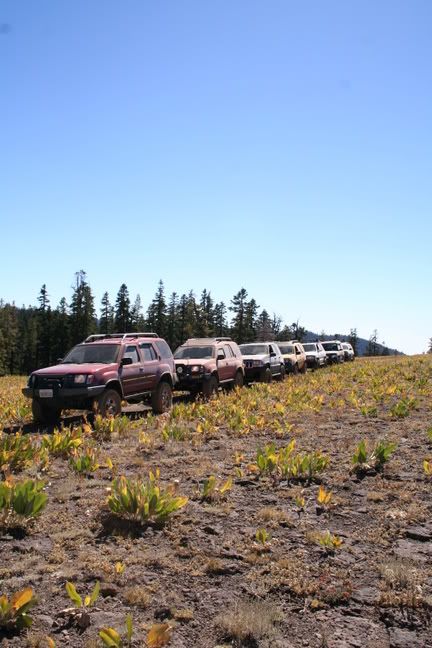
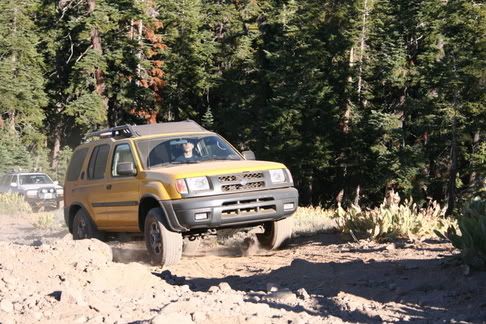
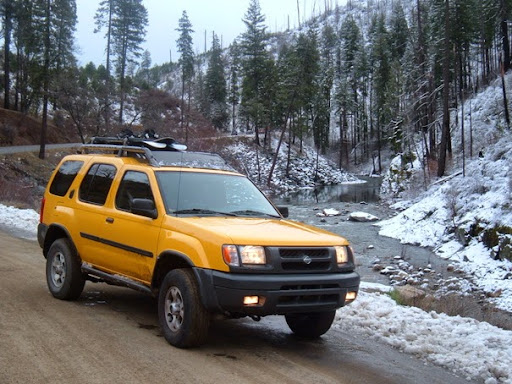
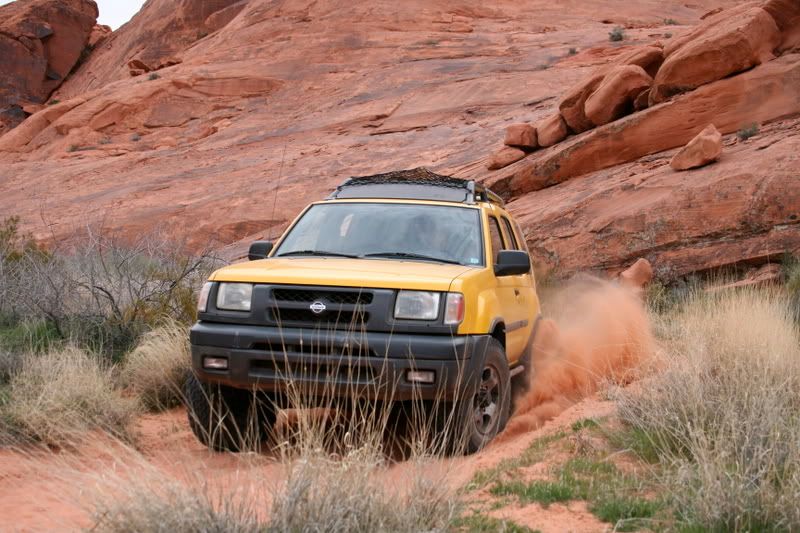
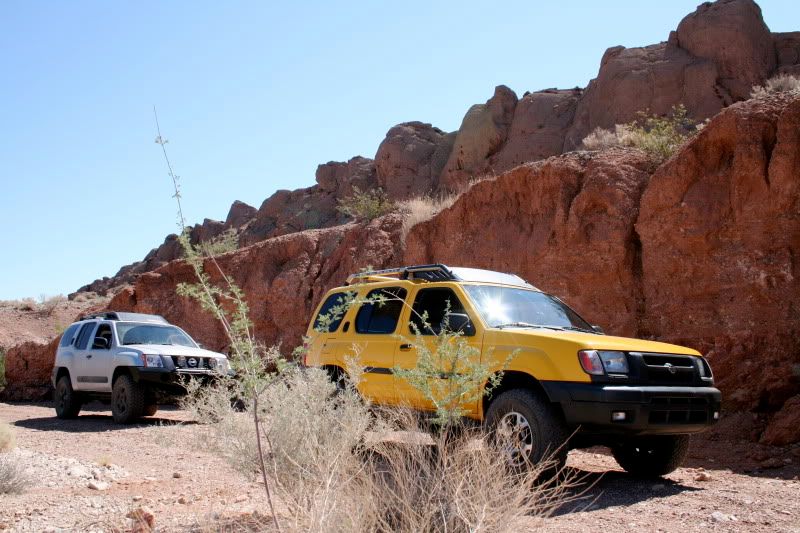
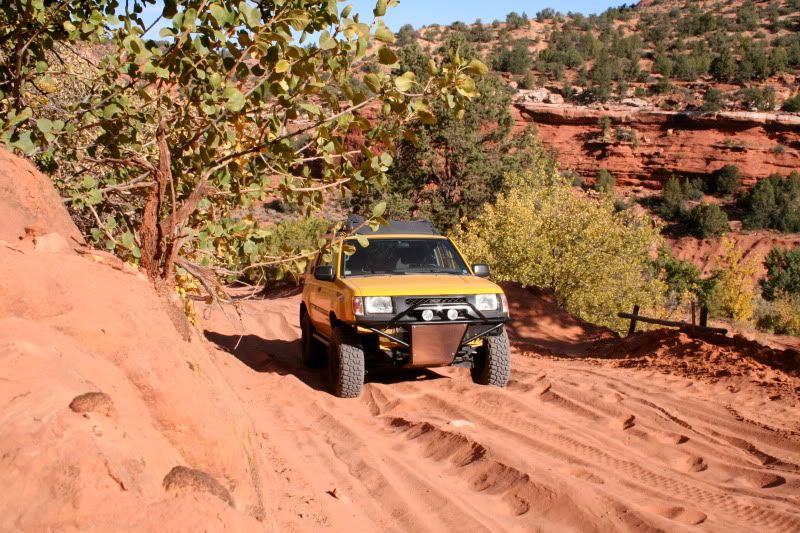
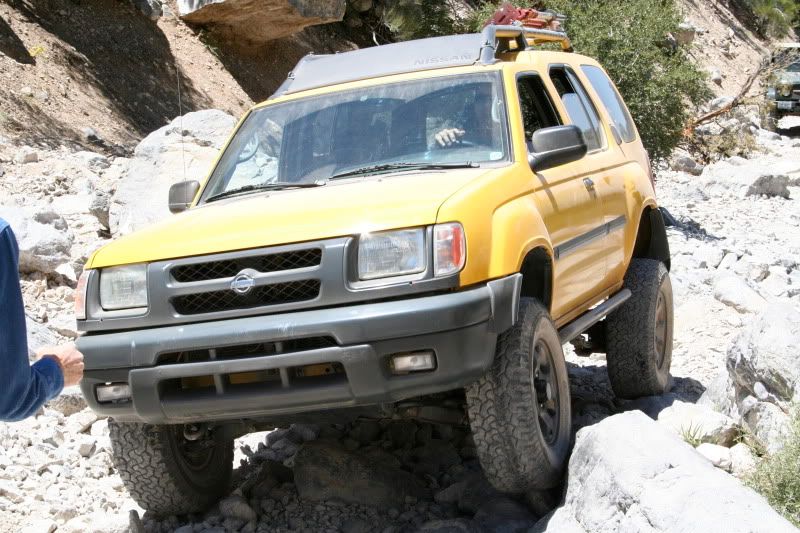
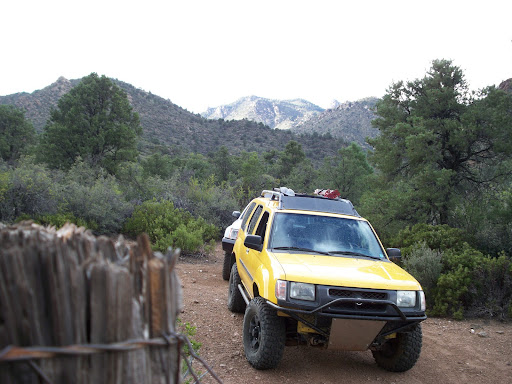
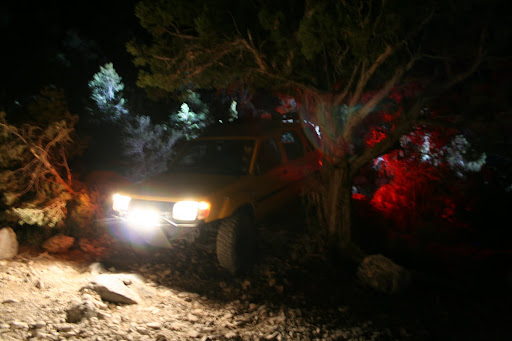
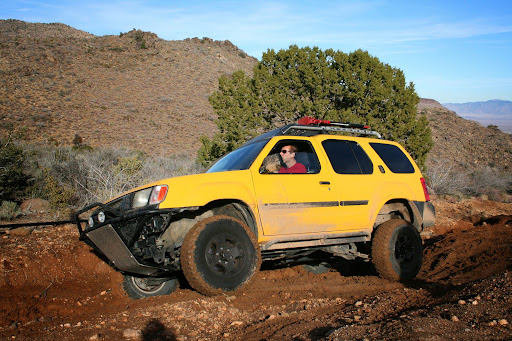
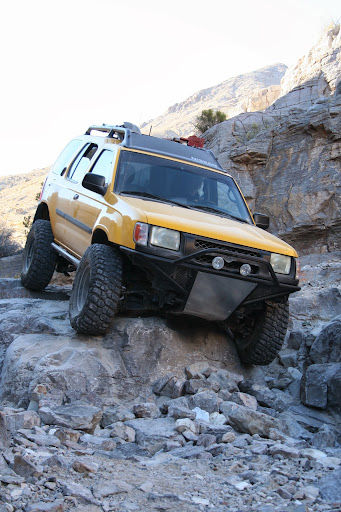
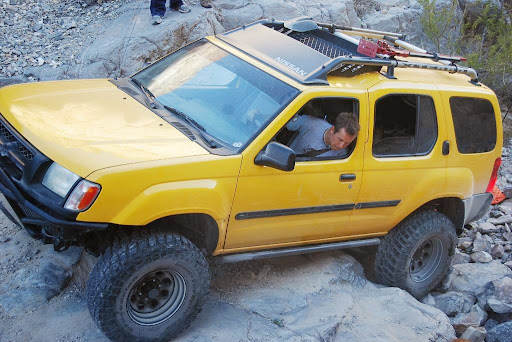
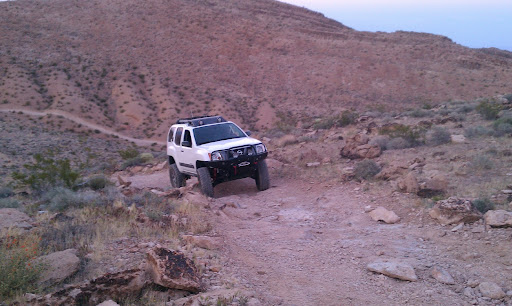
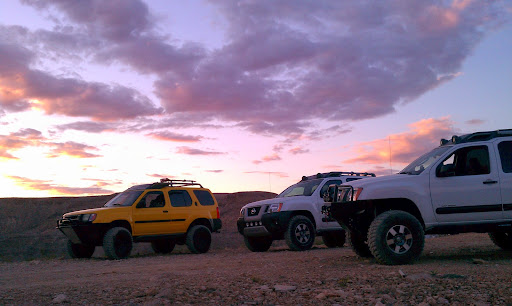
Trail Pictures

Trail Videos
http://www.youtube.com/watch?v=w5PUV5eebMc
http://www.youtube.com/watch?v=jk9ePsbkuuY
http://www.youtube.com/watch?v=6fDR3_uYGm0
http://www.youtube.com/watch?v=uIkwqhgRxps
http://www.youtube.com/watch?v=wzlshpY3j7M
http://www.youtube.com/watch?v=2GXY9umbCP4
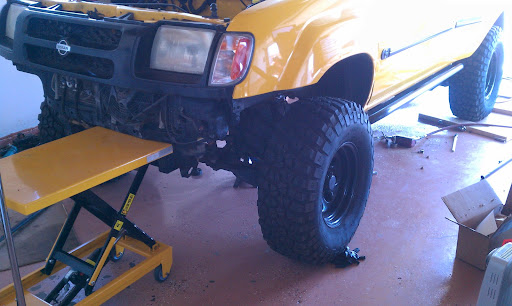
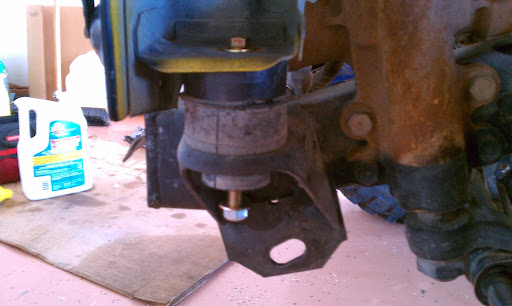
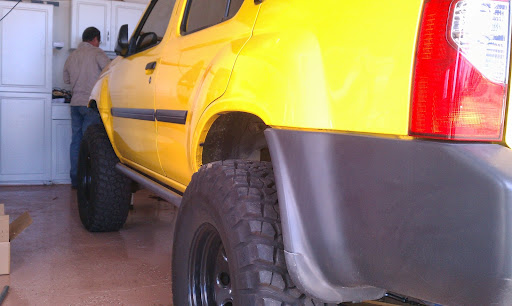
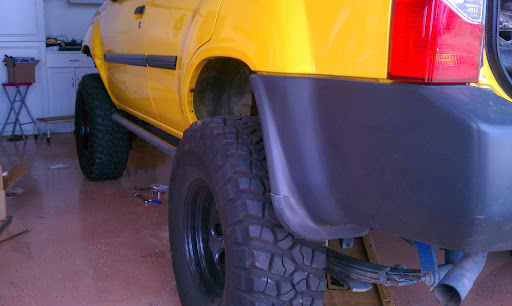
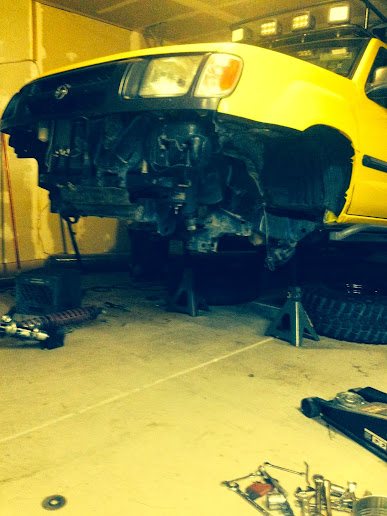
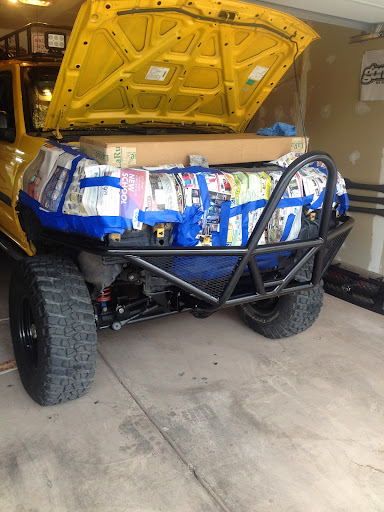
Body lift added 3/2/2013
I only wanted a 1" body lift, so I cut 1/2" inch from each side of the 2" body lift pucks. This allowed each puck to retain the reinforcement in the middle of the puck. All and all it went very well with the use of a hydraulic lift table to lift from the front body crossmember. Then I used a floor jack to lift the back half of the body. A note for those with the stock spare tire..... you have to lower the spare tire down or the rear portion of the body will not separate from the frame. I really like how the 1" lift came out! I will be raising by shrockworks sliders about 1/2" in the near future.
Hardware used:
(2) 10mm-1.25 x 55 8.8 HEX CS
(2) 10mm-1.25 x 140 10.9 HEX CS
(2) 12mm-1.25 x 16010.9 HEX CS (this is the rear most bolts and could have been 15mm shorter)
(6) 7/16 -14 x 5 GR8 HEX CS
(6) 7/16-14 GRC NUT
(16) 7/16 GR8 SAE FW (.925 OD) flat washer
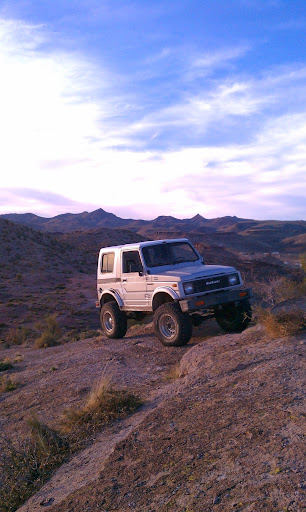
My rig is still waiting for a new head so we did some obligatory wheeling in my dad's Samurai after we installed the BL
Make: Nissan
Year: 2001
Model: Xterra
Color: Solar Yellow
nickname: Anconeus
Drivetrain
86 Waggy D44 Front Axle WITH ARB locker, 5:13 gears, and Chromoly Axle shafts
Rear H233B WITH ARB locker and 5:13 gears
Complete intake ported/polished (Throttle body and intake manifold (lower/upper)
Heads ported/poilised (intake/exhaust side) and combustion chamber reworked
Wolf Technology S1 Camshafts
Doug Thorley headers
2.5" custom exhaust with Flowmaster Y pipe
Rugged Rock HD engine mounts
Supercharger radiator
AC transfercase crawler gears (best mod I've done prior to SAS!!)
Front Tom Words Driveshaft
Rugged Rocks front differential drop kit (Deleted since SAS)
Suspension
Modified Calmini SAS kit modified to fix the breaking radius arm issue
Fox Coil Over Shocks
SOA with Revolver Shackles and longer Bilstein 5100 Shocks
BF Goodrich 315/75/16 KM2's on Craiger Soft 8’s, 16x8
1" body lift
AC braided SS brake lines
32 x 11.5 R15 BFG KM2’s on black steel wheels (Deleted since SAS)
Spencer Low Racing 3" lift with Bilstein 5100 shocks (Deleted since SAS)
Steering
Chevy 1-ton stuff
Grassroots 4x4 centerlink (Deleted since SAS)
AC HD tierod adjusters (Deleted since SAS)
Calmini idler arm brace (Deleted since SAS)
Armor
Shrockworks sliders
Shrockworks gas tank skid plate
Shrockworks rear bumper with tire carrier and Hilift mount
Calmini SAS belly pan skid plate
Custom front bumper with winch plate
Custom front bumper with skid plate (Deleted since SAS)
Shrockworks engine skid plate (Deleted since SAS)
Shrockworks transfer case skid plate (Deleted since SAS)
Electrical
Nissan Quest alternator upgrade
Totron 5" 3x2 lights (2 flood and 2 spot pattern)
Custom LED rock light set up (still in the works)
Bluesea fuse block mounted in glovebox area
Cobra CB with 3' Firestik antenna mounted to roof rack
Miscellaneous
Xoskel first generation Xterra roof rack
How she sits now:
I’ve had my X for so long I figure it is about time I do a build thread..... and here we go...
A long time ago (June 2005) in a galaxy far far way (Berkley California) we bought our 2001 Nissan Xterra (AKA Anconeus) with 33,000 miles on the odometer. We bought it for my wife when she graduated from college.
The first thing we did was take off the mud flaps and stock step rails, then headed out on The Eagle Peak trail with some Bay Area XOC members.
The first “real” mod we did was Shrockworks sliders and a PML. We kept it that way for many years and mainly took it snowboarding, with the occasional mellow trail wheeling.
Once it was passed to me the major modifications began and more aggressive trails were tackled. Here is some pictures and write-ups:
Trail Pictures
Trail Videos
http://www.youtube.com/watch?v=w5PUV5eebMc
http://www.youtube.com/watch?v=jk9ePsbkuuY
http://www.youtube.com/watch?v=6fDR3_uYGm0
http://www.youtube.com/watch?v=uIkwqhgRxps
http://www.youtube.com/watch?v=wzlshpY3j7M
http://www.youtube.com/watch?v=2GXY9umbCP4
Body lift added 3/2/2013
I only wanted a 1" body lift, so I cut 1/2" inch from each side of the 2" body lift pucks. This allowed each puck to retain the reinforcement in the middle of the puck. All and all it went very well with the use of a hydraulic lift table to lift from the front body crossmember. Then I used a floor jack to lift the back half of the body. A note for those with the stock spare tire..... you have to lower the spare tire down or the rear portion of the body will not separate from the frame. I really like how the 1" lift came out! I will be raising by shrockworks sliders about 1/2" in the near future.
Hardware used:
(2) 10mm-1.25 x 55 8.8 HEX CS
(2) 10mm-1.25 x 140 10.9 HEX CS
(2) 12mm-1.25 x 16010.9 HEX CS (this is the rear most bolts and could have been 15mm shorter)
(6) 7/16 -14 x 5 GR8 HEX CS
(6) 7/16-14 GRC NUT
(16) 7/16 GR8 SAE FW (.925 OD) flat washer
My rig is still waiting for a new head so we did some obligatory wheeling in my dad's Samurai after we installed the BL
Last edited:


.JPG)


.jpg)
")