ddddddd
Bought an X
- Location
- los angeles
Hello, here you will find my build thread and the latest pics of my X.
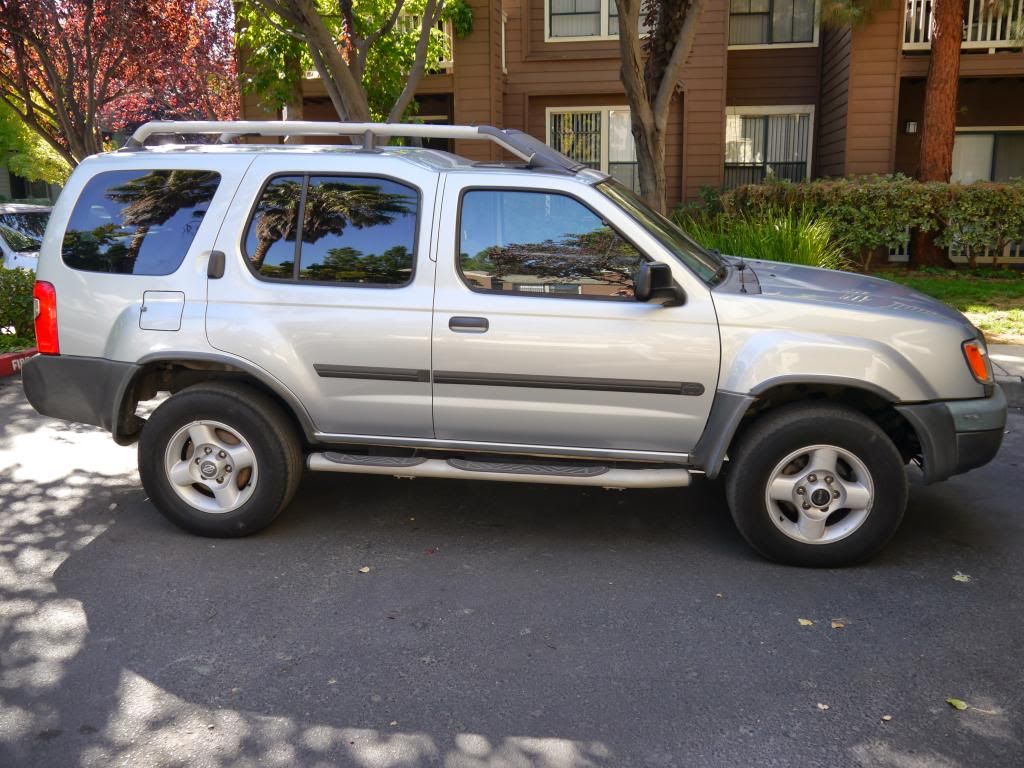
2001 Xterra SE 4x4 5 speed
Stock:
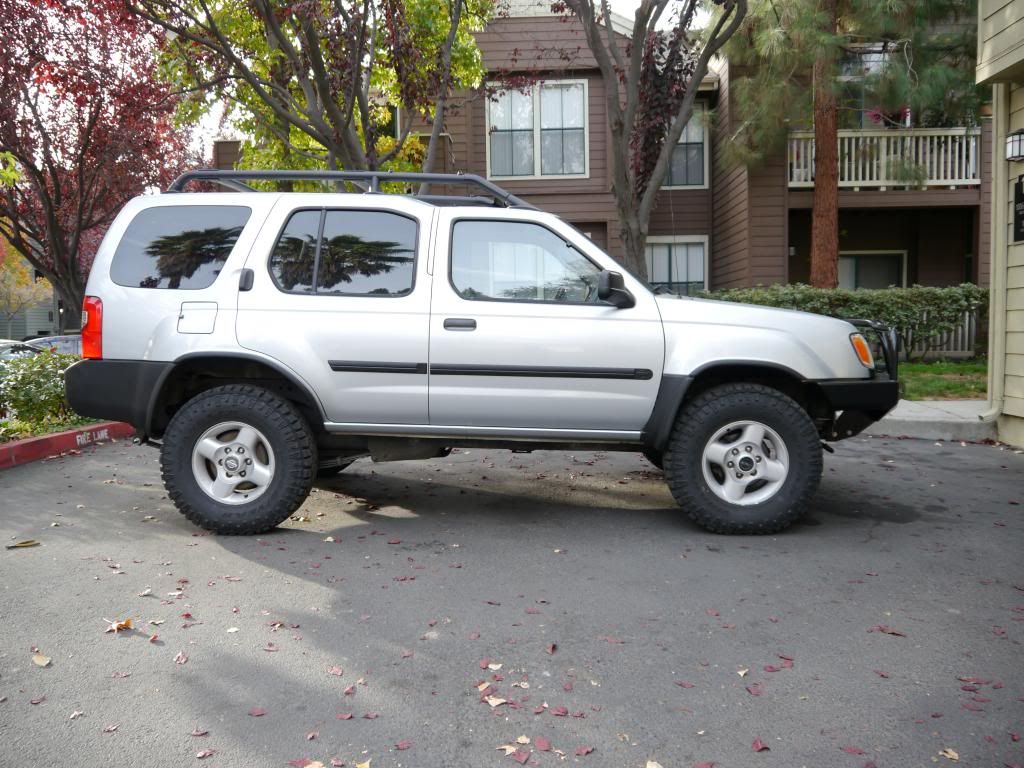
Current:
List of Mods:
Exterior:
2001 Xterra SE 4x4 5 speed
Stock:

Current:

List of Mods:
Exterior:
- Removed side steps
- Chrome Exhaust Tip
- Shrockworks front bumper
- Repainted Grille (black bedliner)
- Repainted trim (black bedliner)
- Repainted roof rack (black bedliner)
- Repainted cowl & wiper arms (flat black)
- Installed Bottle Opener on front bumper
- Electrical wiring
- Blue sea systems fuse box
- 100A resetable breaker
- 4x SPDT fully potted waterproof relays
- 5x Toggle switches in cab
- Installed front LED Spot lights 18W each
- Installed front 20" LED Spot/Flood combo lightbar 130W
- Installed rear backup LED flood lights
- Installed Prodigy P3 trailer brake controller and 7 pin harness
- Panasonic Head Unit
- 2x 10" Polk Audio subs
- 300W mono amp
- Maglite holder (Driver door)
- Added cabin air filter
- Flowmaster Muffler
- Intake Mod (removed resonators, cleaned MAF)
- K&N Drop in Air Filter
- Knock Sensor Bypass
- '02 S/C Radiator
- Rear sway bar delete
- PML
- 265/75/R16 123Q GY Duratracs (32")
- Spark Plugs (120K)
- Spark Plug Wires (120K)
- Distributor Cap (120K)
- Distributor Rotor (120K)
- Clutch Master Cylinder (90K) (135K)
- Clutch Slave (135K)
- Clutch hose (135K)
- Battery (120K)
- Oil Change (133K, 138K, 144K, 149K, 154K, 160K)
- Wheel Alignment (151K, 158K)
- Replaced wire clamps with worm clamps on P/S system (133K)
- New P/S return pressure tube (133K)
- Timing Belt (133K)
- Water Pump (133K)
- Cam & Crank Oil Seals (133K)
- Thermostat (133K)
- Drive Belts (133K)
- Rear Diff drain/fill (134K)
- Front Diff drain/fill (135K)
- Fluid Flushes (Tranny, X-fer) (160K)
- All new radiator hoses (161K)
- Coolant Flush (161K)
- Power Steering fluid flush (161K)
- Re-polish and SEAL headlights (this time i'll seal them I promise)
- Rear diff breather extension
- IAB
- Bilstein HDs front & rear
- Cut fog light holes in Shrockworks bumper
- Bosch Compact 100 Selective Yellow fog lights with Narva Rangepower +50 55W H3 halogen bulbs
- Full skid plates
- Sliders
- Shrockworks rear bumper w/tire carrier
- 3" SL
- 15" wheels
- 33" Tires
- HD Steering upgrade
Last edited: