Metzican's Dream off-road Teardrop Trailer

brett

Bought an X
Location
Little Rock, AR
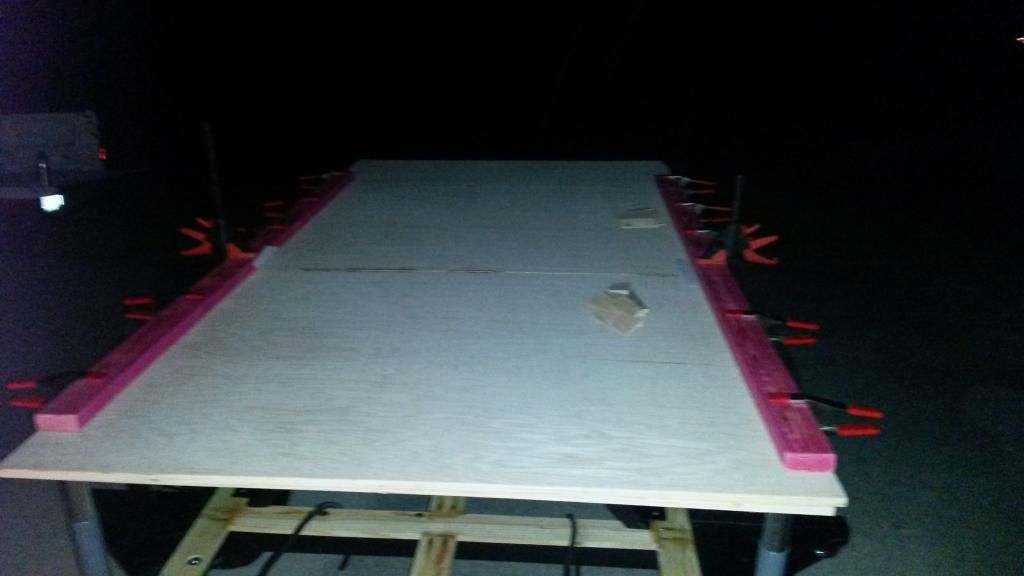
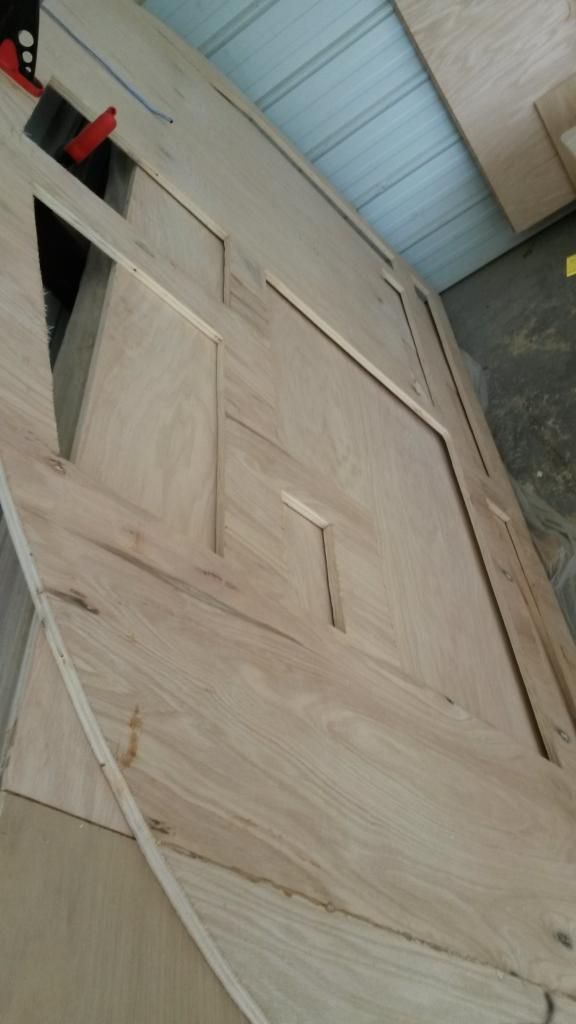
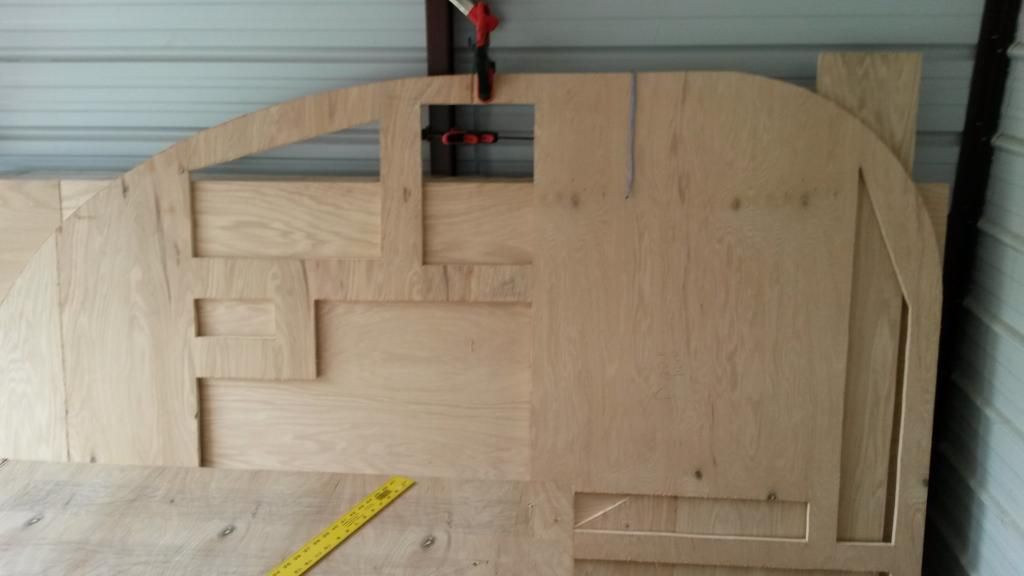
These are my thoughts and yes I have put a lot of thoughts into this. As I'm planning on living out of this thing for 4+ months in a row.

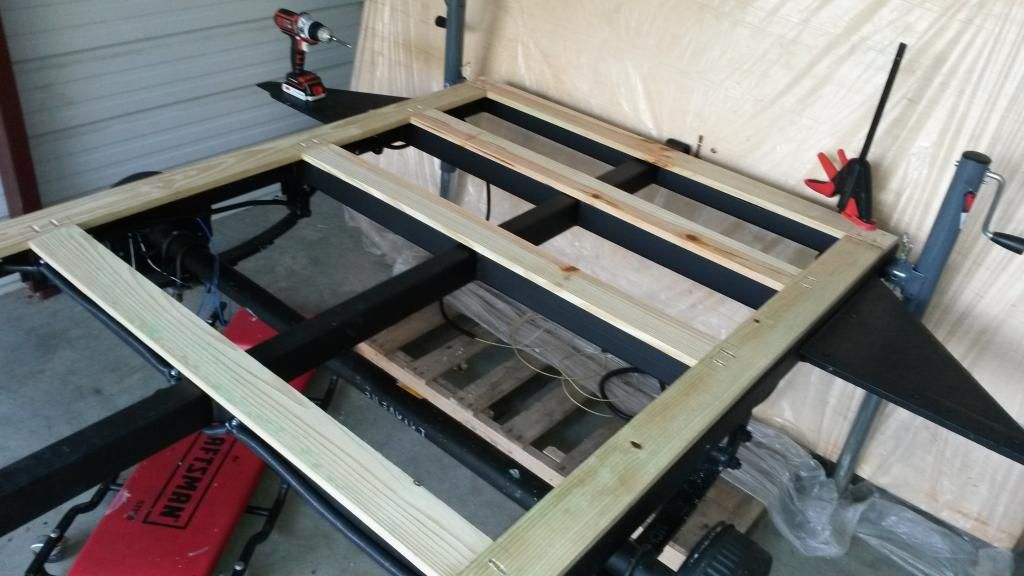
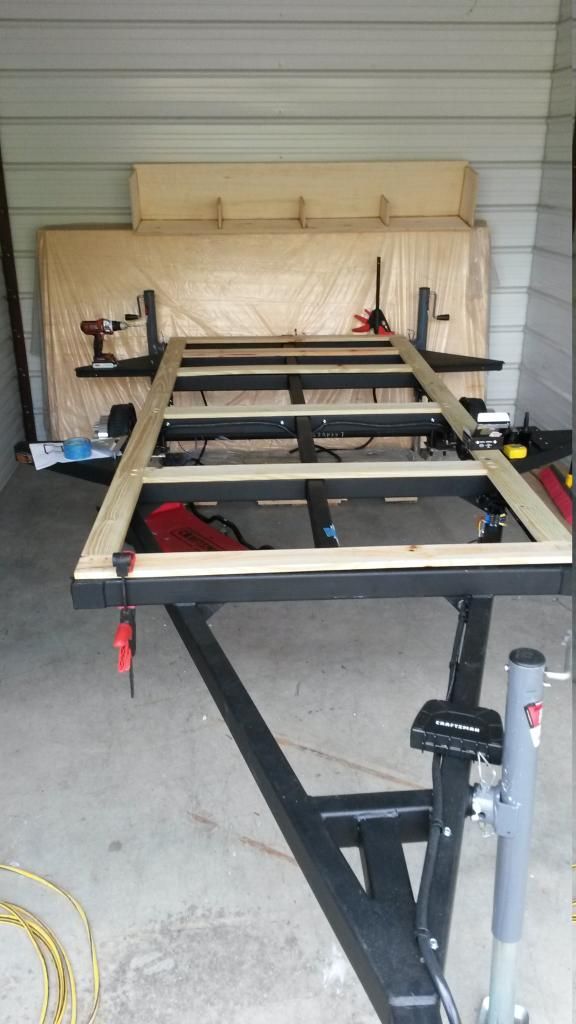
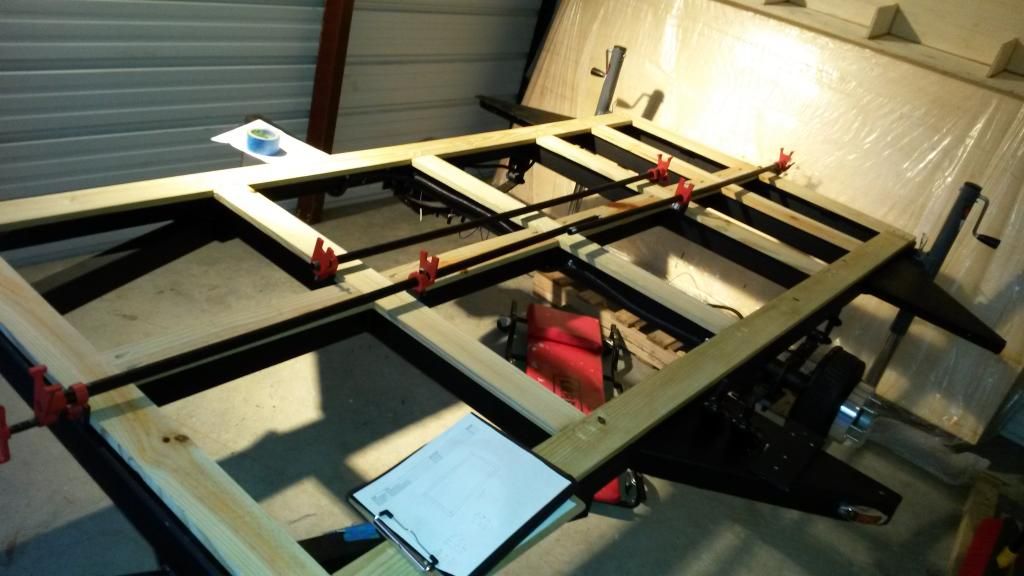
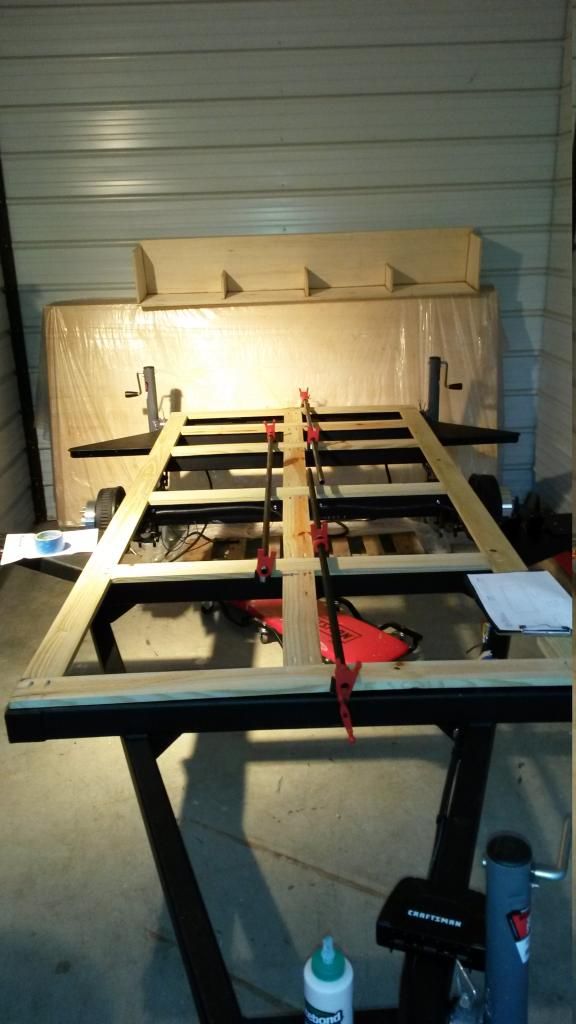
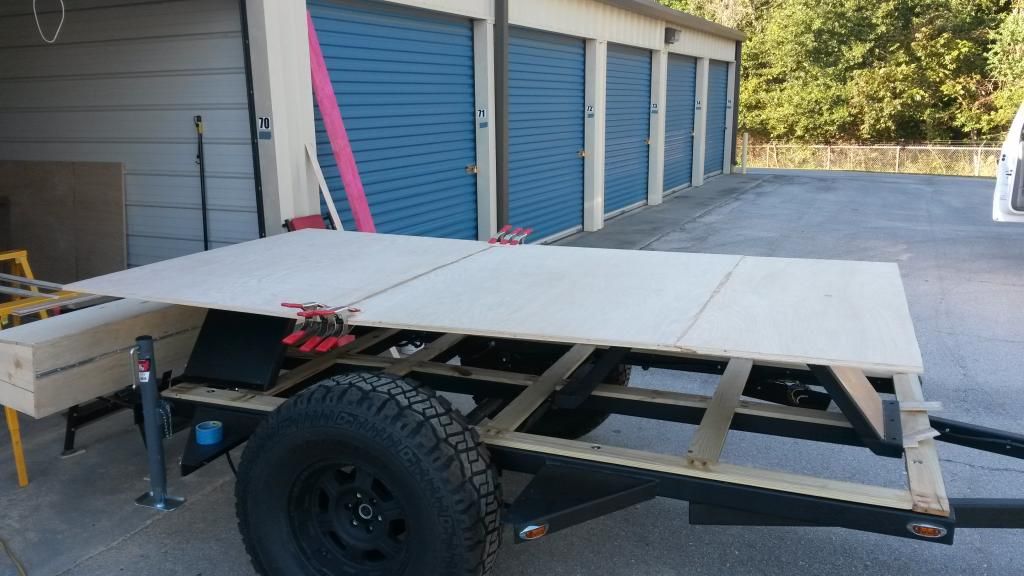
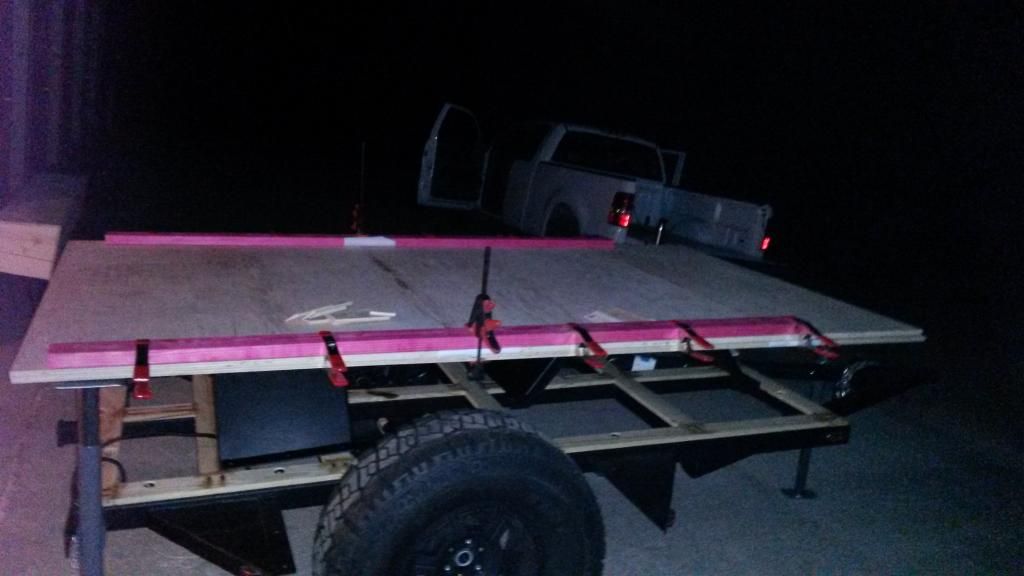
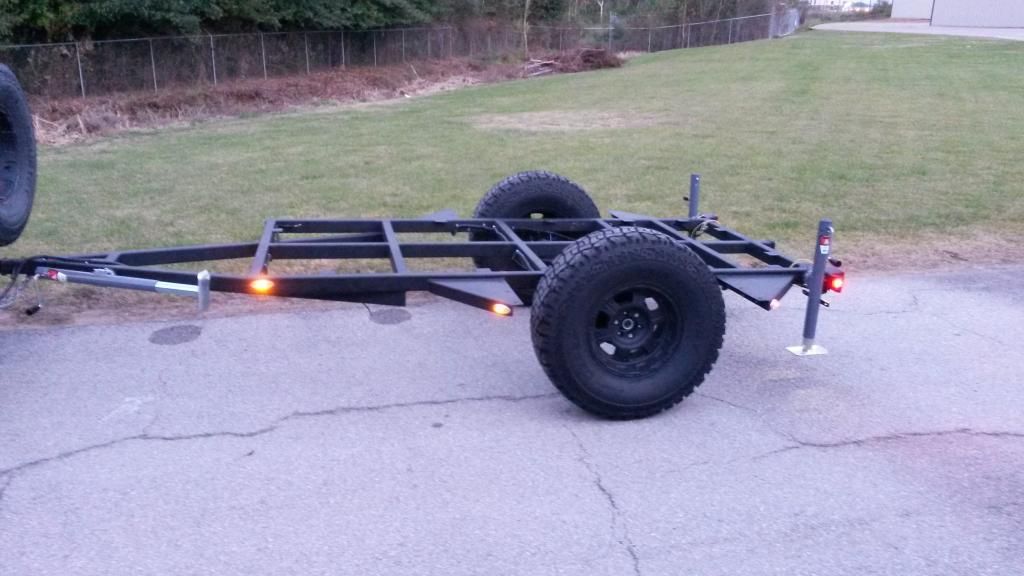
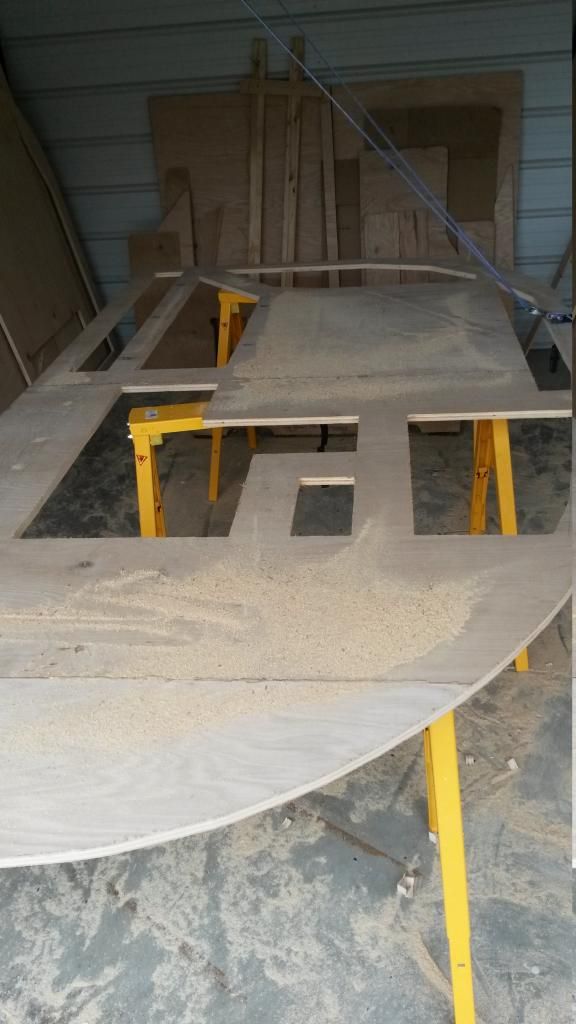
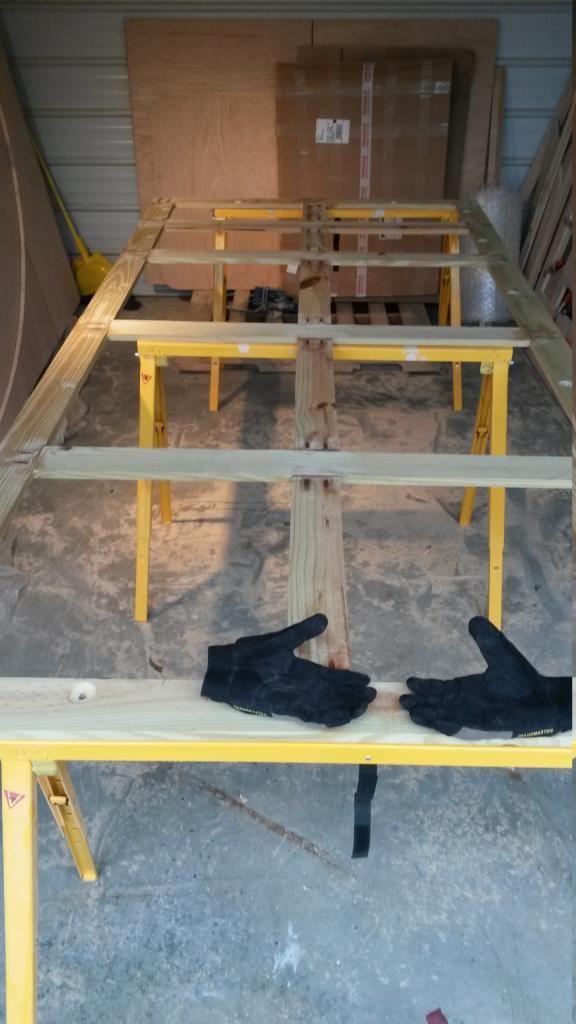
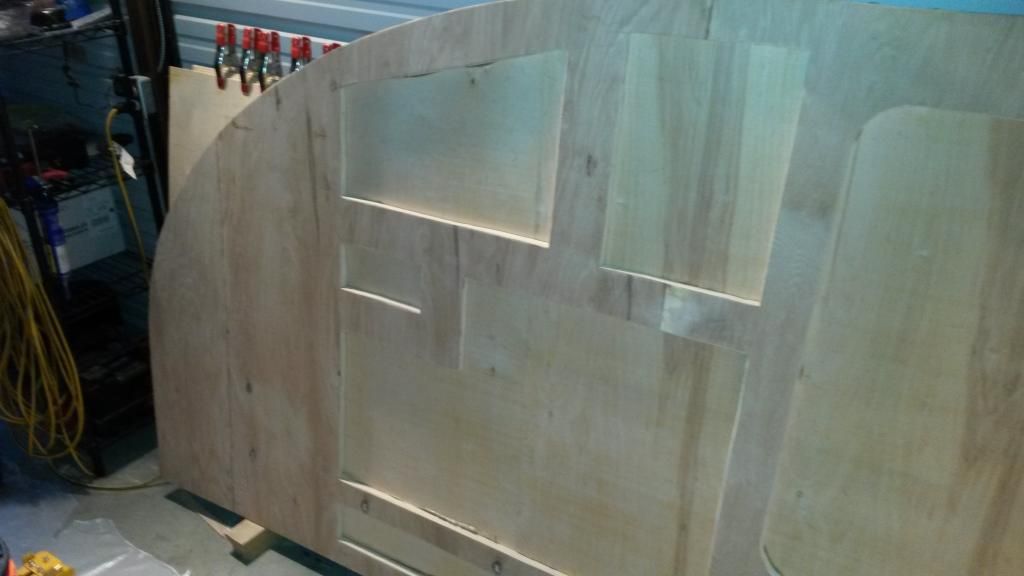
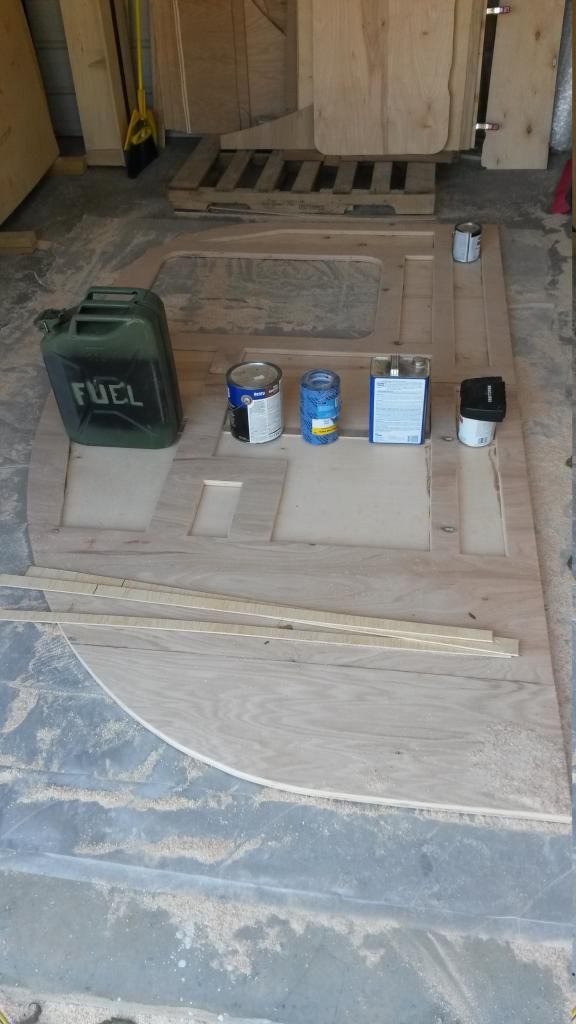
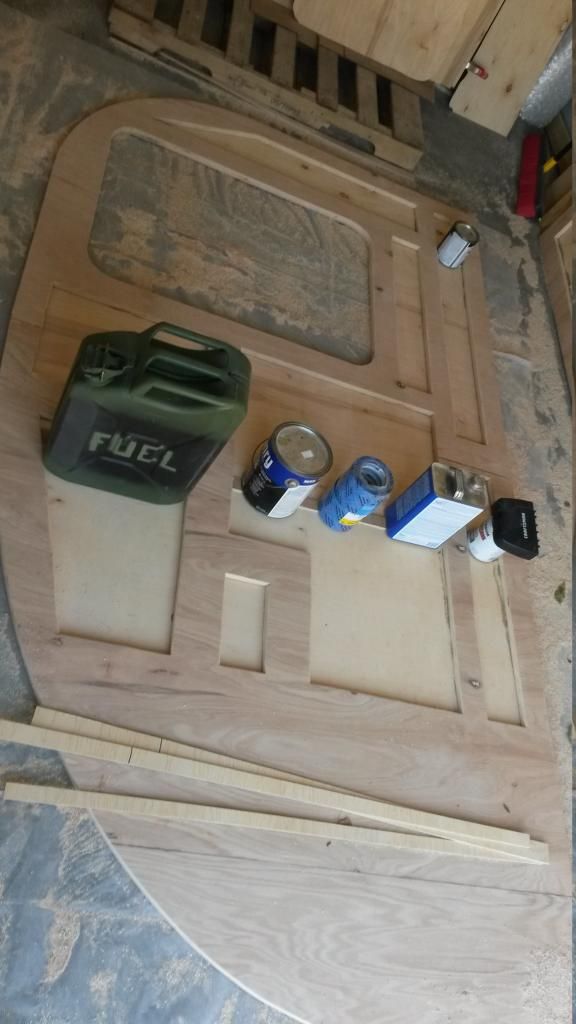
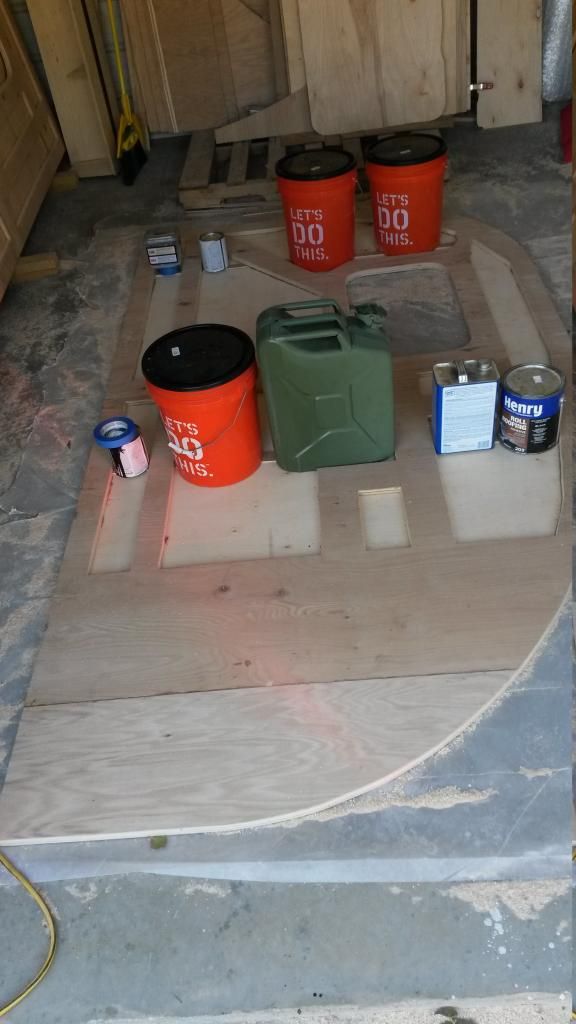
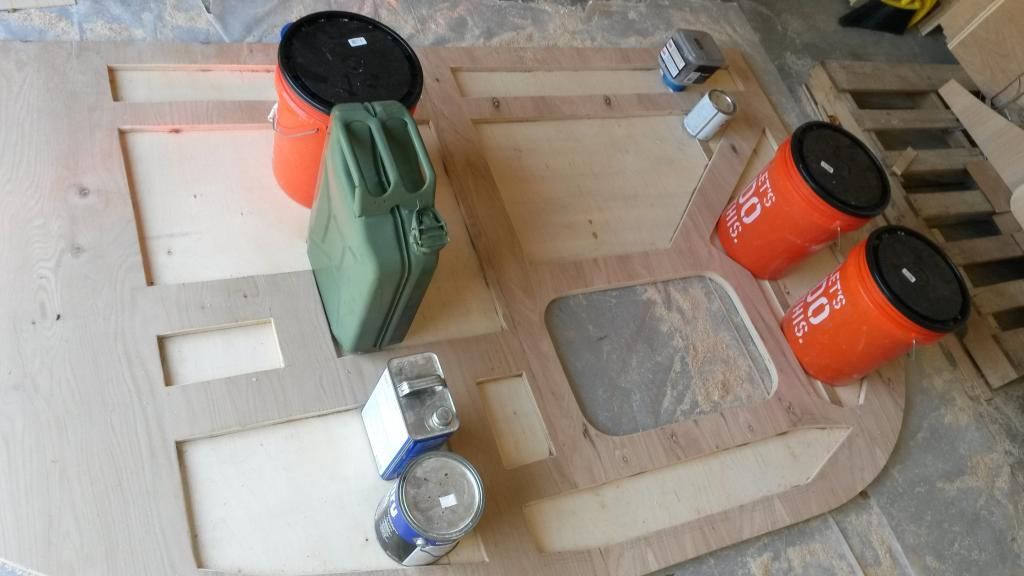
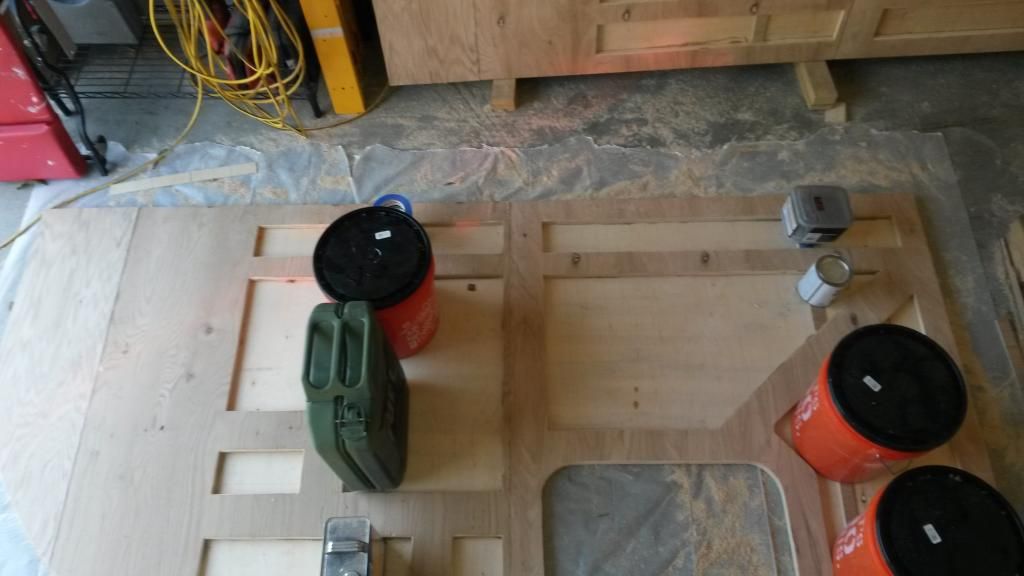
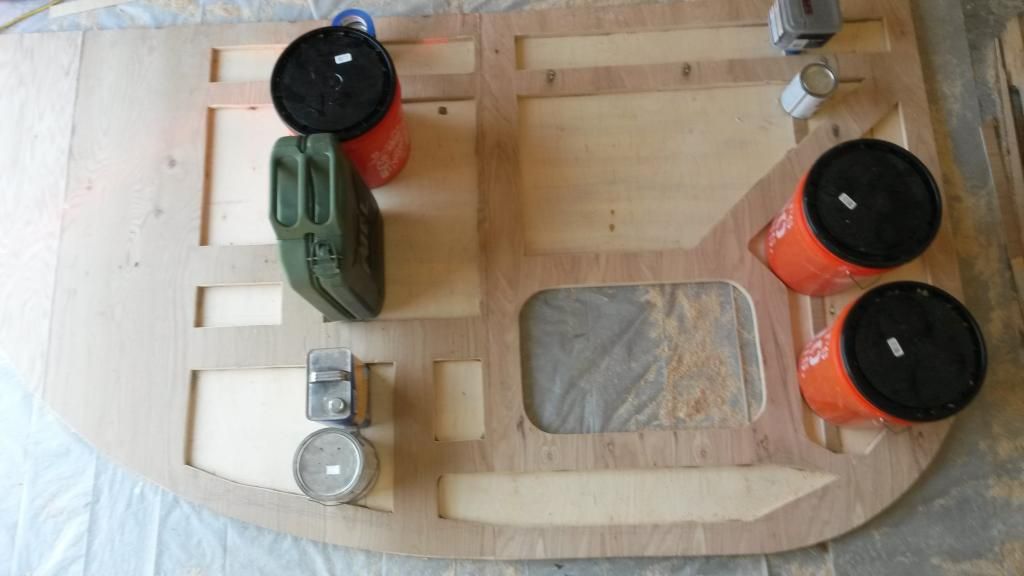
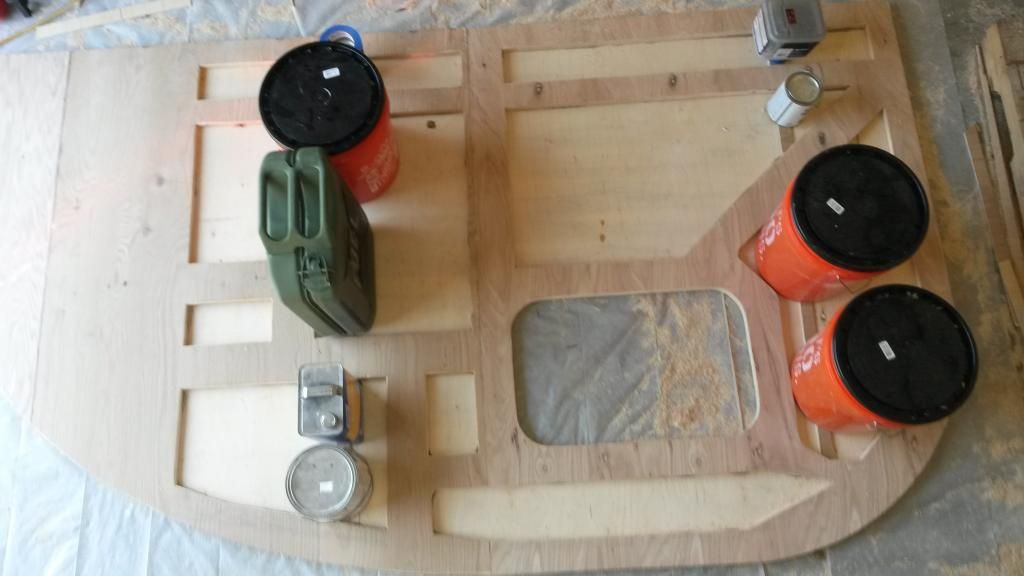
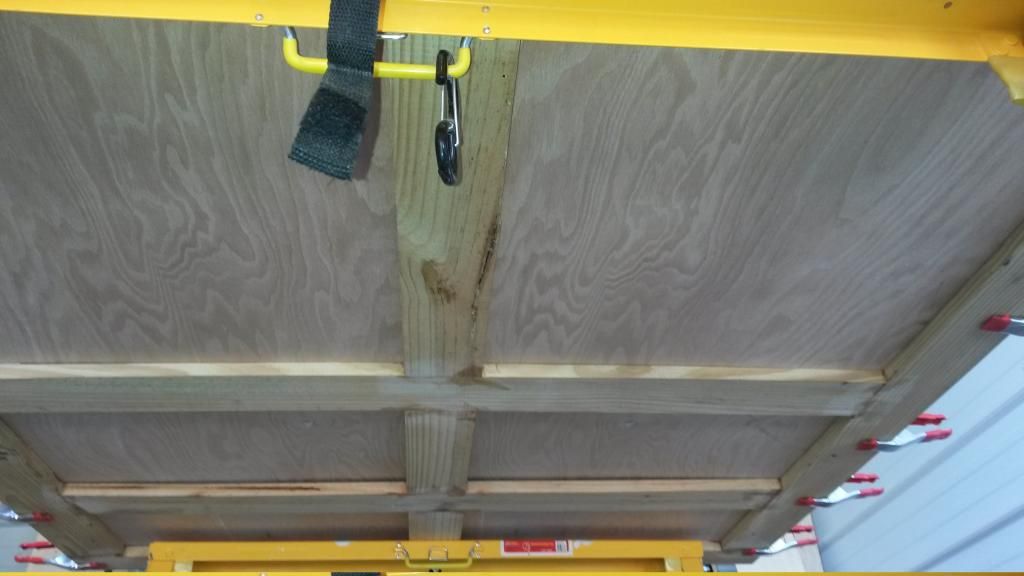
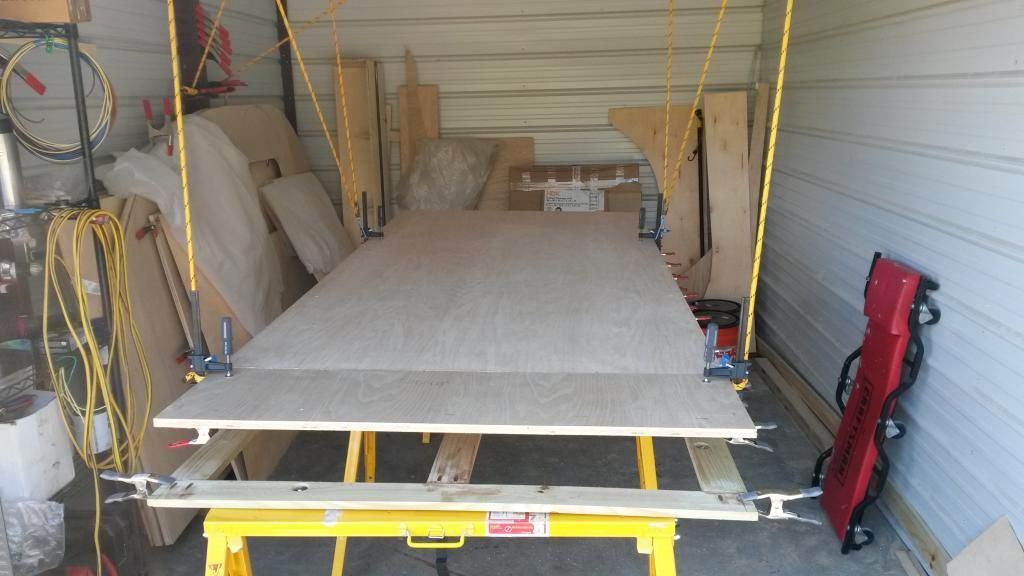
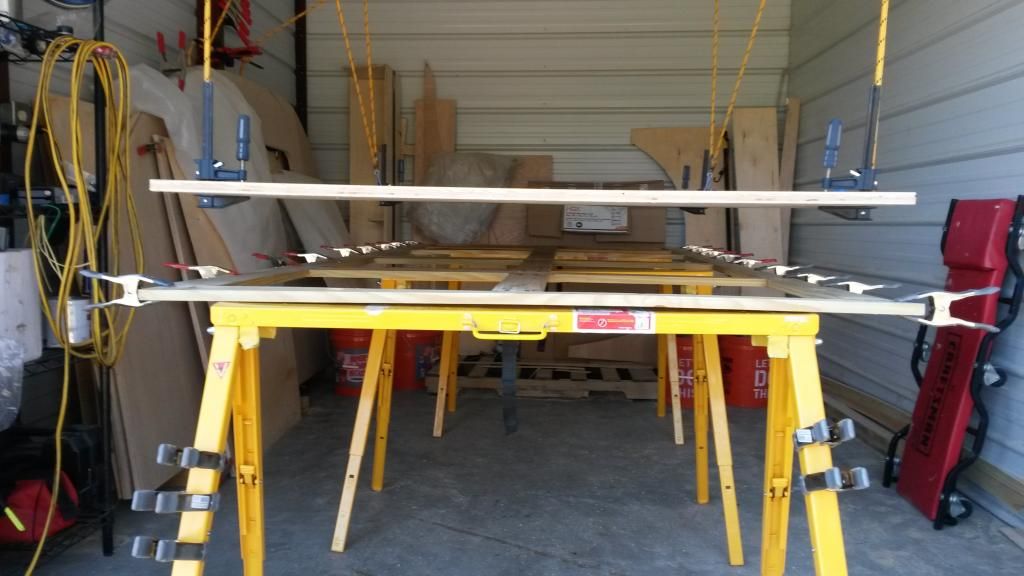
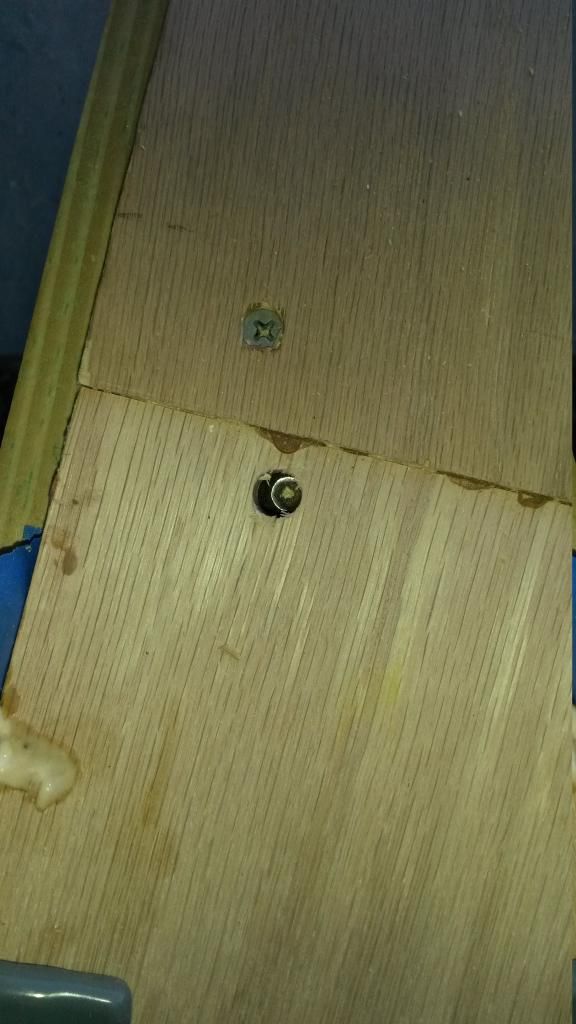
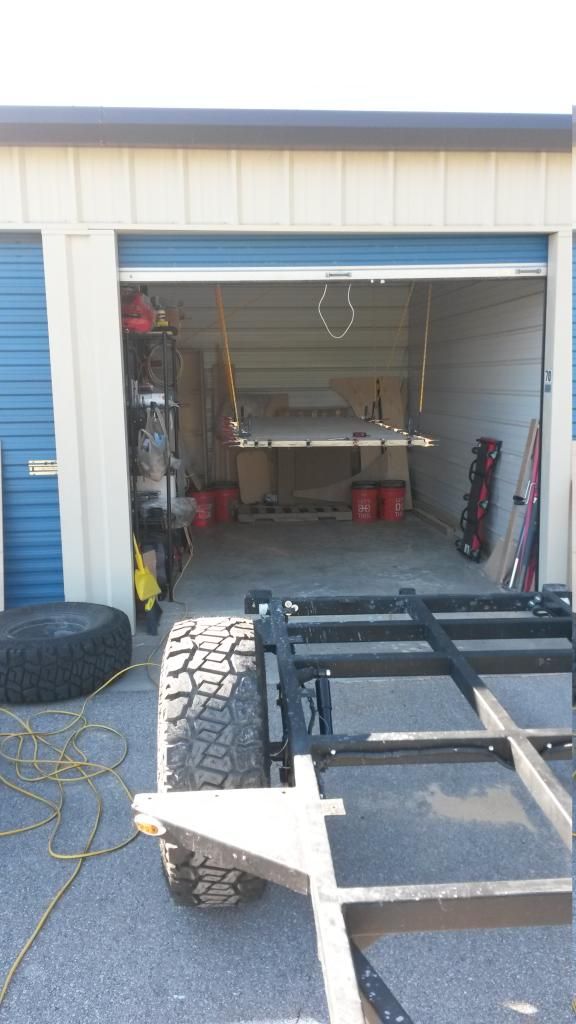
I noticed the extra brace/joist across the rear section of the trailer. Is that just for additional floor support for storage in the rear? I figure so with the fridge, etc.

Considering you live south of me and humidity can be terrible here, have you given any thought to a/c? I've looked at some of the 10' long LittleGuy campers that have the room-consuming window units integrated, but I could never warm up to that idea. I often thought I might like the external, portable Climate Right units - apparently there's even one that heats or cools too.

I suppose a small generator may be in the plans?

Certainly appreciate your responses, it's fun reading of your progress/plans. It's very obvious that you've invested a lot of thought so far.
Keep up the good work!
 

metzican

Suspension Lift
Location
Lafaytte, la
Hmm, I thought I responded to you...

The extra brace is just where the leaf spring hanger is. I could of removed one but then the gap was just too big along with the rear receive extra support is nice. Along with this yes the kitchen is back there with a lot of weight and the water tank is right in front of it. The bulk head will be somewhere between the 2nd and 3rd cross brace from the back. Which will allow the water tank edge to be over that 3 member.

I thought about AC then I was like I would need a generator and ... And not to mention this is camping. So No AC people lived without it in the south for hundreds/thousands of years so I will deal with it. I'm not planning on staying down here forever. And no generator is in the plans as of right now. At least for this trip I plan on moving every to every other day so I don't need a self charging system. The vehicle will do just fine. I might end up picking up a small solar panel for just in case I somehow drain all 4 batteries and can't start my vehicle. This way I can just camp out for a day or so then start it and everything would be fine.

On that note. I really do miss this old gal. I have not been able to do much work since who knows when now and my vacations/work been keeping me busy. Only 1.5weeks tell I dig into her for a week then back to work for 2 more. Hopefully by the end of this holiday season I will have the body made and just need to do finishing details and wiring and installing of all the goodies I have.
 

metzican

Suspension Lift
Location
Lafaytte, la
So I ordered shocks and brackets today along with a male 110v plug thing for easy plug in for the fridges and charger. Along with toggle clamps to hold the hatch close.
 

dhyde79

Titan Swapped / SAS'd
Founding Member
Location
Amarillo, TX
Hmm, I thought I responded to you...

The extra brace is just where the leaf spring hanger is. I could of removed one but then the gap was just too big along with the rear receive extra support is nice. Along with this yes the kitchen is back there with a lot of weight and the water tank is right in front of it. The bulk head will be somewhere between the 2nd and 3rd cross brace from the back. Which will allow the water tank edge to be over that 3 member.

I thought about AC then I was like I would need a generator and ... And not to mention this is camping. So No AC people lived without it in the south for hundreds/thousands of years so I will deal with it. I'm not planning on staying down here forever. And no generator is in the plans as of right now. At least for this trip I plan on moving every to every other day so I don't need a self charging system. The vehicle will do just fine. I might end up picking up a small solar panel for just in case I somehow drain all 4 batteries and can't start my vehicle. This way I can just camp out for a day or so then start it and everything would be fine.

On that note. I really do miss this old gal. I have not been able to do much work since who knows when now and my vacations/work been keeping me busy. Only 1.5weeks tell I dig into her for a week then back to work for 2 more. Hopefully by the end of this holiday season I will have the body made and just need to do finishing details and wiring and installing of all the goodies I have.

on the solar panel, could you make a hinged "door" on the front of the teardrop that would open and you could stash a pair of mounted solar panels in there? that way they're protected during travel and storage, when you're at camp during the day you open it up, before going to bed if you're somewhere that you have to worry about large animals, you close it up...

just my thoughts on it, I like the idea of solar on there, but, obviously, would want a way to protect em during bad weather and such....
 

metzican

Suspension Lift
Location
Lafaytte, la
on the solar panel, could you make a hinged "door" on the front of the teardrop that would open and you could stash a pair of mounted solar panels in there? that way they're protected during travel and storage, when you're at camp during the day you open it up, before going to bed if you're somewhere that you have to worry about large animals, you close it up...

just my thoughts on it, I like the idea of solar on there, but, obviously, would want a way to protect em during bad weather and such....


^The thing about solar panels and defiantly your idea is you park the camper in the shade not the sun. Not to mention that is a lot of work for something that would take 2 minutes to setup.


Built little brackets for my rear blinkers. Nothing fancy. Painted them. Besides this I figured out how I am going to mount my shocks and worked on modifying the brackets I'm going to use.
 

metzican

Suspension Lift
Location
Lafaytte, la
So today I got a little done on the trailer after I had a meeting all morning long. It sucked that I could not tow it to my welders to get the shock mounts all mounted up since my X is sitting at the shop and I am not allowed to tow with my work truck.

I laid down the wood frame work today, I have not bolted it to the trailer yet. I used krag joints with wood glue to hold all the wood together. Tomorrow the plan is to set it up to bolt to the frame. Then start doing all the scarf joints with the plywood to create bigger pieces. I can't mount the wood yet as the frame needs a little bit more welding for the shock mounts and I don't want the wood in the way.

I have to say this is the first time I used the Krag joint thing. thank gobble I did a bunch of test pieces because there measuring system is all off. All of the screws would of gone through the other peace.

One issue I ran into is the wood and some warping that happened.


Before I put in the middle peaces right after I squared up the whole thing.
20141023_1740190_zpsohiidizh.jpg


20141023_173954_zpswwkqjrbv.jpg


Some of the krag joints
20141023_174019_zps6mfyanpe.jpg


20141023_174002_zpsxc7z9zmw.jpg


The middle clamps is to fix some of the warping.
20141023_183459_zps8rhmc3qd.jpg


20141023_183450_zpsnye7idti.jpg
 

metzican

Suspension Lift
Location
Lafaytte, la
So I drilled all the holes for mounting the wood frame to the metal frame. I also worked all day on modifying the scarf jig. I ran into some concerns so lets see if it works tomorrow. I also ****ed up some wiring so I will have to re due that tomorrow. Damn drill bits.
 

metzican

Suspension Lift
Location
Lafaytte, la
So today I had to modify my scarf jig. The guide was all messed up and did a bad cut. I measured off a bad surface. Luckily I only did one bad joint with it which is the floor so I could leave that since it will not look good or I could just re due that joint. I am going to decide tomorrow. After that I did all the Scarf joints on the side plywood for the frame. Tomorrow hopefully I can start gluing it all together.

The aftermath of today's work.
20141025_213314_zpsujy7mitc.jpg


My scarf jig setup for a cut.
20141025_201653_zpsjtlhf6hr.jpg


20141025_201700_zpserebjgmk.jpg


The end results
20141025_201729_zpsohz9ioj4.jpg


20141025_201736_zpssvvgmwiy.jpg


Tomorrow I will trim off the tab and start fitting all the joints together.

I hate sawdust in the eyes and nose and every where else on my face. I also don't think my circular saw was designed to do these deep cuts.
 

metzican

Suspension Lift
Location
Lafaytte, la
So I made some more progress today. It may not seem like much but doing a lot of this stuff by yourself takes a lot of time.

So this is what the scarf joint looks like when you trim off the extra tab.
20141026_110726_zpsyyk03nui.jpg

20141026_110735_zpspma8eu5o.jpg


Gluing and clamping some sheets together. Making one giant sheet of plywood.
20141026_131728_zps9fiwqrvj.jpg


Using Wax papper to make sure the 2x4's don't get glued to the plywood.
20141026_131737_zpsxplbuofq.jpg


One of the Scarf joints. This one on the end did not turn out perfect but each time they became better and better.
20141026_151318_zpsjxkagd8d.jpg


One of the giant sheets.
20141026_164012_zpsrrvhtvro.jpg


Working on the second sheet.
20141026_184114_zpsy9c7ewgb.jpg


Both sheets stacked on top of each other ready for storage for the next 2 weeks.
20141026_195918_zpsfoiccq0q.jpg


20141026_195926_zpswsdkqorj.jpg
 

metzican

Suspension Lift
Location
Lafaytte, la
I saw them, thanks for the pictures. Some of those Teardrops on there were high dollar just to buy. I prefer the home made one's because they are a bit more custom to what works with that one owner vs the general public.
 

metzican

Suspension Lift
Location
Lafaytte, la
So I ordered a bunch more stuff. The big Item was the Fridge/Freezer for the trailer. Still waiting to hear back from the water tank guys so I can get that ordered. I can't wait till I can get back to working on it. This time home I'm hoping to have the walls assembled and shaped. Maybe even the roof supports started if I get lucky!!!
 

dhyde79

Titan Swapped / SAS'd
Founding Member
Location
Amarillo, TX
So I ordered a bunch more stuff. The big Item was the Fridge/Freezer for the trailer. Still waiting to hear back from the water tank guys so I can get that ordered. I can't wait till I can get back to working on it. This time home I'm hoping to have the walls assembled and shaped. Maybe even the roof supports started if I get lucky!!!

Went to the local camper store, holy crap, they want 2 arms and a left nut for their tiny teardrops that're essentially useless! No storage no cooking surfaces no anything!
 

dhyde79

Titan Swapped / SAS'd
Founding Member
Location
Amarillo, TX
I bet you that this build is about 3k more then what they wanted for there trailers. But about 15k less then buying one of equal quality.

I'd almost bet you're wrong...they wanted more than a mid sized tandem axle Winnebago brand pull behind camper....
 

metzican

Suspension Lift
Location
Lafaytte, la
Wow that is overpriced for a road model. Most road models are from 9-18k, Most off-roads are 20-30k in the use. In Aus they go up to 80k+ for a off-road trailer/camper.
 

dhyde79

Titan Swapped / SAS'd
Founding Member
Location
Amarillo, TX
Wow that is overpriced for a road model. Most road models are from 9-18k, Most off-roads are 20-30k in the use. In Aus they go up to 80k+ for a off-road trailer/camper.

List on that one is 11,500 apparently.

Riverside RV 509 Retro Junior
 

J Everett

Suspension Lift
Founding Member
Location
Houma, LA
If I were just going to buy one rather than build, I'd seriously consider the Moby. But they are really pricey. $10,500 to start for the road going RT, $14,500 to start for the low level off road XC. I think you can max out the XTR at close to $30k.

I'd love to find a used one, but I don't think they've been around long enough to have a used market.
 

metzican

Suspension Lift
Location
Lafaytte, la
So I started collecting my Heavy duty wiring this is for winching from the rear of the trailer!

It was cheapest to go with an Pre built amp kit.

20141110_113515_zps8n8wejic.jpg

20141110_113520_zpstnrikhte.jpg

20141110_113527_zpswfsyaphi.jpg


These are the fuse holders
20141110_113533_zpsfw9eauyu.jpg


The high amp disconnects, Vehicle side, trailer side front and back, winch
20141110_113536_zpspnivp9bx.jpg


Battery isolator for secondary vehicle battery and trailer batteries.
20141110_113549_zpssegh86mo.jpg


And a box inside a box guess what!!!
20141110_113637_zpsuu6i9bab.jpg
 

metzican

Suspension Lift
Location
Lafaytte, la
So I spent all day measuring 3 times and cutting once. Hope it all turns out because if I screwed this up it all is down hill.

I drew up all the spots to be cut out besides the window and door.

20141112_124003_zpswcembr0k.jpg


20141112_123936_zpsspx6dyq1.jpg


20141112_123940_zpspewzangu.jpg


My free jig saw performed really well.

Door side
20141112_123945_zps9fhtcwse.jpg


20141112_123955_zps844kxovj.jpg


Window Side
20141112_143841_zpsvcif5vyf.jpg
 

metzican

Suspension Lift
Location
Lafaytte, la
So I finally unpacked the door and window so I could get them fitted and do the cut out for them.

20141113_102354_zpspusxe9cz.jpg


20141113_102402_zpswvehsou3.jpg


I forgot that I ordered a different size window then I had planned for. So I had to adjust the drawing a little. Went smaller vs big.

20141113_123945_zpsk6iibk67.jpg

20141113_123950_zpswg26egkp.jpg


The fitting of the door.
20141113_134956_zpsrudvjvma.jpg


I clamped the two sides together so the bottoms where even. Then sanded it so both sides were even around the whole edge. I just used a orbital sander for this with 60 grit sand paper.
20141113_155510_zpsno0vwfte.jpg

20141113_155519_zpsrrlv91xc.jpg


Did some touch up sanding on the base frame. I am really trying to figure out things to do all weekend long. I can't get the shock mounts welded on until next week.
20141113_155515_zpswbq2vsiv.jpg
 

metzican

Suspension Lift
Location
Lafaytte, la
Well I made more progress today. But nothing too picture worthy. I cut all the outer wall sheets to length for them to be Scarf cut and glued together. I had to readjust my my scarf jig and all the measurements line up, double, triple, and quadrupled checked. So when I cut my test piece due to the thinness of the plywood (1/4") the minuscule flaws in the measurements shows dramatically. So much so I stopped for the day to come home and do some research to figure out how to solve this issue.

20141114_125512_zps5usblccb.jpg
 

metzican

Suspension Lift
Location
Lafaytte, la
I worked on my scarf jig some more and what can I say I can't get the ****er to cut a nice 5' scarf jig for that thin of plywood. I went through about 4' of plywood and 40 cuts. So I just moved onto just doing butt joints on the outside wall and I will seal them with wood putty. It is going to take a good 24 hours to cure maybe longer since it is cold out 30-50's. Tomorrow hopefully I can do that other side tomorrow. Then Monday get the shock mounts welded up so I can bolt down the floor and put the sheet of plywood on top of it.

What it looks like when your trying to "clamp" two sheets of plywood together with glue.
20141115_125707_zpsj7vrg7e2.jpg

20141115_125659_zpszjxydpef.jpg

20141115_125648_zpsywacesk2.jpg
 

metzican

Suspension Lift
Location
Lafaytte, la
Now the other side today. Besides that I also trimmed the outer-wall from yesterday.

This is the other side. I learned some lessons and used my weights better.
20141116_161644_zpsqqq4arlb.jpg
20141116_161728_zpsvmqemhy1.jpg


Yesterdays wall all done and trimmed up. Still have to cut the door out. I have to go over it with the router again to make sure it is all smoothed out.
20141116_161651_zpsylm4ghmf.jpg

20141116_161723_zpszgyaclhb.jpg
 

metzican

Suspension Lift
Location
Lafaytte, la
So I trimmed up the edge with my router.
20141117_131437_zps0s9ruq3a.jpg


Then I flipped over the wall and glued a 1/4" sheet of plywood across the seems to help reinforce it.
20141117_131437_zps0s9ruq3a.jpg

20141117_131455_zpsxmh4r2hx.jpg


Then I did the other wall the same way.
20141117_141001_zpsj0vq3lw6.jpg

20141117_141013_zpsnhxppndn.jpg

20141117_141045_zpshp8htazr.jpg

20141117_141059_zpsly5ya1um.jpg

20141117_141103_zpshr2cpu0p.jpg


Finish results.
20141117_141007_zpsebibn1ej.jpg


Then I upgraded my suspension and am keeping the old for spare parts. Put on my new leaf spring pack and got my shock mounts welded on. Have to still pick up some hardware to finish mounting the shocks.
20141117_170521_zpsqyohixa3.jpg

20141117_170526_zpsuck27mx7.jpg


I also got my breakaway switch in. I am going to hook it up to my main trailer battery I don't see any reason to have a separate battery just for it.
20141117_180819_zpsibgy4dx8.jpg
 

metzican

Suspension Lift
Location
Lafaytte, la
Thank you sir, I'm getting to the point where the trailer should really start taking shape. Well Hopefully start taking shape!! Tomorrow should be finishing up the floor then after this put on side walls and start worrying about the secondary floor and interior.
 

metzican

Suspension Lift
Location
Lafaytte, la
**** the buckets!!! a couple had holes I had to patch up too!!!!

So I got the grade 8 bolts for the shocks Yeah!!! Then while I tightened the top bolt this happened to one side. Yeah! this is what I get for receiving 1-3k worth of turbo's in the mail today.
20141118_110313_zpsgv68awwr.jpg


This is what the other side looks like and what it should look like
20141118_110322_zpspwjcud2j.jpg


So I cut off the welded on "bolt" and then drilled out a hold for another grade 8 bolt I have to buy and then this happens!!!
20141118_111839_zpshvfhx05r.jpg


Great start to the morning while working on the trailer.

Drilled and cut.
20141118_111843_zpswpuweraq.jpg


So now onto the floor I laid the frame down and put the plywood on top and clamped it all together and used my router to cut the plywood to length.
20141118_122807_zpsiog2d7br.jpg

20141118_122821_zps7ht8erk9.jpg


What it looks like for underneath.
20141118_123521_zpscefqjmme.jpg


I drilled the holes for the bolt heads through the plywood this way I can remove the body later if I need to to reattach it.

Lifting the plywood to put the glue between the two and inserting all the bolts and washers.
20141118_125746_zpsjikkarhs.jpg

20141118_125752_zpsgpadhkzp.jpg


Bolt in the hole
20141118_132950_zpsyczkn4pu.jpg


Access to the head of the bolt
20141118_133013_zpss2b4ze5v.jpg


Glue applied clamp down and screwed together
20141118_141538_zpsiv5bwqqk.jpg


Applying adhesive tar to the bottom to seal it
20141118_165555_zpsuszly4cu.jpg


I also got this in today! Now were is my water tank?
20141118_175941_zpsoah8dk4m.jpg
 

metzican

Suspension Lift
Location
Lafaytte, la
So today I don't have a lot of photo's as I just did a touch up job of more black tar/goop to make sure it is water tight so that is going to take another 24hrs to dry.

Besides that I laid out the sides again and routered the edges again for touch up purpose along with removing some glue that squeezed out.

I fixed my shock mount on the one side.
20141119_095552_zpsqyiby65j.jpg


I also installed my Brake controller! And tested it and got it working. That was the only decent place to put it. Now I have to move my air pressure gauge for the compressors but I was planning on moving this sometime anyways as the light is so damn bright.
20141119_144329_zpspleswd3s.jpg


Besides this I picked up this beast and it is incredibly light. Now I have to figure out how to divide it up with batteries, Electrical wires and devices along with everything else.
20141119_150024_zpslsgnkgyc.jpg

20141119_150037_zpsool7e65n.jpg


Also that unknown bock I posted a few days ago you can see a glimpse of what is inside of it in that last photo.

I will probably install a better seal on this box to help improve the water tightness or just a drain hmmm.
20141119_150053_zpsr89r6qfj.jpg
 

jmnielsen

Need Bigger Tires
Location
Lincoln, NE
That tar junk takes forever to dry. I applied mine and then put on insulation and screw the insulation down with screws and fender washers. I waited a week for that stuff to dry and it still seeped out in places when I flipped it over!
 

metzican

Suspension Lift
Location
Lafaytte, la
Good to know. Thanks for the heads up. I had a class for work today so I did not check on it. If it is not dried tomorrow I will go forward I guess anyways.

You insulated your floor? My though is with a 6" foam padding for a bed that will be good enough.
 

jmnielsen

Need Bigger Tires
Location
Lincoln, NE
Good to know. Thanks for the heads up. I had a class for work today so I did not check on it. If it is not dried tomorrow I will go forward I guess anyways.

You insulated your floor? My though is with a 6" foam padding for a bed that will be good enough.

Yeah foam padding would be plenty I think. I had insulation laying around from building a dog house so I figured what the heck and insulated the floor.
 
Top