
- Location
- Smyrna, TN
This was originally going to be a CB install, however, I got my dash apart and ran out of room for a clean install. SO, instead, we have a pretty simple write-up for removing the dash trim.
Author's Note: Sorry for the crappy cell phone pics- I left my camera at home.
My Truck:
2002 5spd 4wd SE
Tools needed:
Phillip's head screwdriver
Step 1: Apply parking brake and REMOVE KEY from ignition.
Step 2: Move the shifters out of your way. For me, this was REVERSE and 4L.
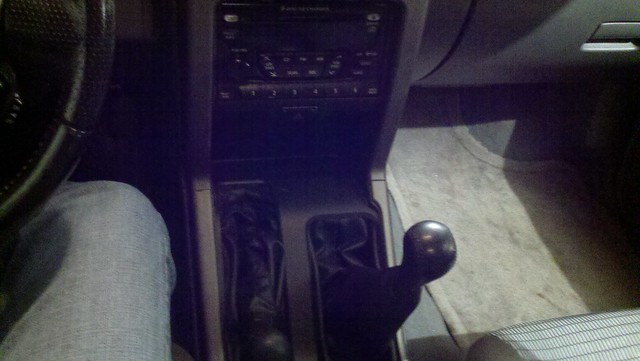
Step 3: Remove the TWO (2) screws under the climate control area and put the screws in a cup holder.
Step 4: Gently apply upward pressure to the trim surrounding the shifters.
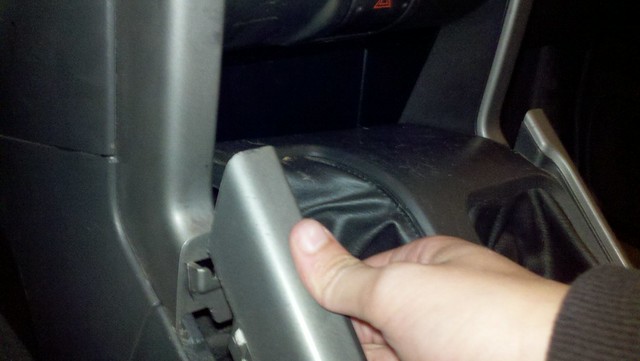
I didn't remove the entire trim and shifter boots, as I had plenty of room by turning it to the side (horizontally).
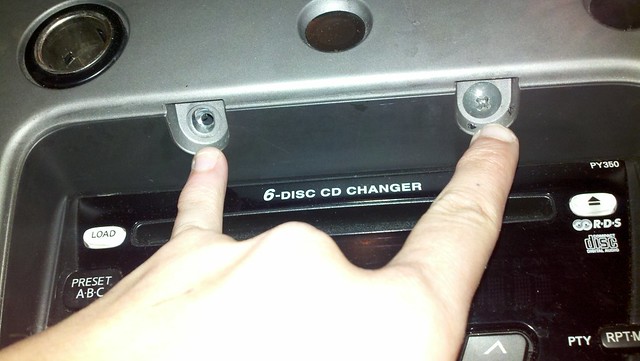
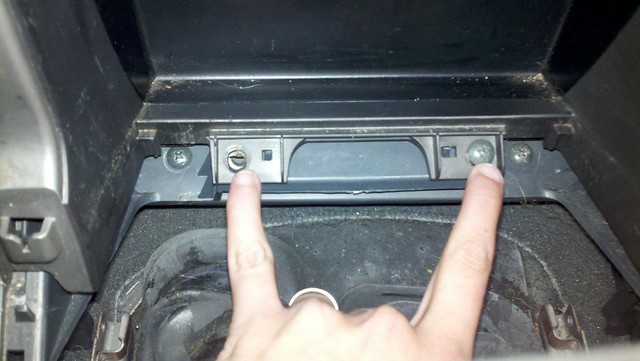
Step 5: Remove the TWO (2) screws under the small storage area behind the shifters
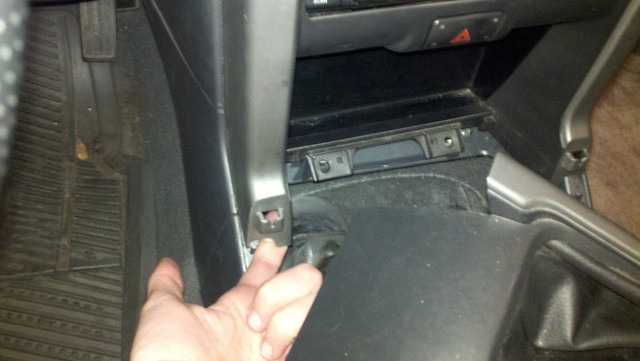
Step 6: Gently apply rearward pressure to the trim surrounding the radio, starting from the bottom and working your way up. I only have one pic, as I needed both hands at this step.
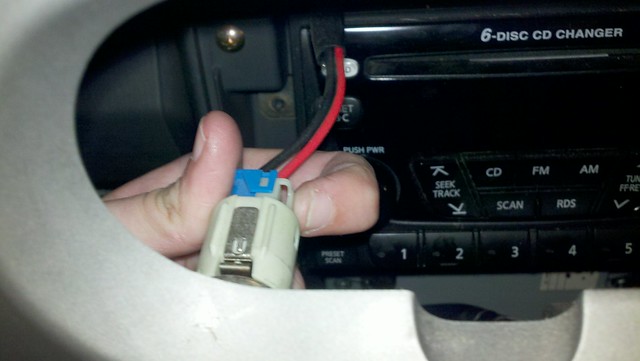
Step 7: Once the trim has been pulled, you must now disconnect the 12V plug wire and the plug to the 4-way hazard lights.
12V plug
4-way Hazard Lights
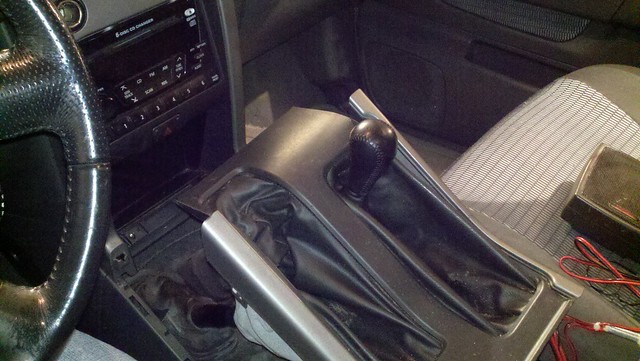
End result:
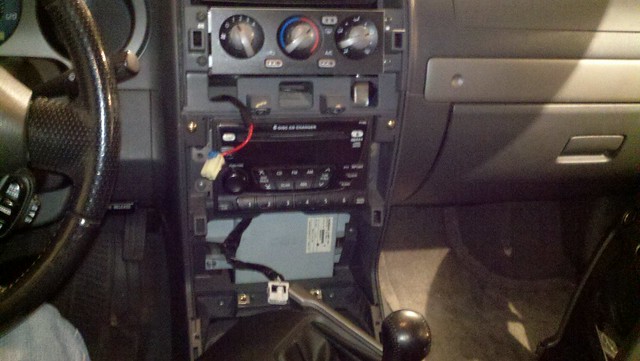
This will give you access to the stereo mount/screws, as well as the factory amp (if equipped). In the photo above, the factory amp is the silver/gray box immediately below the stereo.
Now, unless you are removing your factory stereo, you will want to stop here, do whatever work you wanted to do, then reverse the steps for re-assembly.
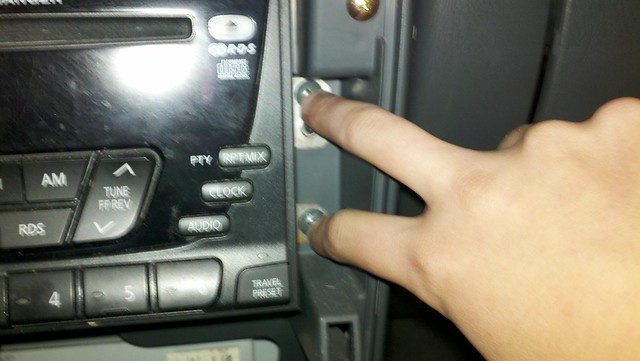
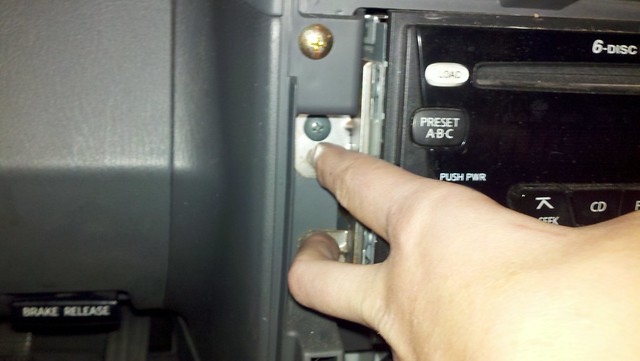
To remove the stereo:
Remove the FOUR (4) screws, TWO (2) on each side.
Then pull the unit OUTWARD.

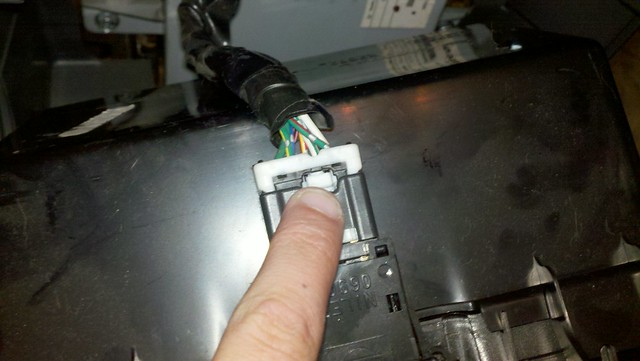
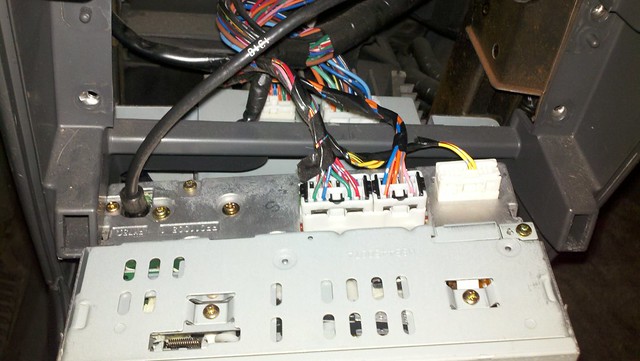
This is what the back side of the stereo looks like. Removing the stereo will also give you access to the PLUGS/WIRING HARNESSES for the amp.
Reverse the order above for installation/reassembly.
TO REMOVE THE TRIM ABOVE THE GLOVE BOX:
Step 1: Remove contents of glove box.
Step 2: Remove the TWO (2) screws at the bottom of the glove box (sorry, forgot to snap that pic)
Step 3: Open glove box and remove the FOUR (4) screws along the top
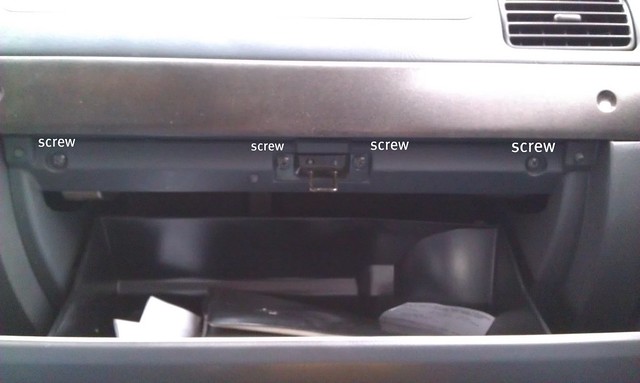
Step 4: Move the entire box assembly out of the way.
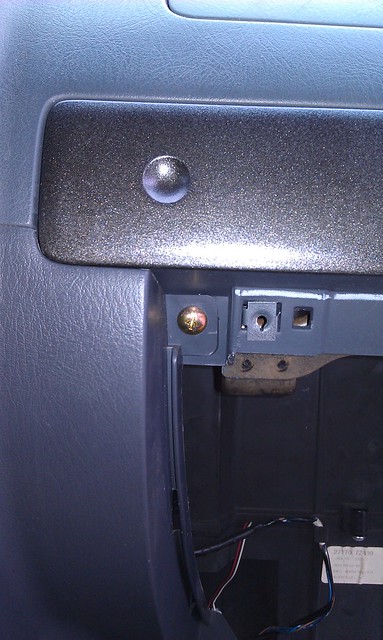
Step 5: Remove the gold screw pictured below.
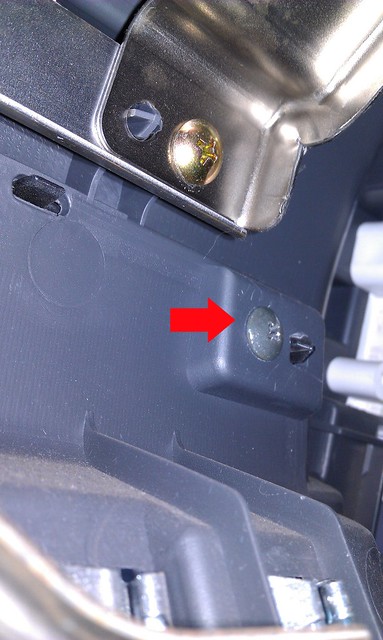
Step 6: Behind the dashboard are TWO (2) hidden screws at either end of the panel. You will need a stubby screwdriver and small hands to access these.
Driver's side hidden screw:
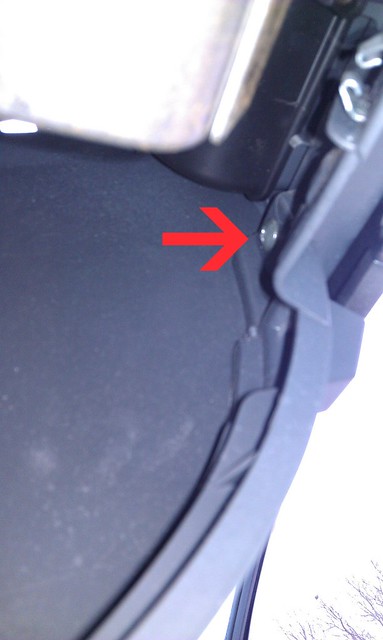
Passenger side hidden screw:
Step 7: Once the screws on the backside have been removed, apply pressure toward you from behind the trim. It will pop off with just a small amount of force.
Installation is the exact reverse.
Author's Note: Sorry for the crappy cell phone pics- I left my camera at home.
My Truck:
2002 5spd 4wd SE
Tools needed:
Phillip's head screwdriver
Step 1: Apply parking brake and REMOVE KEY from ignition.
Step 2: Move the shifters out of your way. For me, this was REVERSE and 4L.
Step 3: Remove the TWO (2) screws under the climate control area and put the screws in a cup holder.
Step 4: Gently apply upward pressure to the trim surrounding the shifters.
I didn't remove the entire trim and shifter boots, as I had plenty of room by turning it to the side (horizontally).
Step 5: Remove the TWO (2) screws under the small storage area behind the shifters
Step 6: Gently apply rearward pressure to the trim surrounding the radio, starting from the bottom and working your way up. I only have one pic, as I needed both hands at this step.
Step 7: Once the trim has been pulled, you must now disconnect the 12V plug wire and the plug to the 4-way hazard lights.
12V plug
4-way Hazard Lights
End result:
This will give you access to the stereo mount/screws, as well as the factory amp (if equipped). In the photo above, the factory amp is the silver/gray box immediately below the stereo.
Now, unless you are removing your factory stereo, you will want to stop here, do whatever work you wanted to do, then reverse the steps for re-assembly.
To remove the stereo:
Remove the FOUR (4) screws, TWO (2) on each side.
Then pull the unit OUTWARD.
This is what the back side of the stereo looks like. Removing the stereo will also give you access to the PLUGS/WIRING HARNESSES for the amp.
Reverse the order above for installation/reassembly.
TO REMOVE THE TRIM ABOVE THE GLOVE BOX:
Step 1: Remove contents of glove box.
Step 2: Remove the TWO (2) screws at the bottom of the glove box (sorry, forgot to snap that pic)
Step 3: Open glove box and remove the FOUR (4) screws along the top
Step 4: Move the entire box assembly out of the way.
Step 5: Remove the gold screw pictured below.
Step 6: Behind the dashboard are TWO (2) hidden screws at either end of the panel. You will need a stubby screwdriver and small hands to access these.
Driver's side hidden screw:
Passenger side hidden screw:
Step 7: Once the screws on the backside have been removed, apply pressure toward you from behind the trim. It will pop off with just a small amount of force.
Installation is the exact reverse.
Last edited:
